Dell EMC PowerEdge R750xa Internal Hardware Overview
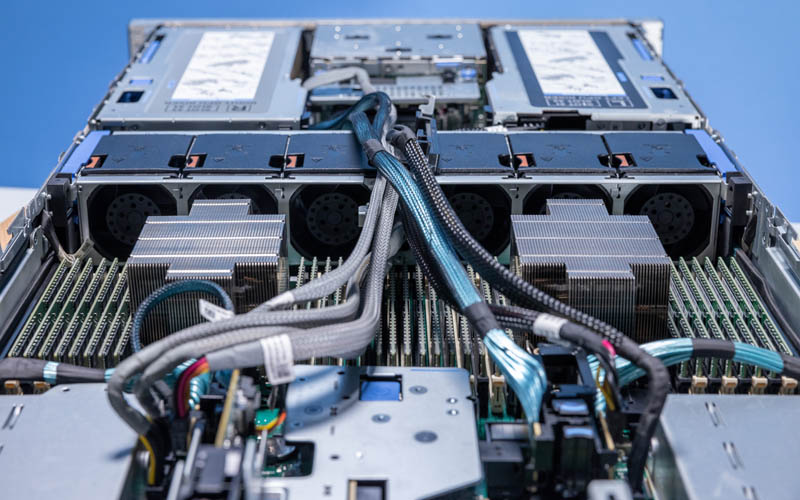
Inside the system, we start with the GPUs and storage, then have a fan partition, followed by CPUs and memory, and finally get to the rear I/O and power supplies.
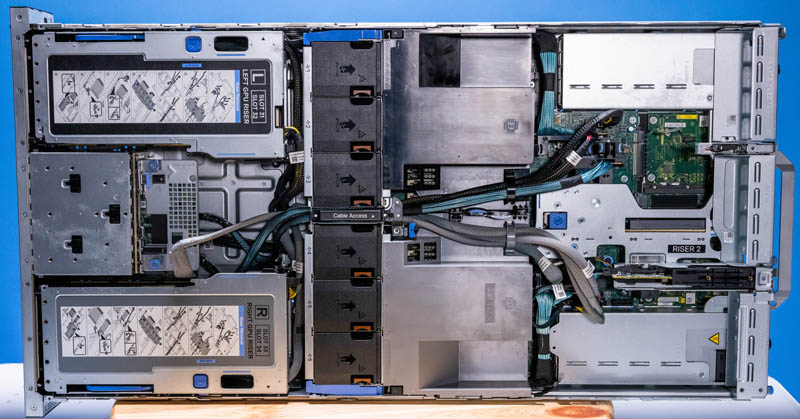
Dell’s configuration puts the I/O plates at the front of the chassis for the coldest possible, airflow. By putting these on risers without actually attaching to a I/O plate at the front of the system, these are mostly going to be used for head-less accelerators like the NVIDIA A100. Some systems attach GPUs to either the front or rear of the chassis so high-end FPGA and other accelerators can use onboard fabric ports. Still, our sense is that NVIDIA GPUs are going to be the top-sellers in this system so most customers will not mind this design.
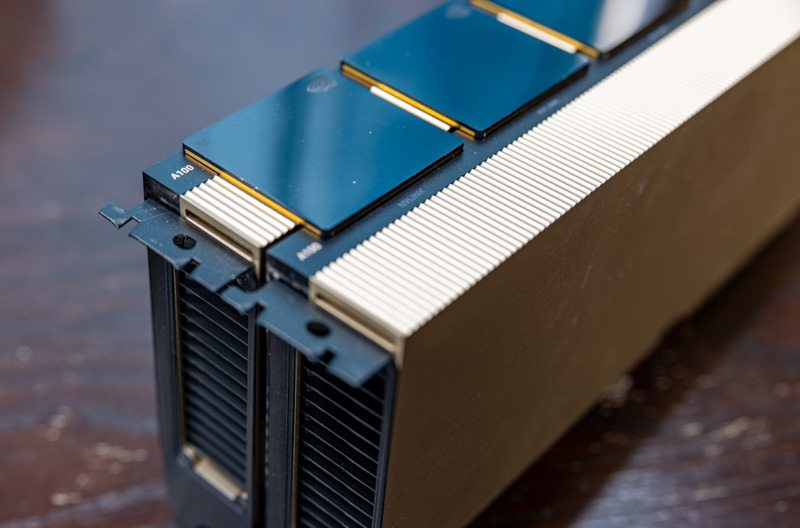
One of the really nice features of Dell’s configuration, which is different than some of the PowerEdge C4140 and some competitive systems, is that by stacking the GPUs, Dell can use NVLink bridges between pairs of GPUs.
Not only can Dell support the higher-end NVIDIA A100 PCIe cards, but it also allows pairs of A100’s that are on the same CPU to use NVLink for communication instead of PCIe. The C4140 with SXM GPUs and the PowerEdge XE8545 allow for all GPUs to talk via NVLink bypassing a major bottleneck in CPU to CPU traffic (e.g. UPI/ Infinity Fabric.) The XE8545 also supports more PCIe lanes, more cores, and higher-TDP/ performance NVIDIA A100’s. While both have four A100’s listed in the spec sheet, the XE8545 is the higher-end solution by a long shot.
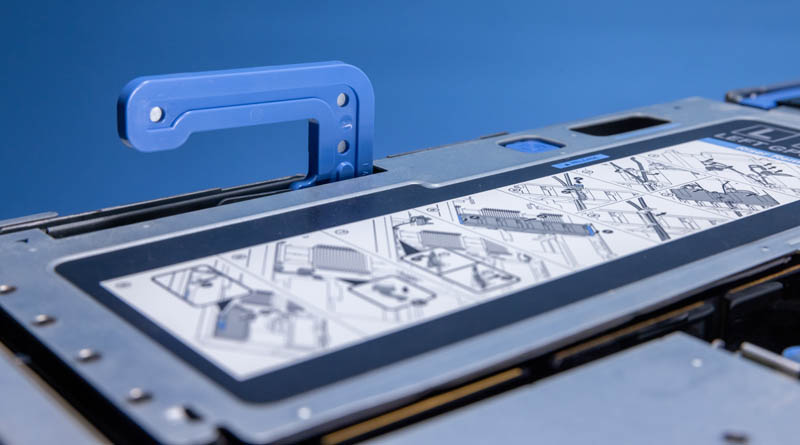
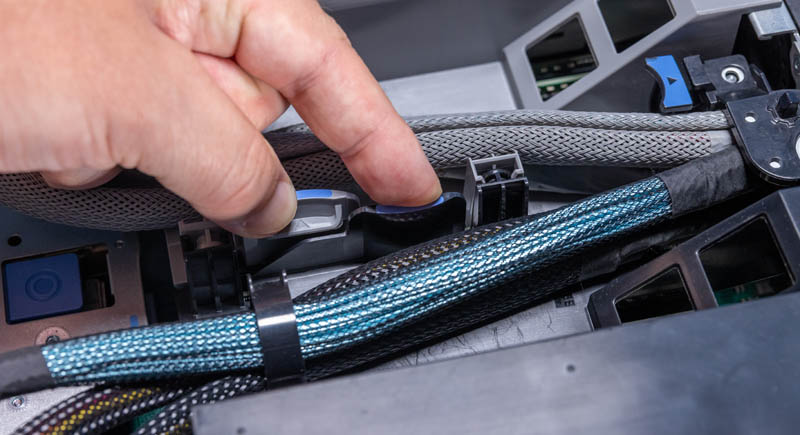
Perhaps the biggest challenge in Dell’s design is that replacing GPUs is not a quick process. While it may look like one simply hits the unlock button and then pops out the GPU, instead Dell has a nine-step process spanning almost the entire chassis printed on the label of each GPU carrier.
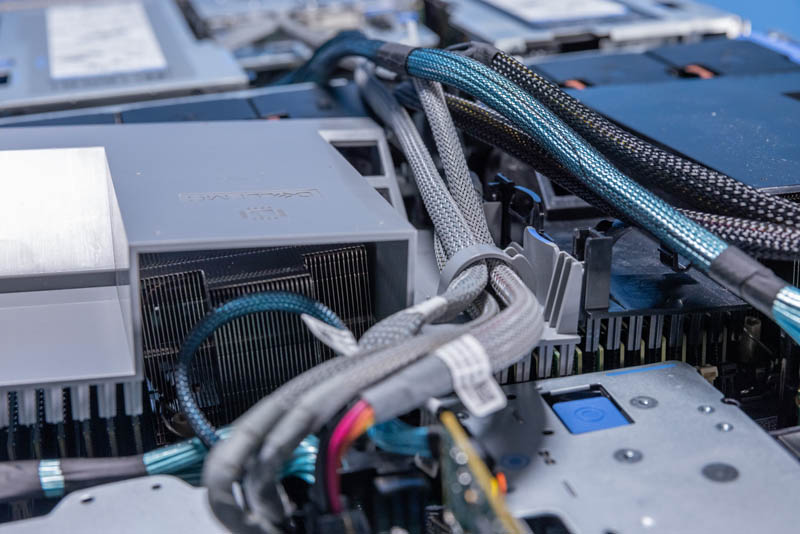
Each GPU is secured to a two GPU riser. There are then power and data connections being fed to each GPU.
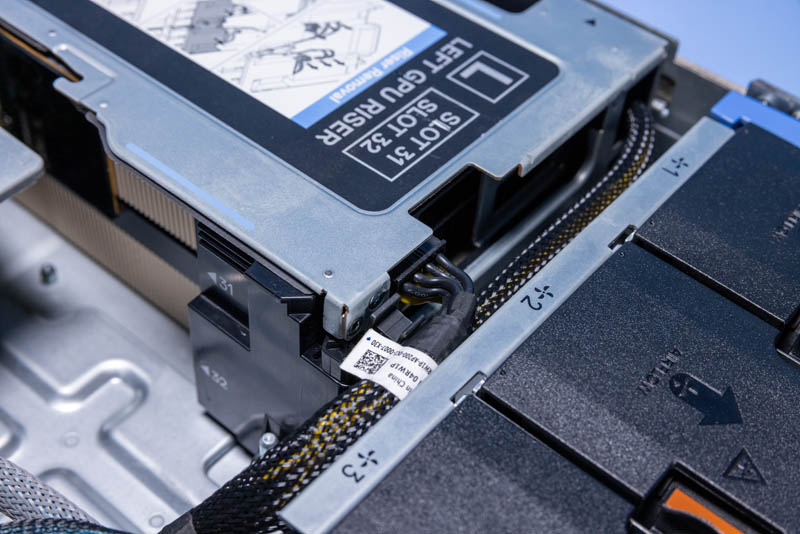
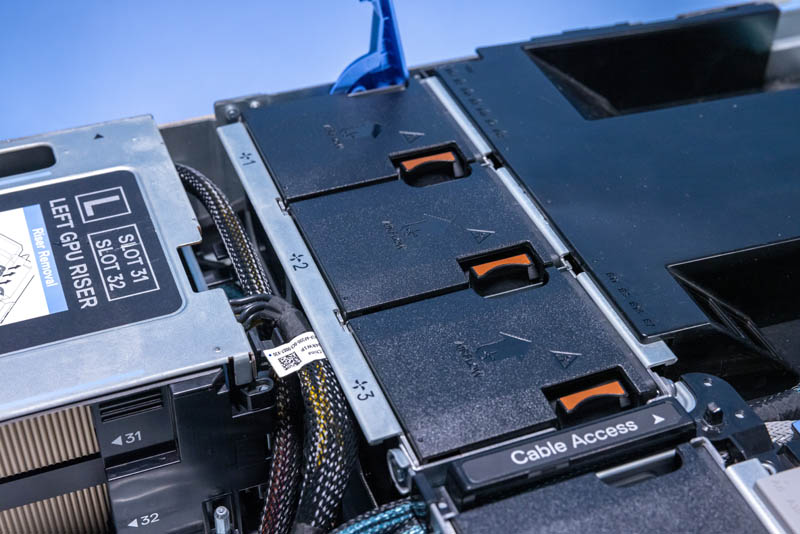
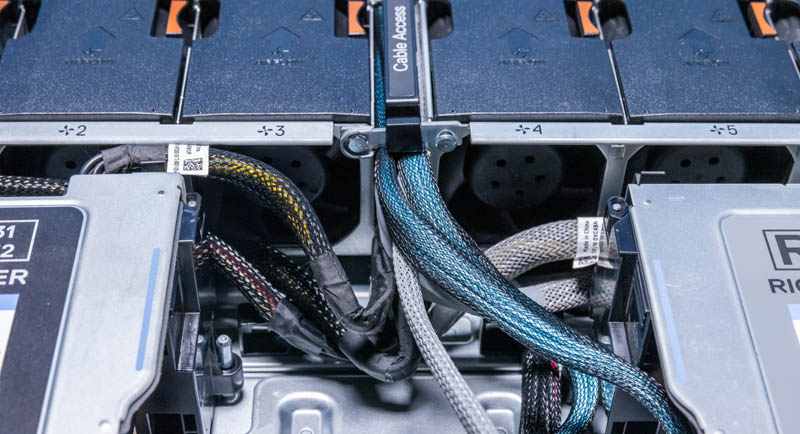
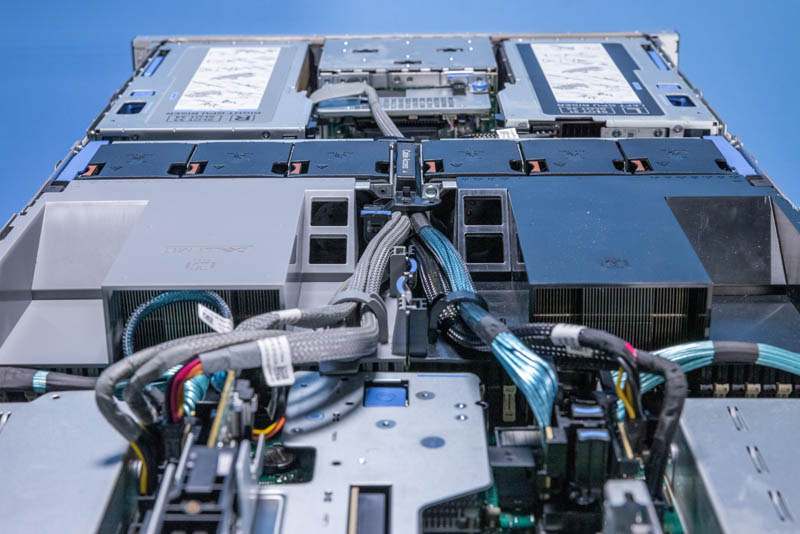
Dell’s design uses a cable access channel in the middle of the fan partition as well as routing cables to the side of the chassis. With no room to service the GPU in place and disconnect cables easily, one is forced to do major work in a 9-step process to liberate the GPU riser, plus any replacement steps, and another 9-step process to put things back together. The sheer number of components and cables made this one of the re-installations most prone to not having proper alignment of any server we have tested from Dell.
Part of the challenge is that the steps are basically:
- Disconnect GPU cables from the motherboard side at the rear of the chassis. That also often means the SAS/ NVMe connections as well.
- Unhook the GPU, SAS/ NVMe connections as needed from the fan shroud
- Remove the fan shroud from over the CPUs and memory
- Open the cable access door
- Remove GPU, SAS/ NVMe connections from the cable access channel
- Remove the entire fan partition
- Remove cables from the hooks tieing down cables from the channels that go on either end of the fan partition once removed
- Remove connections from the front of the motherboard
- Hit the button and use the latch to remove the riser itself
After all of this is done, there are still more steps to disassemble the riser and get to the GPUs. Also, because the fan shroud has to be removed, connections for the other GPUs and the drives need to be detached. When putting this together, there is a higher chance of collateral damage or just missed re-connections because of this design.
This is a very strange feeling. Dell went to great lengths to make all of this fit well together. The entire system is even color-coded in black or grey so CPU-GPU connections can be traced easily through the system. At the same time, having tested so many GPU systems from different vendors, there is a huge gap in how easy it is to service the GPU/ accelerator risers in the R750xa versus competitive systems. Dell’s customers may not know any better sitting inside the Dell ecosystem, but with a broader background in these systems, the R750xa’s GPU riser situation is an absolute nightmare to service.
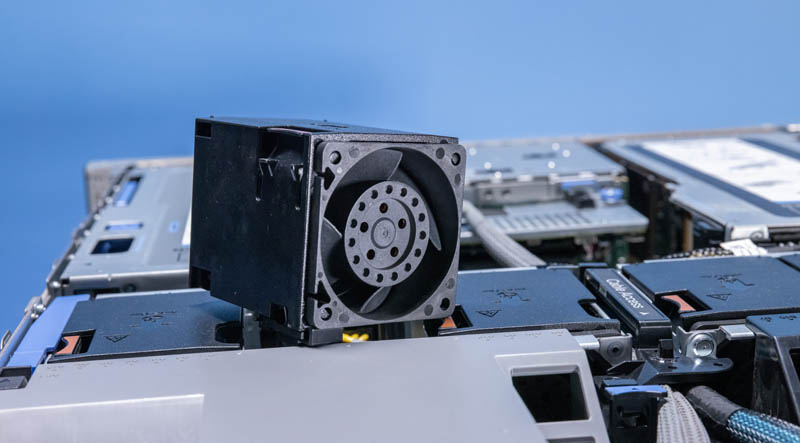
The fans on the other hand are great. Except for the cable access through the middle of the fan partition, everything is very easy to service. The entire partition is removable with a dual lever system, which is great. The fans themselves are dual-fan modules and are probably some of the easiest to swap in the entire industry.
This system uses dual Intel Xeon Scalable Ice Lake edition processors and Dell can span to high-end configurations because so much effort was put into cooling. Each processor gets 8 channels of memory and dual-channel configurations for a total of 16 DIMM slots per CPU or 32 per system. One can use Intel Optane PMem 200 DIMMs in this system, but then the system is limited to 30C environments instead of 35C.
Dell supports up to 270W TDP CPUs like the Intel Xeon Platinum 8380 in this system as well.
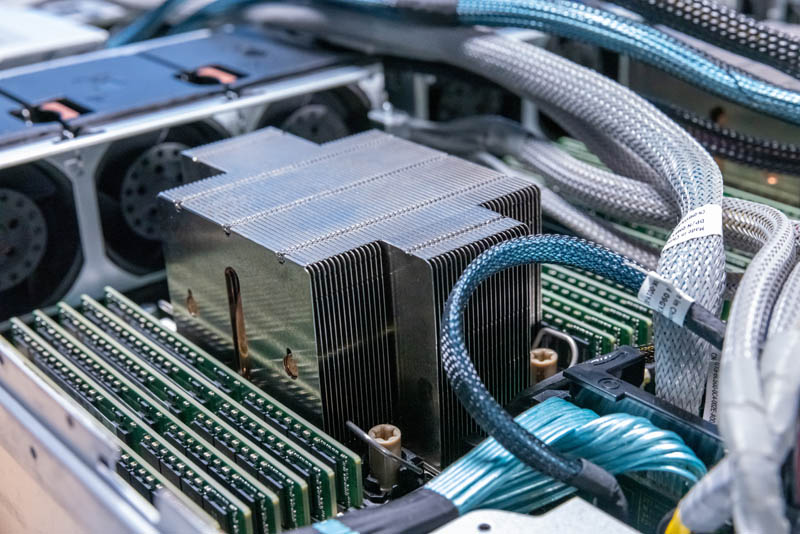
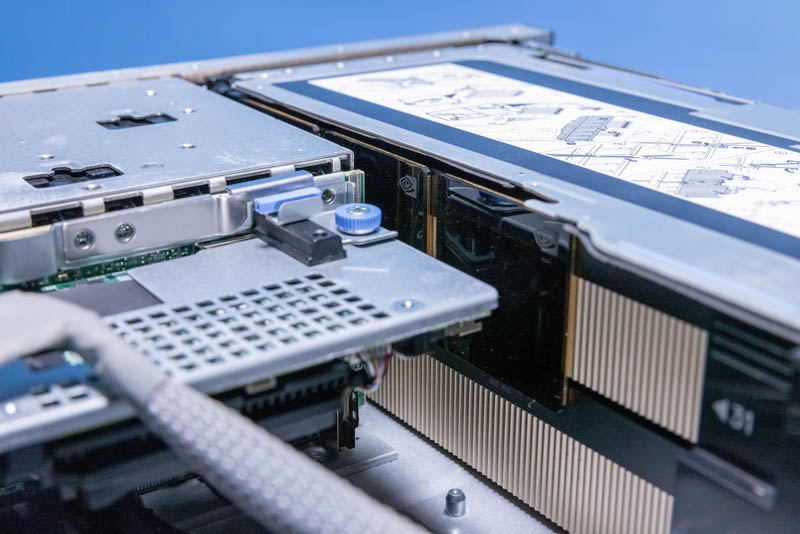
As a quick aside, while we mentioned the 9-step process for GPU/ accelerator riser access, there is another important aspect to the design. With the connectivity passing over the CPU and memory airflow guide, one has to remove the cables to get the airflow guide out. That makes servicing a failed DIMM or upgrading memory capacity a much longer task than in other PowerEdge servers or in competitive systems.
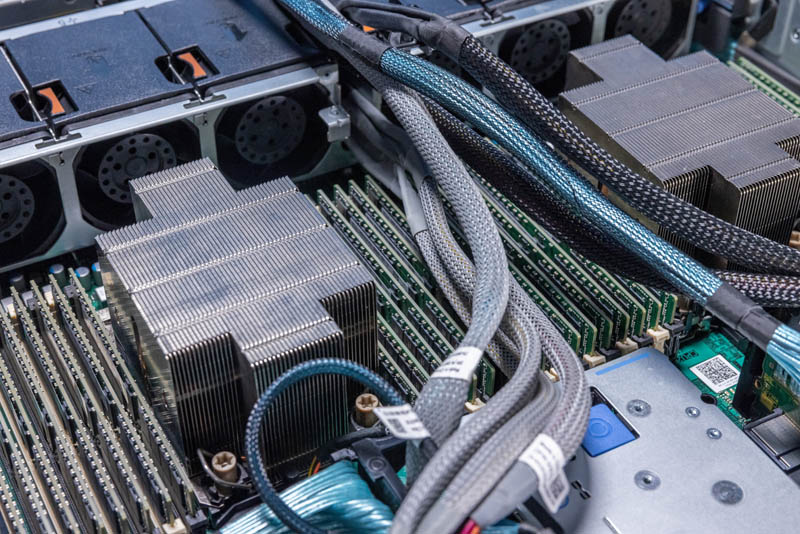
The airflow guides are very nice. They are color-coded to the CPUs and those match the PCIe cables associated with each GPU. There are also tie-down hooks to secure the center channel cables. This was actually a great concept. It just leads to longer and higher-risk servicing of the system.
You may have noticed that the two colors of the shroud are joined at the center. There are tabs that you may think would allow you to service one side without having to remove the other. That is not the case and is also a total bummer that the system is at least not designed to be serviced in hemispheres.
We tried to see if there was a way to do this, but it seems like a lost cause.
This is an interesting block for a few reasons. The blue cables here go in different directions. One goes through the center channel, the other goes around the side of the chassis. The other is that this block one has to be careful to reassemble because the many push tabs are close together. A slight nudge and these can become loose. This is a bigger challenge because of the design where these need to be removed for servicing the memory or GPUs.

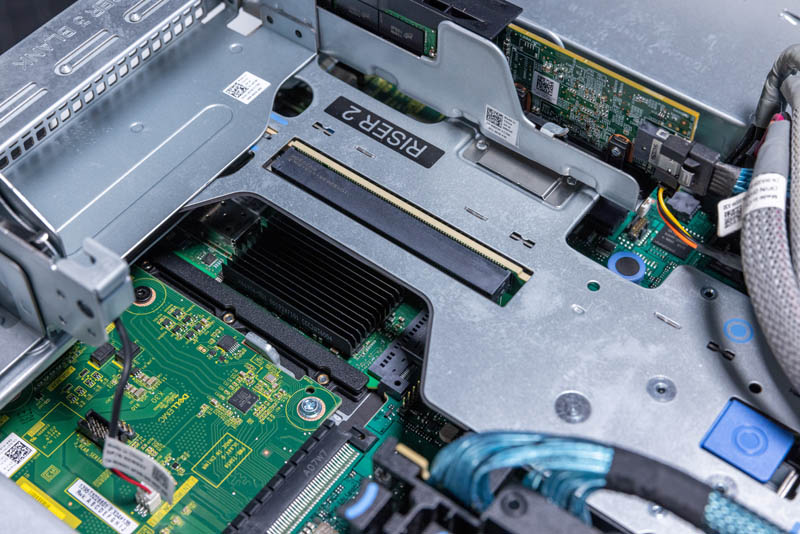
One interesting note here is that while the two low-profile risers go to different CPUs, they are both low-profile designs. That means that one cannot use higher-end networking like the NVIDIA BlueField-2 100Gbps DPUs that are full-height cards. While there are different options for risers, this is also driven by the configuration of the rest of the system since there are only so many PCIe lanes to go around and so much cooling required.
Next, we are going to get to MIG, management, and performance before getting to our final words.


It’s nice to see a real review of Dell not canned junk.
Comments are closed.