
In our Building a Proxmox VE Lab Part 1 Planning article, we discussed the scope of work and purpose behind building a Proxmox lab. This article’s intent is to put that plan into action so that you can get up-and-running using one of the industry’s leading open-source virtualization platforms. Moreover, we want you to follow some leading practices in your designs.
Much like in our previous lab guides, we will leave it up to you to get the operating system installed on your lab machines. Proxmox can be downloaded here and their official getting-started guide can be found here. Also good to have open in a tab is STH’s Proxmox VE 6 Initial Installation Checklist.
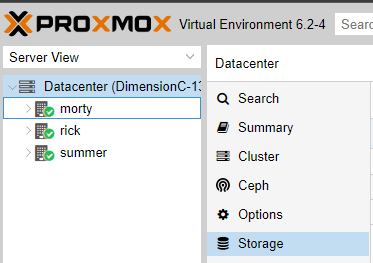
For the sake of this lab, I have given each of my 3 servers a name and IP address in the initial configuration wizard. Rick, Morty, and Summer, at 10.99.10.10, 10.99.10.11 and 10.99.10.12 respectfully. If you are interested in more information about my specific networking infrastructure, please see this article.
Building our Proxmox VE Cluster
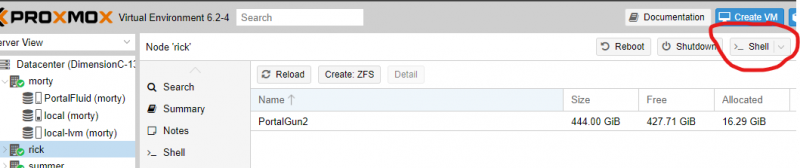
In Proxmox, the term Datacenter refers to a logical grouping of servers. When you install Proxmox on each of your nodes they will each be in their own datacenter by default. This means that there can be no high-availability or failover. To get started, we are going to navigate to one of our servers. I chose 10.99.10.12, it does not matter which you start with. Proxmox’s web interface runs on a non-standard port, port 8006. So the URL for my server is https://10.99.10.12:8006/.
Proxmox’s menu system may be a little confusing to someone who has never worked with it before. If you click on your Datacenter, you will be able to make configuration changes to the Datacenter itself. If you click on a server, you will be able to make configuration changes only to that server.
So the first thing we need to do once we have our servers up-and-running is to create a cluster. Start by logging into one of your servers, it does not matter which one. Click on Datacenter in the menu bar on the left, then click on the Cluster menu item.
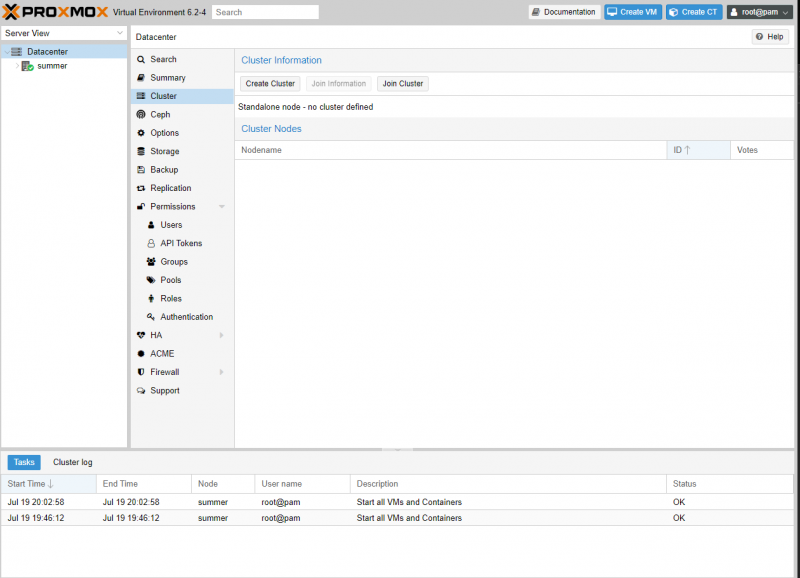
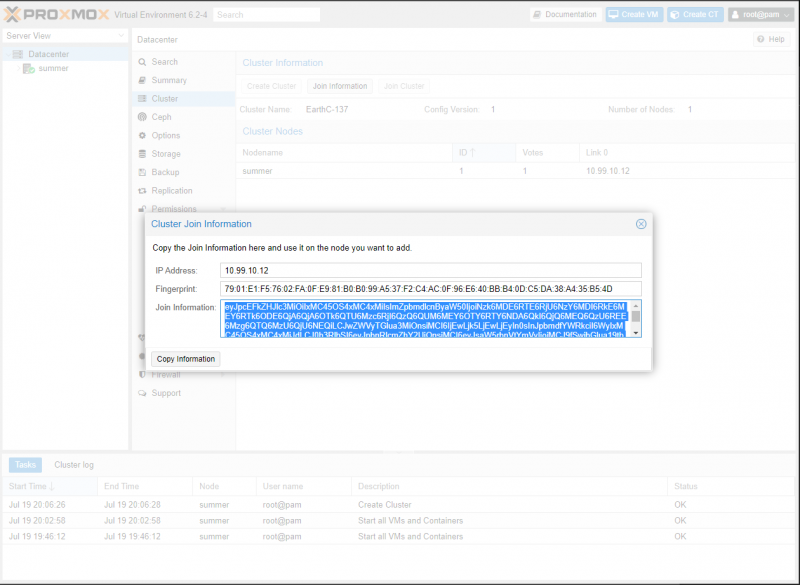
Now that we are on the Cluster page, we can see that we are in Standalone mode. We want to start by clicking the Create Cluster Button. This will open the Cluster Join Information Window. Once we are here, give it a name and press Copy Information.
Next, we need to log into each of our other two servers and go to the Cluster submenu under Datacenter. Instead of Create Cluster, press the Join Cluster button. On these servers, you are going to type the IP Address of the server you did the above configuration on. Then, All you have to do is paste the Join information you copied previously into the box and your other two nodes will join the cluster.
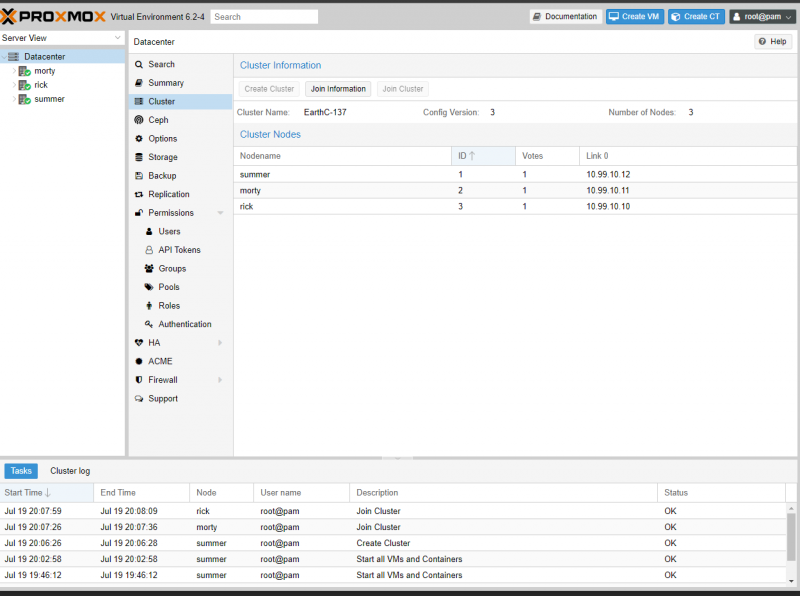
When you have completed that step, log back into a server and you should see all three nodes in your Datacenter.
Proxmox’s Clustering is now setup. In order for that cluster to become a High-Availability Cluster, however, each node will need access to shared storage. In order to do that, we are going to begin to build our GlusterFS cluster.
Creating our ZFS ZPOOLs
Before we can begin creating our GlusterFS Bricks we need to first create our underlying storage filesystem. We are going to do that with ZFS. In Proxmox, you can perform this configuration either via the GUI or by the command-line.
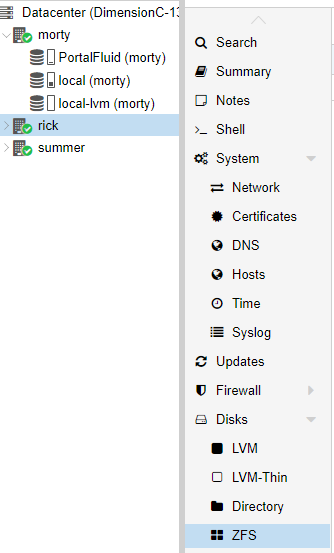
To start in the GUI, you need to click on the individual server you would like to configure. Then you are going to expand the Disks submenu and click ZFS.
Before we get started it is vital that the disks are empty with no partitions on them, or they will not show up. Proxmox will tell you that there are No Disks Unused. This problem will not exist if you have new drives. If you are unsure of how to delete the partitions on a drive in Linux, you can use fdisk or if you prefer to use a GUI, you can boot your server into a portable OS like PartedMagic.
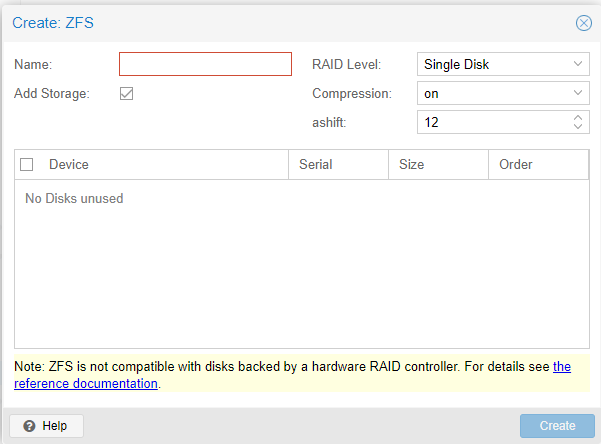
Once you have empty drives, is easy to configure ZFS on Proxmox. We are going to press Create:ZFS. Once in the new window, we are going to give our ZPOOL a Name. After we name it, we need to select the type of RAID we want. For this server, I am selecting RAIDZ. I am leaving compression ON and I am changing the ashift to 13. Then I am going to press Create. For more information on ZFS please see our introduction article on it.

If you prefer to do it via command line, the same process could be accomplished by running the following command via the shell. You can open a shell from within the web GUI in Proxmox by clicking on the server and then clicking Shell. Alternatively, you can SSH to the server using a native too, Putty, WSL2 on Windows, or MobaXterm.
zpool create -f -o ashift=13 PortalGun1 raidz1 /dev/sda /dev/sdb /dev/sdc /dev/sdd
For NVME drives, they will not be listed as sdX devices. For our server running NVME we ran the following command:
zpool create -f -o ashift=13 PortalGun2 mirror /dev/nvme0n1 /dev/nvme1n1
Once you have created your ZFS volumes in Proxmox we can move on to setting up GlusterFS.
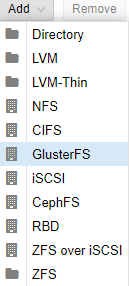
GlusterFS Installation
Unfortunately unlike ZFS or Ceph, there is no GUI option for configuring and installing Gluster. There is only an option to mount the Gluster Cluster when we are done. That being said, it is fairly straightforward and the commands are simple.
We are going to open the shell to one of our servers and run a command. We are running the free version of Proxmox VE and we do not have access to the enterprise lists. Because of that, we need to nano into the file at /etc/apt/sources.list.d/pve-enterprise.list and comment out the line for that list. This is what is covered in that STH Proxmox VE 6 Initial Installation Checklist mentioned earlier.
nano /etc/apt/sources.list.d/pve-enterprise.list
This is done by putting a hashtag in front of the line.
#deb https://enterprise.proxmox.com/debian/pve buster pve-enterprise
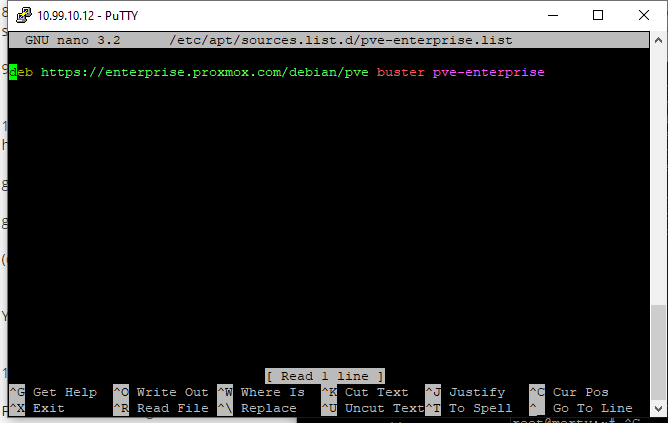
After we have done that we need to save the change by pressing Control+O and then Control+X.
Before we install Gluster, we must run the following command:
apt-get update
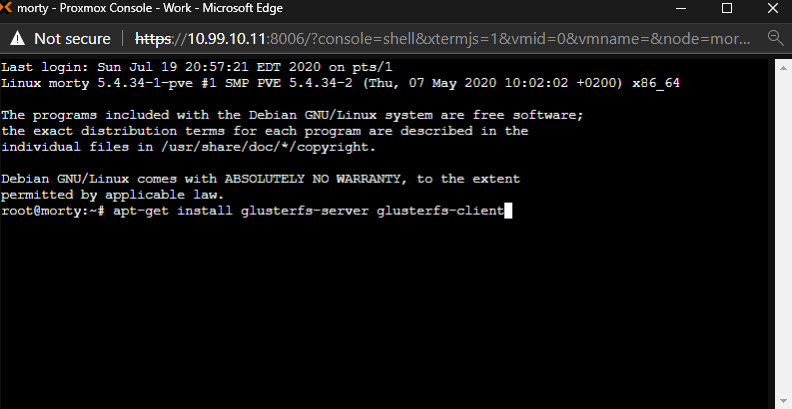
Once that is complete, we are ready to proceed with the GlusterFS installation. Lets start by running the following command:
apt-get install glusterfs-server glusterfs-client
We need to wait for the installation to complete. Then we must tell Proxmox that we want to start the Gluster daemon now and we want to start the Gluster daemon on every startup:
systemctl start glusterd
systemctl enable glusterd
Repeat these steps for all three of your servers.
GlusterFS Configuration
With GlusterFS installed and it’s daemon started we can now configure Gluster. We are going to open the shell from our server at 10.99.10.10. In that shell we need to have Gluster probe our other two servers in order to begin to facilitate our configuration. Before we proceed we need to double-check our work.
Run the command:
gluster peer status
You should return a result of the Number of Peers: 0. This means the daemon is running properly and you are ready to begin configuration. Start by running the probe command.
gluster peer probe 10.99.10.11
gluster peer probe 10.99.10.12
You should see a result of peer probe: success for each of those commands. To verify that we have successfully creating our peering we will run the peer status command a second time. We can now see that the three servers are connected.

Now we need to create our Gluster volume and define our bricks. To do this, we need to know the names and paths of the ZFS volumes we created above. Additionally, we need to determine what our configuration will look like before running the command.
We chose a replicated volume where each node is a replica of the others. In that configuration there is 1 host’s worth of storage, but 2 of the 3 servers could fail.
You could alternatively create a distributed volume where you could instead of 3 hosts worth of storage, but would not have any redundancy.
Finally, you could create a dispersed volume where you could instead have 2 hosts worth of storage, and 1 host worth of storage for redundancy.
For us, we ran the following command:
gluster volume create PortalFluid transport tcp replica 3 10.99.10.12:/PortalGun3/proxmox 10.99.10.11:/PortalGun2/proxmox 10.99.10.10:/PortalGun1/proxmox force
To verify that we have done everything correctly up to this point we can use another gluster command to show us the status of our volume.
gluster volume status

We have successfully installed Gluster and configured our volume. It is now time to mount the volume in Proxmox so that we can begin to use it as a target for storing virtual machines.
Back to the Proxmox WebGUI
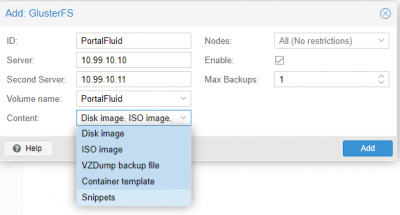
To finish the deployment of our Gluster Volume we need to go to the Datacenter menu inside of Proxmox and click on the Storage menu item.
After navigating to that screen, press the Add button. And select GlusterFS.
We are going to then type in our ID PortalFluid. Then it will ask for 2 of our three server’s IP addresses. We chose 10.99.10.10 and 10.99.10.11. Our Volume has the same name as our ID and we selected all content. When completed, press Add.
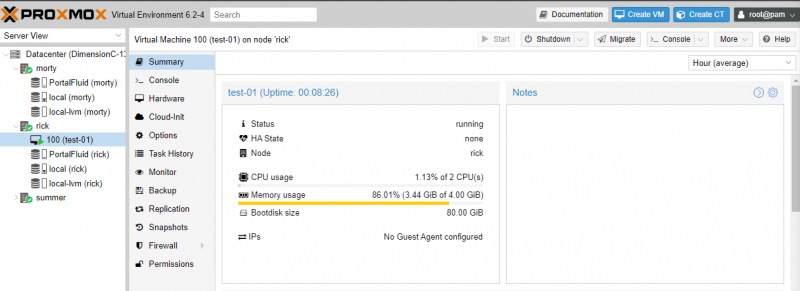
With that done, we are done with Gluster. We can start creating virtual machines and templates to get our systems into production. I have created a test VM and have it up and running already.
In Proxmox, you need to configure each VM to be in high-availability mode individually. Click on the Datacenter then click on HA and finally, click on the Add button under Resources to make your VM failover to another host after a hardware failure.

Final Words
In our original Build a Lab guide, we set out to build a traditional datacenter, one with dedicated compute and dedicated storage. We had some very important single-point-of-failure problems with our original deployment. We had no clustering of our VMWare server. With additional hosts and a VMWare vSphere license, we could have accomplished a highly-available compute infrastructure. However, we did not have a solution to build highly available storage. TrueNAS CORE just cannot do it. This is a licensed feature in TrueNAS.
Large data centers using the traditional model does not have the same problems we did. In those scenarios, your storage often has dual controllers. They may have large fiber-channel networks to connect large, full 42U rack SANs to their VMWare vSphere Clusters. There is not an easy way to solve the high-availability problem with the software we used at home or in a small office.
This guide took a different approach, we built out a high-availability and hyper-converged deployment. Each node is more-or-less equal, and each node handles both storage and compute. We have solved our single point of failure problems in a cheap and cost-effective way. In this model, we can use basically any off-the-shelf hardware. An interesting use case for this deployment model would be using some TinyMiniMicro nodes. That is the beauty of hyper-converged, you don’t need to use application-specific hardware!
We hope you have enjoyed this type of content so far!


This is perfect … been looking for a guide like this forever! How would you add an additional node in the future? Or if a node failed, and you put in a new server, how would you configure it again (as there would be a risk of destroying everything completely)?
GodAtum – Proxmox VE has node removal documentation in the case of a failed, or just simply a removed node. Personally, I just add nodes with new IDs when one fails and is removed. Adding a new Proxmox node largely follows the above steps. Gluster is designed to have nodes join and fail/ remove as well.
You would want to use their disk UUID instead of sdX so on the reboots you don’t accidentally lose a few disks because sdX order has changed.
What msg7086 said.
By UUID or by path is the only sane option for anything that’s going to be more than a quick test.
be kind to yourself and mount by label, so humans can read it. blkid will give you the absolutes when you need them.
I have found nothing on the Proxmox site about hardware compatibility. Proxmox was unable to use my industry standard LSI 20xx HBA’s.
Proxmox is built on Debian Linux so that is where I would normally start for a compatibility list.
Great guide and resource, thanks much. When I am going through the Proxmox HA docs, I am seeing much talk about a separate network for corosync and the need for fencing devices. I cannot find any reference to this in your post, did I miss that, or misunderstood something?
@Patrick, whereas the TrueNAS/TrueCore and pfSense projects provide detailed, excellent and critically important guidance on the question of hardware compatibility. And then refer one to the FreeBSD information as well. Lack of support for the most common LSI HBA’s out there goes beyond Debian roots: some roots have been uprooted.
There is simply no documentation on the Proxmox site akin to the excellent resources available for TrueNAS/TrueCore and pfSense, your guides notwithstanding.
For those who may be interested in configuration management for Proxmox, here’s a somewhat comprehensive Ansible role for deploying/maintaining Proxmox clusters. https://github.com/lae/ansible-role-proxmox
I only know this because I did it a week ago. When you join a host to a cluster, you can press Control C to copy the Join information into the dialog box which includes the IP address. You also need to supply the password for the host you are joining.
Speaking of the TinyMiniMicro guide, is it worth it to do all of this effort when you may only have one drive in each node? Or are you always better off to have at least a mirror? Also, (full disclosure, I’m brand new to ZFS), where will you find a notification when a drive fails? From Proxmox datacenter view or elsewhere?
This is so cool!
Great Guide! I’d love you do the folowup article where you describe the case where one node fails and you replace it with clean cold harware to rejoin the cluster
@Markus. It is worth noting you should use a least two separate networks for ZFS+GLUSTERFS config and three separate networks for CEPH configuration. A separate cluster network will keep Proxmox node clustering clean for features such as migration and high availability. ZFS+GLUSTERFS should be on its own network. You can configure specific storage features such as jumbo frames. For added info, in a CEPH configuration, network 1 = clustering, network 2 = OSD management, network 3 = OSD drives themselves. Network 2 & 3 should ultimately physically match in capabilities and throughput. For example, 10G OSD management & 10G OSD drives.
Hello,
Using this method we cannot use the storage for lxc containers, also the snapshot will not work…
@codedmind
Why not?
I get this error when setting up a VM on the GlusterFS. Looking at Proxmox forums, it looks to be an issue that has not been resolved:
All subvolumes are down. Going offline until at least one of them comes back up.
Any thoughts on this?
Comments are closed.