
Intel has a new socket and standard cooling solution design with the 3rd Generation Intel Xeon Scalable processors. Intel has made a big change for LGA4189 over LGA3647 in terms of installation, so we wanted to cover the process. This is meant to be a bit of a reference guide for our readers. It may not be the guide that you review daily (but it may be worth bookmarking.) Still, we wanted to show it off so our readers are not intimidated by the new processor and socket.
Video Version
If you want to see the installation in action, then we have a video that has that process. Here is the video for this:
For something like this, it may be easier to watch than to simply view pictures. As always, we recommend just watching the video in a YouTube tab or app for a better viewing experience.
3rd Generation Intel Xeon Scalable Socket Background
First off, we saw the LGA4189 socket on STH some time ago. Specifically, we had an article at the Cooper Lake series launch for the Supermicro SYS-240P-TNRT hands-on.
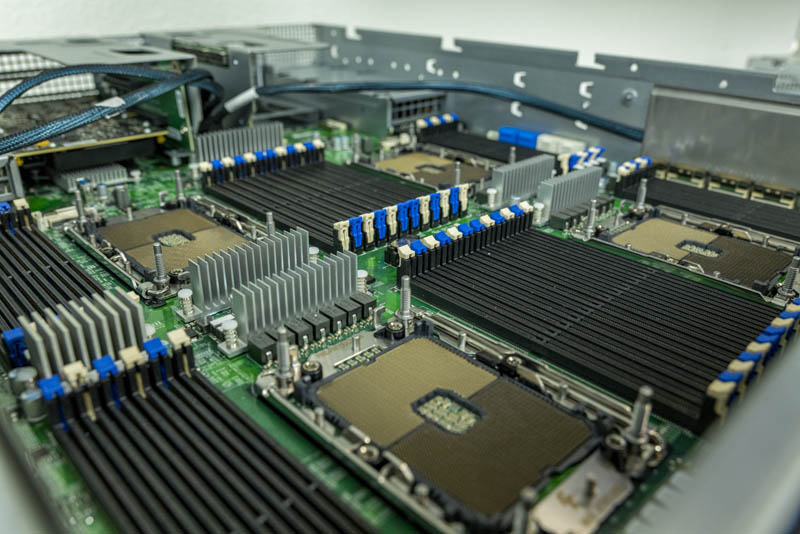
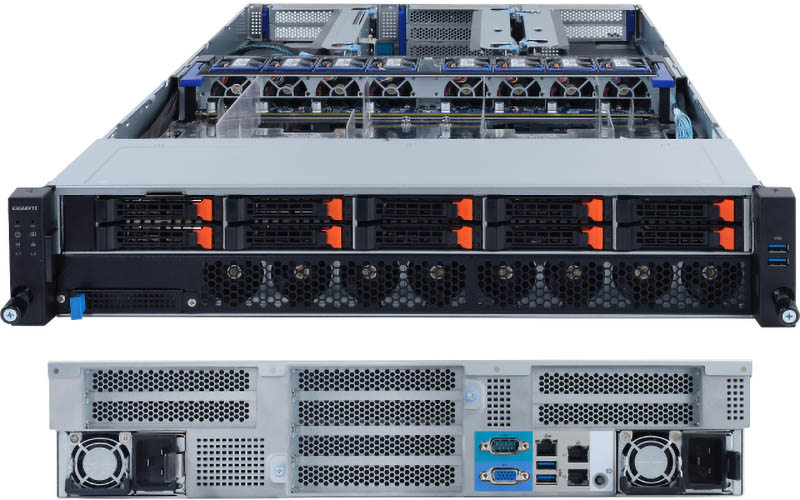
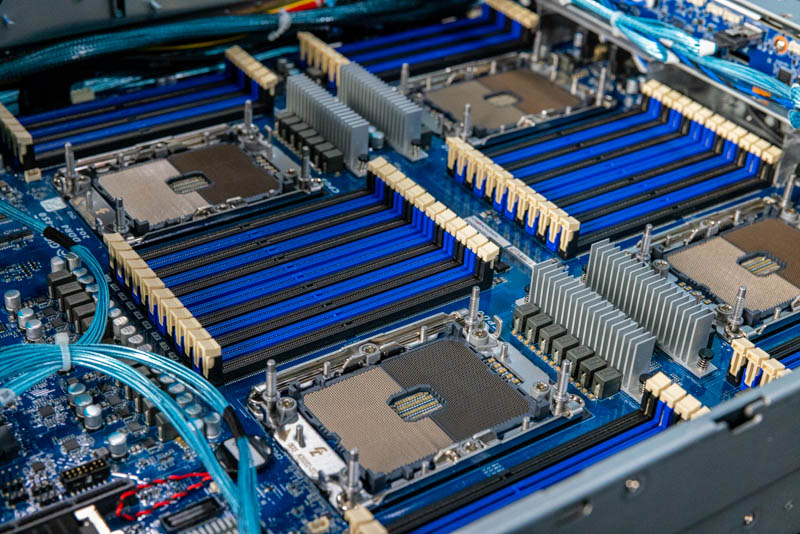
For this exercise, we are instead using the Gigabyte G292-4S1. This is Gigabyte’s 4-socket 3rd Generation Intel Xeon Scalable platform. We previously covered this platform in our Gigabyte R292-4S0 and R292-4S1 4P Cooper Lake Servers piece.
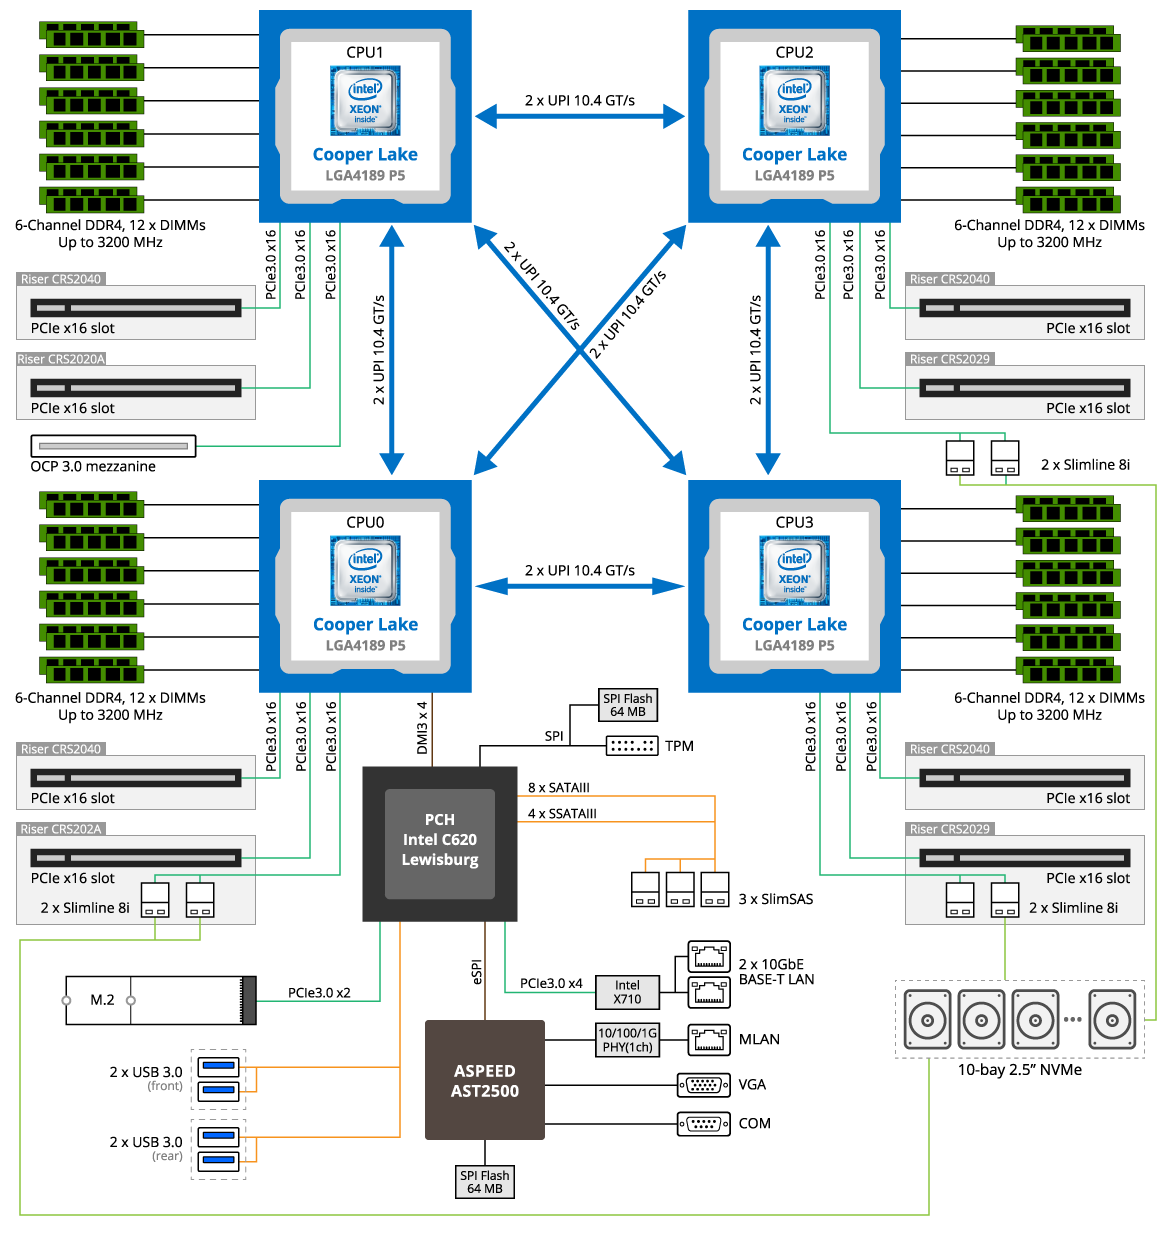
Since this is a technology that many of our readers have not seen yet, the R292-4S1 is a “Cedar Islands” platform. That means we have Socket P5 and LGA4189. In Cedar Island, there are the same number of DDR4 channels (6-per CPU) and 48x PCIe Gen3 lanes per CPU. Originally Cooper Lake processor variants were supposed to land in both this Cedar Island and the upcoming Whitley platform that will be used for Ice Lake. The Whitley version was scuttled about a year ago which we covered in Intel Cooper Lake Rationalized Still Launching 1H 2020.
This is not the Whitley/ Ice Lake Xeon PCIe Gen4 platform, which we cannot disclose new details on. That is also being marketed as a 3rd Generation Intel Xeon Scalable platform since it was set to launch closer to this Cedar Island platform. One would be wise if they have seen some of the images Intel has disclosed such as in Intel Shows Ice Lake Xeons and Talks Sapphire Rapids and Xeon D and noted that the Ice Lake Xeon Socket looks a lot like what we are using here with Cooper Lake.
One may infer that the reason we are doing this is that we have the Cooper Lake hardware, but Intel’s generational design means it is likely to be highly applicable to Ice Lake given what Intel and its partners have shown publicly.
Important: This article is solely focused on the heatsink installation, and we are not advocating putting Cooper Lake CPUs in Ice Lake sockets or Ice Lake CPUs in Cooper sockets. Use Cooper Lake in Cedar Island, Ice Lake in Whitley. That is a major change from the first and second-generation Intel Xeon Scalable, but these are now distinct product lines.
3rd Generation Intel Xeon Scalable Socket Components
Let us first discusses what the different parts are at a high-level so that everyone can understand the assembly.
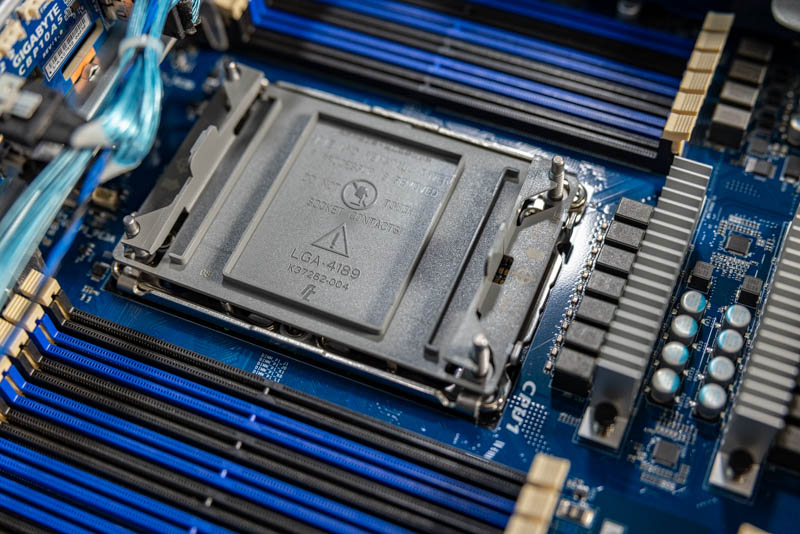
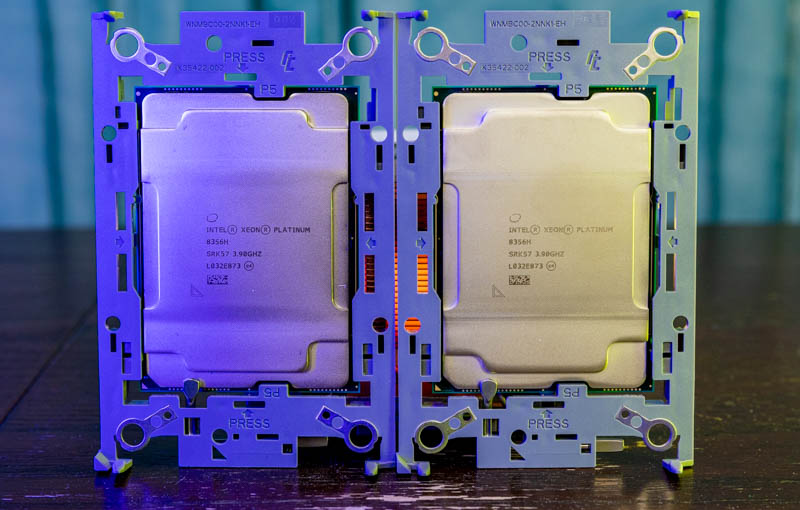
First, we have the socket itself. The socket is dubbed “P5” and LGA4189. As we will see in photos later, the CPUs are labeled as “P5” as well.
The socket is covered by a plastic cover. This is meant to protect the socket before the CPU is installed.
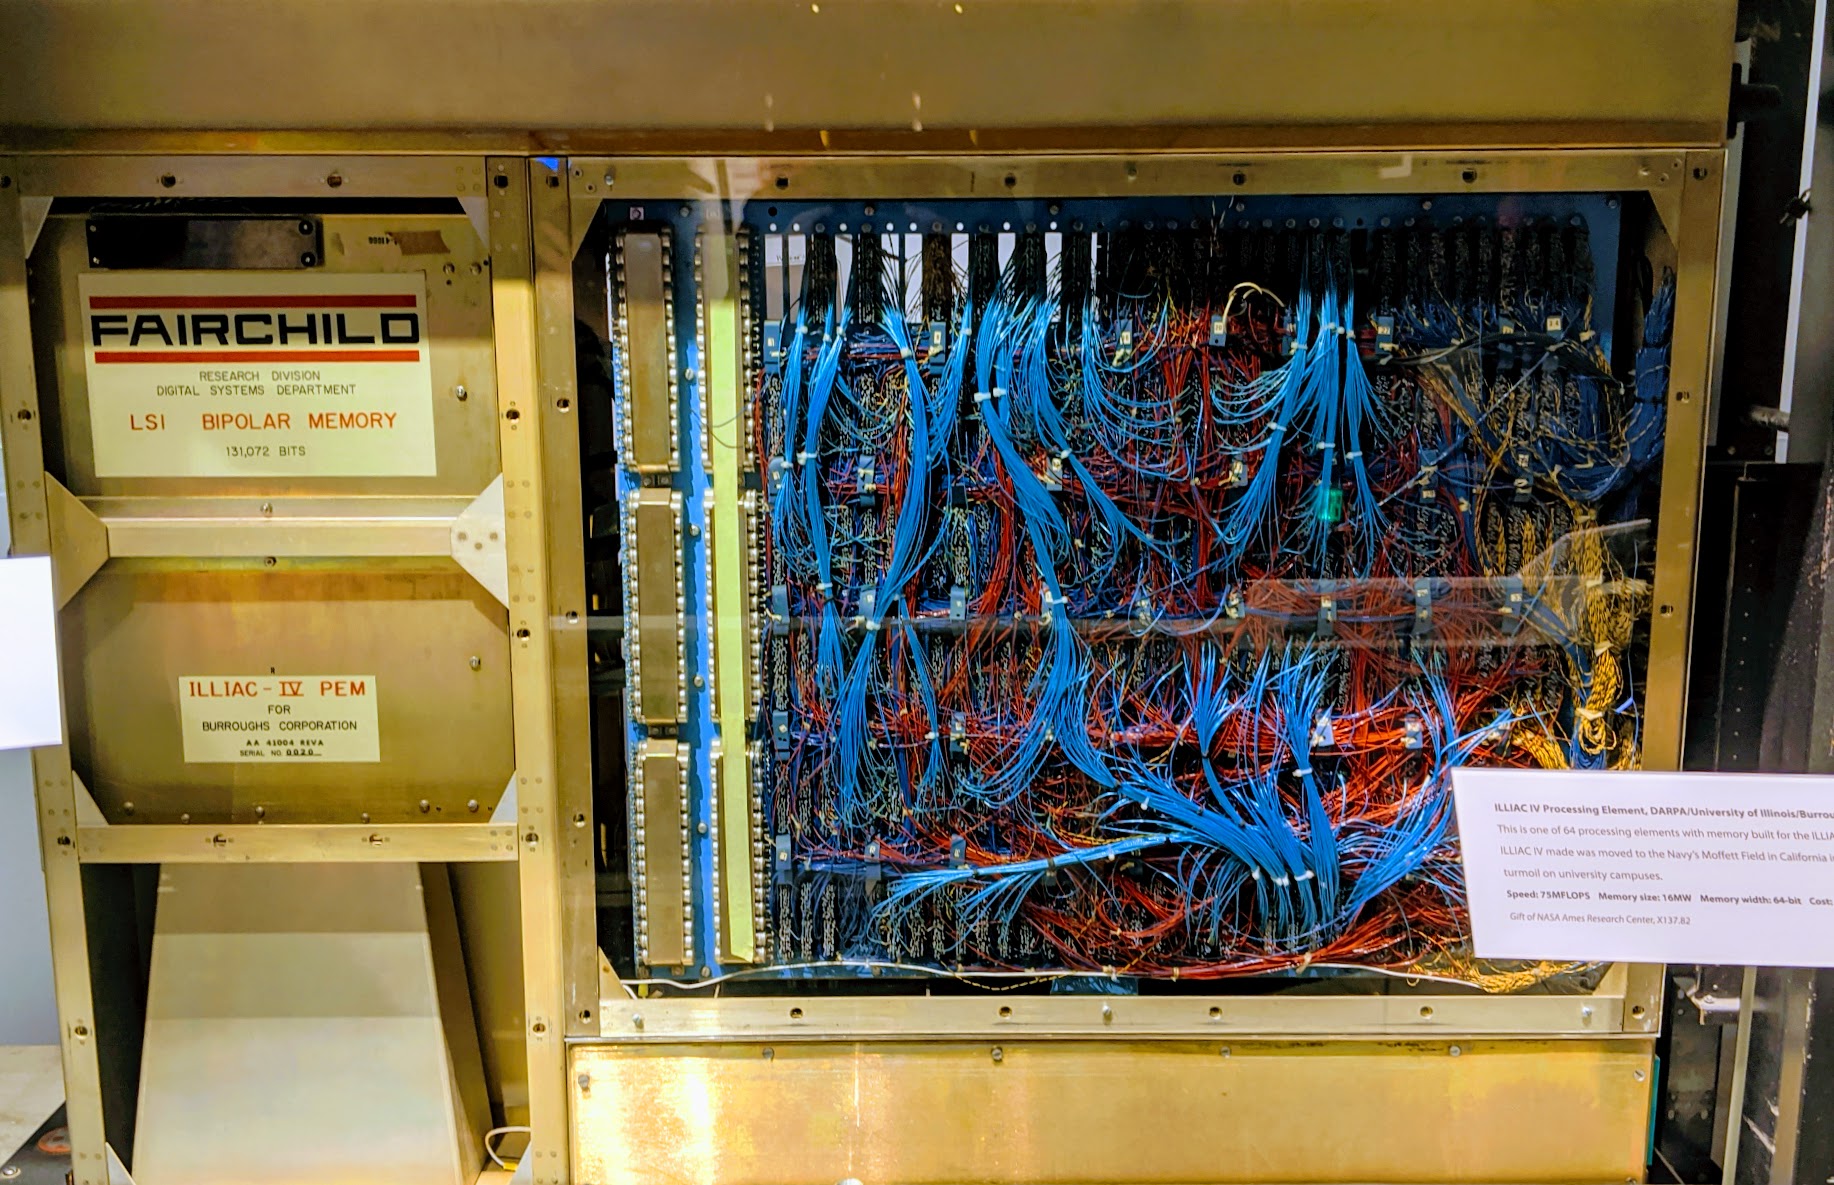
In modern systems, we have more DIMMs and peripherals than in older systems which makes this important. Originally, I was going to note that we have more cables due to the shift towards more cabled PCIe, but then I was reminded of a trip to the Computer History Museum in Mountain View California a 5-minute drive away. Saying today’s computers have a lot of wiring probably would make a previous generation (or two) object to that statement.
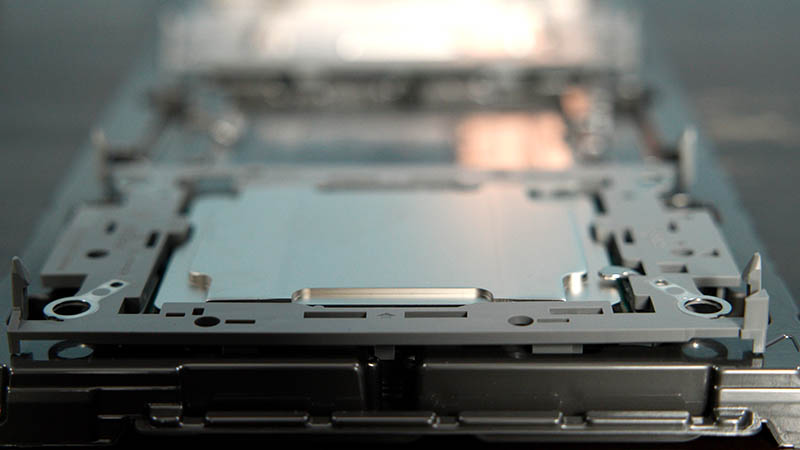
Under the plastic cover, we have the LGA4189 socket. You may hear references to Socket P4, Socket P5, Socket P+, LGA4189-4, LGA4189-5, or other names. For the purpose of installing coolers, these all use the same cooler mounting. The big difference is that Socket P4 is the Whitley socket while we are looking at P5 which is the Cedar Island socket. As such, we get different keying to ensure one does not put the wrong CPUs in the wrong socket, but this is almost the same.

One will notice on the sides of the sockets that we have threaded guide pins which will help both secure the solution as well as guide the cooler so it mounts in the correct position.
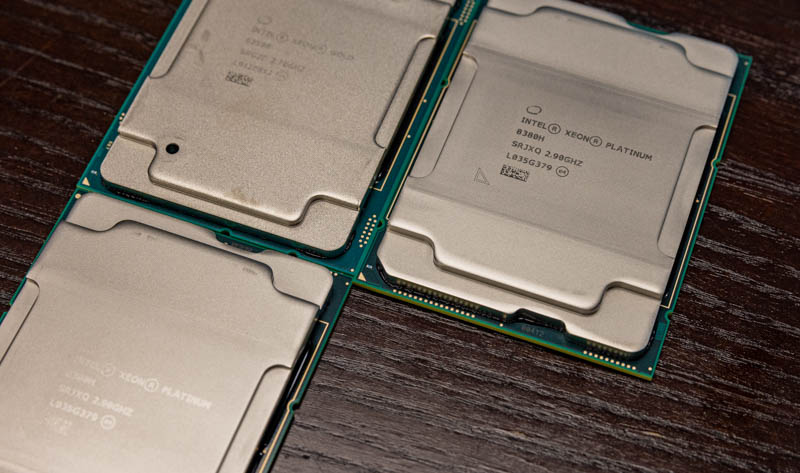
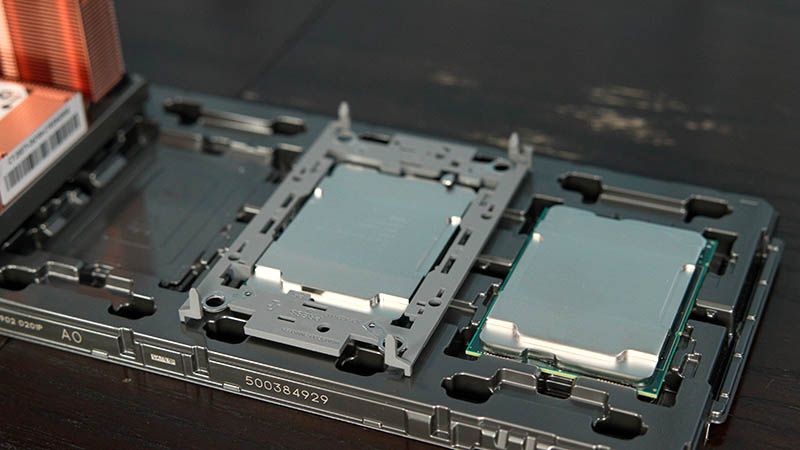
LGA4189 CPUs are larger than the LGA3647 parts that preceded them. The width is very close but one can see they are slightly longer. Here we have an Intel Xeon Gold 6258R in the top left with two Intel Xeon Platinum 8380H CPUs below and to the right. At the junction, we can see the Platinum 8380H is slightly longer.
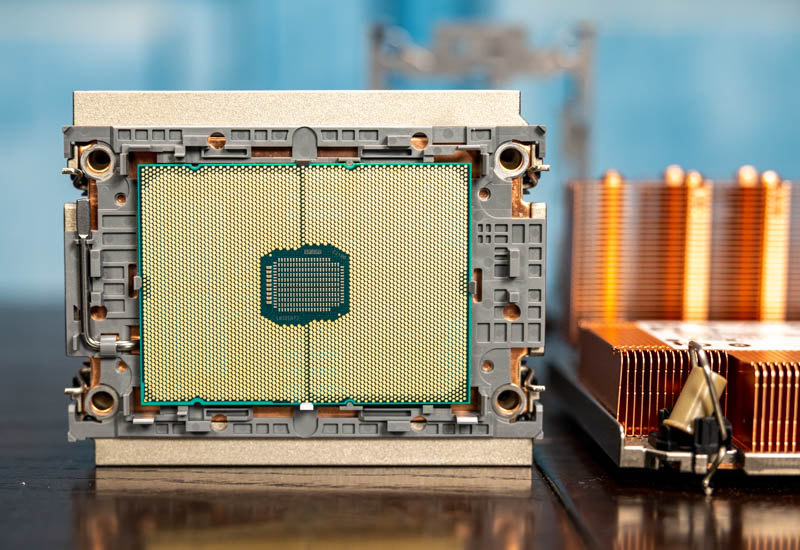
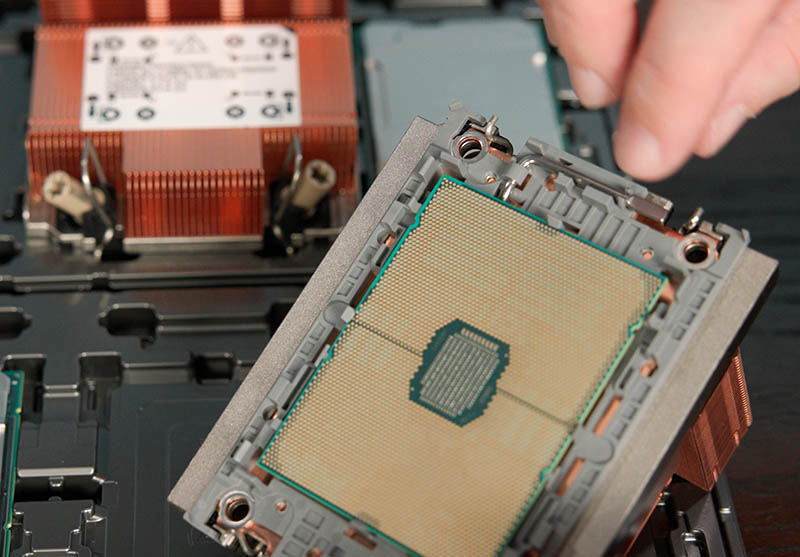
The cooler itself is comprised of two main parts. We have the CPU retention carrier. This bracket holds the CPU in place. These are color-coded and keyed differently so we are able to distinguish if we have a Socket P5 (LGA4189-5) as we have here for Cooper Lake/ Cedar Island or if we have a Socket P4 (LGA4189-4) for the upcoming Ice Lake Xeon series:

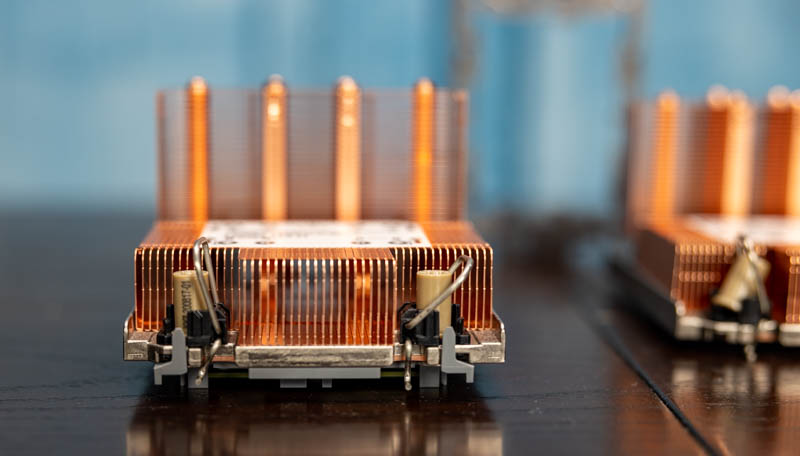
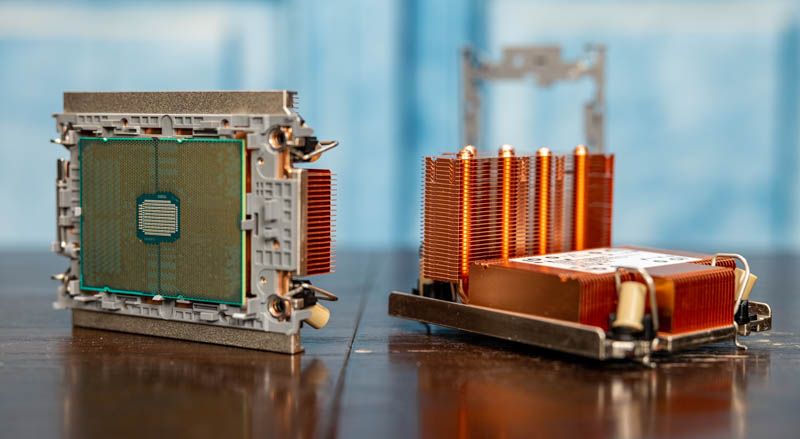
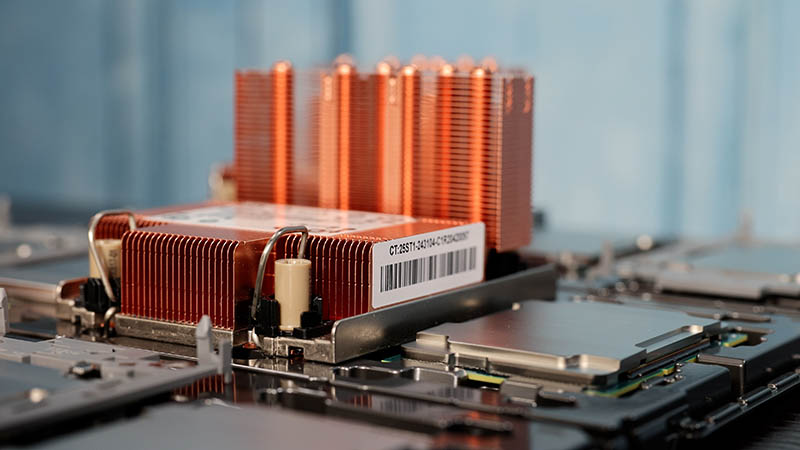
The second part is what we normally think of as the cooler. In this case we have a passive copper heatsink. Other options can include active coolers, and cold plates/ liquid cooling blocks.
In comparison to AMD’s methodology, we have a very different installation. Since 2017 Intel Xeon’s have been on a path to increasingly assemble the CPU with the cooling solution then use guide pins to have the entire assembly drop into the socket.
In the next section, we are going to show how one goes from all of these parts disassembled to having them installed in a socket.
3rd Generation Intel Xeon Scalable Socket Installation
The CPU installation does not start with the server, socket, cooler, or even the CPU. Instead, installation starts with the stock Intel CPU tray.
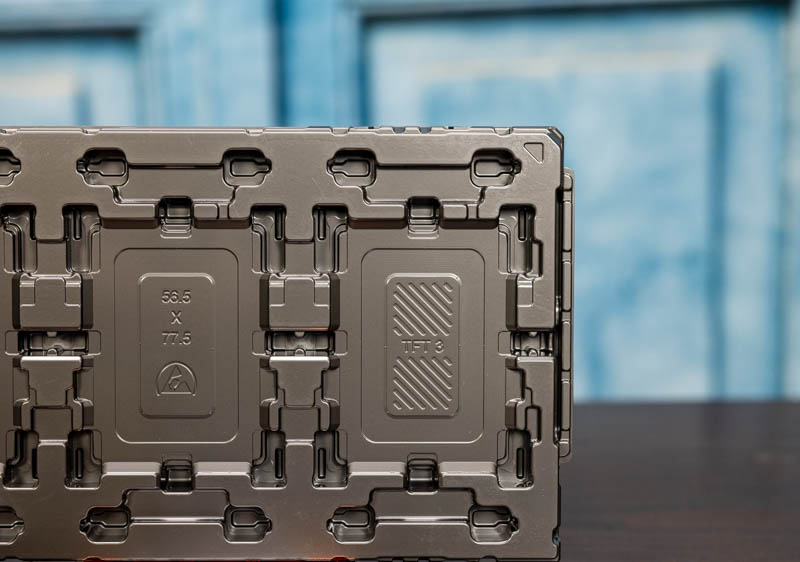
These trays are specifically designed to be part of the installation process. Step 1 is to ensure that your CPU Pin 1 marking matches the Pin 1 marking on the CPU tray. Since the CPUs are rectangular, you may think that it does not matter how they are placed. This is not the case. The tray is specifically designed for the Pin 1 markings to be aligned.
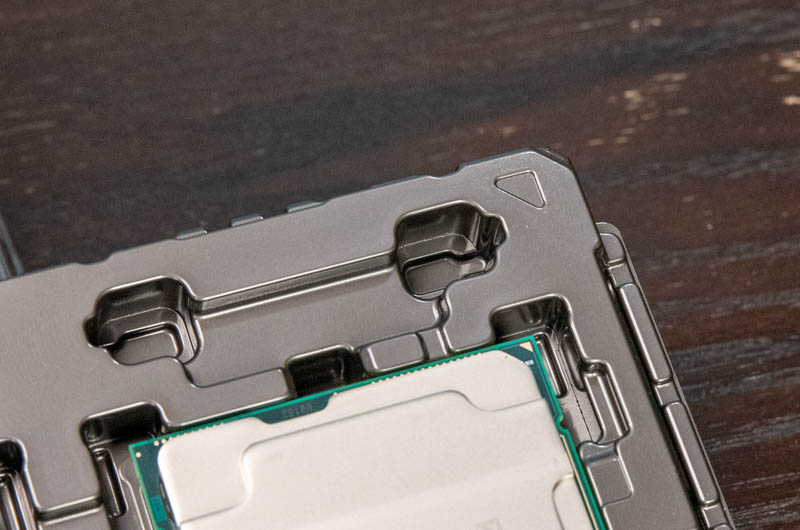
Once the CPU is in the tray correctly, the next step is that you want to get the CPU carrier bracket and align the Pin 1 marking on that to the CPU and tray so that everything remains aligned.
Many people do not know that the official method of installing LGA3647/ LGA4189 CPUs into corresponding carrier brackets happens in the specifically designed CPU trays. Here is the LGA3647 version atop the LGA4189 version. There are many guides out there that miss this detail.
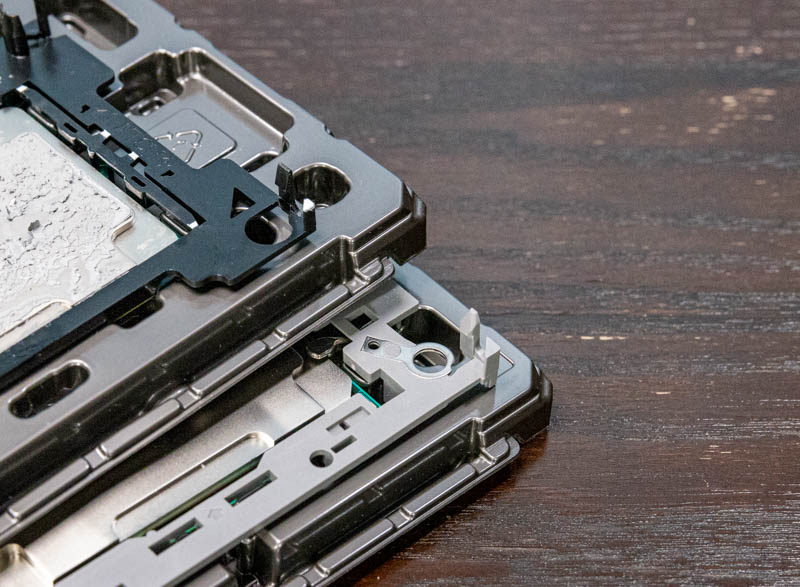
The carrier brackets are also usually color-coded to the P5 (Cedar Island as shown) and P4 (Whitley for Ice Lake Xeons) to ensure you are installing the correct CPU to the correct socket.
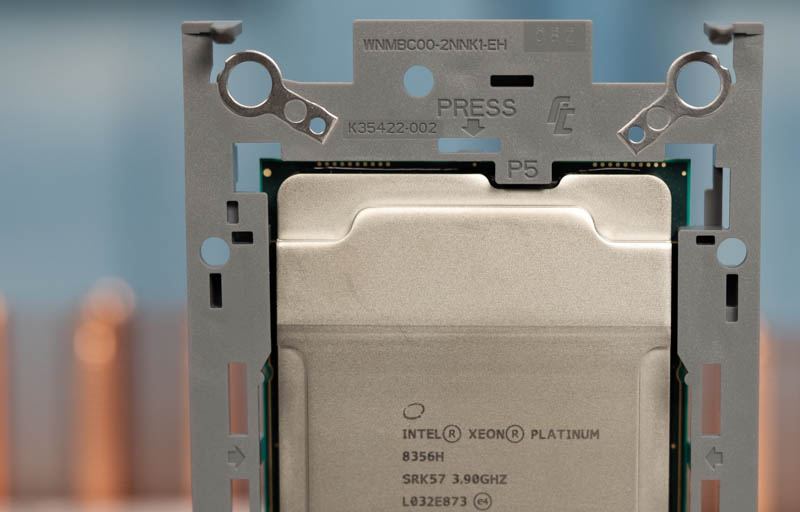
Before pressing the bracket into place, a good alignment check is to check the plastic carrier keying with the metal heat spreader on the CPU for both top and bottom edges. We also want to ensure that the metal TIM Breaker lever is retained in its clips and is not dangling. Now that everything is aligned, we push down on the middle portions of the short edges of the CPU until we hear the bracket click. This does require some force, but not so much as to break the delicate bits.
The next step is to push down on the middle portions of the longer sides of the CPU. Again we should hear a click.
Once this is done, it is best to verify everything is in place properly. There are keying notches on the side of the CPU that should be set with the carrier bracket. There are also clips that go under the CPU to support it. The entire assembly should not have parts that look misaligned. Those are tell-tale signs that something was done incorrectly.
One quick note here is that if you see something misaligned, it may be tempting to use your bare hand to move it into place. Generally, you never want to touch the contact pad side of the CPU. Doing so can potentially cause issues with conductivity when you install the CPU. The other potential danger, even if there are no issues at first, is that the friction from touching and oils on your hand can corrode the contact pads over time as they oxidize. From a social perspective, STH always advocates trying to keep CPUs free from corrosion. Less corrosion means less waste and fewer issues.
Now that the CPU is installed into the carrier bracket, it is time to install the heatsink/ cold plate. With servers, thermal paste is generally applied to the heatsink using factory tools to get an even application. If you did not have this, then you will want to apply thermal paste here. Our Gigabyte test server was used for internal and customer testing prior to our using it so the factory thermal paste is not on the heatsink. To speed photo re-shoots we are doing this without the TIM, but normally it is just pre-applied to the heatsinks.
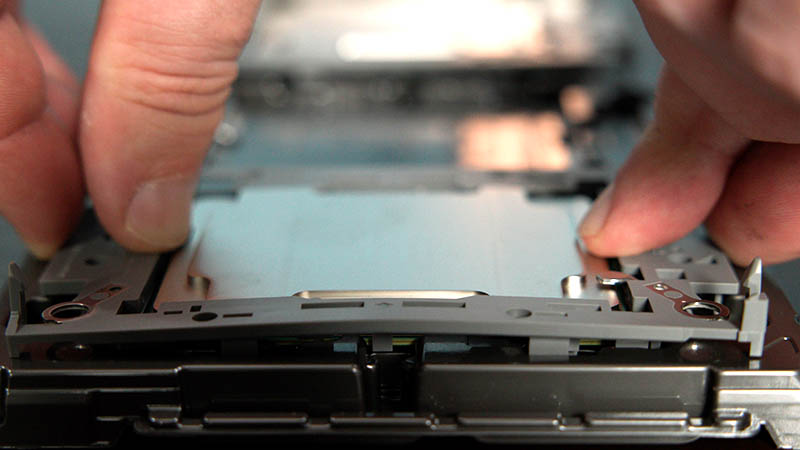
We install the heatsinks onto the supported CPU and bracket. Again we simply press this into place after aligning the Pin 1 notch to the CPU and carrier assembly.
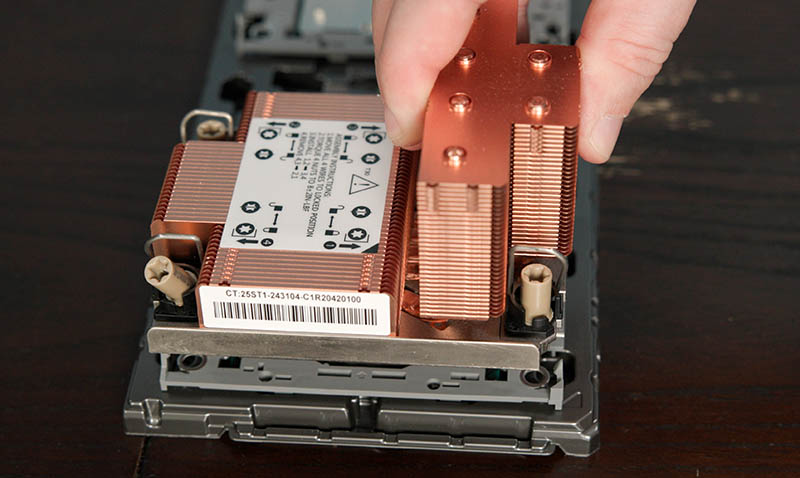
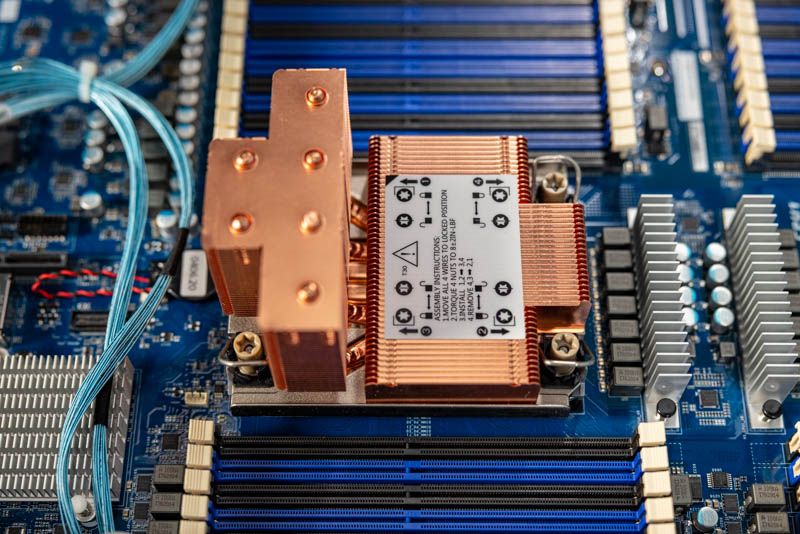
Once this is pressed into place, we hear a click. Again, inspect around the CPU to ensure proper fit and alignment. Also, a telltale sign is that all four holes for screwing the system into place should be aligned. We also want to ensure that the wires near each of the four posts are over the Torx screws in the unlocked position.
Once this is completed, it is time to install the CPU into the socket. First, remove the socket cover.
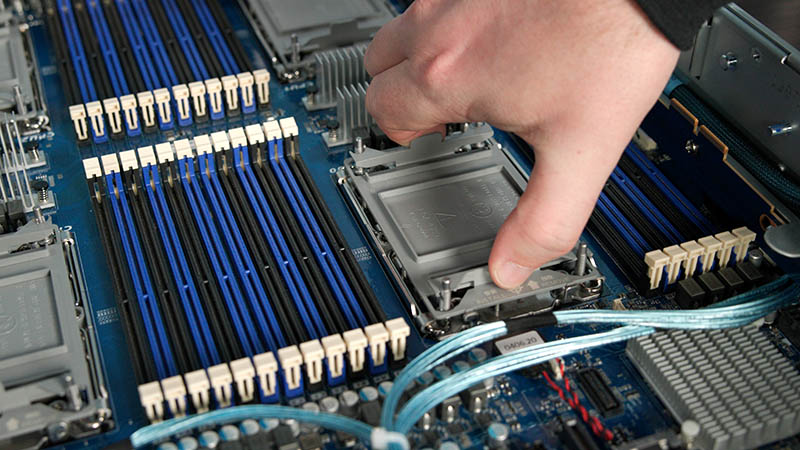
Now, keeping that Pin 1 alignment, install the assembly onto the threaded socket posts on the motherboard. This is fairly simple to do, just ensure you do not miss the posts and haphazardly drop the solution.
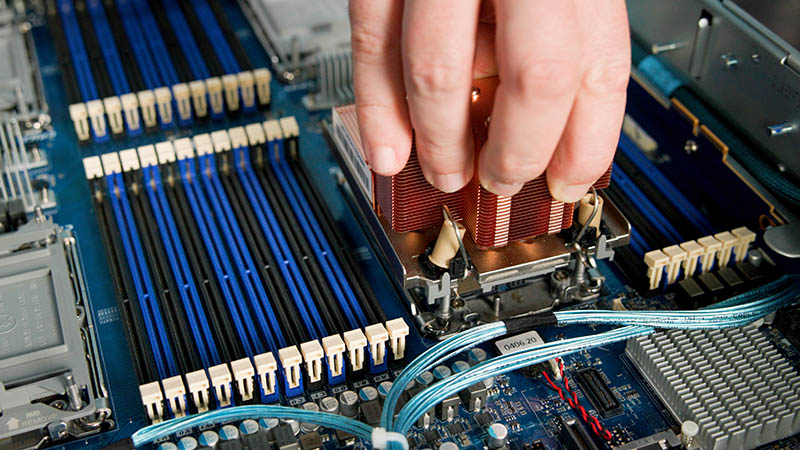
The next step is the alignment step. The wires around the four screws should be tilted over the screws/ nuts locking the solution into place. This is called the anti-tilting feature and is actually useful. On these larger CPUs one can change the plane of the CPU/ heatsink and get a tilt. In the LGA3647 generation, we did not have this feature so we had a specific order that one needed to screw the cooler into the motherboard.
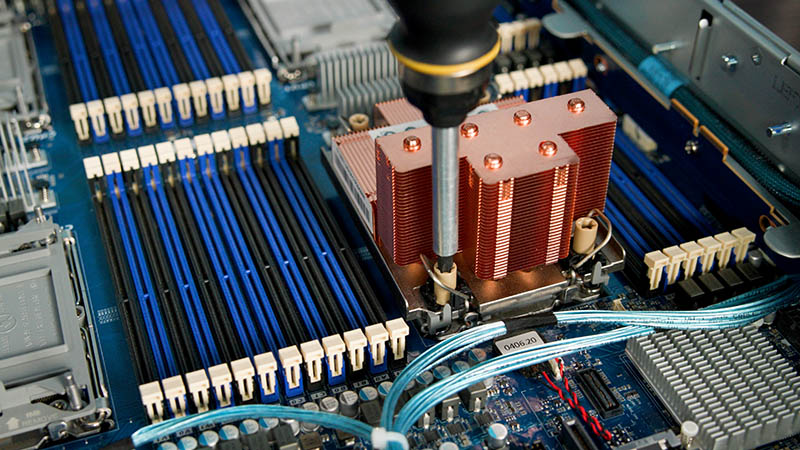
Finally, we screw the CPU and cooling assembly into the socket. In a major change from the previous generation, we do not need a specific order. Instead, we need to ensure we are at 8in-lbft / 0.904Nm of torque. We use a T30 bit as we did with LGA3647 here, however, LGA3647 solutions usually had a 12in-lbft torque spec.
Assuming all of this is done, we are now ready to install any other CPUs into the system.
This covers the installation process. The removal process is largely the same, except that one may run into difficulty separating the CPU from the heatsink. That is why we need the new TIM Breaker.
Who is TIM Breaker?
If you have ever installed a LGA3647 CPU, you probably have seen “TIM Breaker” on the plastic carrier. I was once asked, “who is TIM Breaker?” That is a question that I think about every time I see the print on CPU carriers. At first, I thought perhaps it is the designer of the bracket. I quickly realized that TIM Breaker is Thermal Interface Material Breaker.
With Intel’s socket design, one of the challenges is removing a CPU from a cooling solution due to thermal compounds working on a lot of smooth surface area. The CPU can effectively become “glued” to the heatsink or cold plate. TIM Breaker is a spot that is specifically marked on the LGA3647 CPUs to put a flat head screwdriver into so that one can easily remove it. You simply insert the screwdriver and twist.
On the third-generation Intel Xeon Scalable, this design has moved a step further. The design now calls for a little lever placed in the carrier clip. This lever can be used to forcibly separate the CPU and thermal solution by simply actuating it. If you go through the images in this article, you will notice that this lever has a specific cutout that makes the CPU tray directional and one can see the other side when the clip is installed and one is looking at the CPU faceplate.
Final Words
As one may infer from this article, we are going to do a Cooper Lake series before AMD EPYC Milan and Intel Ice Lake Xeon processors launch. Originally, this was something we hoped to do in Q3/Q4 2020, but it took a long time to put together.
In the near future, expect to see several 3rd Generation Intel Xeon Scalable CPU reviews along with a review of the Gigabyte R292-4S1. This has been an extremely expensive project, but it is moving, and it needs to be done over the next few weeks.
Hopefully, our readers can use this guide in the future as more 3rd Generation Intel Xeon Scalable processors launch. While Cooper Lake/ Cedar Island are not the highest volume products outside of big customers such as Facebook, Ice Lake Xeon/ Whitley will be the mainstream volume LGA4189 platform. Now that there is a guide on how to do this, there are no excuses for someone installing these improperly.


That is an odd looking copper heatsink, Patrick. Highrise plus lowrise. In this server is there sometging that physically occupies the space above the lowrise part?
The chassis has two sets of 1U fans so they are effectively being cooled by different airflow channels through the chassis.
Thanks, Patrick!
Very cool. This is definitely a nugget of useful information that needs widespread propagation. Your explanation of how current Intel Xeons are assembled into the heatsink prior to installation into the socket reminded me of how many of IBM’s large mainframe processors, especially their thermal conduction modules, or TCMs, like the ones they used for their later System/370 and System/390 machines as well as some of their POWER5, 6 and 7-based HPC servers, are pre-loaded into their large and very heavy cooling hat assemblies before going into the sockets of the huge processor complexes typical of those mainframes. This made installation and removal much simpler and prevented damage to the thousands of pins on the carrier substrates, some of which weighed a good several pounds and were unwieldy to handle as it is.
It obviously wasn’t the biggest part of the project; but it looks like a solid number of mechanical engineering hours(and, in all odds, a whole bunch of failure reports from assorted wacky installation mishaps in prior gen CPUs) went into getting that to where it is today.
Everything from the CPU tray being involved to a dedicated mechanism for dealing with clingy thermal paste; plus reduced need to torque the screws in order and fewer places where direct contact with either the thermal spreader or the LGA is necessary.
Do you know if this is a product of pure Intel design; or is this sort of thing something that Intel customers whose employees are populating a zillion sockets a year work with them on in order to increase assembly speed and reduce damage/accidents during installs and swaps?
Comments are closed.