
Since we have a few of the QNAP USB RAID enclosures after reviewing the QNAP TL-D400S 4-Bay and QNAP TL-D800S 8-Bay SATA JBOD DAS, we thought it would be worth doing a quick how-to on how to set RAID levels on the USB enclosures. It is super easy, but some may also just want to see the feature.
How to Setup RAID on QNAP USB RAID Enclosure
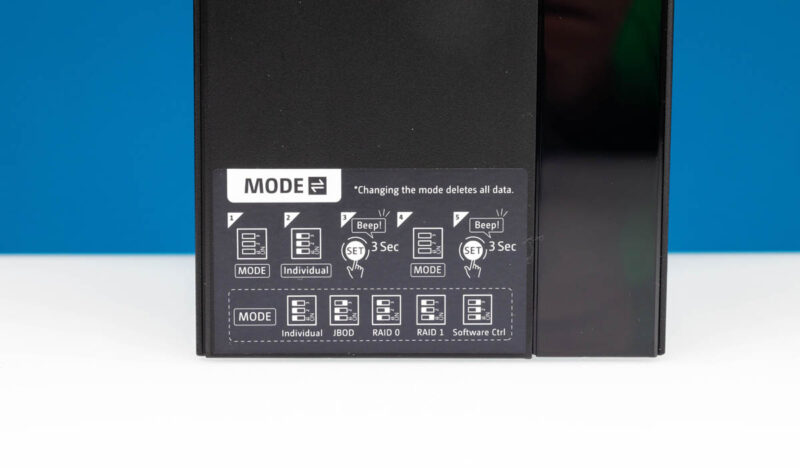
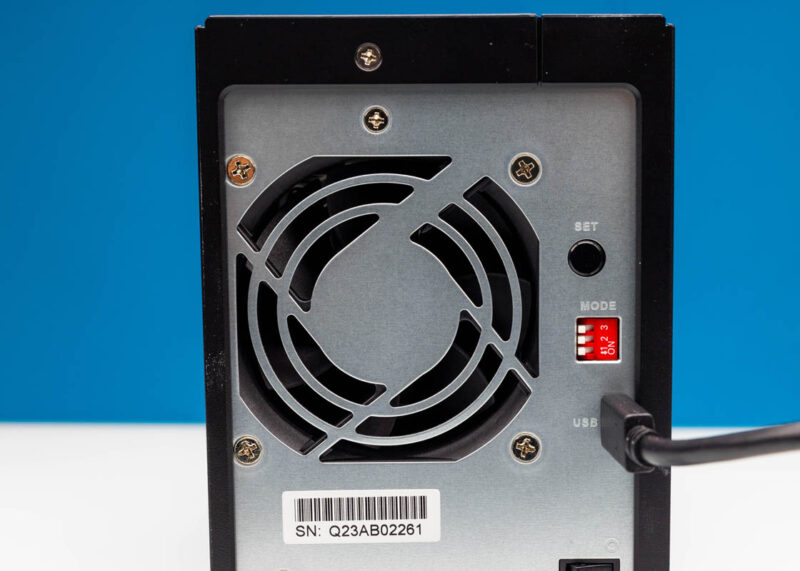
These USB RAID enclosures have switches at the rear that allow one to set the RAID enclosure mode even without the software. In a 2-drive enclosure like the TR-002 (Amazon Affiliate link) we get an individual mode, JBOD, RAID 0, RAID 1, and then software control.
When you first get an enclosure like the TR-002, it should be in the individual drive mode.
If you plug the enclosure in like this, you will see two USB drives.
Here we have two Seagate Exos X22 20TB drives installed and that are showing up in the enclosure.
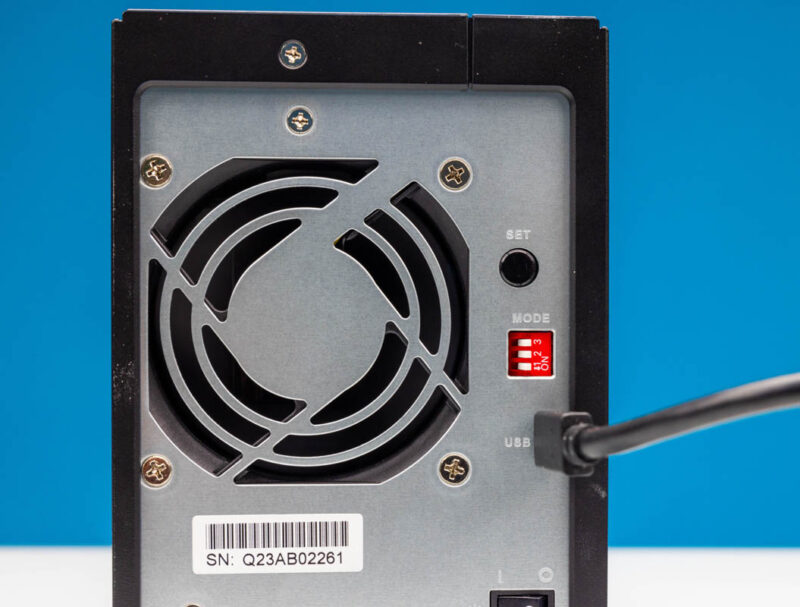
If you go through the procedure shown on top of the unit, then you hit the set button for three seconds.
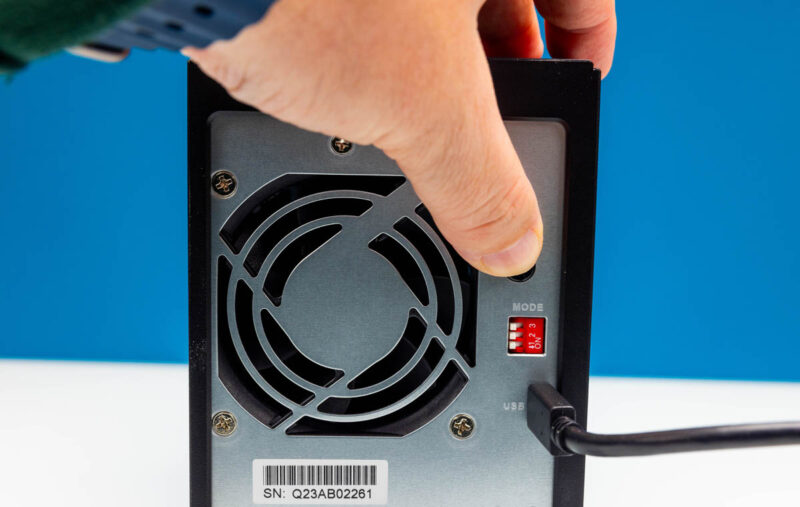
You then set the switches to the desired mode such as RAID 1 or in this case software control, and then hold the set button again.
In the software control mode, you use an application called QNAP External RAID Manager.
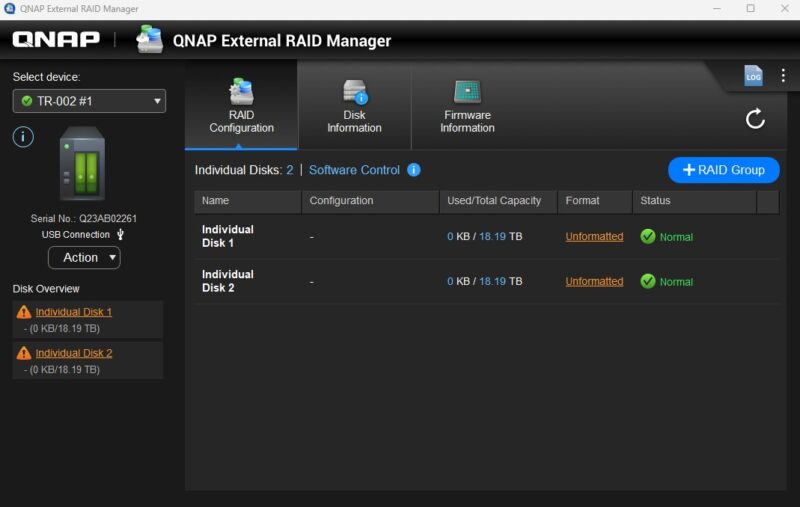
Here we can see that we have the two Seagate drives. We can also see the disk information.

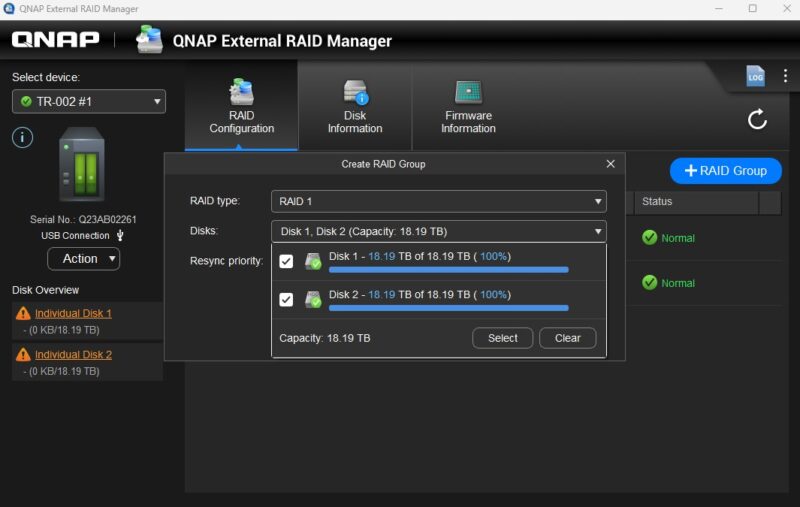
Clicking +RAID Group is how we can turn the disks into JBOD, RAID 0, or RAID 1 in the first dropdown.
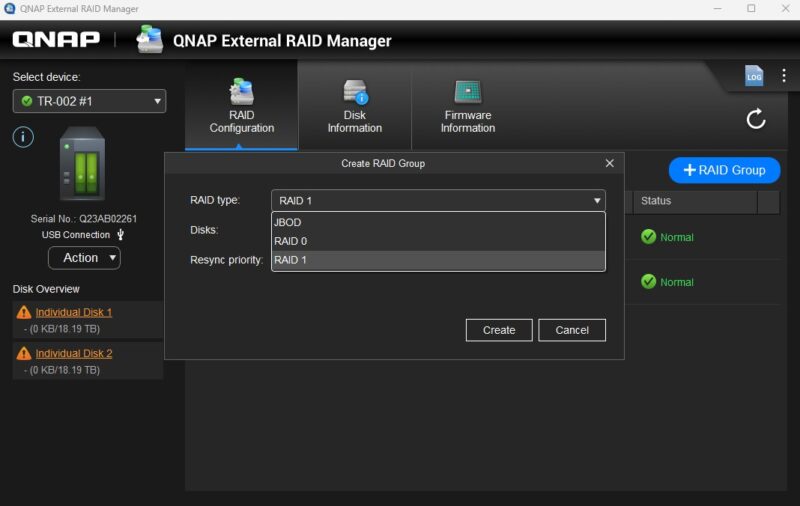
The second is where we select disks. For a 2-bay RAID enclosure, it is likely that both drives will be used, but in larger enclosures, one could use fewer than all the drives for a RAID array.
x
The last setting is the resync priority most will just leave it as default. It is used to describe the prioritization between rebuilding disk activity and host disk access. With larger drives, it might actually make sense to prioritize the rebuild.
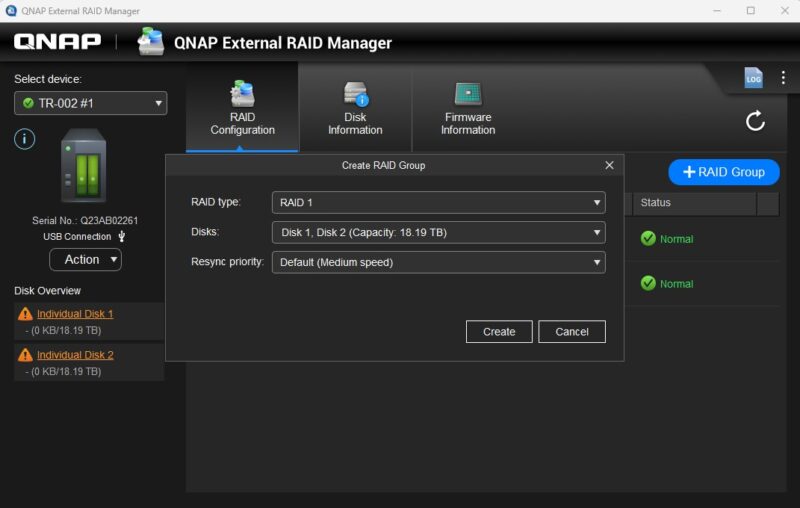
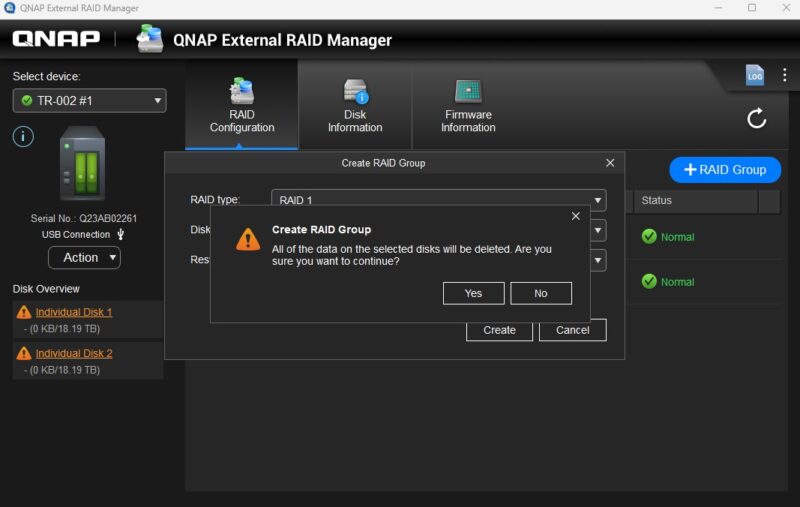
At that point you click create, and then confirm via the dialog.
Something that is strange is that after the RAID array build completes, the same orange caution triangle appears.
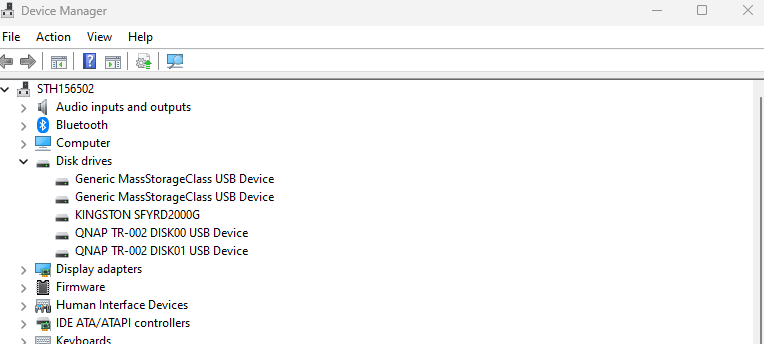
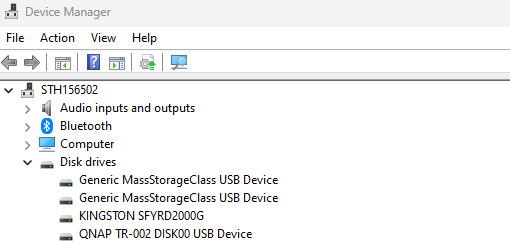
Once that is done, we see a single device in Windows device manager.
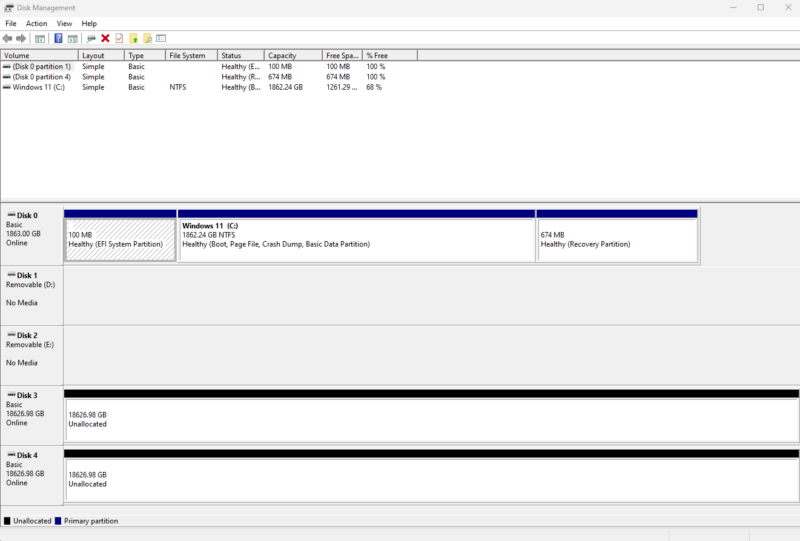
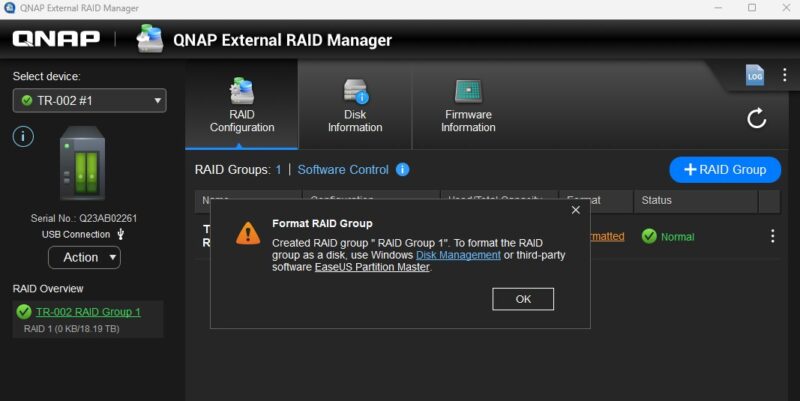
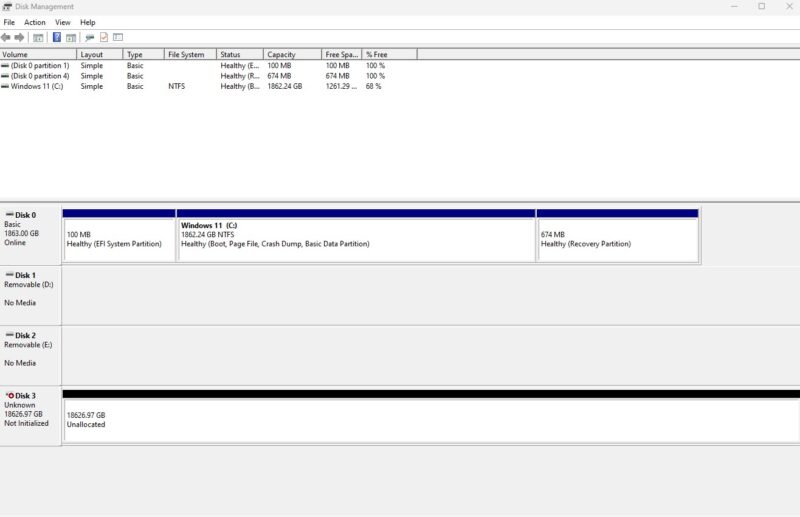
Then we see the un-initialized disk in Windows Disk Management.
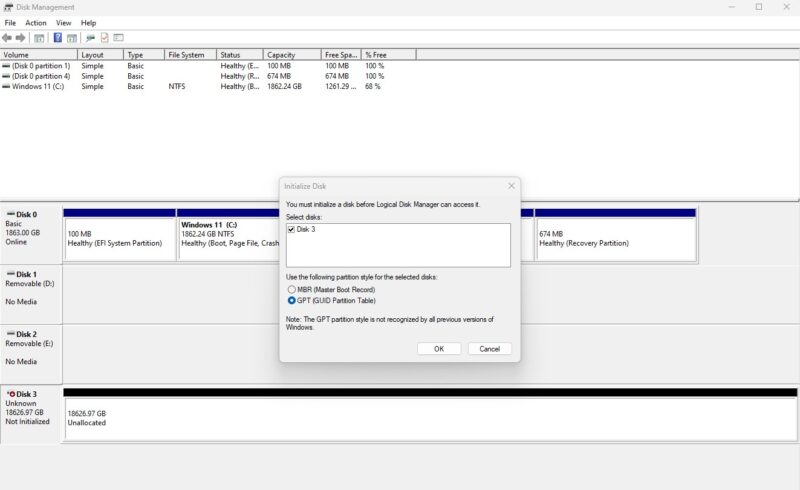
From there we can initialize the disk.
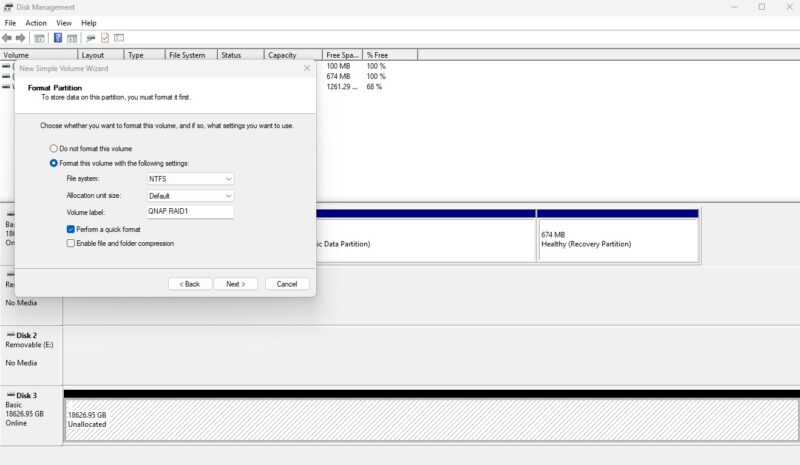
Then you can format and use the drive.
Between the switch RAID modes and the software modes, it is pretty easy to make the change.
Final Words
For a lot of folks, a simple USB RAID enclosure is perfect. Finding a way to get a few drives in RAID 1 for some redundancy while also being easy to connect and setup is a big bonus. The switches are not hard, but they feel like a 1990s solution instead of having a single switch to pick the mode. Still, the software mode is pretty easy to select and do things in a GUI. We showed the Windows version, but there are other versions, such as for Macs available as well.
Overall, a very easy experience.


Is it possible to leave the drives in individual mode and then use them for a ZFS pool?
Yes.
If you’re going to use the drives individually then there is little point to paying extra for a hardware RAID enclosure. In any case, RAID is largely considered obsolete nowadays anyway.
I keep it this way ..
a) quick internal storage to buffer, can be damaged, redundancy by external USB disks
– internal 24TB RAID-0 with 3x Samsung SSD 870 QVO, 8 TB, SATA (MZ-77Q8T0BW)
– using inexpensive Icy Dock ExpressCage MB732SPO-B
b) 2x 10 TB backup on external disk via USB3 with UASP (USB Attached SCSI Protocol) for more speed and throughput, also faster transfer of small files
– using USB3 controller with driver supporting MSI and UASP
– using StarTech USB-B 3.1 Gen2 Enclosure, 3.5″, USB-B 3.1 (S351BU313) also with UASP
The RAID-0 of 3 SSD 870 QVO to speed up the SSDs, as they become slow when the cache is exhausted, this way I keep the speed up to at minimum of 3×160 MB/sec, usually more.
As the data is replicated / mirrored to two external USB3 disks, it is possible to have this internal storage for the sake of speed.
I perform a combination of
– disk images for the OS SSD using Macrium Reflect
– mirroring of user data in its original / native format to prevent a situation, that an archive format might not be readable.
Macrium Reflect Home has two nice features
– Rapid Delta Restore (only writes/alters data on SSD that needs to be changed)
– Grandfather/Father/Son backup, mix of Full, Differential, Incremental and other types
FreeFileSync is a proven tool for data synchronization, I only use it for mirroring data.
This program is fast and reliable. One feature is very useful, you can configure how many old versions of your files you want to keep. Either in the same folder or in a parallel folder hierarchy, where its easy to remove the duplicates from there recursively if you should need space.
This is much better for me as this covers all backup, recovery, desaster recovery actions.
Fast and very silent due to the SSDs in the case. The external disks I can power-off on demand.
No extra cost and complexity due to external RAIDs with a lot of additional functions (and bugs in the OS/firmware).
For RAID in the system I am using my server mainboards Sata Controller to be independend of RAID inside of Windows, so that I can access the backup data without a running Windows.
Comments are closed.