Gigabyte R292-4S1 Internal Hardware Overview
In our internal overview, we are going to discuss what connects this server and what makes it operate.
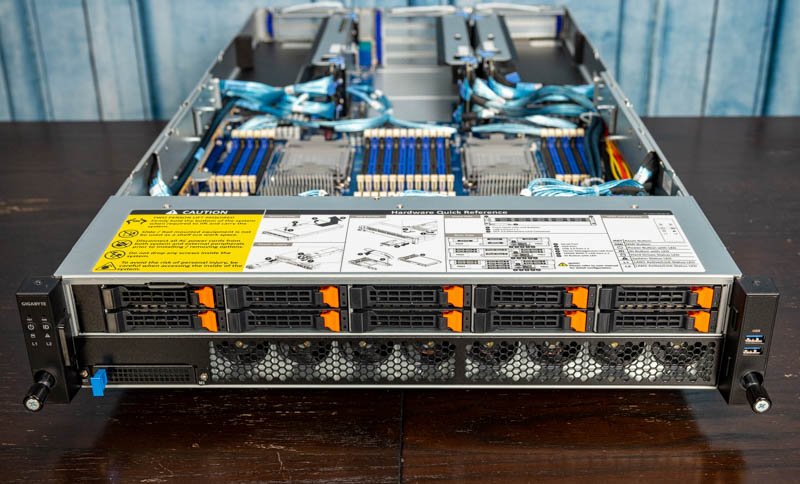
Here is an internal view with the CPUs, memory, and airflow guide installed to give some sents of the server. We already discussed the PCIe slot connectivity on the rear and NVMe storage/ fans in the front. As a result, we are going to focus on the middle section with the connectivity, CPUs, cooling, and some miscellaneous items.

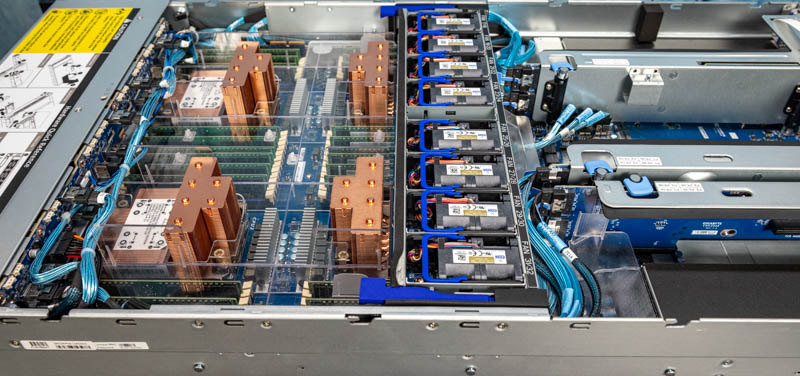
Taking a look at the NVMe storage backplane we can see a massive number of cables. We will have the block diagram later in this review, but the front storage is connected to different CPUs. This practically means we have cables that need to terminate near each of the CPUs.
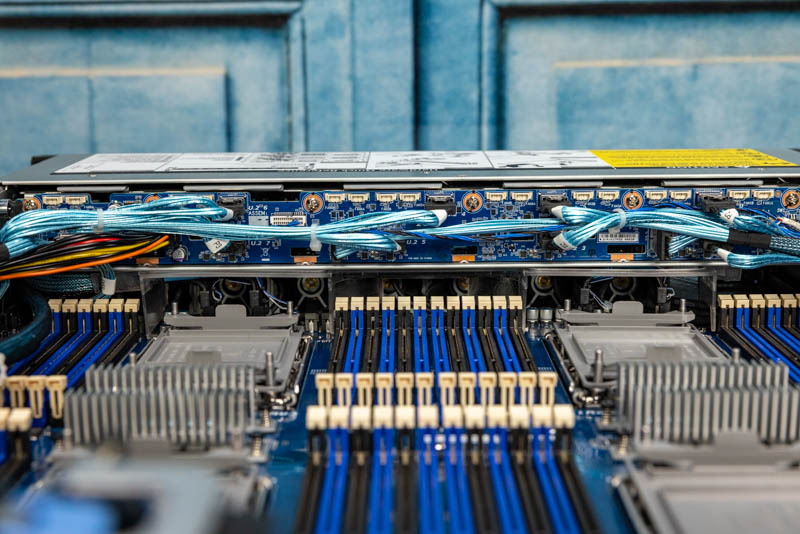
One of the practical challenges of routing 192 lanes from four processors is that there is an enormous number of cables in this system crisscrossing the chassis. One can see from the above photo that instead of having a traditional mid-plane fan partition with cable routing sections, Gigabyte starts the motherboard under the 2.5″ NVMe bays. Overall this solution works, but there is one corner near the front of the chassis where there are a large number of cables. This makes the installation of the airflow shroud a bit trickier to the point where we often used the two latches to just move the NVMe cage out of the way to install it. This corner is perhaps the hardest item to work around in the entire chassis.
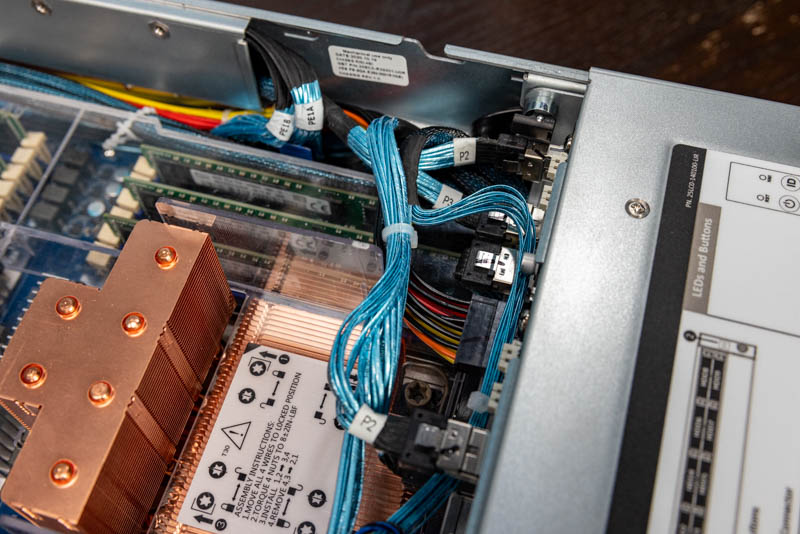
The benefit, of course, is that this design greatly shortens the chassis, likely by more than 10%. As a result, one effectively trades having to unlatch the two pins that hold the NVMe cage in place to service the front fans and the sockets. It takes a few seconds, but it is a trade-off.
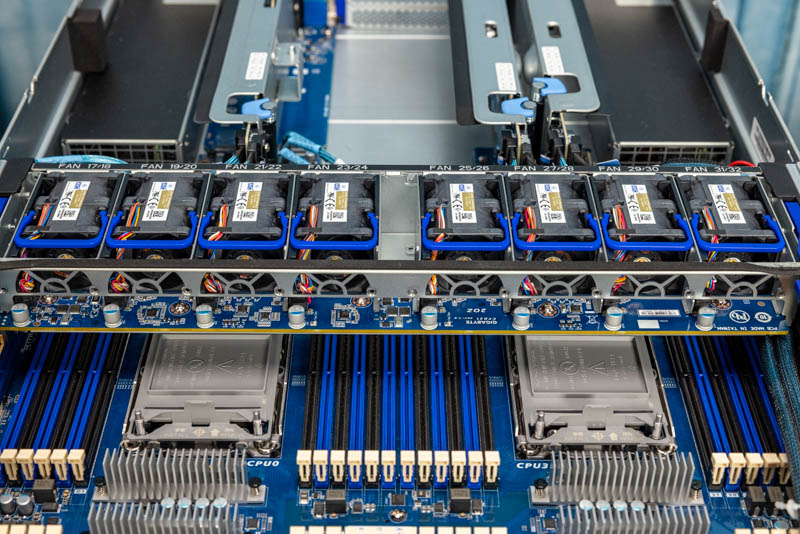
The CPU socket area is dominated by four LGA4189 Socket P5’s. These each have a full set of 12 DIMMs. This gives us a total of 48x DIMM slots and four CPU sockets.
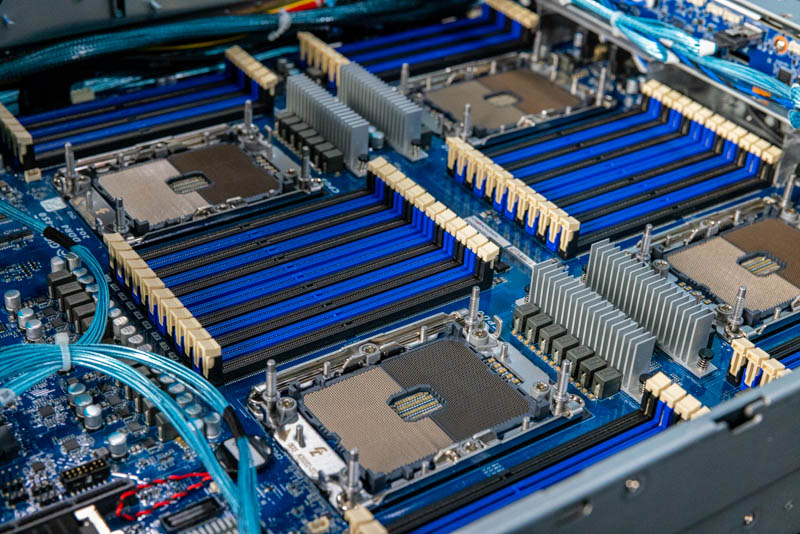
Each “L” CPU can take up to 6x 256GB DIMMs and 6x 512GB Intel Optane PMem 200 modules for a total of 18TB of capacity in this system (6TB RAM + 12TB PMem 200.) One can also use 48x 256GB DRAM sticks to get 12TB of RAM. A quick note from a platform perspective is that in Cooper Lake, unlike Ice Lake, PMem 200 only operates in App Direct mode. For this segment, applications like SAP HANA which is perhaps the most cited, are optimized for App Direct mode that provides high bandwidth, low latency, and persistence. This is a key feature that AMD does not have with its EPYC offerings.

TDPs of Cooper Lake are higher. That means while the Xeon Platinum 8280 is a 205W TDP part, the Platinum 8380H is a 250W part. Adding another 180W of TDP means that cooling is important. Gigabyte’s solution is to use these large two-tier copper heatsinks.
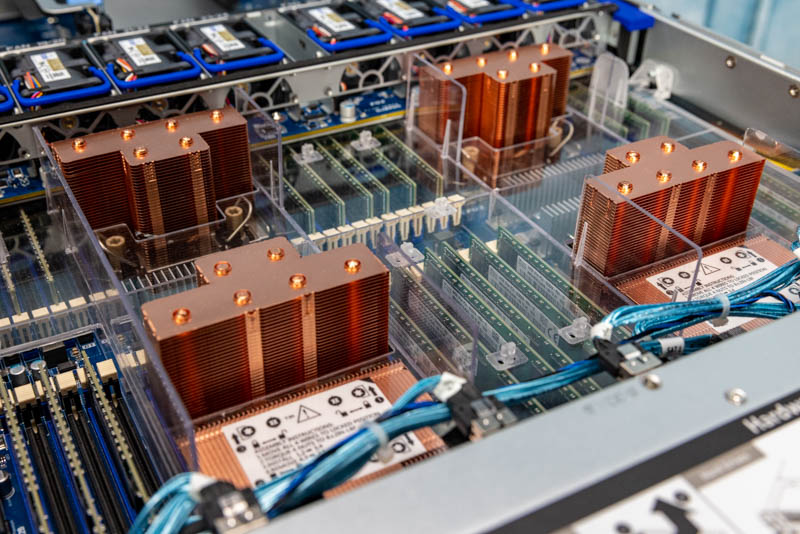
The heatsinks are designed in this manner because the chassis has two cooling zones. The bottom zone is driven by the front fans and cools the memory and potentially Optane PMems (memory in this system fully configured can use several hundred watts of power.) The top zone bypasses the 10x 2.5″ NVMe array cools the heatsinks, and then goes to the rear I/O. This middle section is driven by the mid-plane fan array. This array has both hot-swappable fans as well as latches on the entire section. This allows one to move the fan partition to access the DIMMs/ sockets underneath.
Thie fan partition is another reason that Gigabyte was able to shorten the chassis, and also influences the heatsink design into the second tier.
There are two other features we wanted to cover. First, the chipset is the Intel C621A which is the new Lewisburg refresh part (silver heatsink.)

The second is that there is an onboard M.2 slot for those who want to utilize M.2 for a boot device. It even has its own heatsink to ensure the M.2 drive is kept cool which is important since the airflow over the M.2 drive will have passed over the CPUs and memory.
Everything here is PCIe. This is a more modern server. There are 12x SATA ports, via three SlimSAS connectors, but these are not going to get used in a system like this.
Next, we are going to get to the block diagram and management before getting to performance, power consumption, the STH server spider, and our final words.


This is exactly why we read STH. Ya’ll on a roll with these. It’s like “hey there’s this thing, here’s everything you need to know about it” BOOM.
I wish you reviewed every server out there so the server buying experience was more transparent. I know that’s impractical, but this is so much better than the Dell marketing material on its servers and the junk they pass off as collateral. Oh and I don’t think Dell even has these just the R940/R840 so this is technically higher-end than Dell’s highest-end 4-way
Best review, also only review. Nice STH on not squandering and doing good write up.
I’m learning so much here
I didn’t even know what cooper was until I saw the heatsink video with this system
Comments are closed.