Installation and Troubleshooting
My troubleshooting had to immediately kick into gear when the DeskMini B660W failed to post upon initial power-up. After some tinkering, it became readily apparent that while the B660 supported 13th gen CPUs, it only did so after a BIOS update.
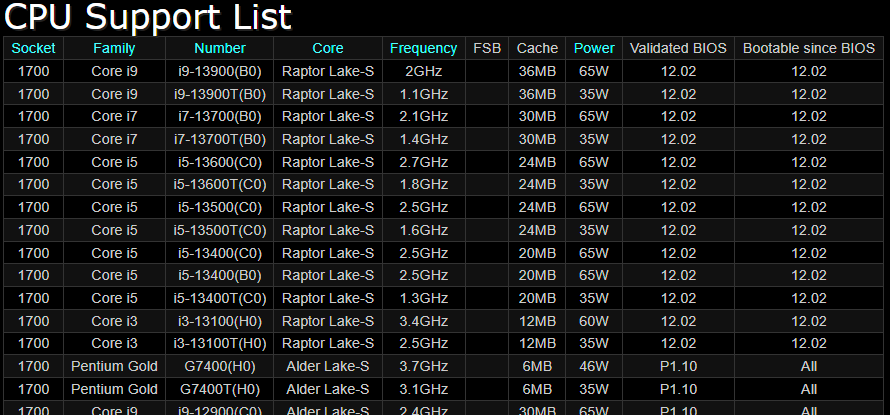
In order to do the BIOS update, I needed a 12th gen CPU so the system could boot. I borrowed an i5-12600K CPU (which is NOT on ASRock’s official support list but worked just fine) and used it to perform the update, after which my i3-13100 booted up fine.
Next problem! My selected OS was originally going to be VMware’s ESXi 7.0 Update 3n, but the onboard Intel I219-V NIC was not detected during the installation, which was a bit of a roadblock. No matter, I am aware of the community driver, so I built my installation USB stick with that driver integrated, tried again, and was immediately met with the same issue.
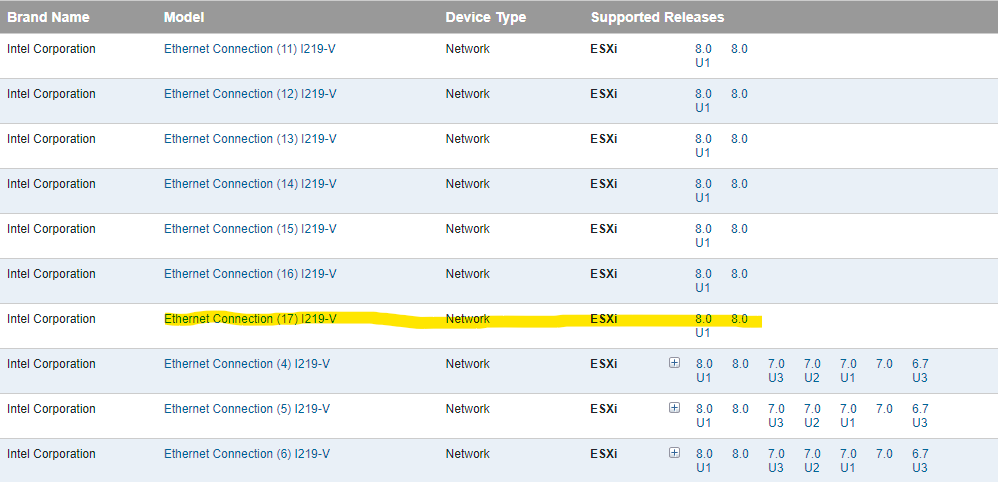
A bit of searching later led me to realize that this is version 17 of the I219-V controller, which is only supported in ESXi 8.
No matter, I built an ESXi 8 Update 1c installation USB, and immediately upon boot-up, the system ran into a purple screen of death. The last relevant line on the PSOD was complaining about “Jumpstart plugin tpm activation failed.” and I found some other users online who had tried using the DeskMini B660 with ESXi 8 and had run into the same issue. On a hunch, I disabled the TPM in the BIOS, which allowed the installation to proceed. Is disabling the TPM my favorite thing in the world? Absolutely not. Did the original server have a TPM? Also, absolutely not, so I did not feel too bad proceeding. After all of that, ESXi 8 was installed with no further complaints.
ESXi 8 Works!
After all the trouble getting things installed, once that was finally accomplished, everything else moved much more smoothly.
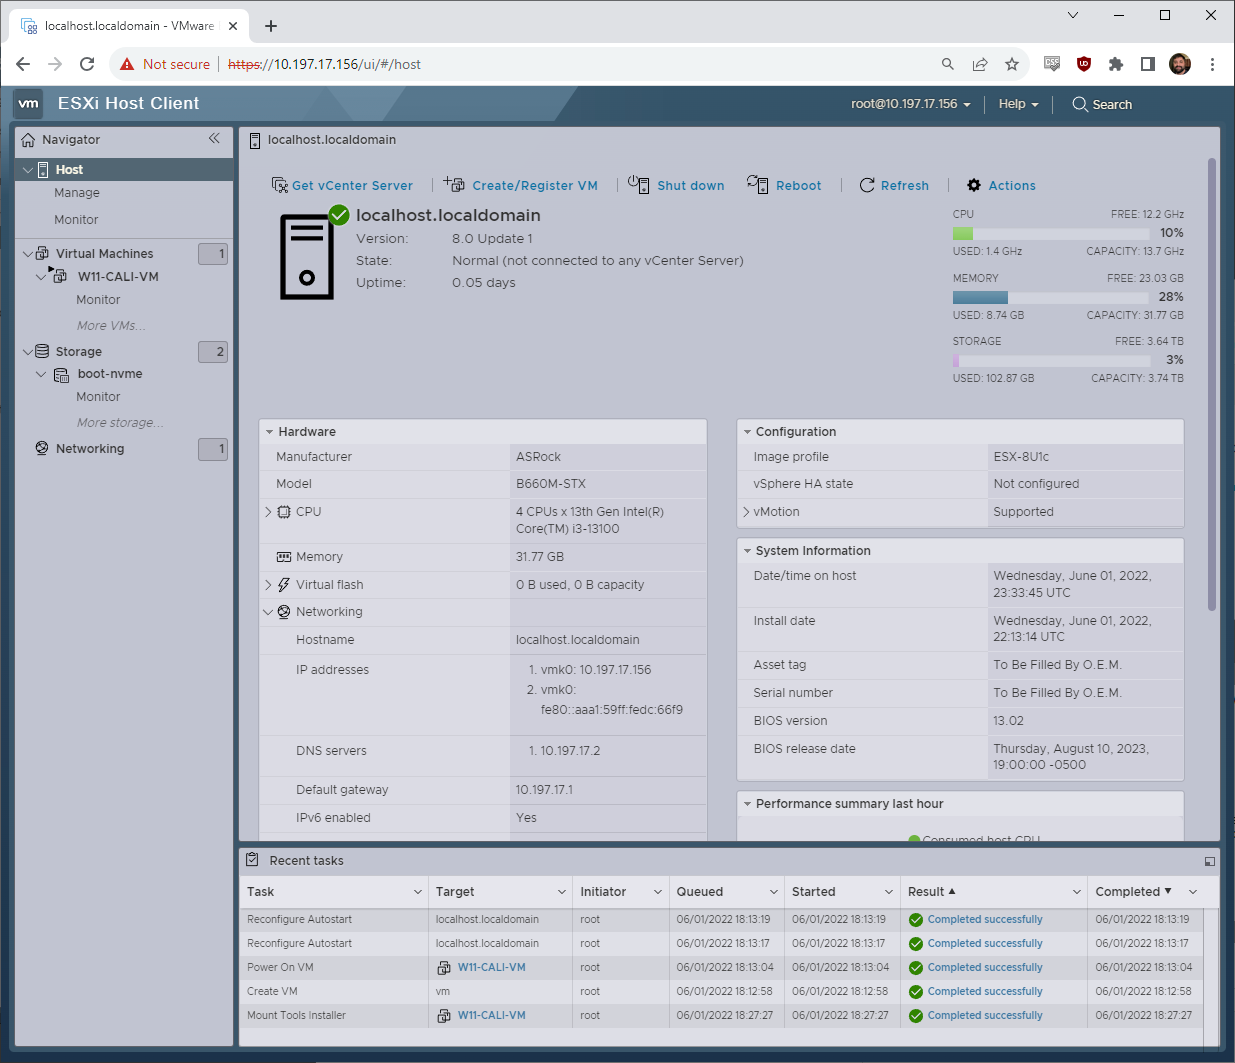
As with all my ESXi installations, the very first thing I always do is configure NTP, enable the Autostart feature, and apply my licensing. In this case, I will have to ship this system on-site before I can migrate the server to this host, so in the meantime, I built a management VM that I could remotely access once the system was plugged in.
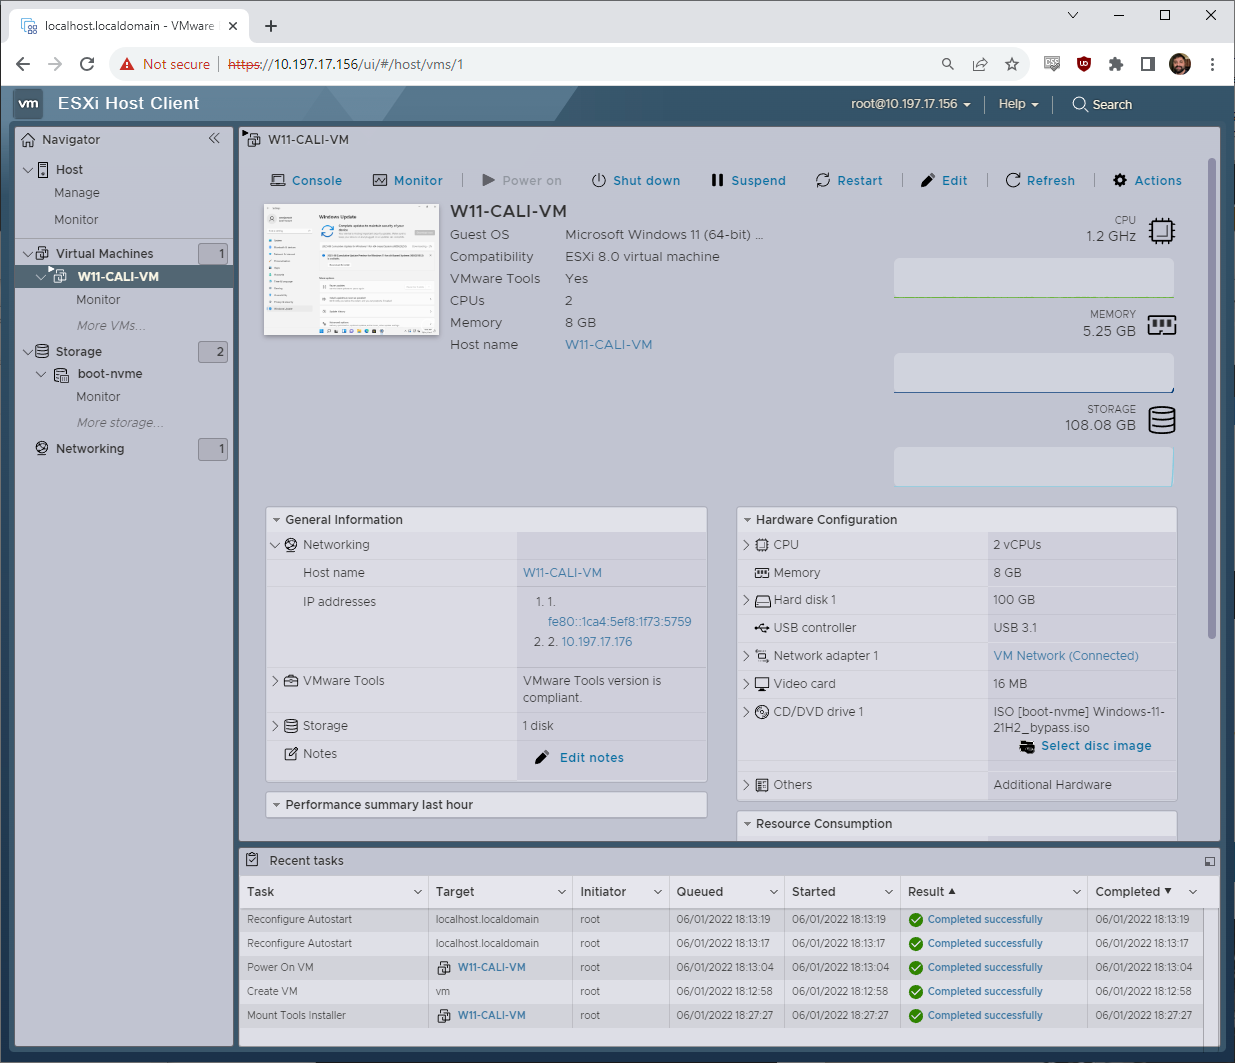
My little VM is just a basic Windows 11 system with my standard remote management stack installed. I also installed my backup and restoration software (Veeam) and some other technical utilities onto this VM so that it is good to go for the restoration.
Since the new server is so much faster and has a higher capacity than the failed server, carving out a bit for a management system like this is no problem.
ESXi Tip – Remote Console Access
I promised an ESXi tip, so here you go. Changing the network configuration is much easier to do from the ESXi console than it is via the web GUI. I usually would handle this step via a BMC remote iKVM, but this little DeskMini does not have one of those. However, even daily users of ESXi may not know that you can remotely access the console UI via SSH.
First, enable SSH on the host via the web GUI:
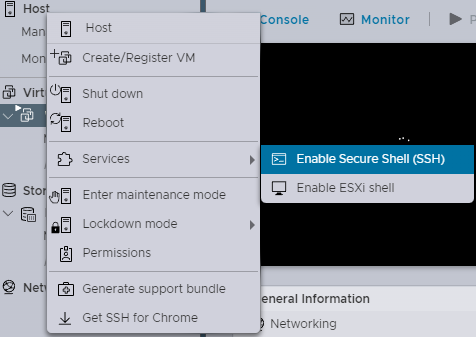
After that, connect to SSH and issue the command dcui
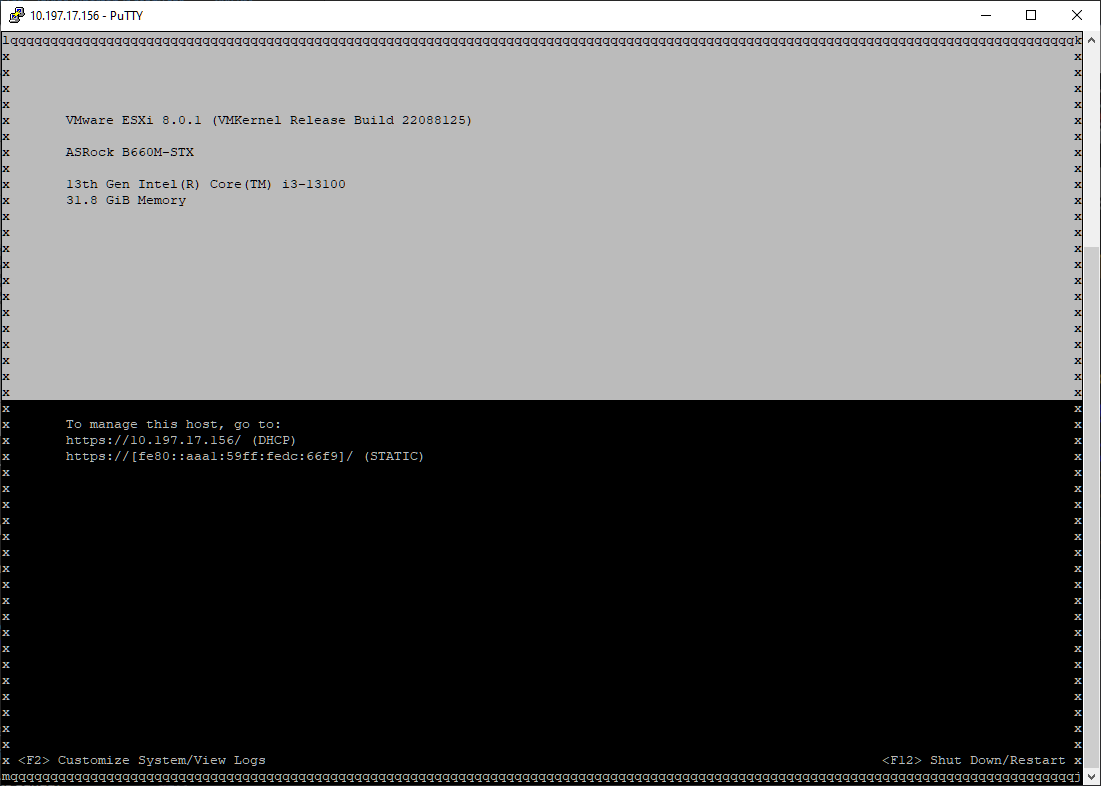
This presents a facsimile of the traditional ESXi black and yellow console screen. You can press F2, log in, and make any changes you like. This similar to how we connected to VMware ESXio in our Using DPUs Hands-on Lab with the NVIDIA BlueField-2 DPU and VMware vSphere Demo.
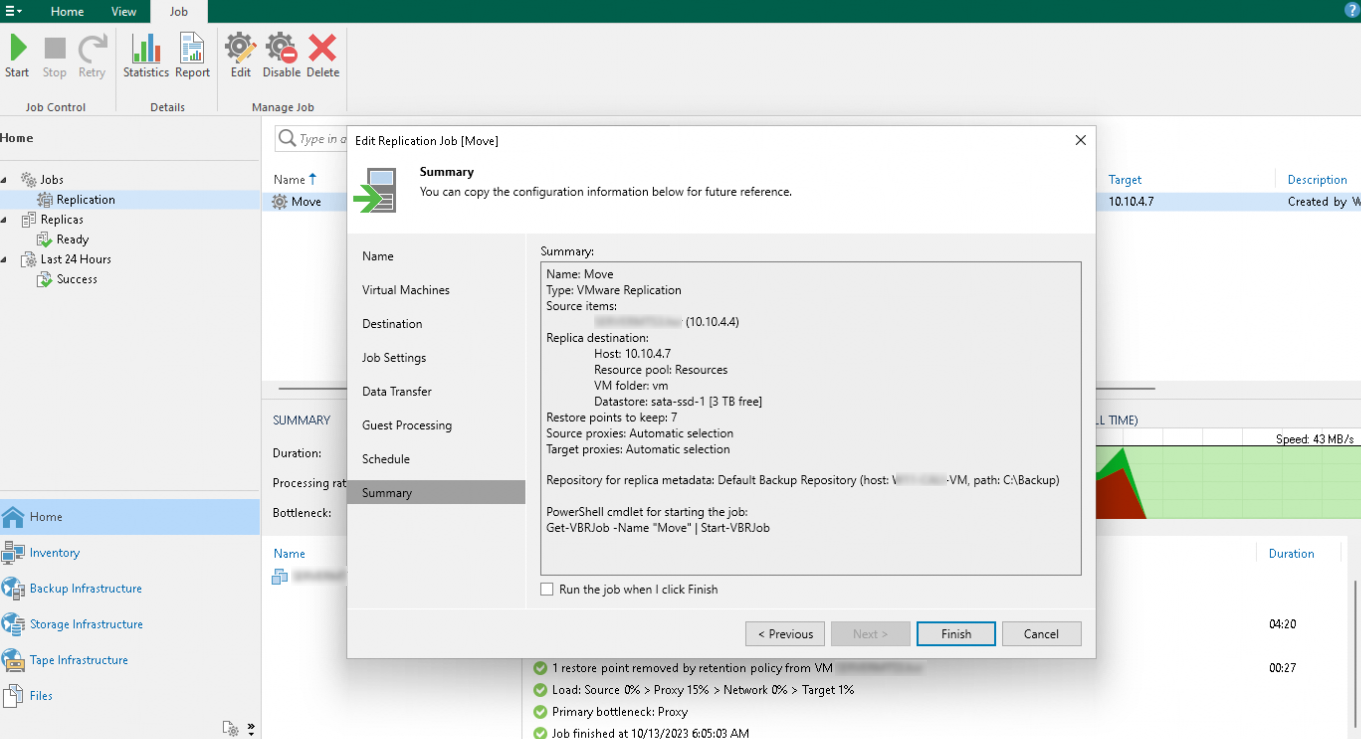
Migrating with Veeam
I have not actually transferred the restored server over to this new hardware yet; I have to ship the server to California first, and it is still with me in TX. When I covered building my new ESXi/pfSense firewall appliance, I did VM migrations with Veeam, and that is what I will be doing once the new server arrives onsite.
Since the 2008 R2 server has already been migrated to a VM running on the backup ESXi server, the project to migrate to this new host is relatively simple since I will just be moving the VM between two existing ESXi hosts. I will use a Veeam replication job to do this, and I have paid ESXi and Veeam licenses to enable this functionality.
If you want a more thorough step-by-step on how to do a Veeam migration, I recommend reading my ESXi firewall article!
Final thoughts
All told I like the little DeskMini B660W! This little system will provide a new and hopefully stable hardware platform for a few months while the Windows Server 2008 R2 system is decommissioned.
After that, it will probably end up either reprovisioned as a desktop or perhaps the Windows 11 management VM will be kept around as a jumping-off point for remote tech support and monitoring of this client site.
Hopefully, you enjoyed this look at building an “emergency” ESXi box.


Hi, so you did not have any errors upon launching the ESXi installer regarding the CPU?
I have a 13th gen i3 and ran into these errors, only to have found a workaround on a forum about disabling the efficiency cores in the BIOS (which is not my favorite thing to do, power efficiency wise).
I installed the latest version of ESXi 8 available at the time, end of September or early October.
Maybe a newer version was released which fixed newer 13th gen CPU support since then and will definitely have a look when returning home after the holidays.
Fernando,
The i3-13100 does not have any efficiency cores to disable, and so ESX will not panic because of a heterogenous CPU architecture because… well, there isn’t a heterogenous CPU architecture because there are only P cores.
Thank you for the clarification Will!
Mine’s the i3-1315U from the NUC 13 so yeah, makes sense.
That said, great article and will definitely refer back to it if I do need an additional homeland machine :)
Comments are closed.