
After the extremely fun multi-Kingston E100 400GB failure in June 2014, STH had an opportunity to re-build a few elements and do a few tutorials in the process. This guide was completed during one of the interim rebuild steps. Not a fun process but a great learning opportunity.
Prep work – Before you start
This guide will show some information from the lab, other steps may be augmented by other systems to demonstrate aspects. The starting point for this guide is a set of Hyper-V Server 2012 R2 servers. There is a virtual domain controller and a Windows 8.1 management VM. Having a management VM for sets of Hyper-V Server 2012 R2 machines makes remote management extremely easy, especially when the base Hypervisor nodes are not publicly addressable.
To make life simple, on the Windows 8.1 VM you will want the Microsoft Server Manager part of the Remote Server Administration Tools (RSAT) and Hyper-V Manager tools installed. If you are on a local network, you can use a physical Windows 8.1 machine to do all of this work.
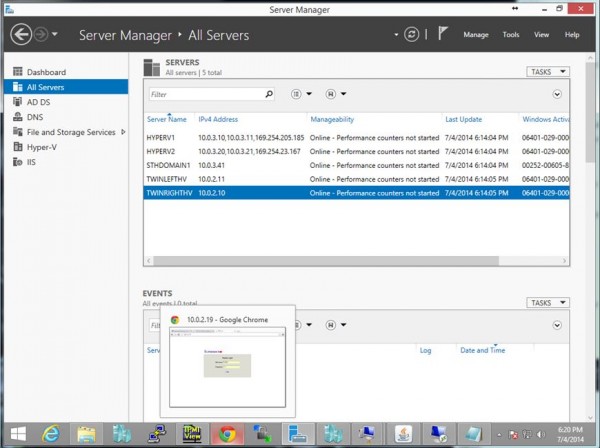
Note here that there are a few servers already part of this domain including four hypervisor nodes and a primary domain controller for the “sth.local” domain. This was taken in progress while building so things have certainly changed and gotten more robust.
How to Setup Hyper-V Replication
The first step is that you want to get into Hyper-V manager. You can simply right-click on the server under All Servers and start the process.
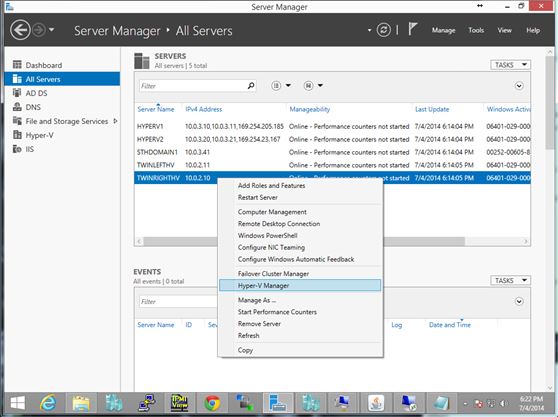
As a note: if you have not already added your hosts you can launch hyper V manager -> actions -> connect to server -> <servername>
Next, it is time to enable replication. We are just going to show one direction for this guide, but you can replicate for the other server for a better HA architecture where both servers replicate and can failover to the other node.
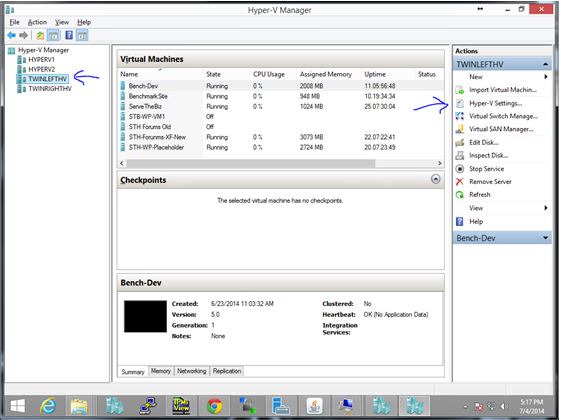
The first step is to ensure you are on the correct node and then click on Hyper-V settings.
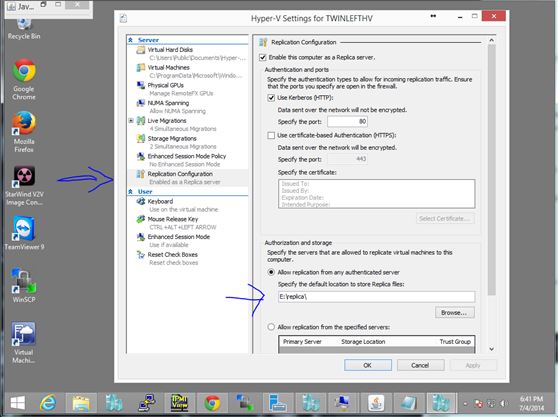
Now let’s get our replication setup, we will be using Windows Hyper-V Replica. You can click on Replication Configuration on the left side and bring up the replication configuration screen.
Here you want to check “Enable the computer as a Replica server”. This screenshot has the default “use Kerberos (HTTP)” checked and port 80. That is the easiest. The better option is to use certificate based authentication (HTTPS).
The next step of specifying a replication location is important. There are going to be replicas and snapshots so you likely want to have a large enough data store specified to handle that storage need.
Aside from space (replication does use a lot, especially with snapshots), one also needs to remember speed. As different VMs attempt to make replicas, one does not want to bog overall performance down with slow storage media. Also, if the original server fails, one wants to failover to the replica quickly, so slow storage trying to spin up multiple VMs simultaneously is not a good combination.
The next step is enabling replication on the Windows Firewall. This is something that every guide on the subject mentions, but for some reason Microsoft’s Wizards to not help with.
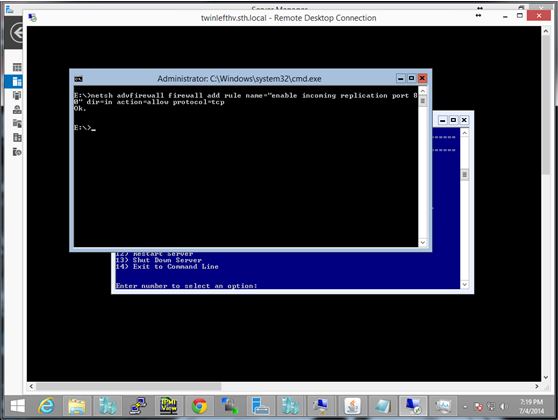
For those using the CLI method, that command was: “netsh advfirewall firewall add rule name=”enable incoming replication port 80″ dir=in action=allow protocol=tcp”
Normally you can simply load windows firewall, find “Hyper-V replica http listener” and enable the rule. For some setups, the CLI version works.
An example from the GUI firewall looks like this:
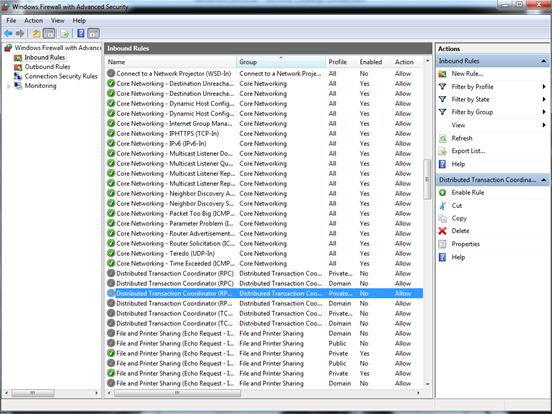
That is usually a much easier method but the CLI version tends to be the easiest.
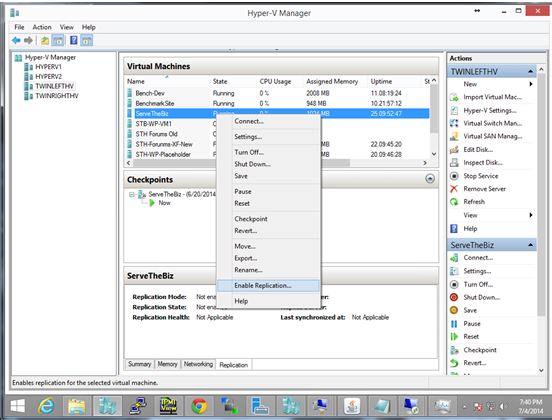
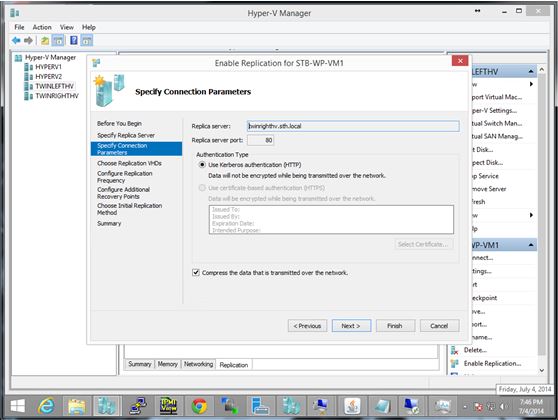
The last major step takes you back to Hyper-V manager to actually enable the replication on a given VM. Once back in the Hyper-V Manager you can right-click on the VM you want to replicate and click “Enable Replication”.
That brings you to a Hyper-V replication wizard which explains the process fairly well.
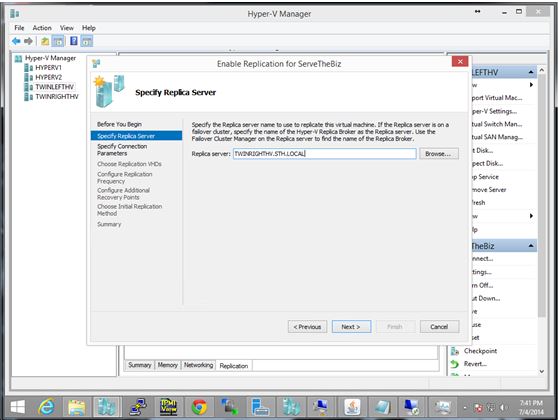
Since this VM was on “twinlefthv” we will replicate it to “twinrighthv” which one sets on the next screen:
From here you can click finish and start replication using default settings. Or you can click next to drill down a bit more. Options include replication frequency, VM wide VSS, periodic snapshots, and initial replication methods. Initial methods include NOW, scheduled later, or import/export from external media.
Conclusion
This is an extremely easy guide to get Hyper-V replication working. There are many other options and items to configure but this will get you started with Hyper-V replication. If you have any questions, head over to the Hyper-V forums.


So this is using 2 Hyper-V Server 2012 R2 servers (the free one). You then made a simple domain. Joined them to the domain. Then you can just follow those 5 or so steps and have HA replication working? Seems easy.
Great article.
Now for latency on SAN/storage, the timings for Clusters is pretty tight, I found that I had to tweak them or the MS Cluster is going to get angry. I found that VSS stuns on the Clustered Machines freaks them out. Get your current cluster timings:
PS C;\Windows\system32> get-cluster | fl *subnet*
The Defaults are:
CrossSubnetDelay : 1000
CrossSubnetThreshold : 5
PlumbAllCrossSubnetRoutes : 0
SameSubnetDelay : 1000
SameSubnetThreshold : 5
I had to change them to these:
CrossSubnetDelay : 2000
CrossSubnetThreshold : 20
PlumbAllCrossSubnetRoutes : 0
SameSubnetDelay : 2000
SameSubnetThreshold : 20
Cluster is now happy when Backups run.
Thank you for the write up!
Please use a Powershell cmd-let for changing the firewall.
Netsh is being removed in the near future.
Sometimes it’s even being mentioned when executing a Netsh command.
Comments are closed.