Gigabyte S452-Z30 Block Diagram
We just went over the hardware, but given the fairly massive scope here, some may find it easier to look at the block diagram. For the block diagram, here is what the solution looks like:
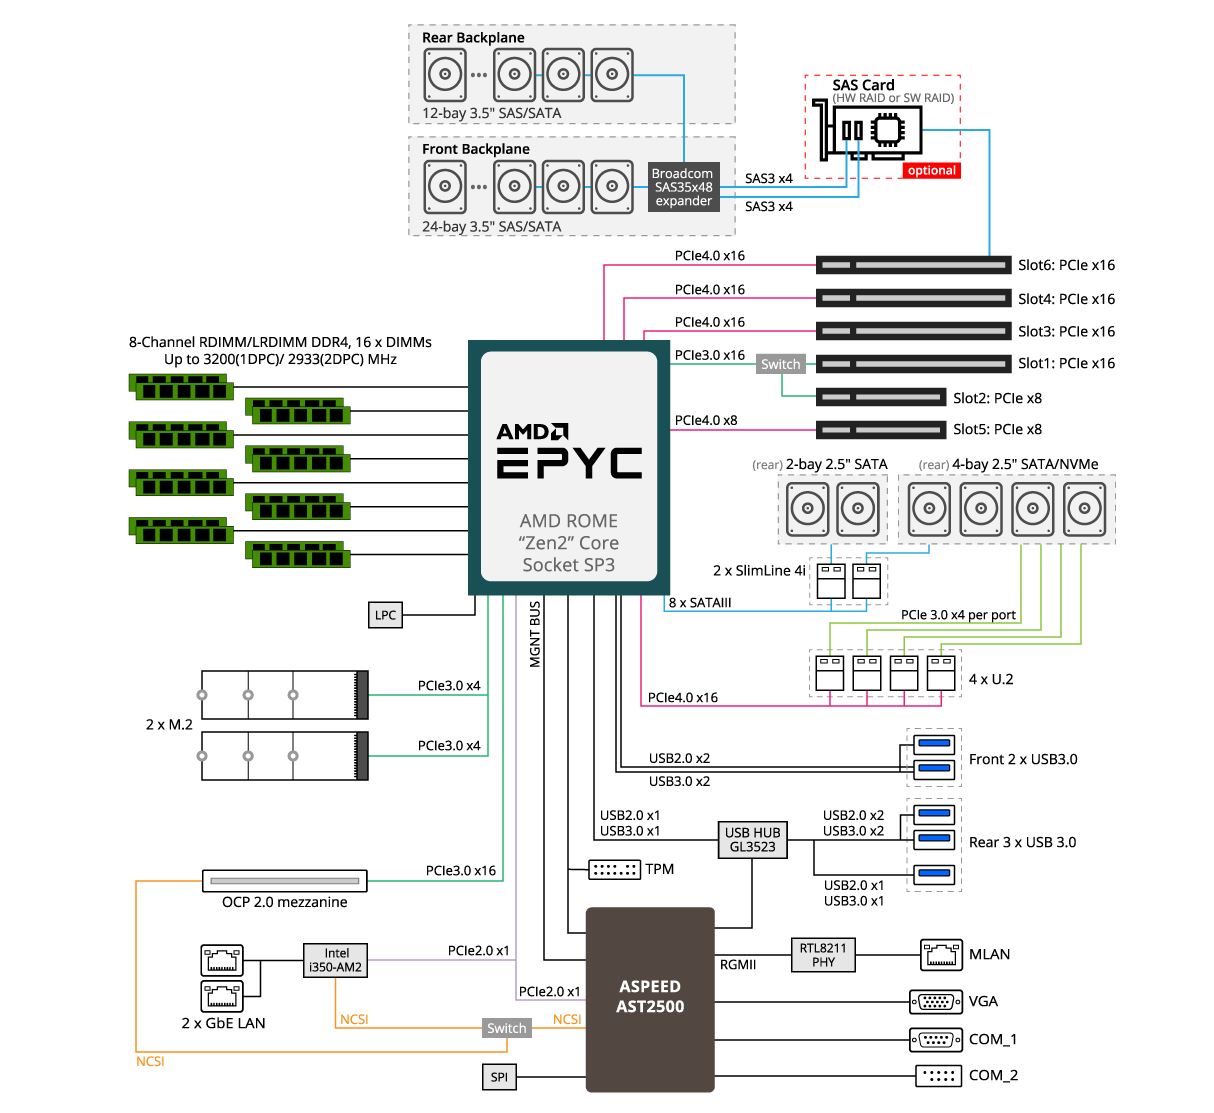
Since this system is based on the MZ32-AR0 motherboard, the layout looks somewhat familiar. We like the use of PCIe Gen4, but wish that Gigabyte found a way to make the platform entirely PCIe Gen4.
Gigabyte S452-Z30 Management
As one can see, the Gigabyte S452-Z30 utilizes a newer MegaRAC SP-X interface for Gigabyte that is common on a number of its newer platforms. This interface is a more modern HTML5 UI that performs more like today’s web pages and less like pages from a decade ago. We like this change. Here is the dashboard.
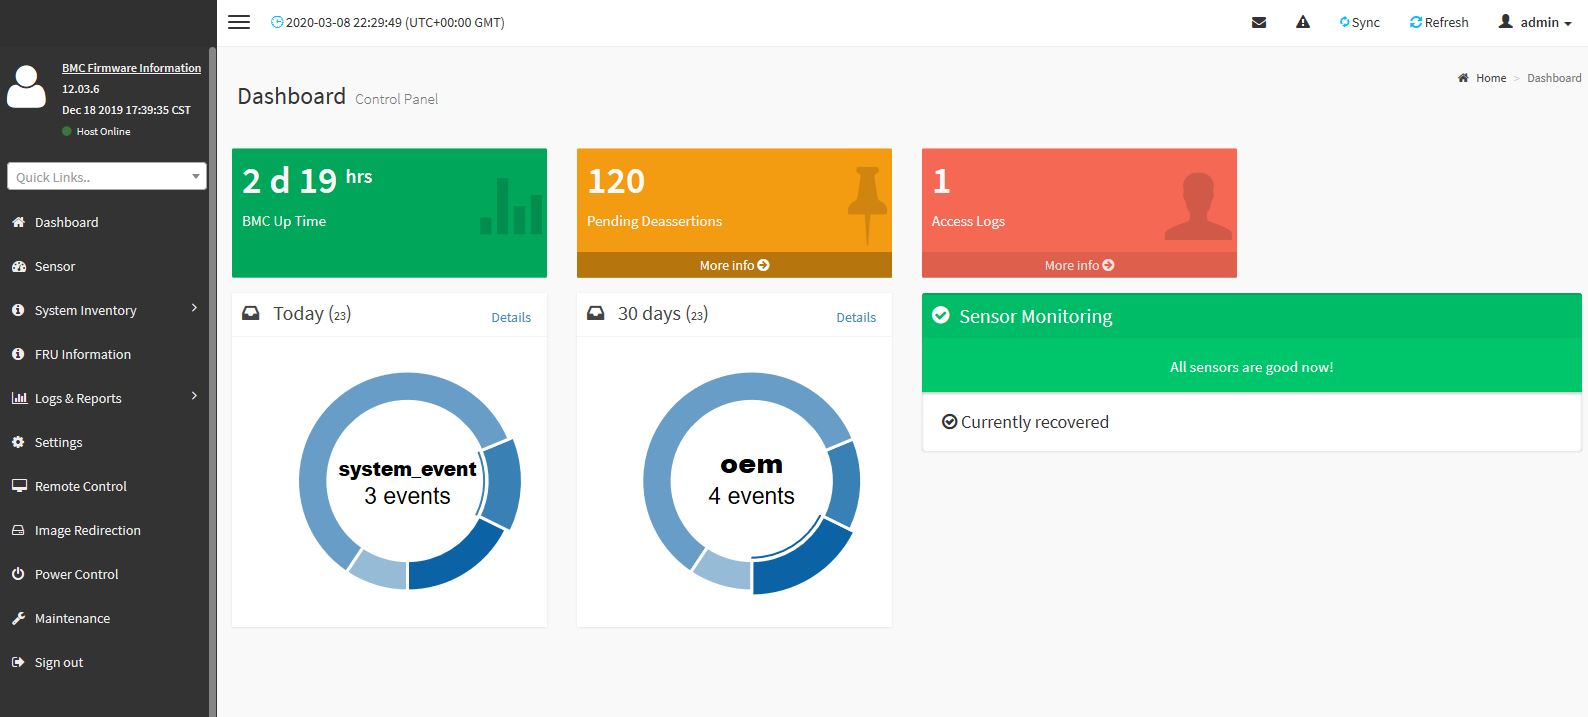
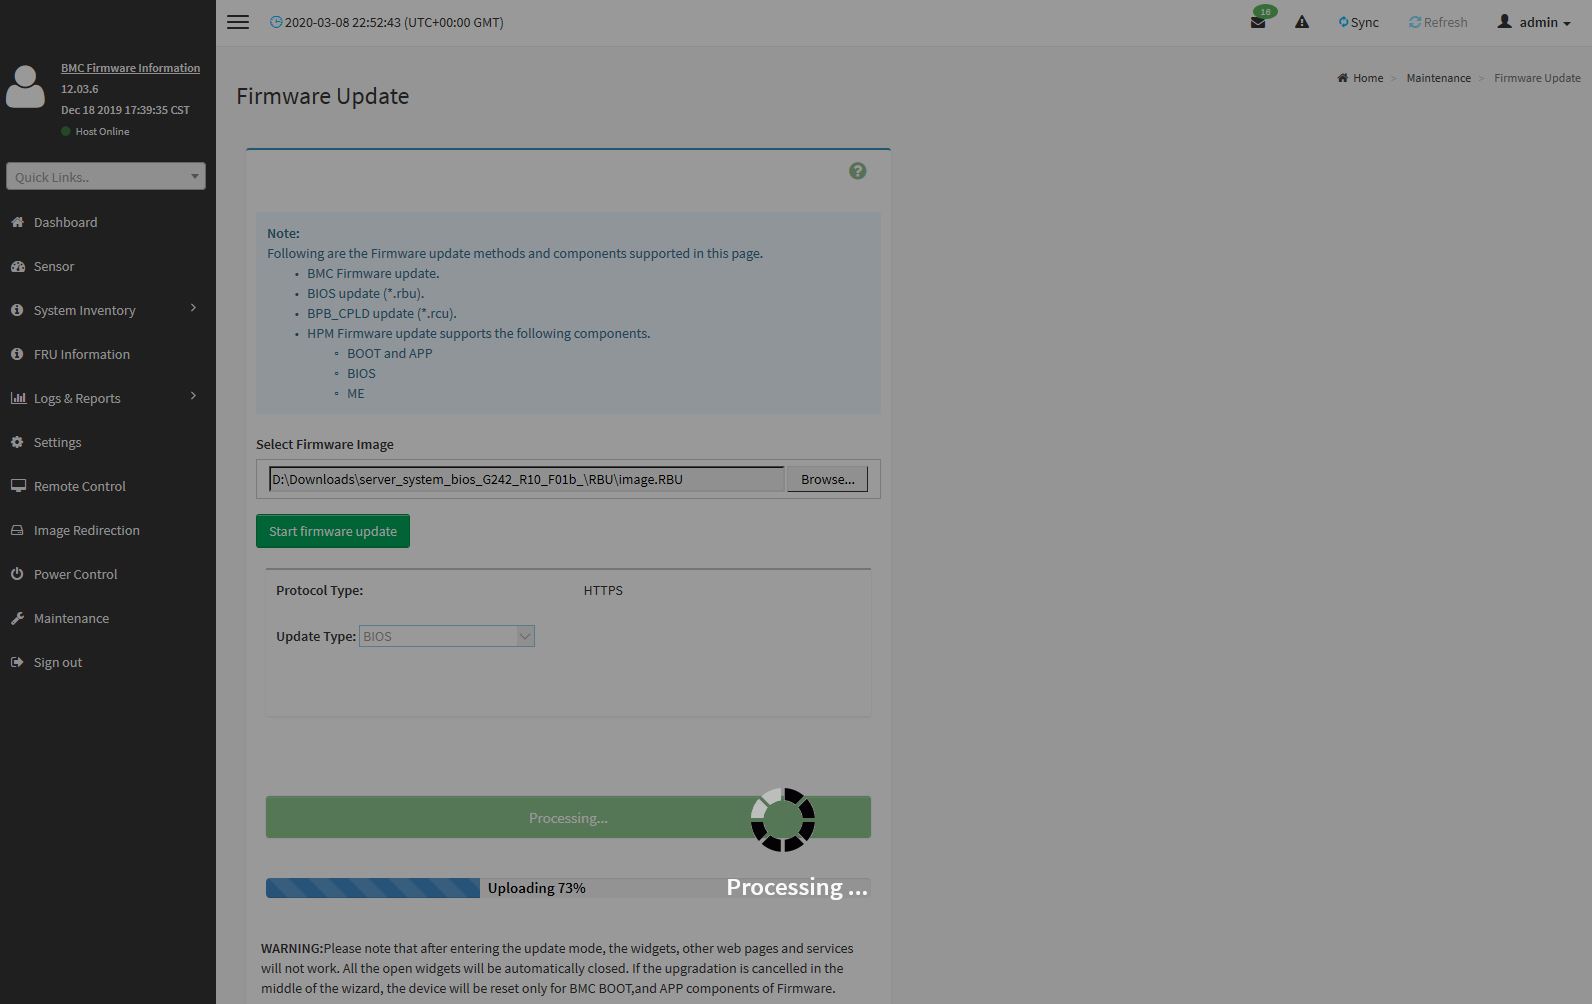
You will find standard BMC IPMI management features here, such as the ability to monitor sensors. One can also perform functions such as updating BIOS and IPMI firmware directly from the web interface. Companies like Supermicro charge extra for this functionality, but it is included with Gigabyte’s solution.
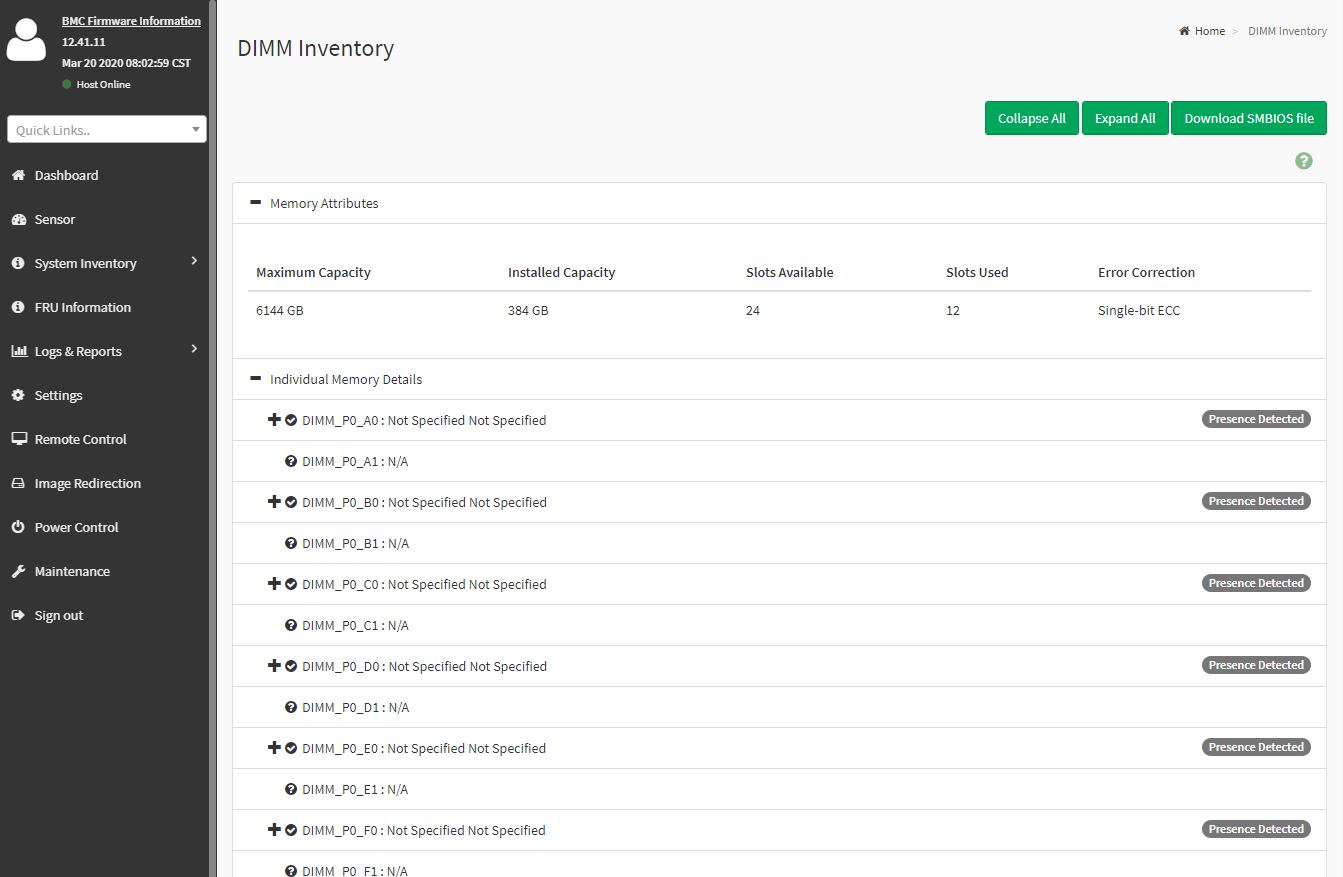
Other tasks such as the node inventory are available. One can see this particular node with generic TSV memory.
One of the other features is the new HTML5 iKVM for remote management. We think this is a great solution. Some other vendors have implemented iKVM HTML5 clients but did not implement virtual media support in them at the outset. Gigabyte has this functionality and power control support all from a single browser console.
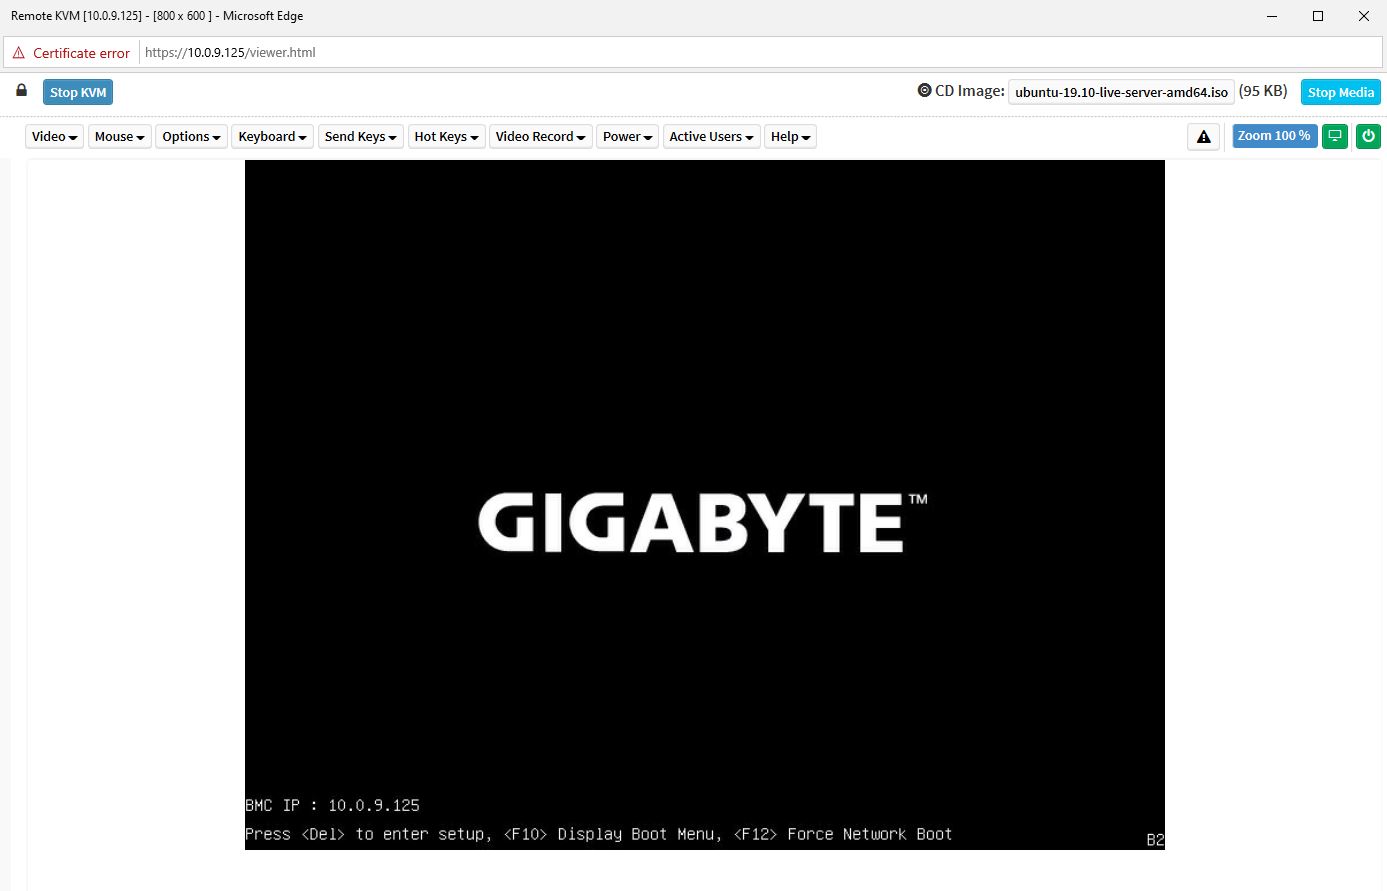
We want to emphasize that this is a key differentiation point for Gigabyte. Many large system vendors such as Dell EMC, HPE, and Lenovo charge for iKVM functionality. This feature is an essential tool for remote system administration these days. Gigabyte’s inclusion of the functionality as a standard feature is great for customers who have one less license to worry about.
The web GUI is perhaps the easiest to show online, however, the system also has a Redfish API for automation. This is along what other server vendors are doing as Redfish has become the industry-standard API for server management.
As a quick note, this was our first Gigabyte system with a BMC unique password feature enabled. In the future, these systems will have a unique password due to a California law mandating the practice.
If you are looking for a unique password, it is usually the 11-digit serial number for the motherboard on Gigabyte systems. We found a sticker on the top front of the chassis with our password.
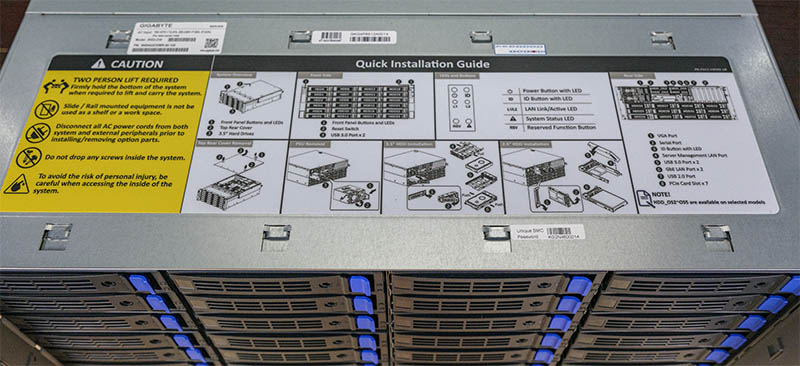
This is a less than ideal location for this sticker. It would be better if it were on a front or rear edge of the server. Stickers on top of servers are prone to get scratched in the data center as gear is racked and serviced above. If the sticker is scratched, getting this information is going to be a bit harder which matters for later in a server’s lifecycle. This is perhaps the easiest item to change but the server does not have a traditional service tag which is where we commonly see these stickers placed. Hopefully in future units Gigabyte simply moves the sticker’s location but this is where it was on our test unit.
Test Configuration
For this test we utilized the following setup:
- System: Gigabyte S452-Z30
- CPU: AMD EPYC 7402P
- RAM: 8x 32GB DDR4-3200 ECC RDIMMs
- Storage: 30x WD 10TB, 12TB, 14TB SATA HDDs (assorted), 2x 10TB WD SAS3 HDDs, 2x Kioxia SAS3 (PX03) SAS3 SSDs, 2x Intel S3510 SATA SSDs
- HBA/ RAID Controller: 2x Broadcom SAS3408 8-port SAS tri-mode controller
- NIC: Broadcom dual 25GbE OCP NIC 3.0, Supermicro 100GbE (Intel 800 series based),
We wanted to get the server setup with a number of different drive options simply to confirm two main factors. First, we wanted to test that we could mix SATA/ SAS and HDDs with SSDs on the backplane. Second, we wanted to test that the link to the RAID controller would remain 8x 12Gbps even if we had 6Gbps devices.
On the CPU side, since we are limited to 180W, we think the AMD EPYC 7402P is a great fit since it offers plenty of cores at an affordable price point. With the Xeon E5 generations of servers, dual 8-12 core CPUs were common for this type of storage server so consolidating to a single EPYC 7402P makes sense. We also think the lower-cost “P” series single-socket only servers are ideal for a server like this. We originally tried this server, as you may have seen, with the AMD EPYC 7272. We soon realized that we needed full 8-channel memory bandwidth SKUs to really get the performance we wanted.
Let us move onto performance before getting to power consumption and our final words.


Almost ordered 3 of these systems today, unfortunately it just missed the mark for us. It would have been a home run if someone took out 6 of the 3.5” drive bays from the back, moved the power supplies down to where ~ 3 drives were and put between 6 to 8 nvme where the other 3 drives were. That would free up room in the top 2 u for a motherboard with 2 sockets and 32 dims. With that you could have tired storage, or vm’s that could include nvr duties with possible room to add accelerator cards for video AI. Would be a branch office powerhouse, just add networking.
Something I think is an interesting use case is utilizing the PCIe slots for NVMe storage whether that is an internal card or an external chassis.
@Patrick: Thoughts of using this as a high-performance TrueNAS Core appliance with a Gigabyte CSA4648 (Broadcom SAS3008 in IT Mode) HBA?
We did not get to test FreeNAS. Proxmox VE or soon TrueNAS Scale are based on Linux.
Comments are closed.