
Today’s quick guide will show how to install CentOS 6.3 on a Windows 8 desktop quickly using Hyper-V. When it comes to popular Linux server distributions, CentOS tries to match Red Hat Enterprise Linux (RHEL) and is a web hosting heavyweight distribution. We recently showed how to run Ubuntu in Windows 8 Hyper-V, taking only a few minutes for the installation. The CentOS installation does take a bit longer since the standard installation does not include Hyper-V Integration services. With Windows 8 Hyper-V there are now many applications that can be run natively on Windows 8. For those that missed it, we posted a guide on installing Windows 8 Hyper-V recently. This guide shows how to install CentoOS 6.3 in Windows 8 Hyper-V but it will work just as well in Windows Server 2012.
Test Configuration for Windows 8 Hyper-V
For this guide we are using the Windows 8 X79 test bed. For this, the Windows 8 iSCSI initiator is being installed in order to support Hyper-V virtual machines.
- CPU(s): Intel Core i7-3930K
- Motherboard: ASUS P9X79 WS
- Memory: 32GB (8x 4GB) G.Skill Ripjaws X DDR3 1600
- Drives: Corsair Force3 120GB, OCZ Vertex 3 120GB
- Power Supply: Corsair AX850 850w 80 Plus Gold
- NAS/ iSCSI Target: Synology DS1812+
Let’s see how easy it is to install CentOS 6.3 Linux in Windows 8 Hyper-V. Be warned it is very easy!
Running CentOS in Windows 8 Hyper-V
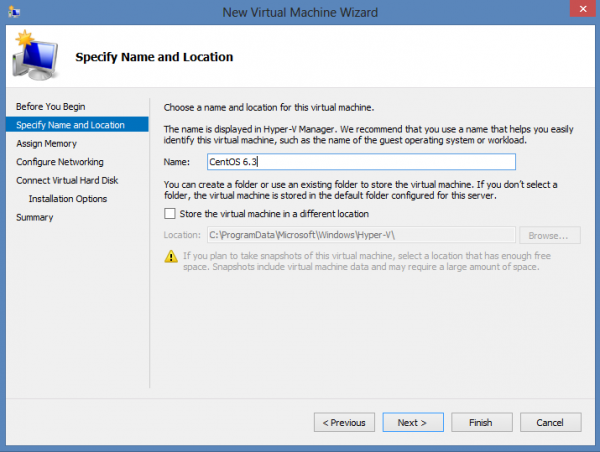
From the Windows 8 Hyper-V manager, create a new virtual machine. When the Windows 8 Hyper-V wizard opens, give the virtual machine a descriptive name. For this, CentOS 6.3 is good since that is the Linux distro we are using.
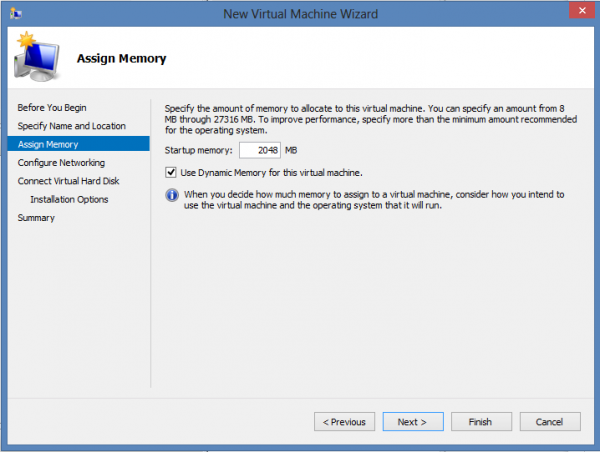
Next, you will need to do memory allocation. In this example 2GB is enough. We are using a CentOS 6.3 desktop installation here, to show a Linux GUI at the end but we could also be using CentOS 6.3 minimal. It should be noted, Dynamic Memory appears to have issues with Linux distributions at the moment.
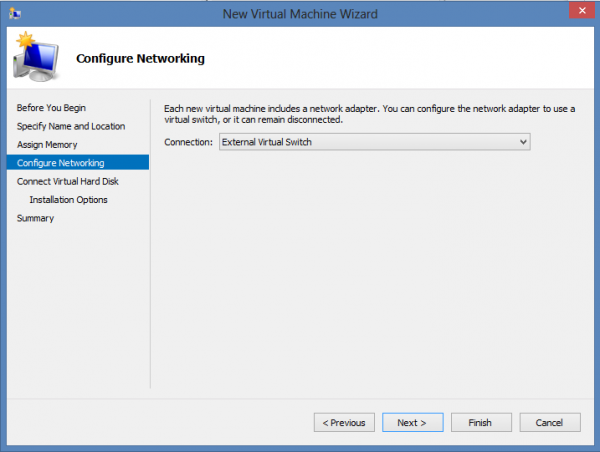
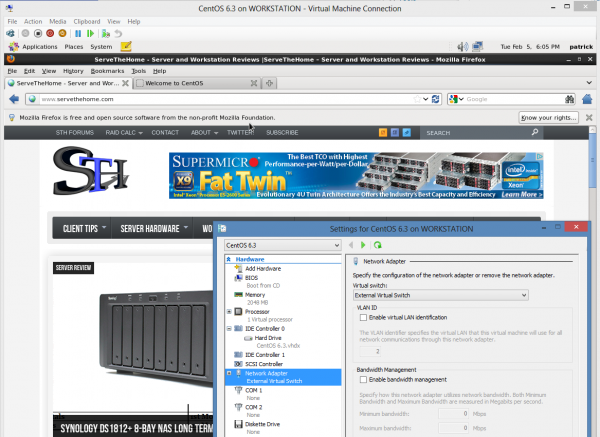
The next step is to configure the virtual switch. To make things such as installing security updates easy, we are using an external virtual switch. We showed how to configure one in the Windows 8 Hyper-V install guide.
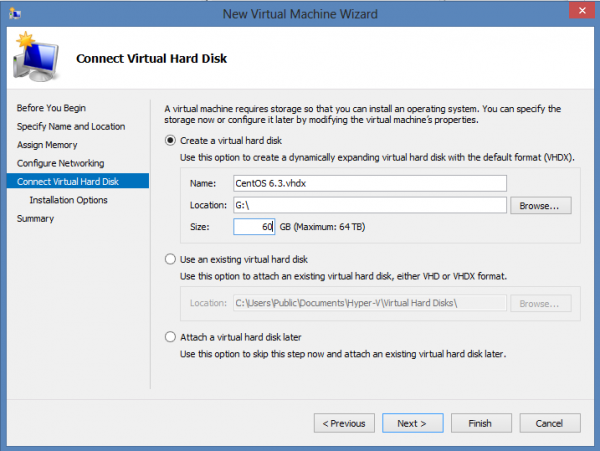
Now one needs to configure a virtual hard disk. This virtual disk is sitting on a Synology DS1812+ iSCSI volume so the volume can be re-attached easily to a Windows Server 2012 machine. Here is a 3 minute guide for setting up the Windows 8 iSCSI initiator. This vhdx is backed by RAID 6 Synology storage so it should remain fairly safe.
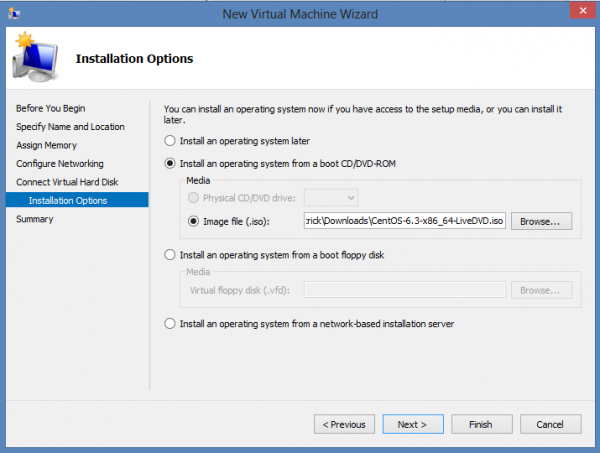
On the next screen I would recommend making it easy and selecting the following option for CD/DVD. From here, select the iso you wish to use. We will use the CentOS 6.3 standard distribution.
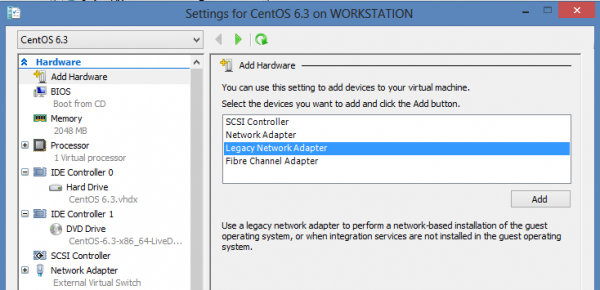
After clicking through the summary, you will want to start the machine. The step above was the physical equivalent of loading the machine with the installation media. One major difference between CentOS and Ubuntu on Hyper-V is that CentOS does not have the latest Hyper-V integration components. At this point, it is probably best to add a legacy network adapter to the virtual machine. This will allow the installation of Linux Integration Services later. You likely want to have this attached to an External Network when it is setup.
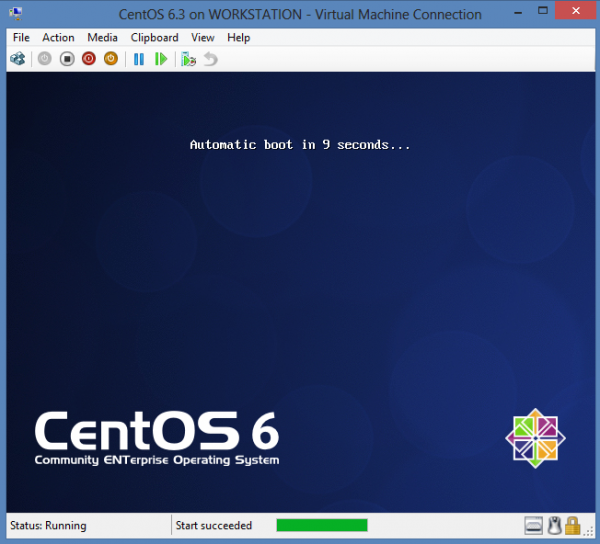
We are all ready to go. Select the Windows 8 Hyper-V VM for CentOS 6.3 that we just created and click start.
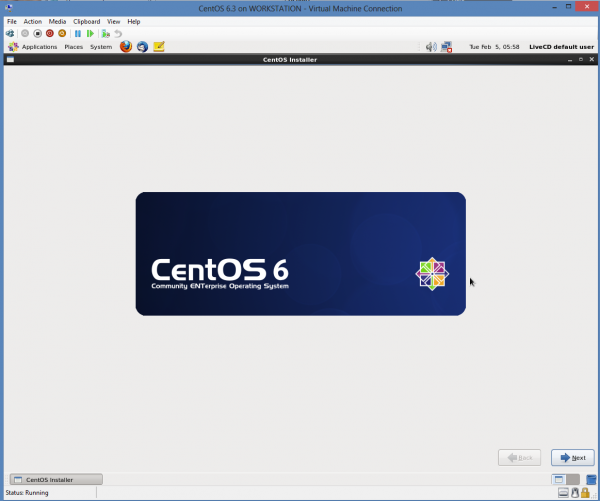
Next, you will want to click connect to get to the console. Since we are installing the desktop CentOS version in the Windows 8 Hyper-V machine there is a nice graphical installer. For those that did not experience this, not too long ago Hyper-V virtualization would render the mouse useless. Now, it all works from the installer (after integration services are installed.)
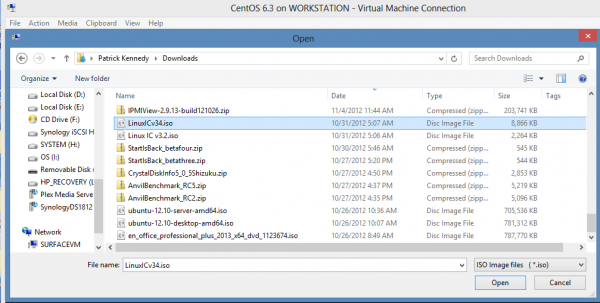
The next step is to download the Linux Integration Services for Hyper-V from Microsoft. We are using version 3.4 for this guide. To keep things as easy as possible, you can go to Media -> DVD Drive -> Open and select the ISO downloaded from Microsoft. The current version is called LinuxICv34.iso
Since we are using the standard CentOS 6.3 installation, the CDROM will automatically mount and you can simply right click on RHEL63 and select Open in Terminal. That will bring up a terminal to /media/CDROM/RHEL63. CentOS 6.3 tries to match RHEL releases hence why we are using RHEL63 here.
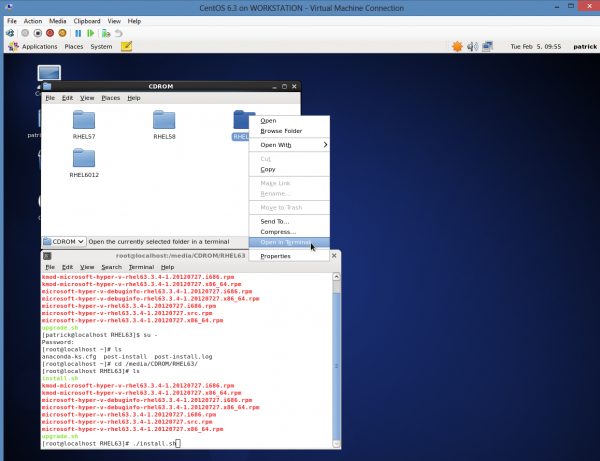
Since you are most likely logged on as your username not as root (and by default you are not a sudoer) you do need to do an extra step to get this to work. Here are the basic commands one needs to execute to get this to work:
[quote]su –
cd /media/CDROM/RHEL63
./install.sh[/quote]
In sequence here is a summary of those commands. Become root so you can install the integration services. Change directory to the RHEL63 directory. Run the installation script. One does need to reboot the VM at this point for the Linux Integration Services to work. You can shutdown (instead of restart.) Remove the legacy adapter and Integration services from the VM at this point. While in the VM settings, you may also want to allocate more CPU and/ or RAM to the Hyper-V VM. Once you start the system everything will be online.
That’s all there is to getting a fully functional Linux virtual machine in Microsoft Windows 8 Hyper-V. CentOS is very popular and although it is slightly more difficult to get working than Ubuntu, the installation is much easier than it had been previously. Hopefully this helps those looking to complete the CentOS installation in a few easy steps.


Thanks for this. First guide with pics anyone can do. On the su – command, should not that you are gaining root privileges so you want to close that session after doing this. On a clean installation, I have no issue going root for a minute or two.
Worked for me. Thx
Great step by step.
Liking the last pic.
Hi there,
I am encountering a nasty Hyper-V bug, just looking for someone to confirm/reject it.
After installing the Hyper-V integration services, the CD-Rom is not recognized anymore. Does someone else had/have the same issue?
SV – is it a physical CDROM or virtual/ IPMI? Forums may be a good place to discuss.
Hello,
I have done several installs of CentOS in Hyper-V and never has my mouse worked on install, after installation I’ve had to install the Integration Services in order to use the mouse. What am I missing? I am working in Windows 8 Pro and am not sure if that makes a difference.
In your above guide you mention Ubuntu but I think you mean CentOS:
“Since we are installing the desktop Ubuntu version in the Windows 8 Hyper-V machine there is a nice graphical installer.”
Thanks for the post.
Comments are closed.