
This is a very straightforward article. In this how-to, we are going to cover how to add virtual media to an ASRock Rack server using the HTML5 iKVM as well as the IPMI web interface. We recently went over the methods for How to Add Virtual Media to a Supermicro Server via HTML5 iKVM Web IPMI Interface as Supermicro put some of its features behind a license activation. ASRock Rack does not do this on platforms like the ASRock Rack W680D4U-2L2T/G5 and U4LW-B650/2L2T we reviewed. Still, there is more than one way to accomplish this.
How to Add Virtual Media to an ASRock Rack Server via HTML5 iKVM Web IPMI Interface
The easiest method is perhaps the easiest for many administrators. To mount an ISO to the server remotely, the first step is to launch the HTML5 iKVM viewer (or Java one, but let us move beyond Java here.) Go to the left-hand Remote Control, and then hit HTML5. Here we already have the HTML5 terminal open.

Often one will want to power down the server if the purpose of mounting the ISO is to use a live CD/ installation media.
At the top right of the HTML5 iKVM, there is the “CD Image” portion with “Browse File” and “Start Media”.
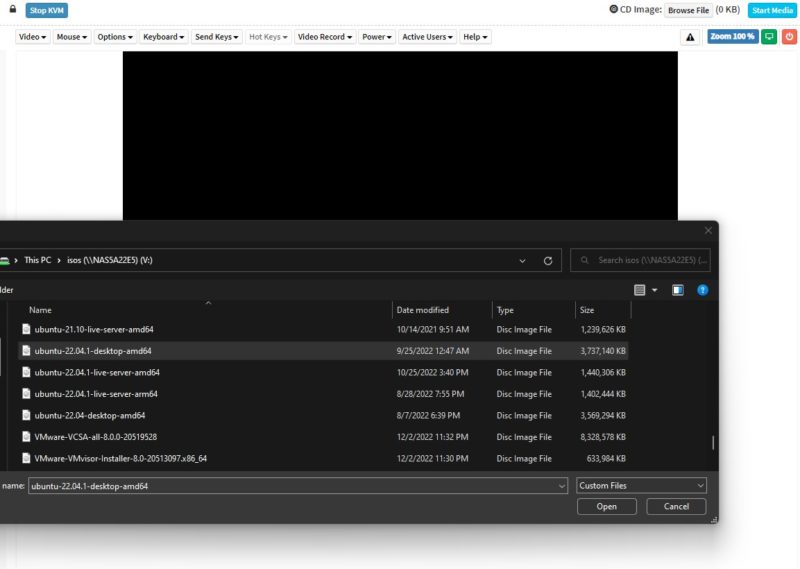
That will bring up a local explorer window (in Windows, Finder in MacOS, and so forth.) Select the ISO you want to mount and click Open.
The next step is to “Start Media” and then power on the server and boot from it. If you just want to mount an ISO onto a live server, you do not need to go through the power cycle, but most ISO mounting via IPMI is for OS installation.

Then you are done and you can select and boot off of the ISO media.
Method #2: Mounting an ISO Image over IPMI via a Network Share
If you do want to go through the NFS/ CIFS/ https mounting, there is a setting for that buried in either the Image Redirection or Settings menu.
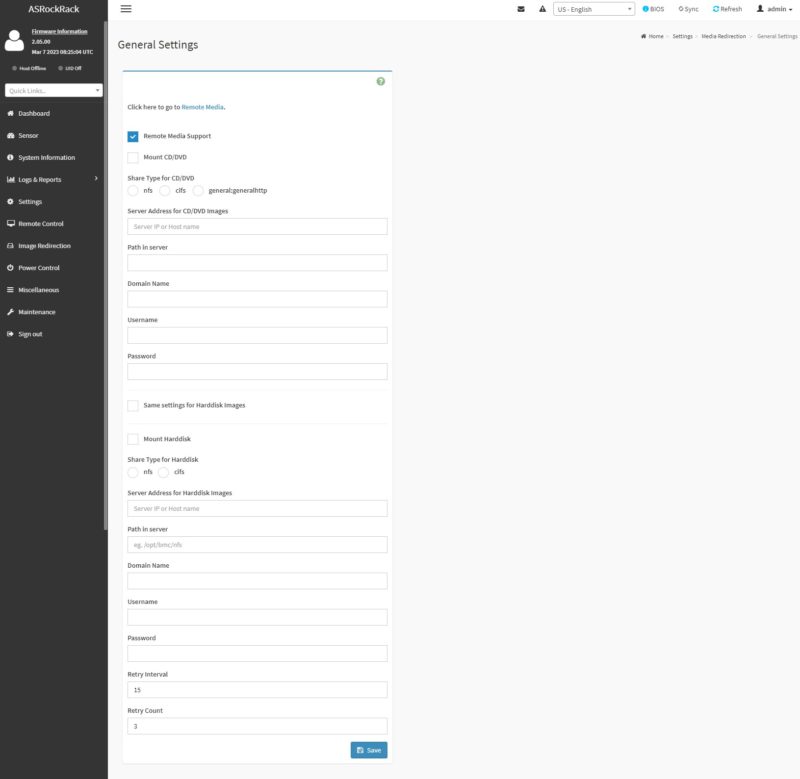
The configuration here is going to vary greatly based on where the ISO is. It can, however, be handy if you are accessing the server over a low bandwidth connection and are mounting the ISO over a faster network.
Final Words
Having the HTML5 iKVM remote media mounting is a great feature. It makes remote OS installation and troubleshooting much easier. We really like that ASRock Rack provides this functionality in its ASPEED AST2600 solution and does not put the useful and intuitive feature behind a licensing paywall. Many admins do not realize they need this feature until an issue arises. Waiting to get a license procured and applied is not what one wants to be doing when one needs to get a server up and running.
We hope this quick guide helps our readers as we refresh some of our old IPMI management content.


“The easiest method is perhaps the easiest for many administrators.”
A hedged tautology?
hm i guess that doesn’t work. i can add an iso i can start the media redirection but my server will ignore this and go straight to the bios over and over again
I managed to get the virtual USB-CD to show up, upon switching the BIOS into legacy mode.
That breaks a lot of things (e.g. boot-to-BIOS from the KVM), and while the mounted image was being parsed (going by the bytes-transmitted), I still didn’t manage to get memtest86 to actually show up on screen.
Comments are closed.