
Supermicro made a change with its newer IPMI firmware. One of the great features that we get is the ability to use an HTML5 iKVM instead of using Java. For all of those admins who had to work through Java prompts for years just to get an iKVM session going, HTML5 is simply awesome. In the newer X12, X13, H12, H13, and later generations of systems, Supermicro made a change to how remote mounting media works. That means it is time for a quick guide.
How to Add Virtual Media to a Supermicro Server via HTML5 iKVM Web IPMI Interface
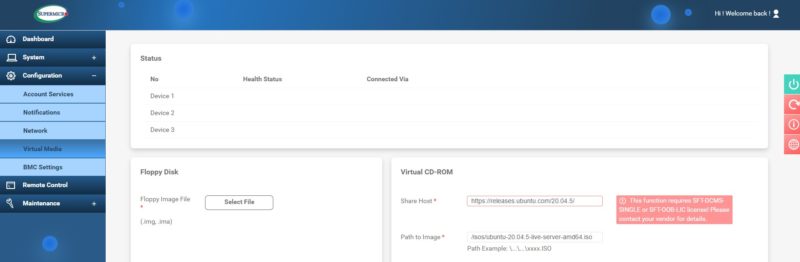
If you log into a newer Supermicro server’s IPMI management interface and open the HTML5 iKVM, you will see something like this:

The “Virtual Media” menu item that we are familiar with from the Java version is there, but it is not available. Supermicro’s newer servers do not let you use this function, on the HTML5 browser, without a license. It usually still works on the Java browser, but the whole point is not to have to use Java. In the newer version of the IPMI firmware, you may see this layout instead:
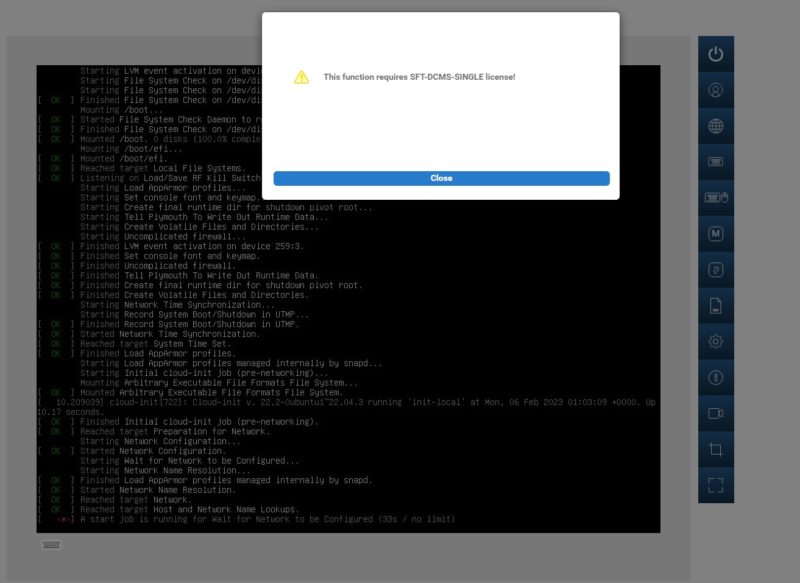
We have an easy and a hard way to get it working. The easy way is to buy SFT-DCMS-SINGLE and then apply the license file. That will allow you to do a traditional virtual media mounting via the browser.
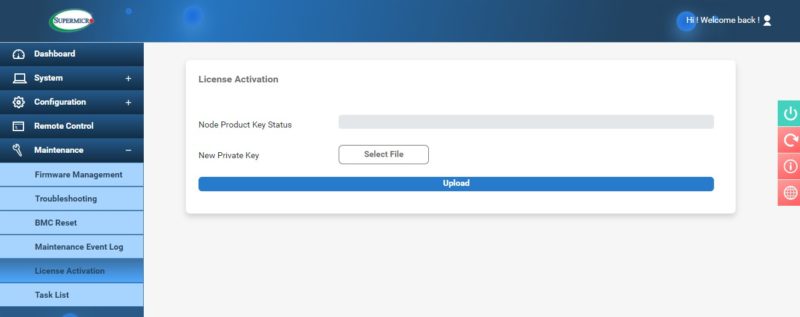
If you have a single server, this is a $130-200 license that adds other features, but it is the easiest way to get that HTML5 Virtual Media working.
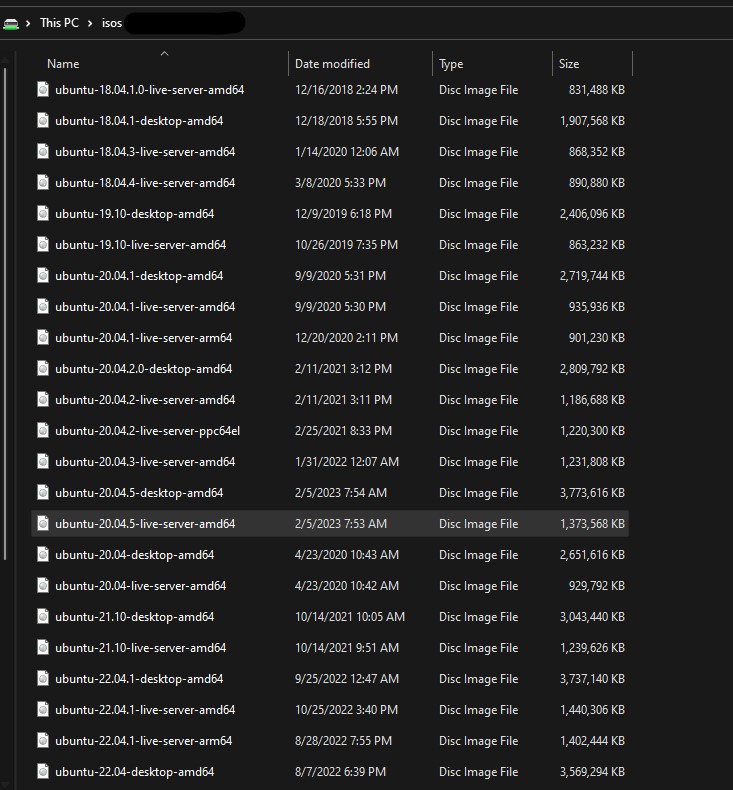
The less expensive way is to mount over a network share. Here we have a QNAP NAS that we have an isos share available. This network share needs to be available from the management network. The below look at the directory is being viewed from a Windows PC with the network share mounted.
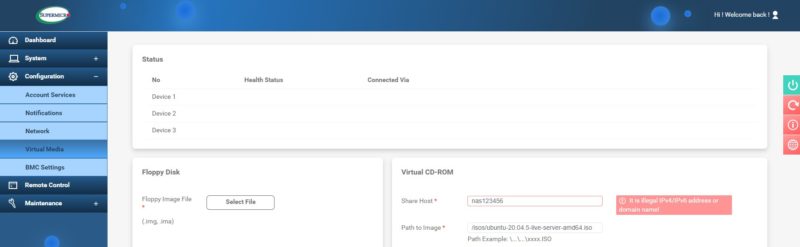
On the Supermicro IPMI web interface, you will want to navigate to Configuration then Virtual Media on the left-hand menu.

There, the two required fields are the host and the path. On the hostname, if your NAS has a DNS name of “nas123456” for example, you cannot just put “nas123456” in the share host field.
Since one sees “domain” for the field, another option one may think of is using a https server with ISO images. That requires a SFT-DCMS-SINGLE or SFT-OOB-LIC license.
That leaves us with an IP address and then a path.
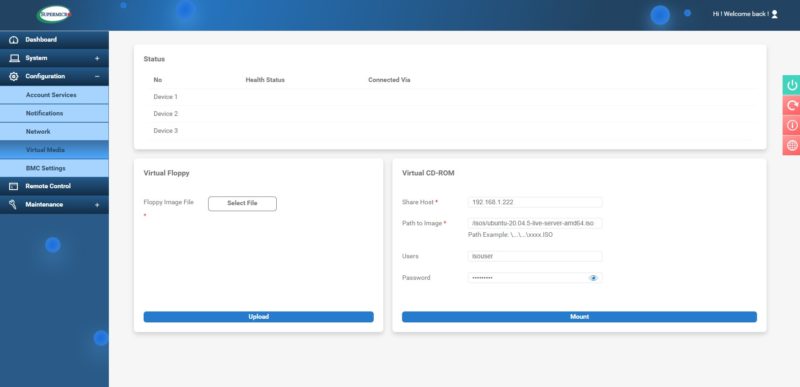
So here we have:
- Share Host – IP Address
- Path to Image – path on the network share. In this case it is “\isos\ubuntu-20.04.5-live-server-amd64.iso”.
- Note here, if you try “/isos/ubuntu-22.04.1-live-server-amd64.iso” because that is the directory when you are going through the share on linux, or “\\isos\ubuntu-22.04.1-live-server-amd64.iso” those will not work. Be careful with the “\”.
- Users – This is a username if the share requires it
- Password – This is the password if the share requires it. Note, there are some characters that you cannot use, for example the “?” here. So if the network share, by chance, has a “?” is the password, the Supermicro IPMI will not accept this.
Once that is set, the ISO can be mounted using the mount button at the bottom.
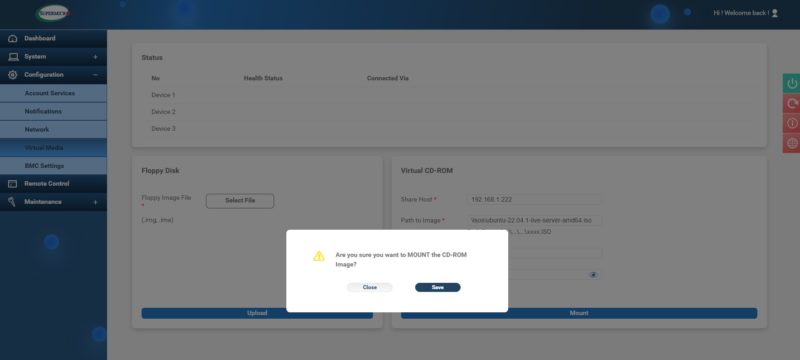
Once that is done, you should see the ISO mounted up top under “Device 1”.
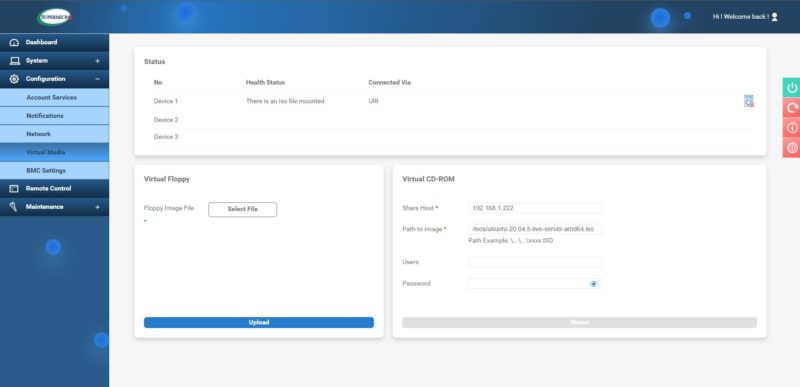
At that point, you can install the OS or drivers as needed.
How to Unmount a Supermicro Virtual Disk
If you want to unmount a Supermicro virtual disk, then you will go under Device 1 (pictured below) and on the right side there is a disk with a red “x” image. Click on that, and you will get this dialog.
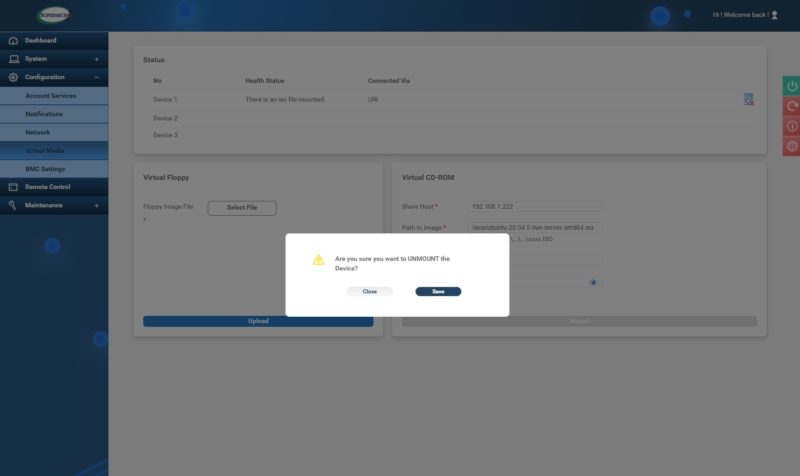
After that, the disk should be unmounted. If you forget this step, then the system might continue to boot from the virtual media ISO.
BONUS: Supermicro IPMIview 2.0 Works in the Opposite Manner Without Installing Java
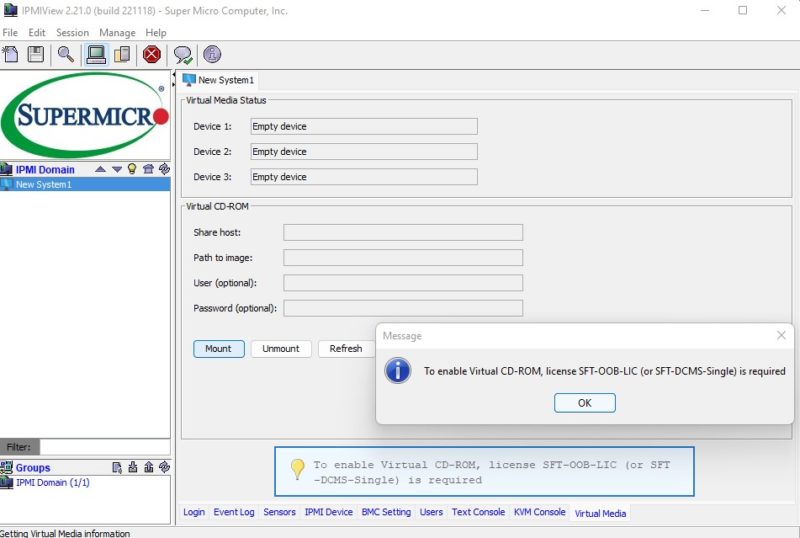
Many at STH know we have been using IPMIview 2.0 for a long time. The IPMIview 2.0 program has been one that is known to let you run the Java iKVM client without installing Java and keeping that up-to-date. Given what we showed above, many will be surprised to find that IPMIview 2.0 works almost in an opposite way. The Virtual CD-ROM with IPMIview 2.0 requires a license (SFT-DCMS-SINGLE or SFT-OOB-LIC):
However, if you utilize the OpenJDK viewer, then you can get the remote iKVM and also select virtual media and mount a drive remotely using this.
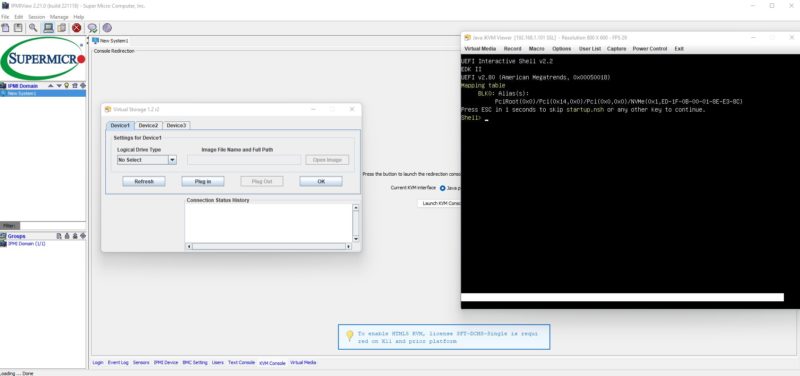
If you want to mount a local ISO to Supermicro IPMI and do not have a network share reachable by the hosts, and do not have a license, then using IPMIview 2.0 will allow you to get your job done without a license.
Final Words
It is too bad that this feature is being taken away and hidden behind a paywall with the HTML5 viewer. It is one that previously set Supermicro apart from Dell, HPE, and Lenovo. While having the current functionality is OK, the price point of $130-$200 to get the feature SFT-DCMS-SINGLE for the HTML5 iKVM virtual media feels like a lot if you are not using other features. At least there are alternatives available. Usually, we pay $50-75 for a USB drive to get mounted to a server with remote hands in a data center, so that is another option if the server’s USB ports are enabled.


On some of the H12 boards such as the H12SSL-i you also need a SUM license to mount an iso through the network.
https://github.com/lclancey/Unlock_H11_Virtual_Media
I wrote this script and tested on my H11SSL board.
I have never, ever gotten the network virtual media to work. no combination seems to be successful.
How do you _UN_define a virtual media (device) once you have pointed it to an ISO on your network share?
Or is it that once you have it defined, it is there permanently?
It’s really a shame that Supermicro has gone this route. I paid over $1,000 for my board, an M12SWA-TF, then they wanna milk me for another $200 to enable remote mounting media! Pisses me off. This was one of the reasons that I spent more than $1,000 on your board! Clown show. Will go with another manufacturer for my next server board.
Comments are closed.