
Today in the lab we have a Synology DS416j 4 Bay NAS to review with a twist, we are going to do so alongside two Amcrest 1080P surveillance cameras and two Seagate IronWolf hard drives. The DS416j is a more budget friendly solution that can handle four hard drives for increased storage capacity. The DS416j does not sport as many features as the DS916+, which lowers the price point of the package. Compared to the DS216j it offers higher storage capacity for a modest increase in price.
The need to monitor areas of a typical household are increasing. More and more people are using online retailers to purchase gifts at this time of year, these often get delivered at random times throughout the day and left on your front doorstep making a tempting target for thieves. Other areas of your house can also benefit from monitoring such as the entrance to the back yard. Even keeping an eye on your baby in its room sleeping while you are busy around the house.
Generally, components of home surveillance solutions are:
- Cameras to cover critical areas of a home/ office
- A NAS to provide storage for the cameras so that footage can be reviewed later
- A software solution to manage cameras and adjust pan/ tilt/ zoom (PTZ) features
- A wired or WiFi network to provide camera to NAS connectivity
- Power via PoE, outlets or other sources
Synology is offering its DS416j NAS loaded with its Surveillance Station software and two Seagate IronWolf hard drives to address components 2 and 3. Is now offering a bundle with a pair of Amcrest 1080P PAN/TILT WI-FI Pro/HD Cameras to address component 1. The existing power and networking are used to address components 4 and 5.
Let us take a look at the Synology DS416j 4 Bay NAS which will be the centerpiece of our Surveillance Station.
Synology DS416j 4 Bay NAS Specifications
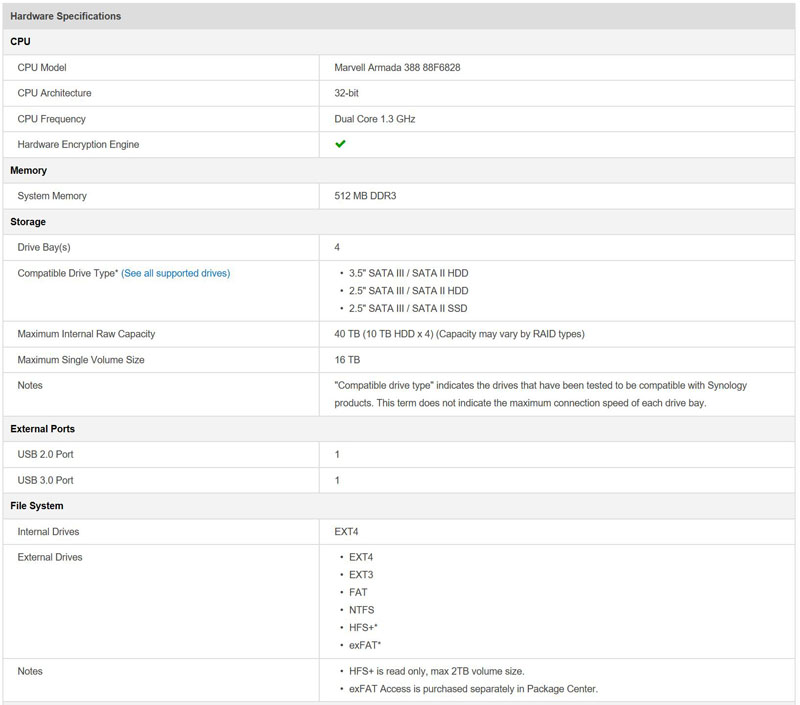
- CPU: Marvell Armada 388 Dual Core 1.3 GHz
- RAM: 512MB
- Number of Drives: 4
- Drive Interface: SATA 3
- Maximum Internal Raw Capacity: 40 TB (10 TB HDD x 4) (Capacity may vary by RAID types)
- Maximum Single Volume Size: 16 TB
- Dimensions: (Height x Width x Depth): 184 mm x 168 mm x 230 mm
- Weight: 2.21 kg empty
- Power Consumption: 21.6 W (Access), 12.75 W (HDD Hibernation)
- Power Supply: External AC 100-240V Universal, 50/60Hz single phase
For complete system specifications of the DS416j head over to Synology to find more detail.
Synology DS416j 4 Bay NAS Overview
Synology sent over a review sample DS416j with simple packaging. Our package was double boxed which included ample foam inserts to protect the contents. Inside the box, we find an accessory box that holds additional accessories.
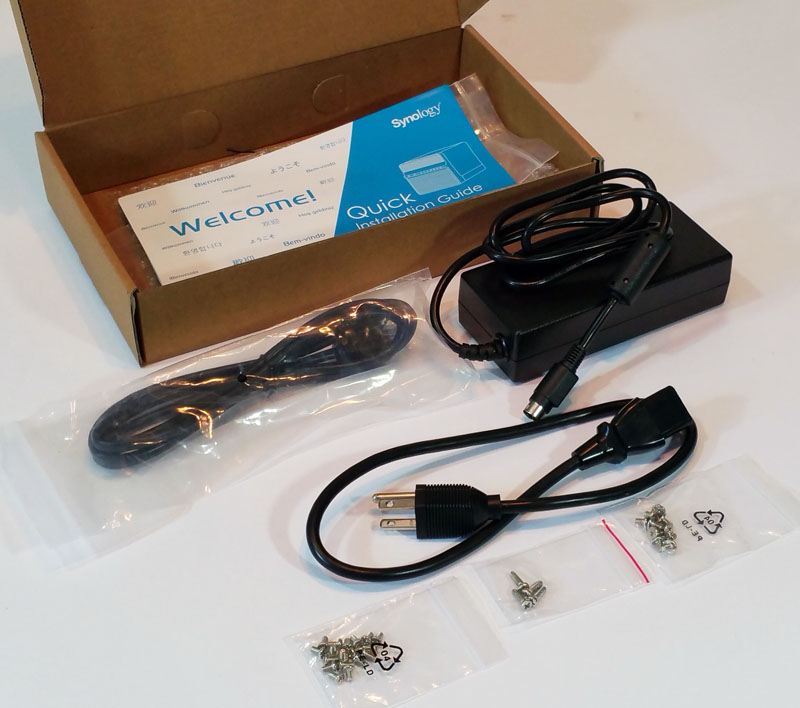
Accessories included with the DS416j include
- DiskStation DS416j enclosure
- Welcome Note
- AC Power Adapter
- AC Power Cord
- RJ-45 LAN Cable
- 3x packaged of assorted hard drive mounting screws
Synology DS416j 4-Bay NAS Installation
After removing the DS416j from its packing material, we can now take a look at the NAS.
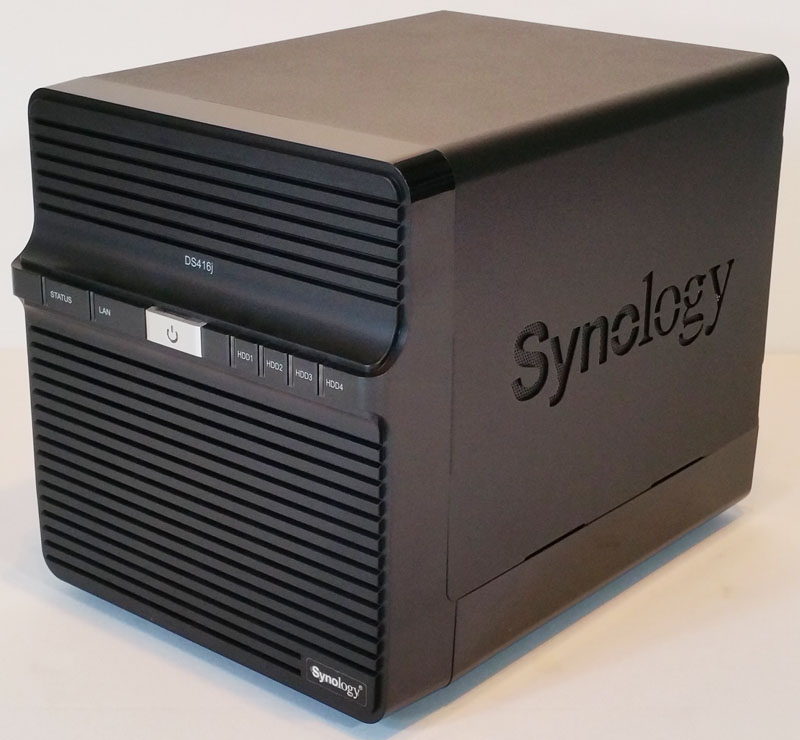
The enclosure of the DS416j is made of metal and plastic which gives a solid enough feel to the NAS. The Synology DiskStation DS416j is not the highest-end NAS that the company offers. On the other hand, it is just what one may need for storing IP camera video.
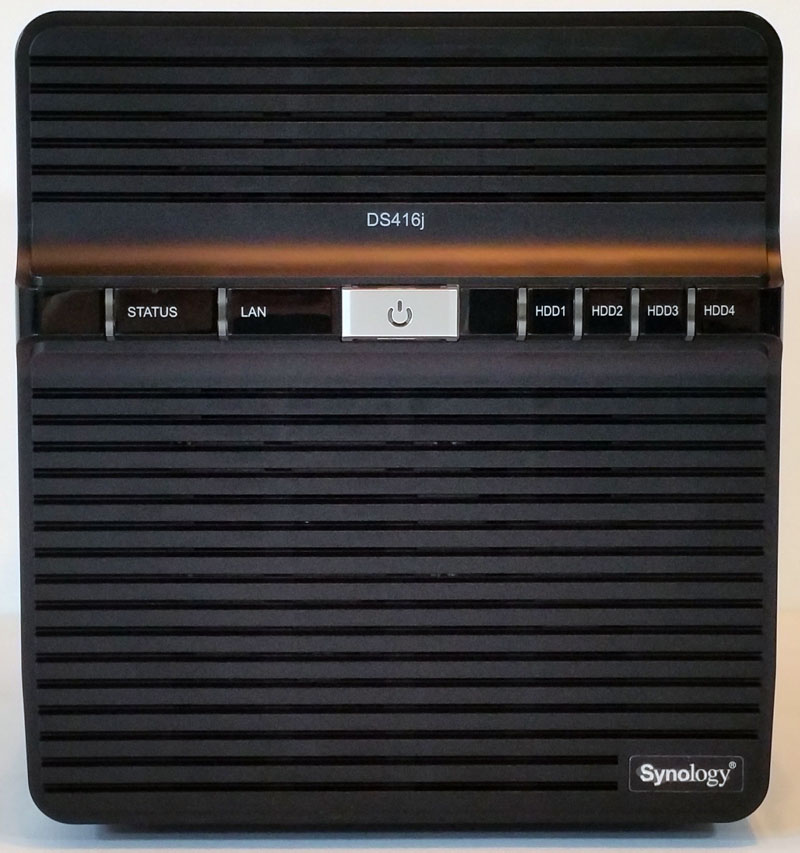
Looking at the front, we find a silver power button in the middle and status LEDs on either side.
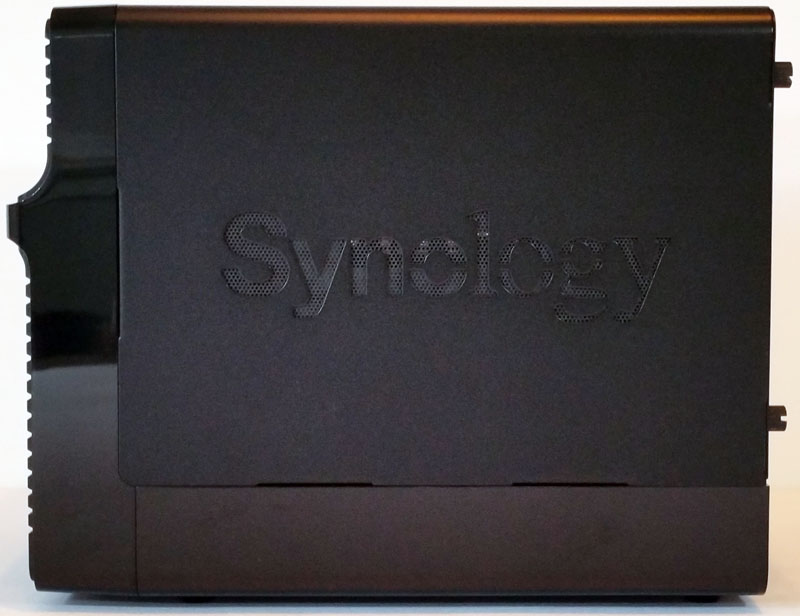
Looking at the side, we find the hallmark Synology Logo which is on both sides of the case. The vents also provide ventilation for the NAS which will help in cooling.
The back of the NAS has 1x USB 2.0 and 1x USB 3.0 ports, 1x RJ-45 1GbE LAN Port and power connector. There is a security port to lock the unit down at a location as well. Nothing is worse than having cameras but having the recorded footage get swiped during a break-in.
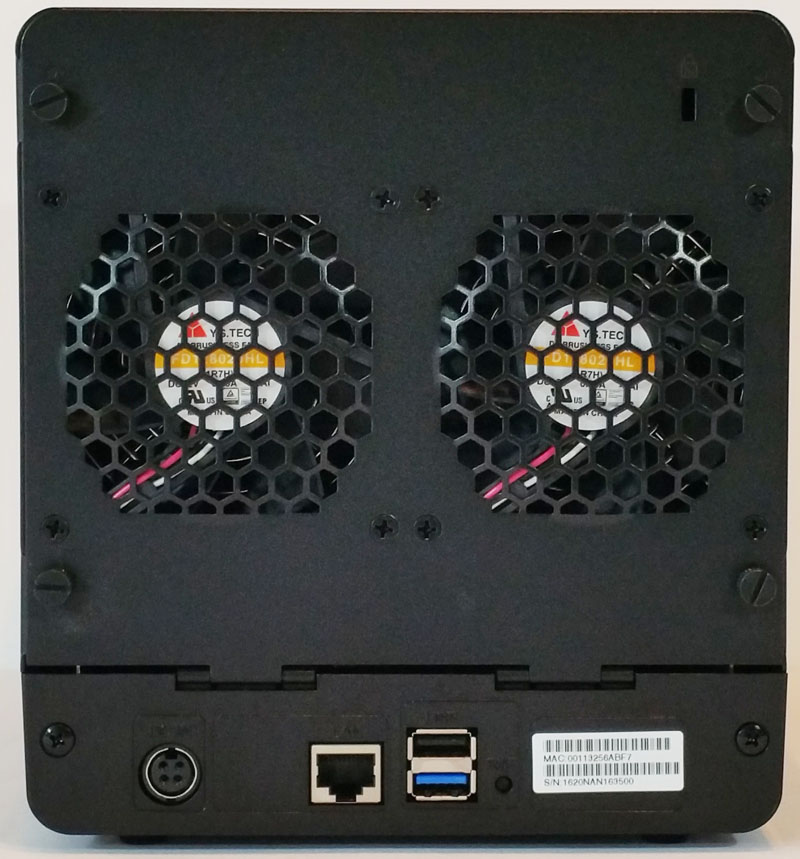
The two large 92mm cooling fans take up the bulk of the space. We also find a reset button on the right side of the USB 3.0 (Blue) port. Four screws secure the case to the base which you can spot bracketing in the case fans.
Let us move on to see how to install hard drives into our unit.
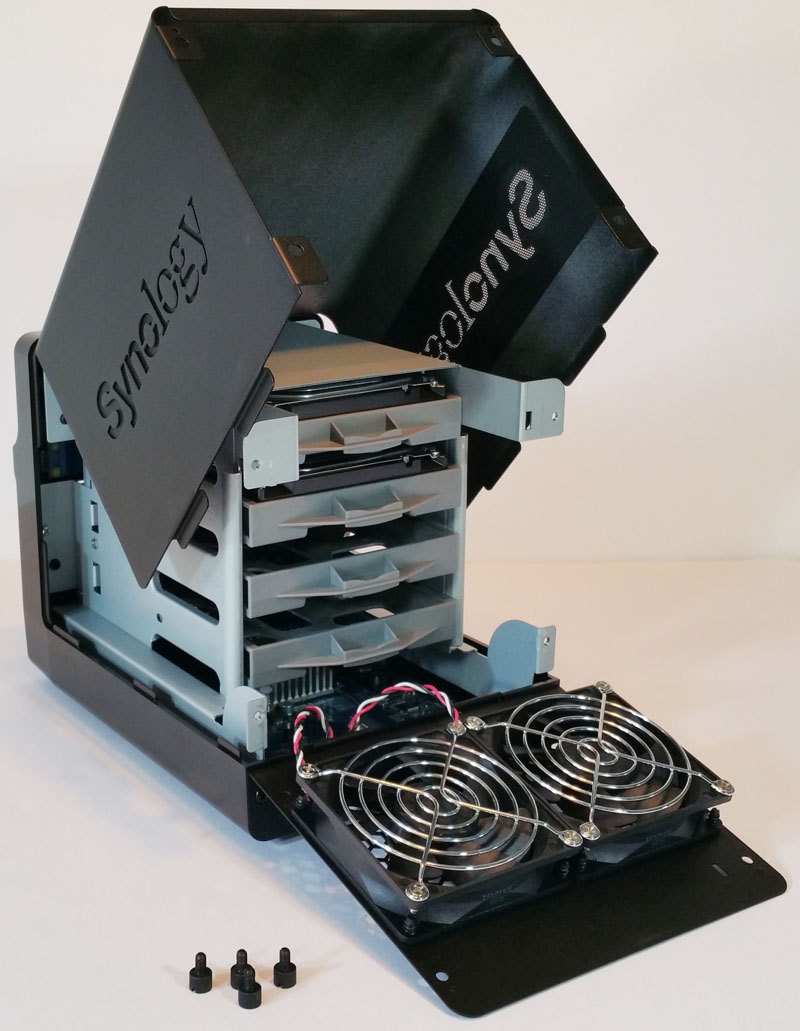
After removing the four screws the back plate will fold down, this plate has the fans attached. The case itself will lift off to gain access to the drive bay. Two screws on both sides of the hard drive tray secure them in place. Once the screws are removed, the drive tray will slide out. Our sample unit came with two drives pre-installed in the top two bays.
Each drive bay can accommodate either a 3.5inch or 2.5inch hard drive or solid state drive up to 10TB in size for a total of up to 40TB raw capacity.
There is no front access to the drives. Synology has enclosed the drives which make for a more secure unit. They cannot be removed by a simple locking lever at the front.
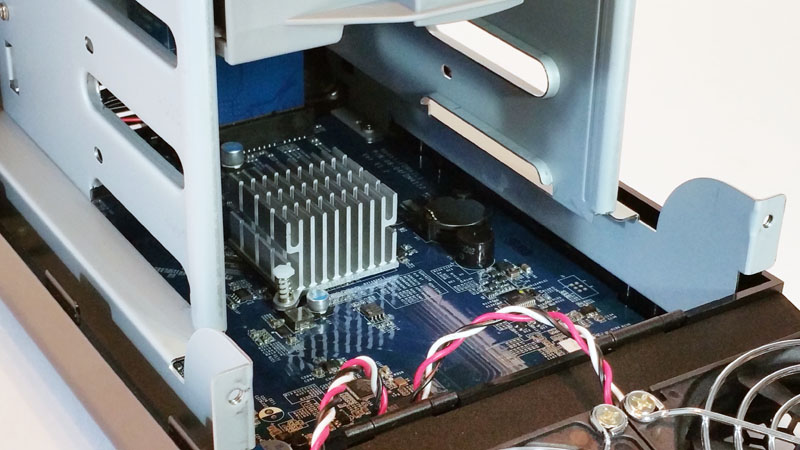
Here we have pulled out several hard drive trays to get a look at the processor board underneath. We spot the processor heatsink which is more than adequate for cooling the low-power Marvell Armada 388 Dual Core processor.
AMCREST 1080P PAN/TILT WI-FI Pro/HD Camera
Our DS416j will be used as a Surveillance Station, for cameras, we will use two Amcrest 1080P PAN/TILT WI-FI Pro/HD Cameras.
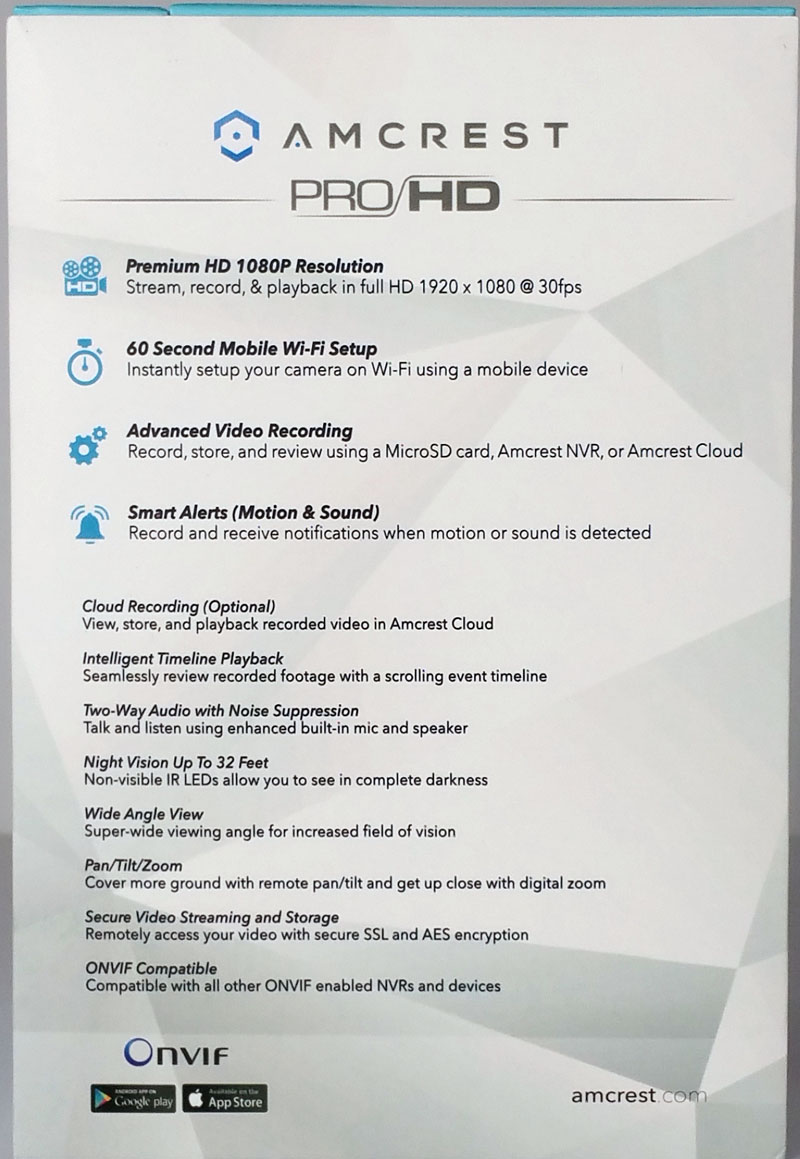
The product description outlines essential features: Amcrest 1080P WiFi Video Monitoring Security Wireless IP Camera with Pan/Tilt, Two-Way Audio, Plug & Play Setup, Optional Cloud Recording, Full HD 1080P (1920TVL) @ 30FPS, Super Wide 90° Viewing Angle and Night Vision IP2M-841B. For more detail head over to Amcrest to see a complete list of specifications.
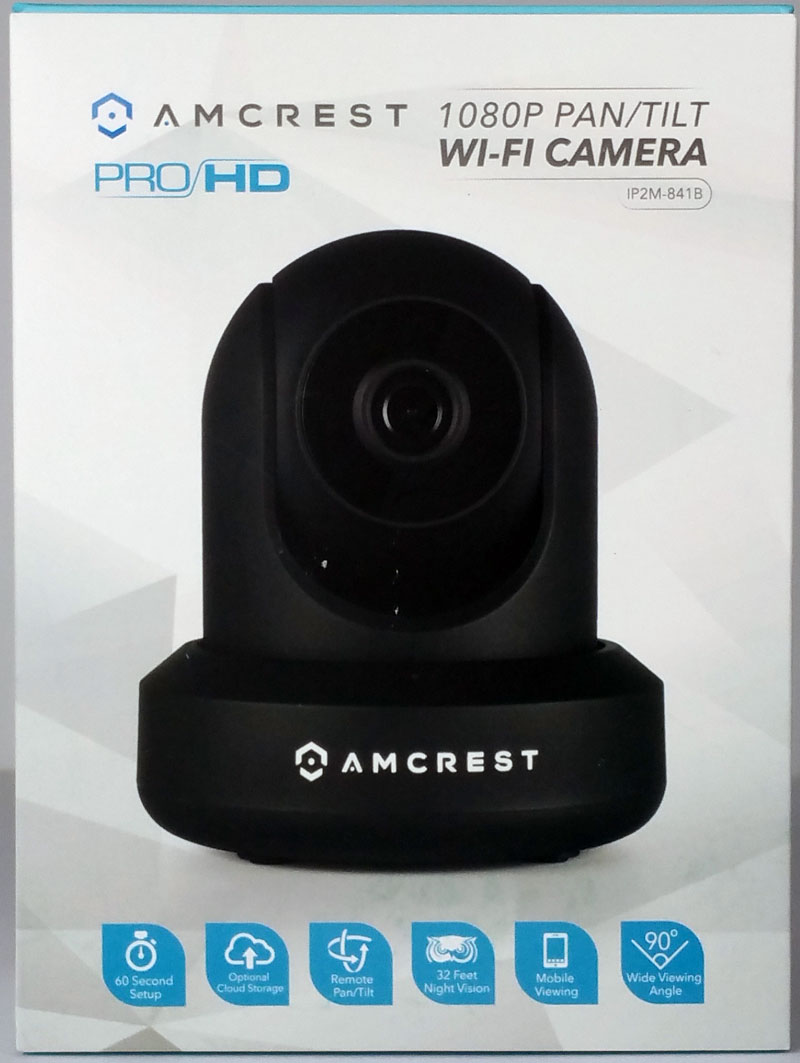
Here we see the front of the retail box for the AMCREST 1080P PAN/TILT WI-FI Camera. We get a brief rundown of the capabilities with the blue icons at the bottom of the box.
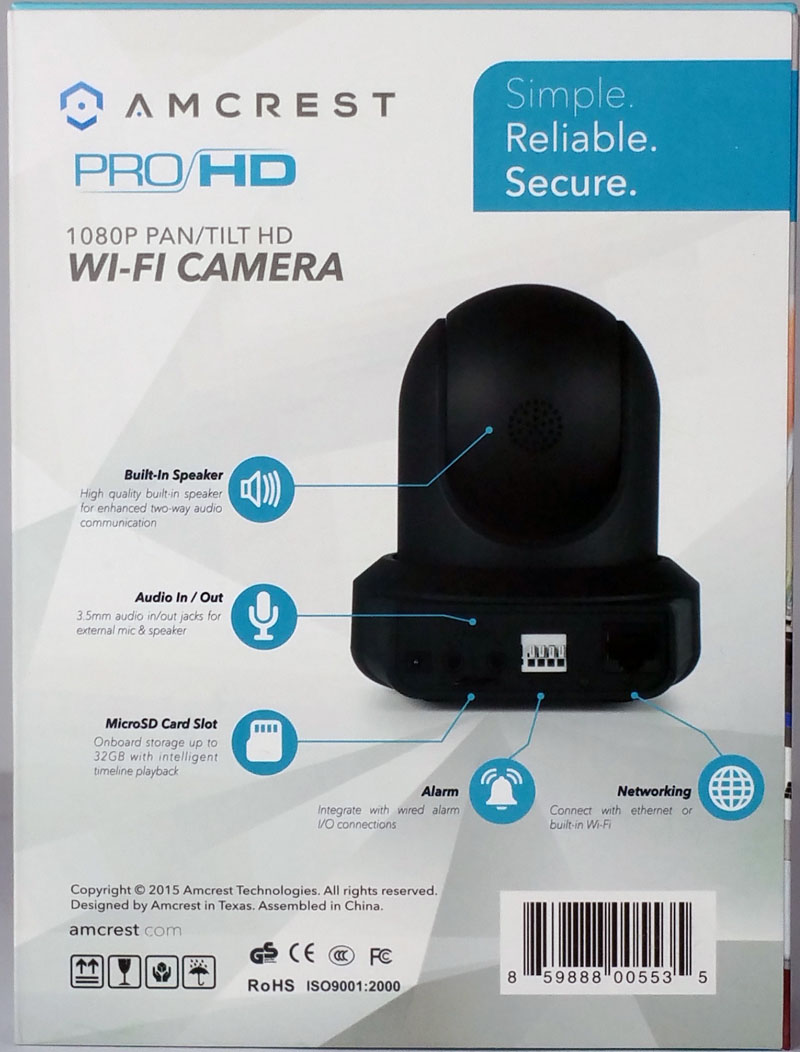
Turning the retail box to the back, we get more information on these cameras.
The retail box for the AMCREST 1080P PAN/TILT WI-FI Camera’s provides lots of information on the capabilities of these cameras.
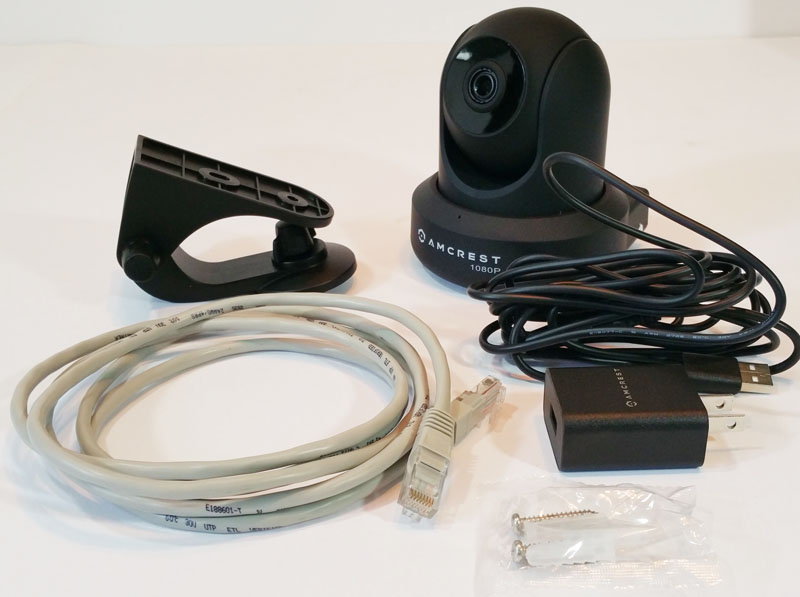
Amcrest 1080P PAN/TILT WI-FI Camera Accessories
- Amcrest ProHD IP2M-841B Camera (Black)
- Network Cable
- USB type power connector – power cord length is about 9.5 feet long
- Application CD + Quick Start Guide
- Additional angle bracket
- Package of mounting screws
- Amcrest supplies 1 Year Warranty Provided Directly from Amcrest
Synology DS416j – 4 Bay NAS Management
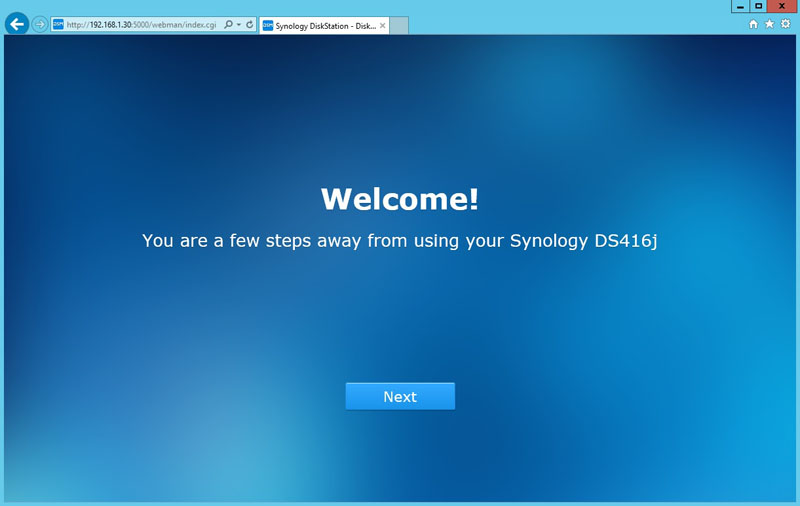
Getting our DS416j up and running is the same as the DS216j and DS916+ we reviewed earlier. We will walk through the steps here also. If you are a SMB service provider, you will get even faster after installing a few Synology units at client sites.
After turning on the NAS and connecting it to your network type in “find.synology.com” in your browser to bring up the management interface.
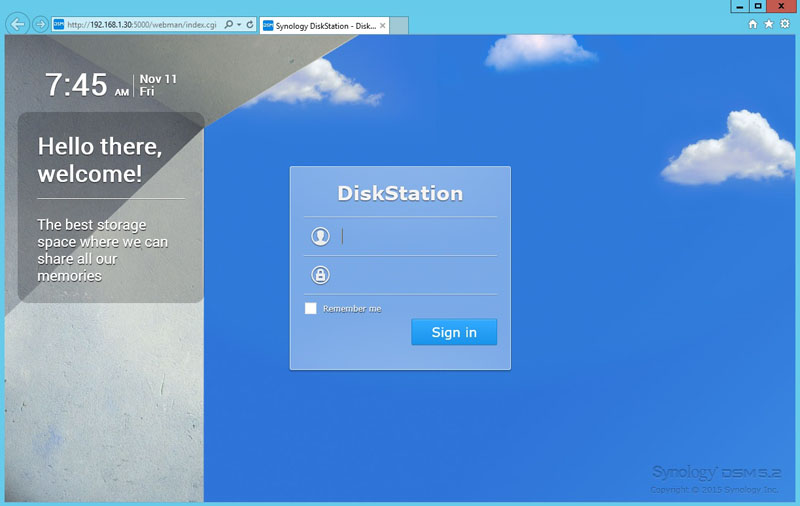
After this page comes up, we can now connect to the DS416j by using admin as username and leave the password blank. We will change this login information in the next step.
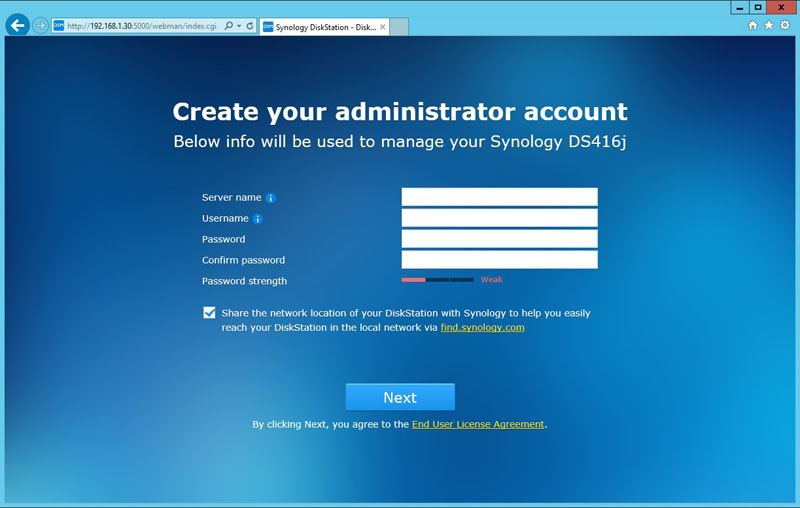
The next step is to create an admin account and password, and you can also give it a server name, clicking next, completes this process.
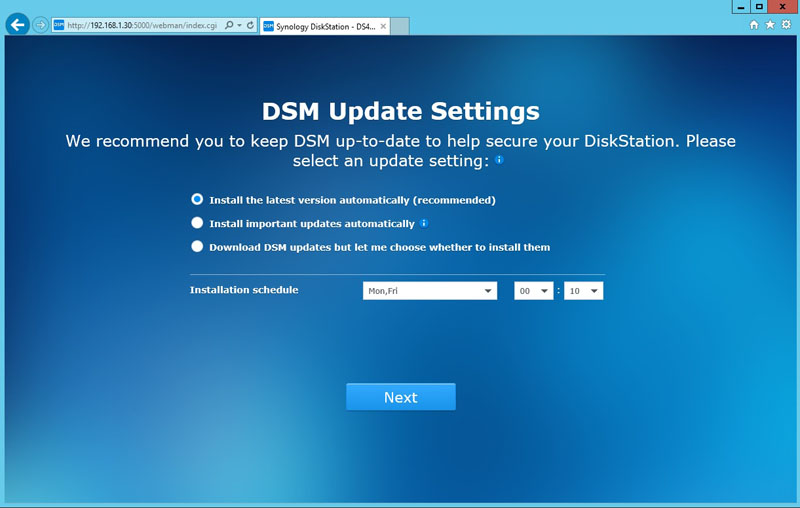
The next step is to configure DSM Updates and Maintenance.
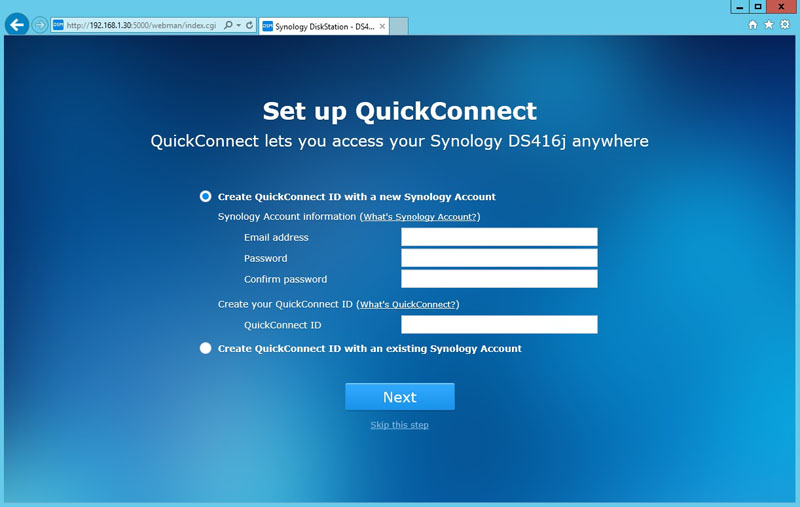
If you would like to setup QuckConnect for remote access you can do this now, or skip it.
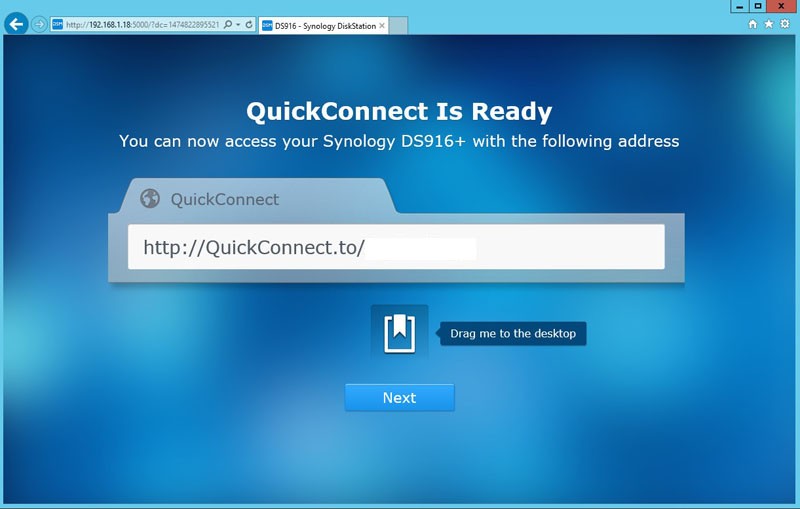
In the Ready screen, the address shown will have the QuckConnect ID at the end.

The next to final step is installing packages that you might want. We installed all of the packages. If you are not interested in these, you can skip this step.
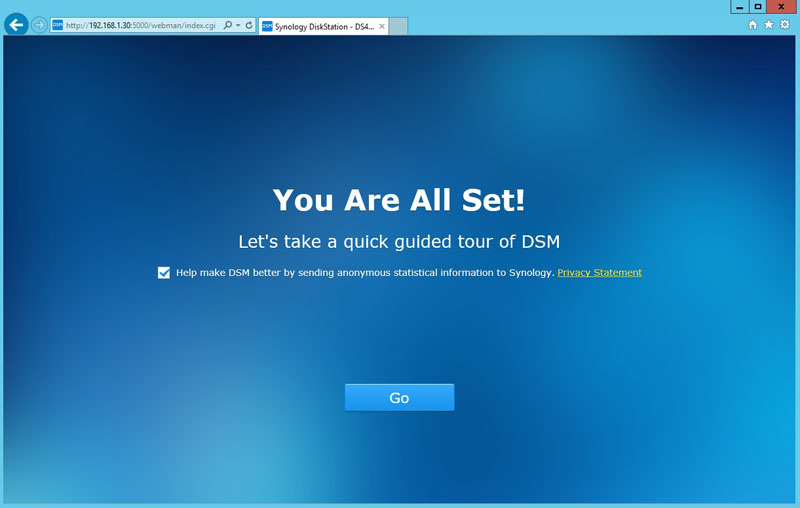
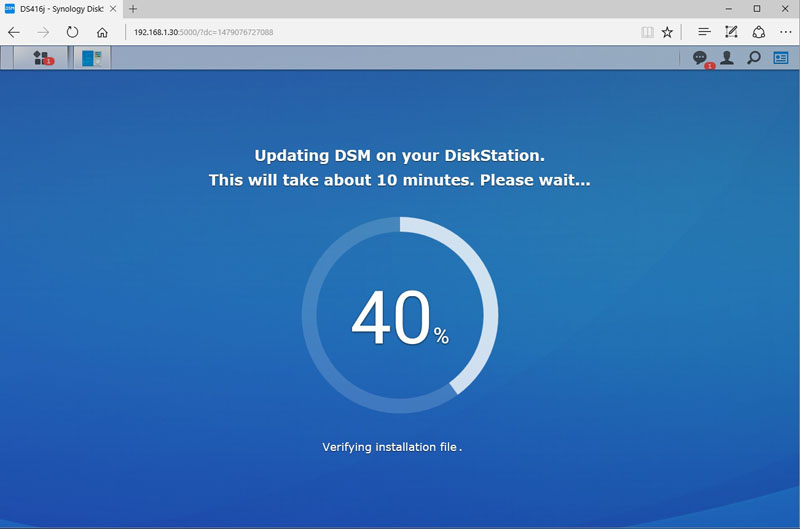
A few minutes later, we are finished with getting the system setup and running.
After pressing Go, we find ourselves at the main configuration screen for administering the DS416j.
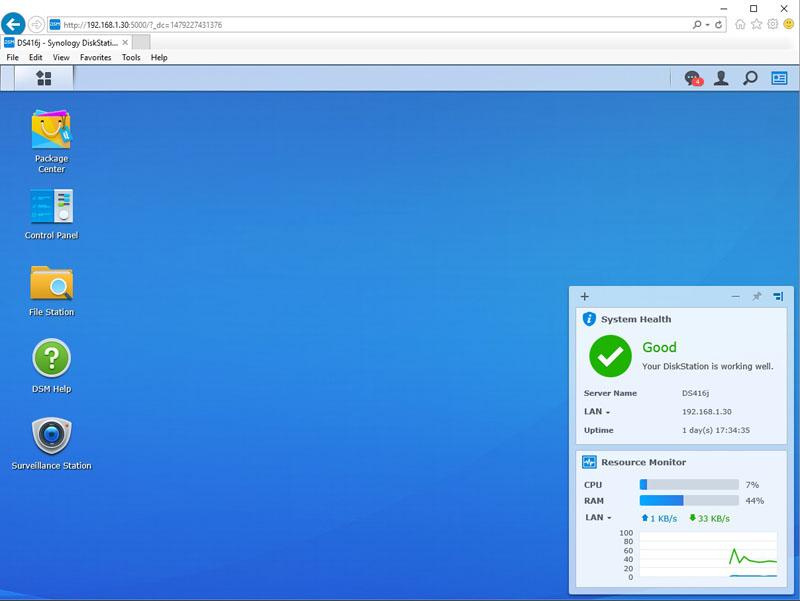
After looking at DSM 6.1 Tips and Help screen, we see the main desktop for our DS416j.
Our DS416j is using DSM 6.1 for the operating system. If you would like to check out DSM 6.1 via a Live Demo head over here.
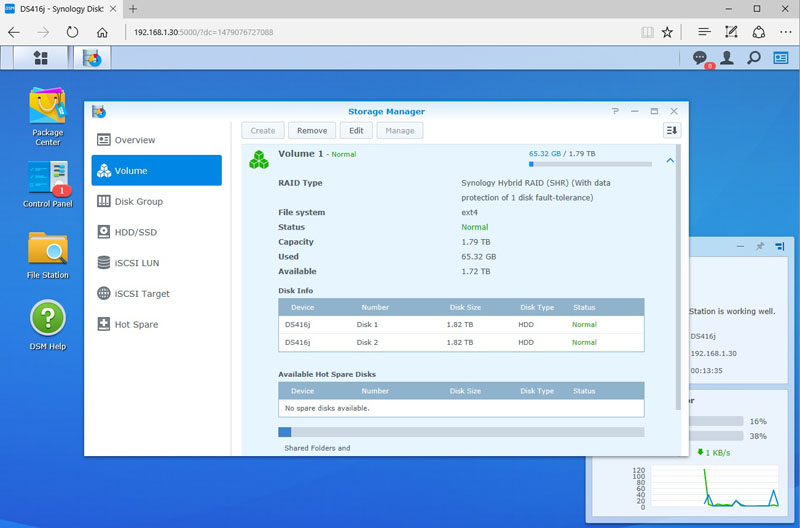
Our Synology DiskStation DS416j came to us preconfigured with two hard drives. Clicking on the top menu bar options icon, we find an abbreviated control panel. Let’s click on the “Storage Manager” to get the DS416j setup.
Our DS416j RAID was setup using Synology SHR RAID. It has two Seagate IronWolf 2TB hard drives installed so this RAID configuration will work just fine for our tests. We also spot that we have a total of 1.72TB space available on our system after it has been completely setup.
Turning the Hardware into a Powerful Surveillance Solution
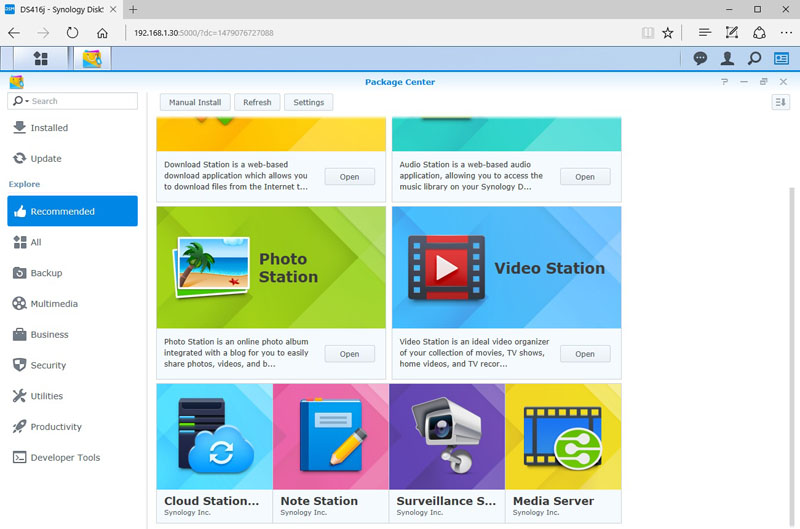
We will be using the DS416j as a Surveillance Station, so we need to get that installed. By clicking on the Package Center, we can find the Surveillance Station under Recommended packages. At the time of this writing, the program already has seen over 5.7 million downloads.
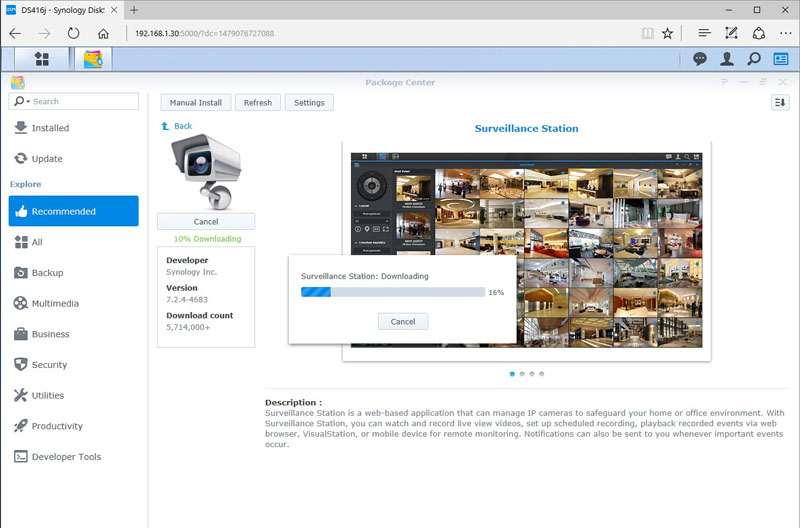
Clicking on Surveillance Station Install begins this process.
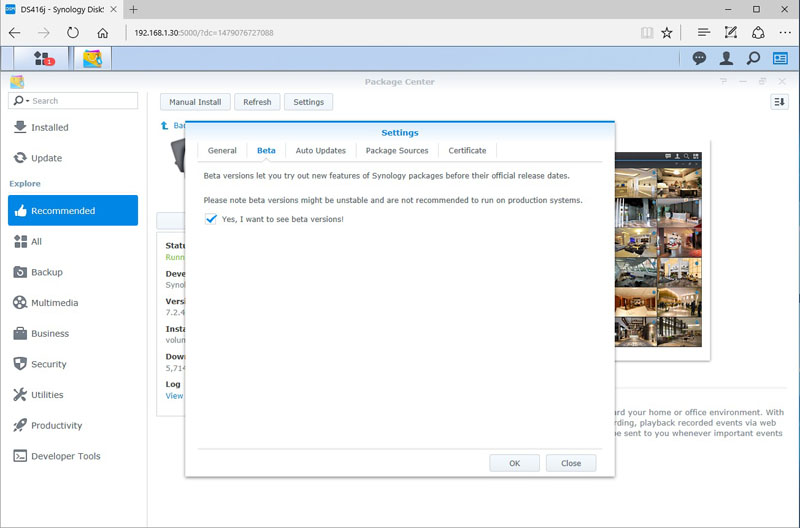
Synology has just released Surveillance Station Beta 8.0, and we wanted to see how that worked. In the Surveillance Station Package screen head over to Settings, Beta, and click the boxed shown. After hitting OK we then moved over to the Update Button and starting updating Surveillance Station Beta 8.0.
For more information on Synology’s Surveillance Station Beta 8.0 head over here.
A few minutes later we had Surveillance Station Beta 8.0 installed and updated.
We now have the DS416j setup and fully updated including Surveillance Station Beta 8.0. The next task is to get the Amcrest 1080P PAN/TILT WI-FI Pro/HD Cameras installed and connected to the Synology NAS.
Amcrest provides a software CD with each camera which we will need to use. Alternatively, you can download the software from their site.
Amcrest provides a complete suite of applications to operate the 1080P PAN/TILT WI-FI Pro/HD cameras on their own. We wanted to use these cameras with our DS416j, and the utility we will need to use for this is Amcrest IP Config Tool.
We also plugged in the power cord to our camera and connected it to our system using the supplied ethernet cable. To set up our cameras, they will need to use the supplied ethernet cable to connect to your network.
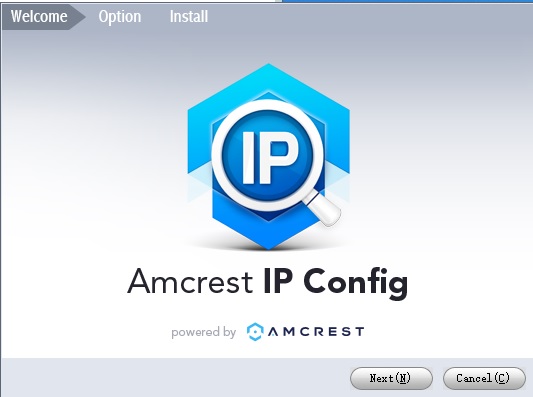
Let’s go ahead and get Amcrest IP Config Tool installed on our workstation.
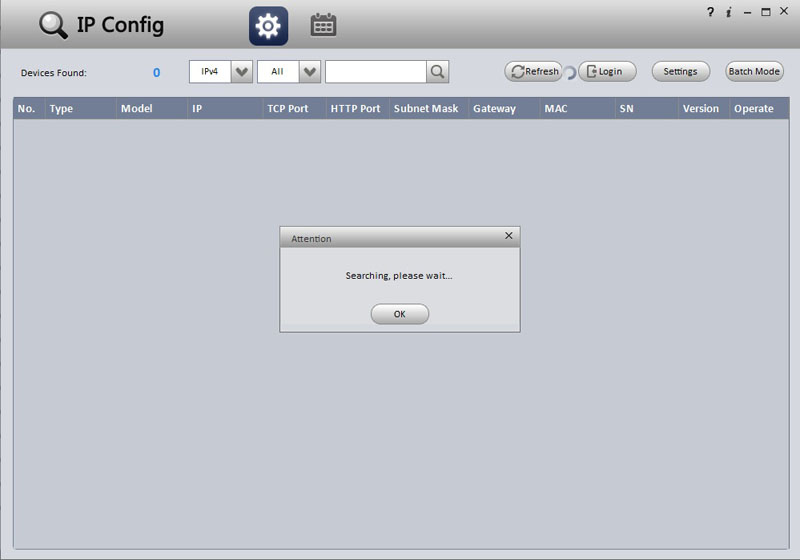
After installing Amcrest IP Config Tool, we can launch it and get our cameras configured.
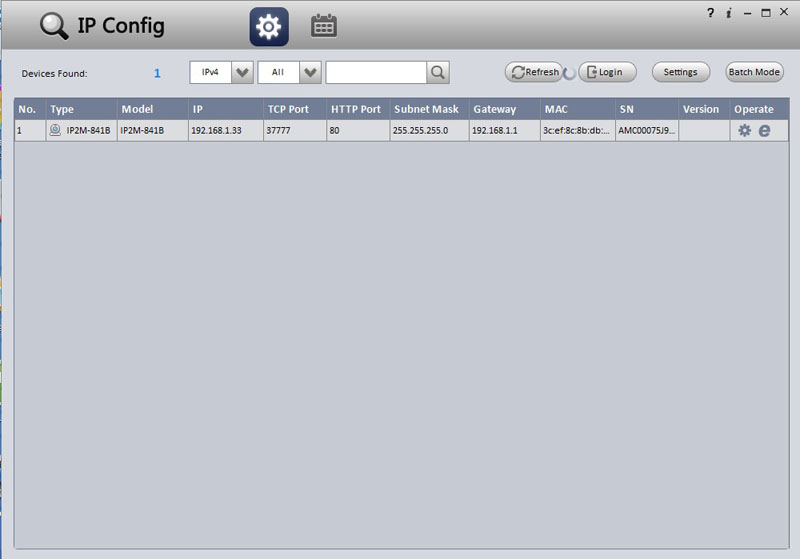
A moment later Amcrest IP Config Tool has found our camera on the network.
Let’s move on to getting the camera configured.
On the right side of the line that shows the new camera we find two Icons, one is a configuration Icon, and the next one is an “E” for Explorer, let’s click the “E.”
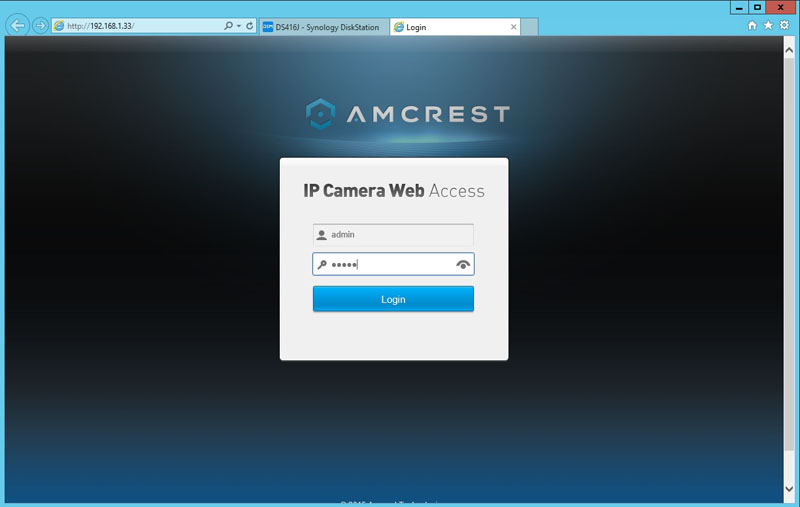
Clicking the “E,” brings up a web page with a camera login screen. Because this is the first time we have logged into the camera we will use default login information. For username and password use “admin” for both.
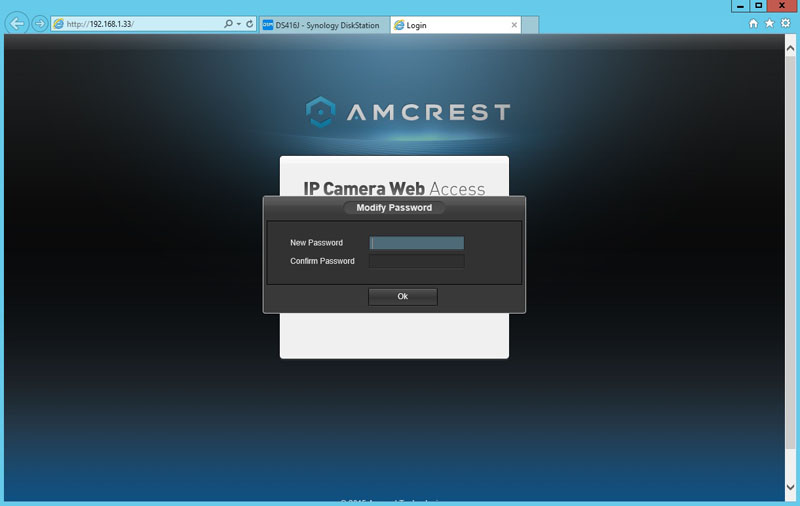
It is never a good idea to keep using default username and passwords. Upon the initial login Amcrest requires us to change the default password.
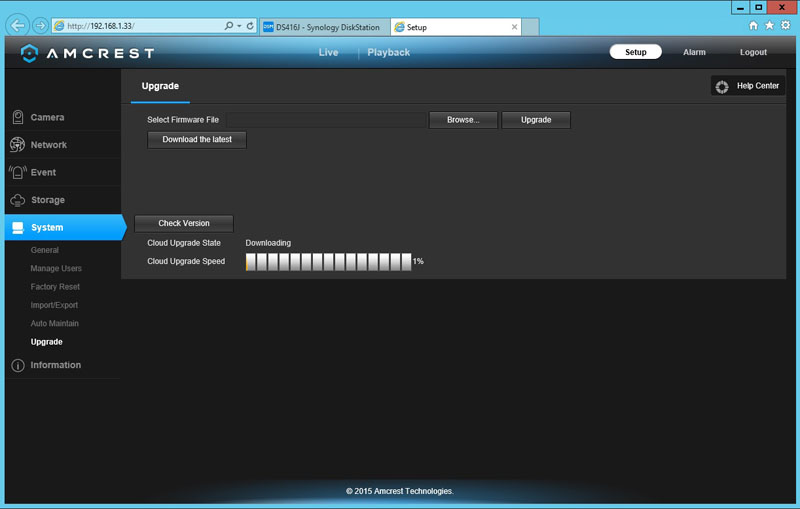
After changing the password, we updated the camera firmware before we moved on.
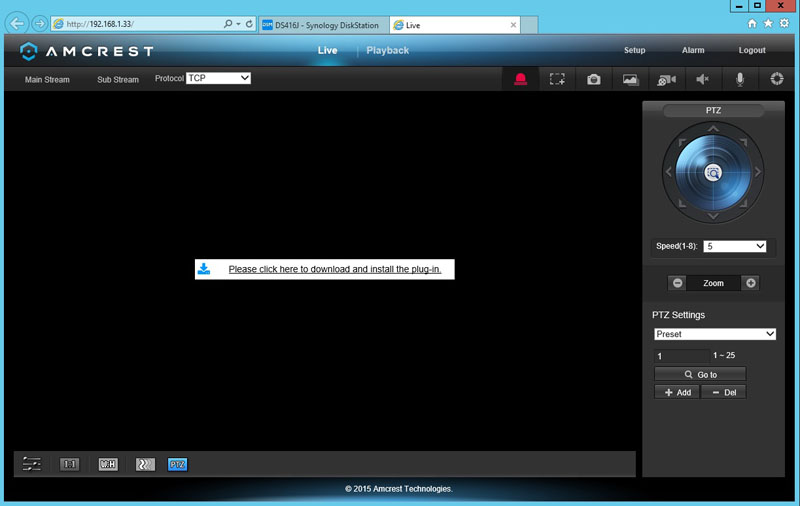
After updating, we wanted to see how the camera was working and we ran into an issue. The Amcrest software requires a plugin to view what our camera is seeing. Our workstation operating system is using Windows 10 which does not allow the utilization of this plugin; we tried Chrome also, and it would not work.
The workaround for this is very simple. Use Windows Explorer 11 which comes with Windows 10. What we did was copy the link from Windows 10 Edge and pasted it into Windows Explorer 11 and logged back in. Amcrest software then downloaded the need plugins, and everything worked fine.
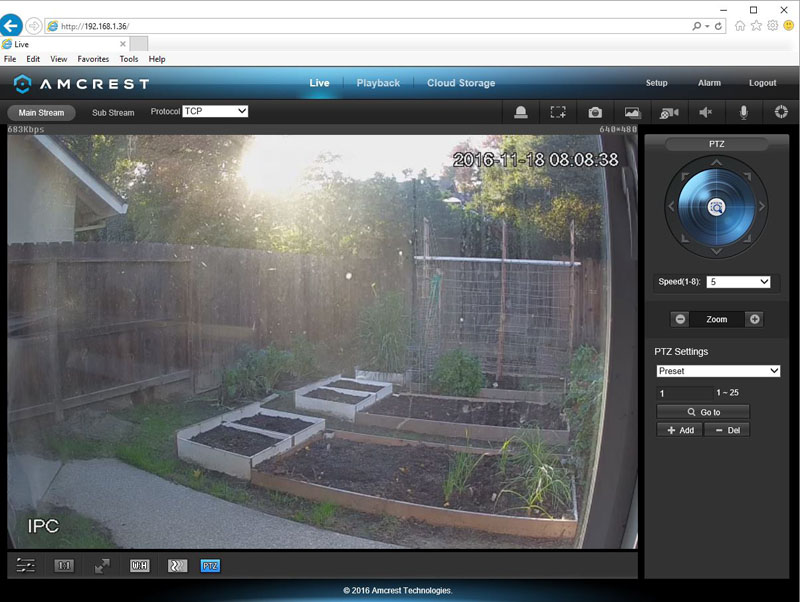
We did not place our cameras in locations for security purposes as we are only testing them. We ran our test config on our test bench. Here we are looking out our window and the garden for a simple test.
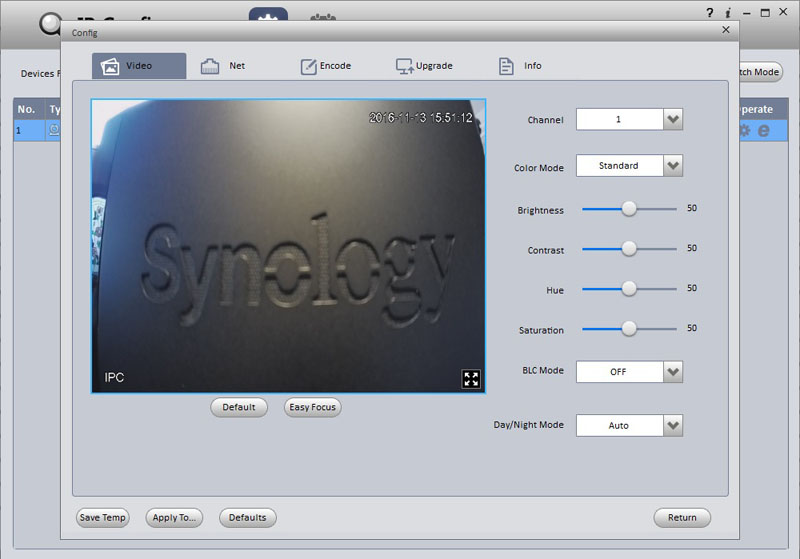
With the camera working we looked at the configuration Icon, from here, we can adjust brightness and other settings.
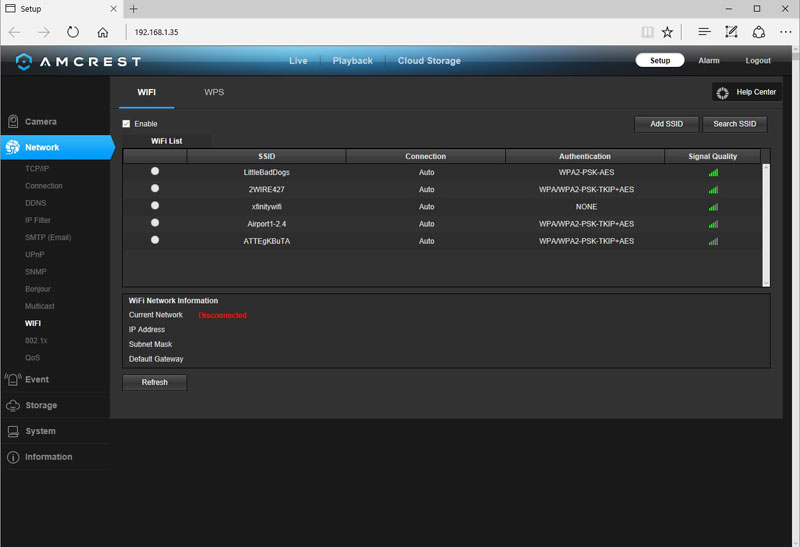
To change your camera to Wi-Fi enabled click the Setup button on the top menu bar, this will bring up options on the left side of the screen. Click on the Network and down to Wi-Fi; this will give you a list of Wi-Fi connections and connect to the one you want to use.
If you decided to use Wi-Fi and connected to your Wi-Fi network, you can disconnect your camera from your wired network.
We now have our cameras set up and configured so let us move on to Surveillance Station Beta 8.0 and connect the cameras to our NAS for control and recording.
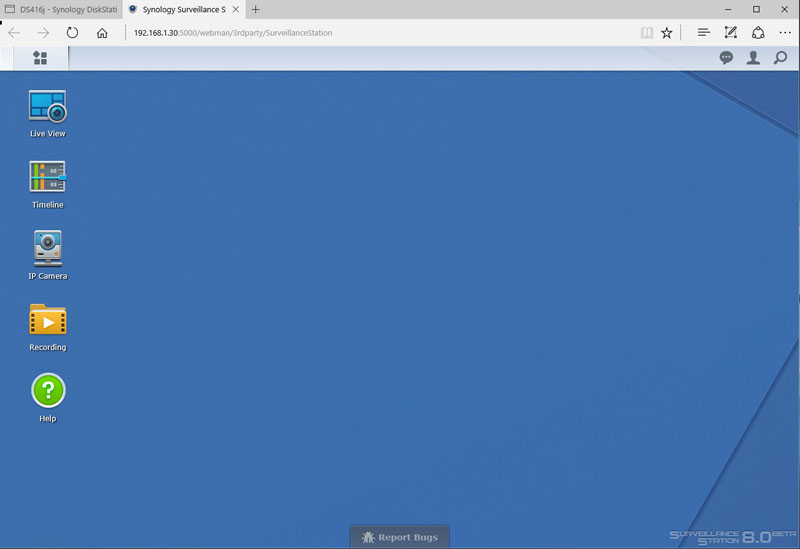
After we installed Surveillance Station Beta 8.0 a desktop Icon will show up, click on that to bring us to the Surveillance Station.
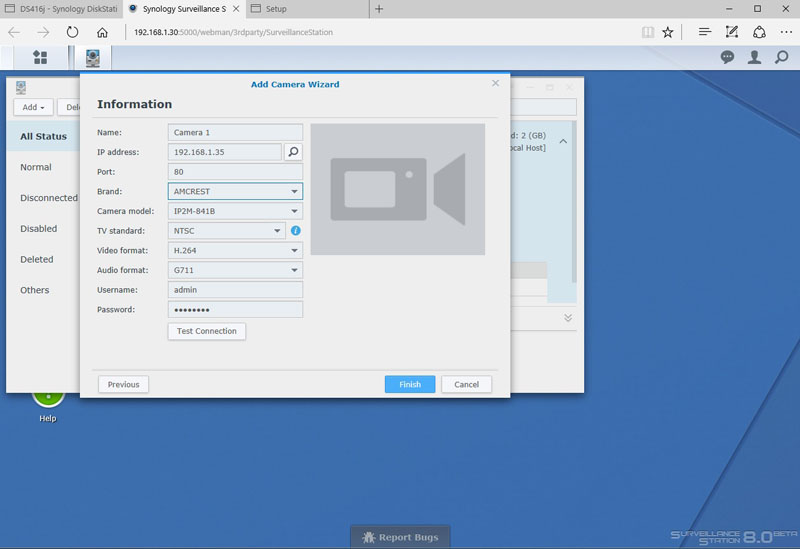
The first step is to connect our cameras, click on the IP Camera on the desktop and then add a camera. Here you can name your camera, search for its IP address, select the brand and model, enter username and password. When all finished entering the information, press Test Connection.
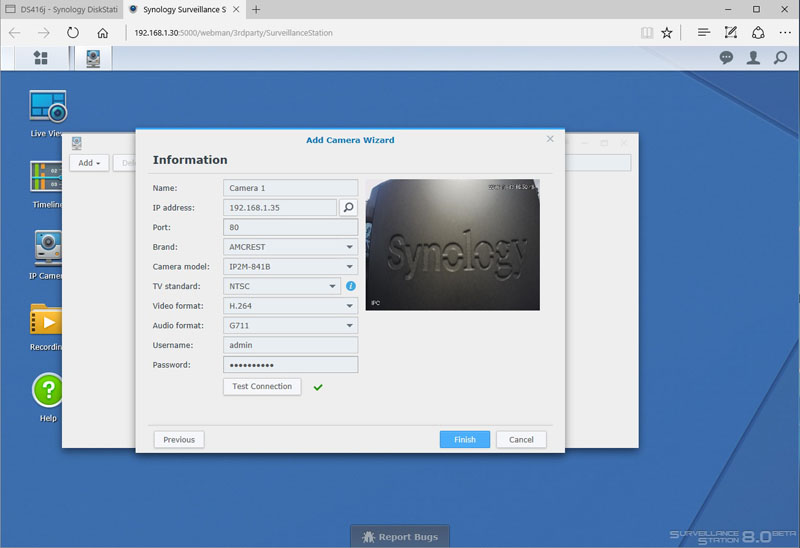
After the Test Connection has finished, we can see what our camera is viewing. After this step is completed press Finish to continue.
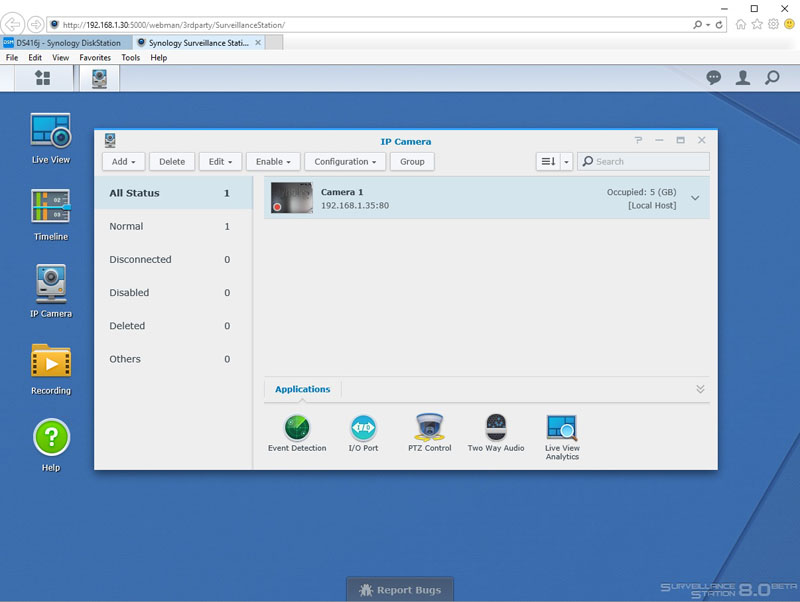
Here Camera 1 shows up on the main IP camera list.
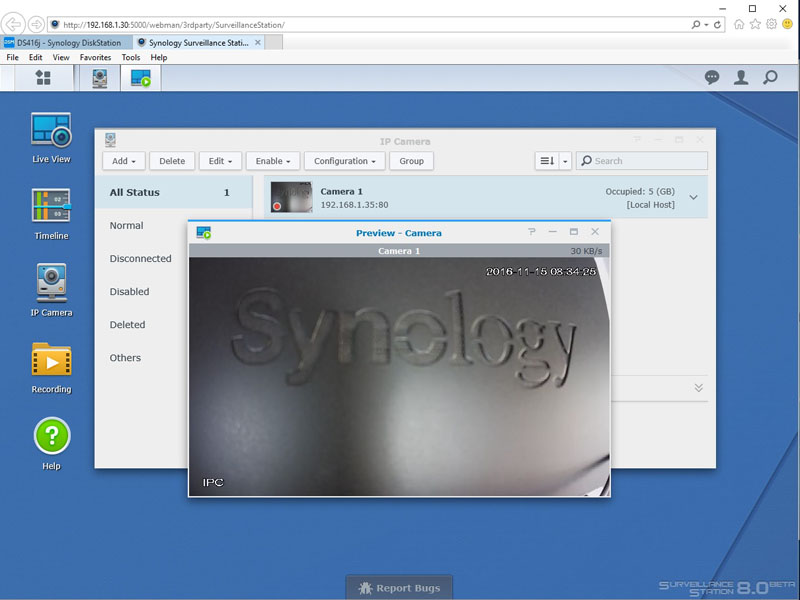
If you click on the picture, you can see the camera view again.
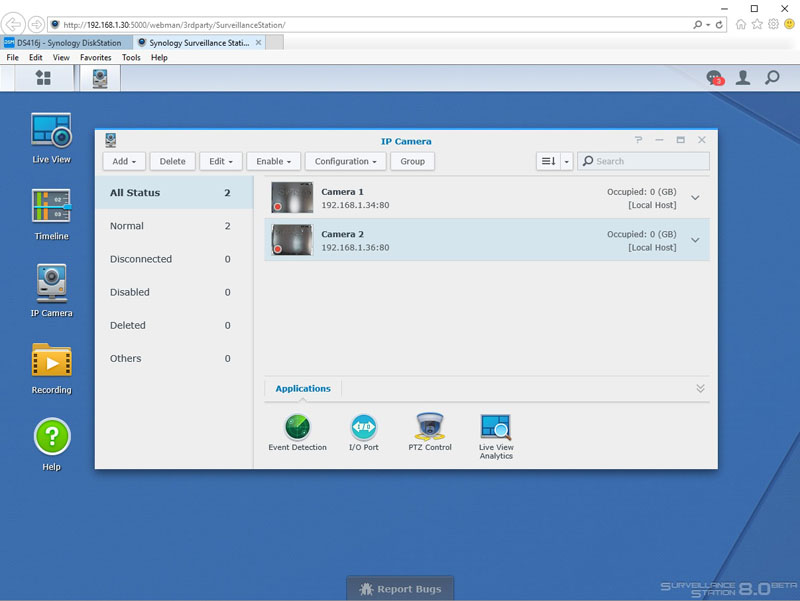
We have gone through the steps to add our second camera and it now shows up on the IP Camera list.
We now have both cameras configured, Camera 1 is through a wired connection, Camera 2 is through a Wi-Fi connection.
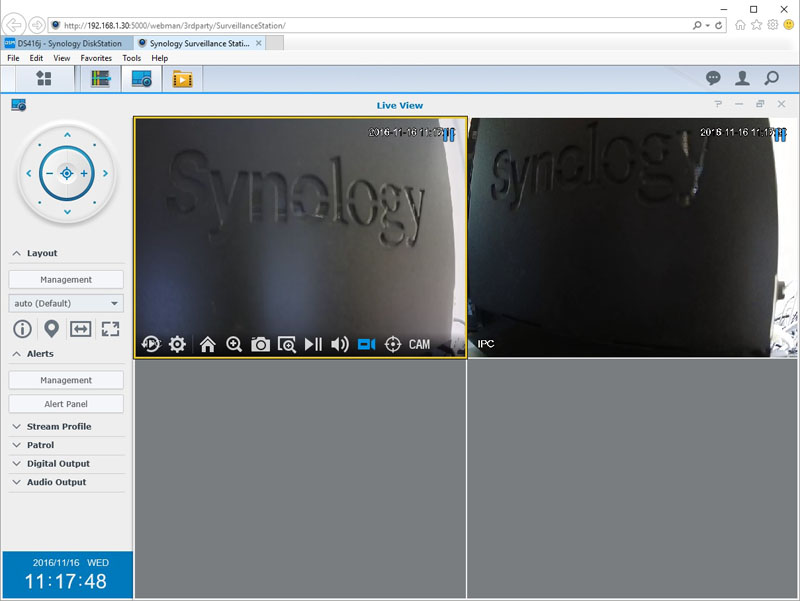
To get full control of our cameras, click on the Live View Icon on the desktop. With Live View you have complete control of the cameras, panning around, patrols, snapshots, and audio output. Some of the features become active when you mouse over the camera window as the first camera shown. This view is very handy to monitor your camera, click the home icon to restore preset configurations.
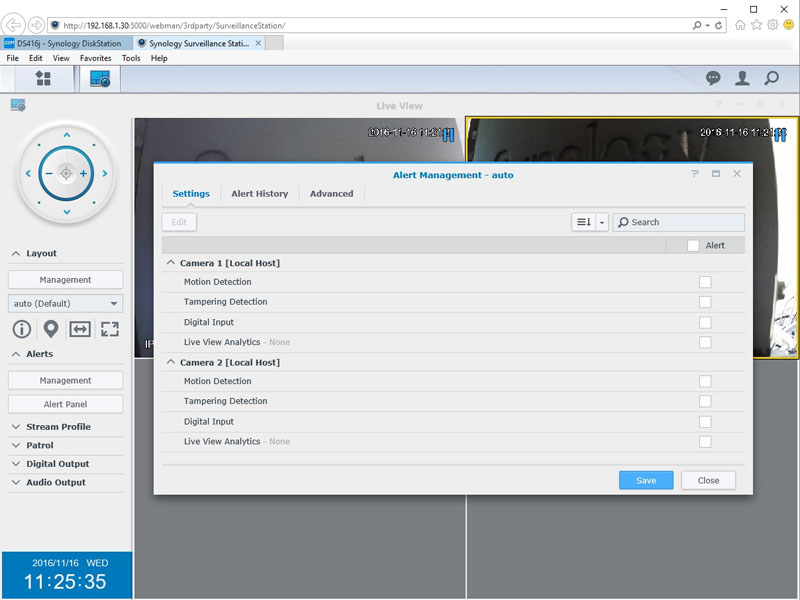
If you have alerts setup click on the Alert Panel button, this brings up the status of your devices.
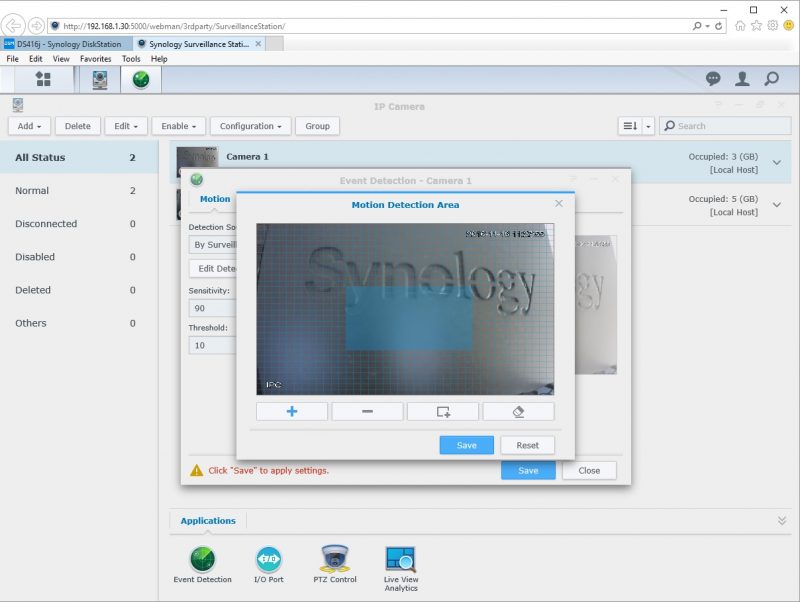
At the bottom of the screen, there is an Event Detection Icon; this allows you to set up events that will trigger alerts. In the window shown, you can select an area to watch for motion that will set off an alert. Controls are available to adjust for Sensitivity and Thresholds for alerts.
This is an area that will be completely transformed in the next few years as Event Detection becomes primarily driven by machine learning inferencing models. For now, the Synology implementation is the industry standard method of event detection.
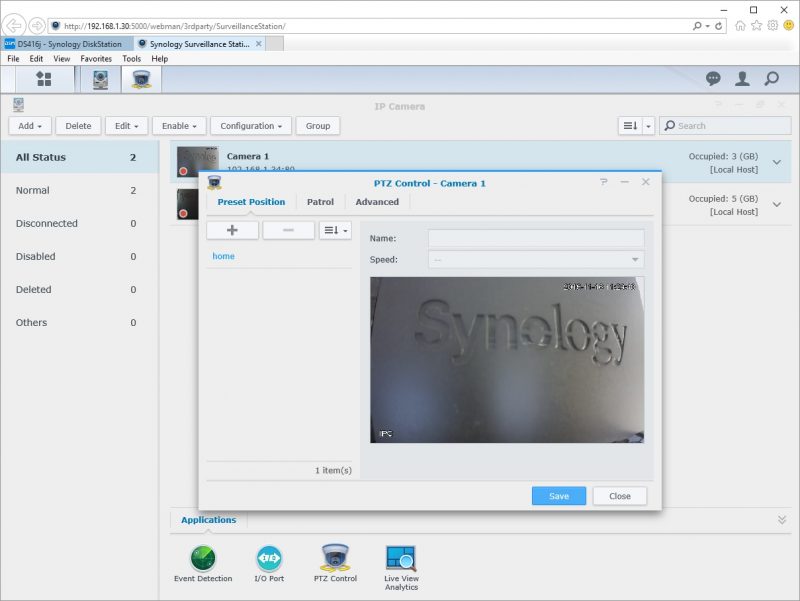
The PTZ Control is where you would setup camera patrols so that it can cover a larger area, such as a parking lot or your entire backyard or large room.
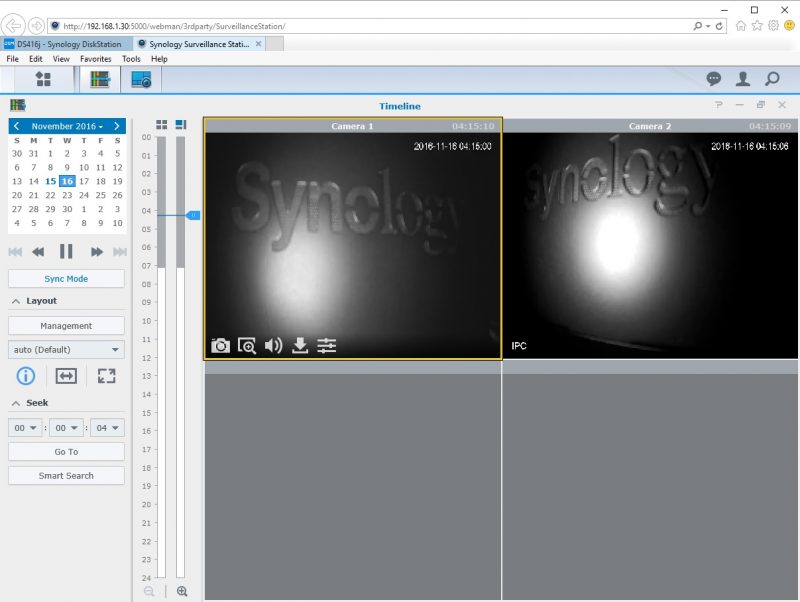
Using the Timeline app, allows you to select dates and scroll through the recorded videos.
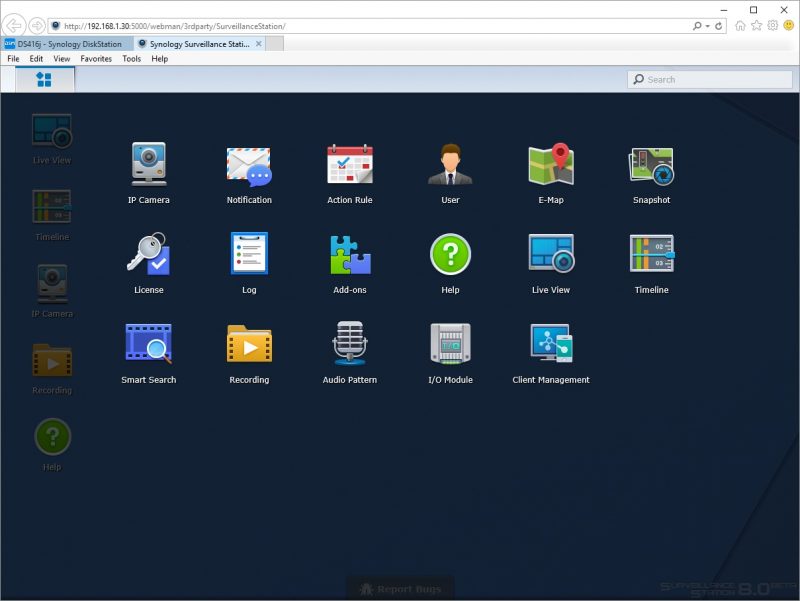
Back at the Surveillance Station desktop now, at the top left of the screen, there is a menu button which brings up additional options.
Let us take a look at how you would like to be notified by alerts. Clicking the Notification Icon brings you these settings.
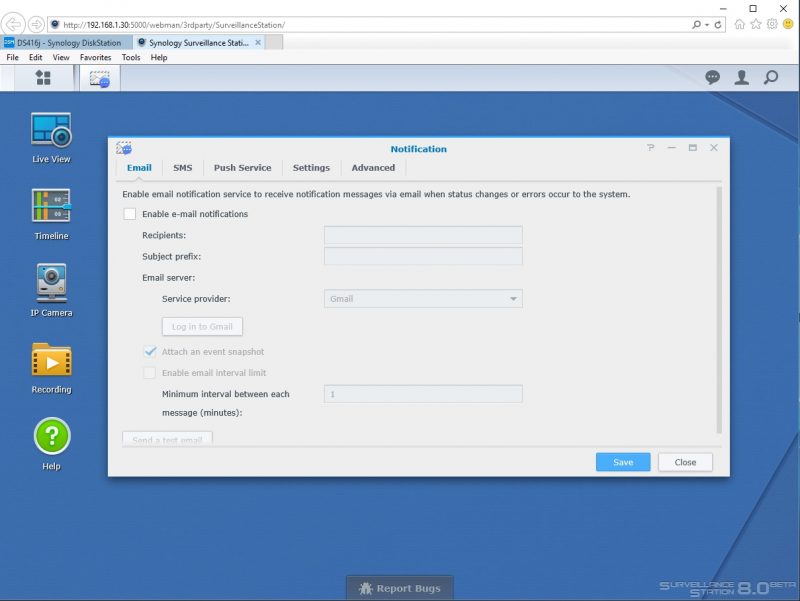
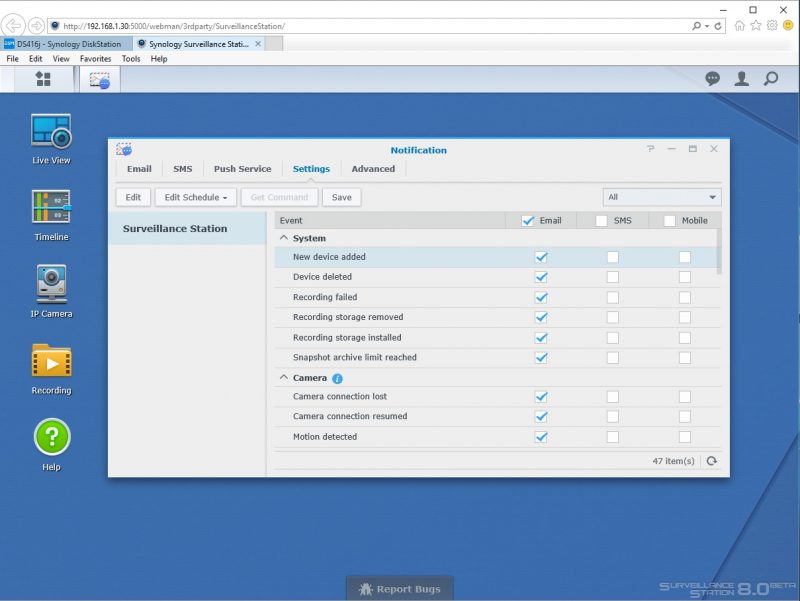
Alerts can be sent to email, SMS and Mobile with additional options.
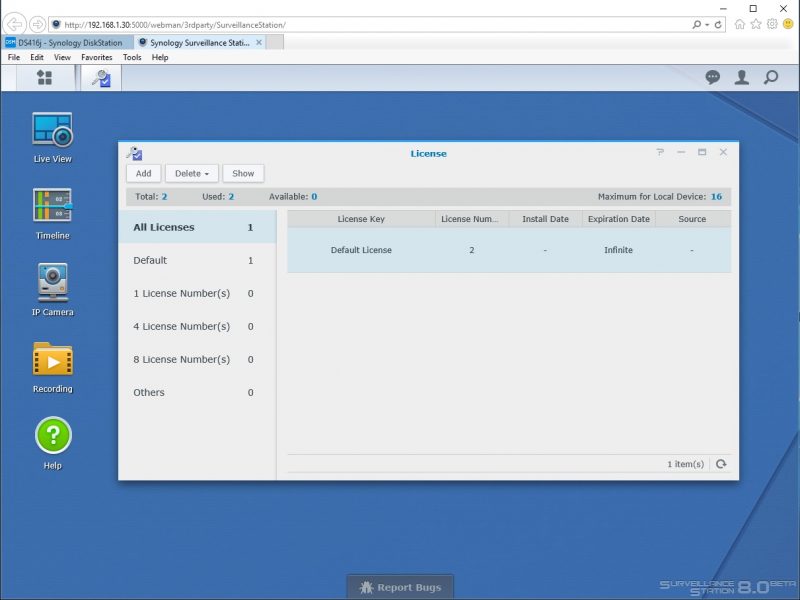
The Surveillance Station comes with a license that supports two cameras. If you need more than two Synology offers license packs for additional cameras. These packs sell for around $55 for one license and $200 for four.
Not only can alerts be sent to you by email, SMS or Mobile, triggered events can play audio to the camera that has a triggered event. The Surveillance Station 8 solution with Amcrest cameras is very easy to manage. While buying additional camera licenses is an additional cost, the ease of installation and use helps offset the cost with hours saved.
Now we have configured our DS416j and our cameras all up and running, let’s move on to performance testing.
Synology DS416j 4 Bay NAS Performance
Our Synology DS416j can be setup to run in seven different configurations, SHR, JBOD, RAID 0, 1, 5, 6, 10 if it is equipped with four drives. For our testing our sample NAS which only came equipped with two Seagate IronWolf 2TB hard drives we will use the default RAID configuration of SHR.
The performance benchmarks we will use are Intel NAS Performance Toolkit and ATTO Disk Benchmark
Our network consists of a Quanta LB4M 10Gb Uplink Switch that connects our DS416j to our workstation. This is not a consumer switch, however, it was a very popular 1GbE/ 10GbE switch for large cloud providers.
Intel NAS Performance Toolkit
The Intel NAS Performance Toolkit (Intel NASPT) is a file system exerciser and analysis tool designed to enable performance comparisons between network-attached storage (NAS) devices.
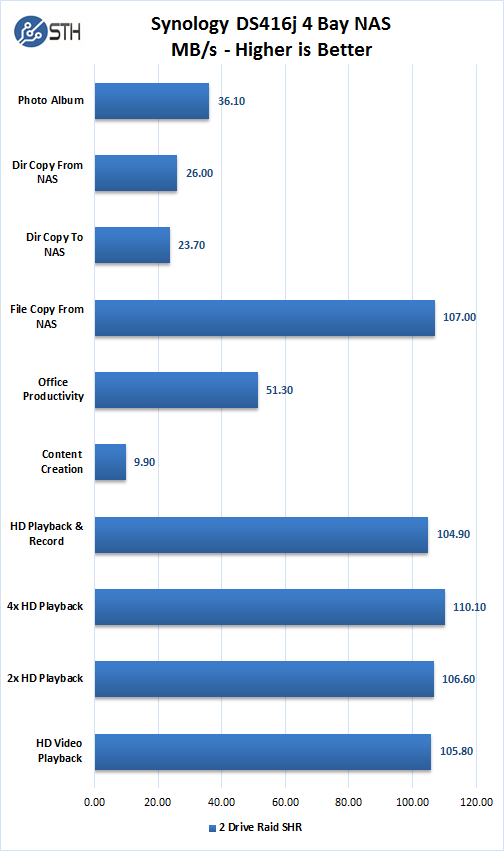
With two drives installed in our DS416j and using RAID SHR we see performance slightly better than the DS216J we reviewed earlier. The processor in the DS41j is Marvell Armada 388 Dual Core which is the next step up from the DS216j’s Marvell Armada 385.
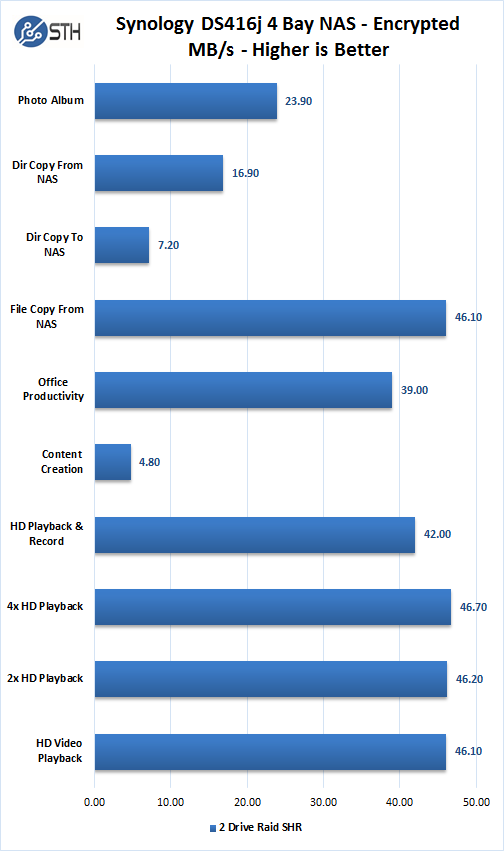
Encrypting the Surveillance folder does impact performance a great deal, but it did not affect our video capturing ability.
ATTO Disk Benchmark
ATTO Disk Benchmark identifies performance in hard drives, flash drives, RAID arrays as well as the host connection to attached storage.

Synology DS416j SHR results which show good performance and reaching 110 MB/sec sustained Write, and 107 MB/sec Read transfer rates.
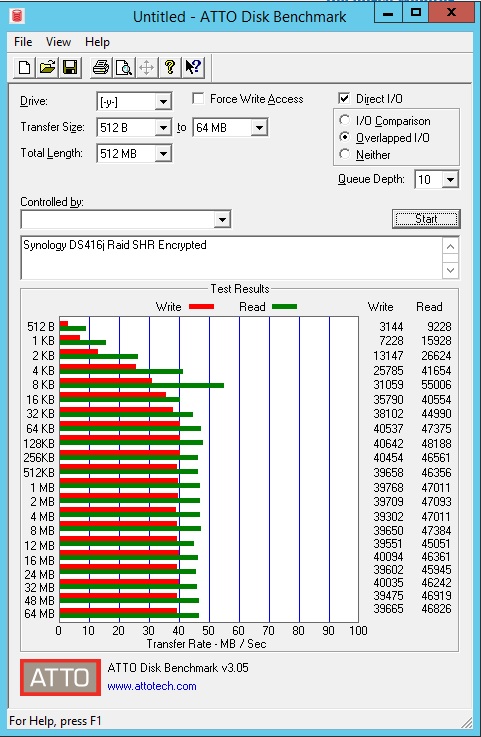
Encrypted performance drops accordingly to 40 MB/sec Writes and 48 MB/sec Reads.
The next test we wanted to do was see just how much hard drive space a full 24-hour nonstop capture would take up using both cameras.
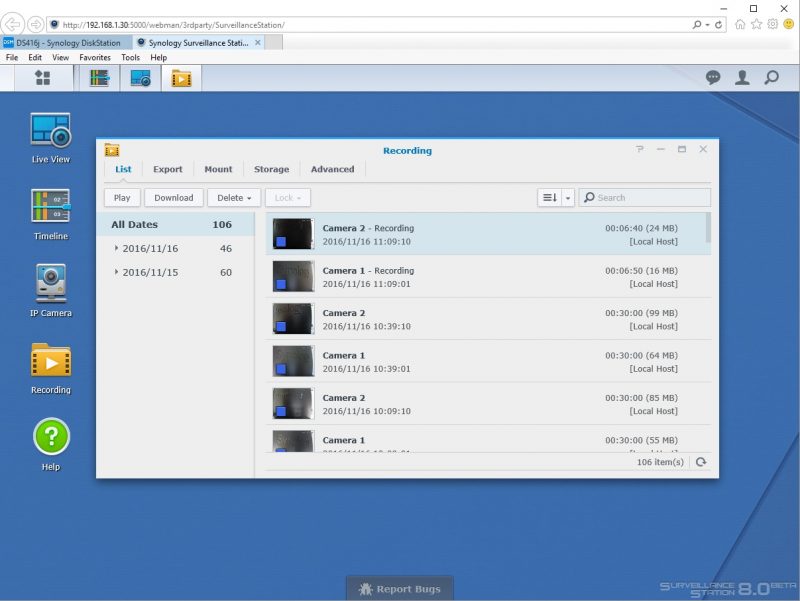
When running captures for this length of time, we can find under the Recording Icon and list of videos captured by each camera. These are broken down into 30-minute segments. You can also view each of these segments by clicking on the desired timeframe.
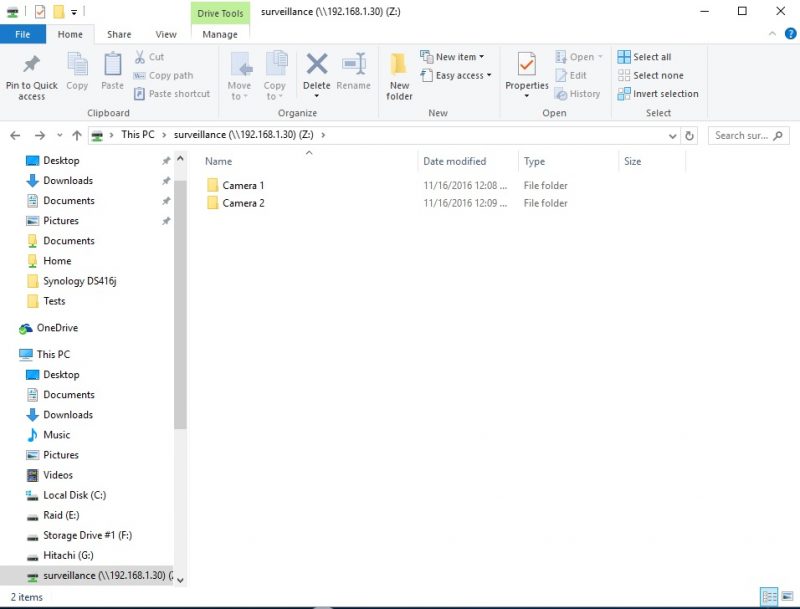
On our workstation, we network mounted our Surveillance folder on the DS416j, in this folder we see one folder for each camera, folders labeled by the name you assigned for the camera.
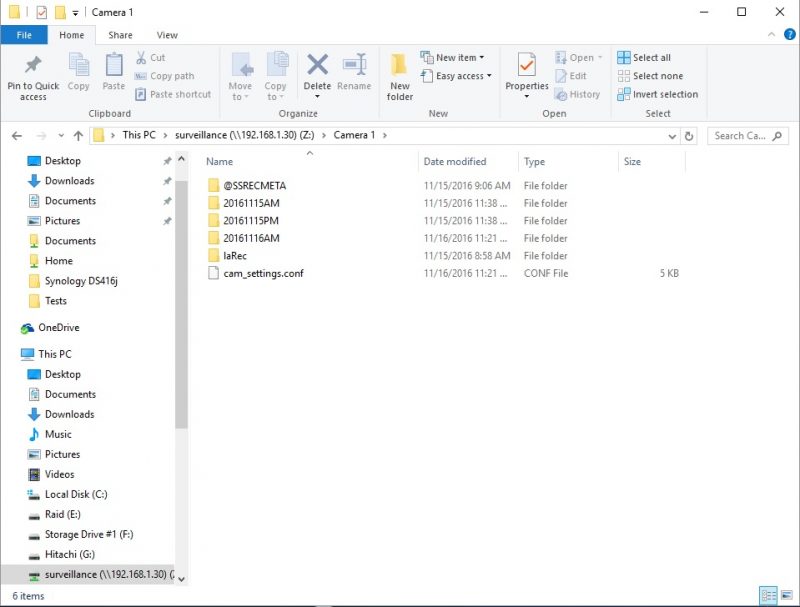
Inside a folder, we find subfolders labeled by date and time.

Further drilling down into these folders, we find the actual video files; these are broken down into 30-minute segments. You can view these here also by using your Windows media player. This organization makes it easy to find video captures if a need to review footage arises.
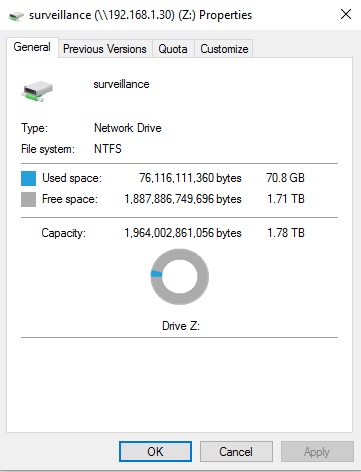
In our test case, we see for a 24-hour period we captured 70.8GB of video files. Depending on your camera settings you might end up with more or less disk space used. Our settings were the defaults, so we consider this an average amount of disk space.
With our setup of two 2TB drives and a usable disk space of 1.78 TB, we would be able to capture 25 days of non-stop capture. To extend capture storage space, set up the system only to record by triggered events. An example might be the camera is pointing down your walkway outside your front door; a trigger event might be when someone walks up to your door, and it records for a length of time then stops. Your videos would then be much smaller and easy to find events that happen. One can also use much larger drives and get ten times the storage.
Power Test
For our power testing needs, we use a Yokogawa WT310 power meter which can feed its data through a USB cable to another machine where we can capture the test results.
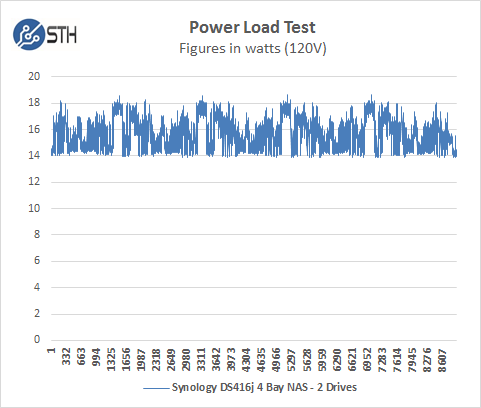
The DS416j with two drives idles at around 13.872watts and under max load during our tests we saw a peak of 18.672 watts.
In addition to all the features, we have just shown there are also apps you can download for your cell phone to control and check your Synology DS416j NAS. We use a Samsung Galaxy Note 4 so we entered the Google Play Store and searched for Synology and found a list of apps that we can use.
We downloaded and installed DS Cam on our Note 4.
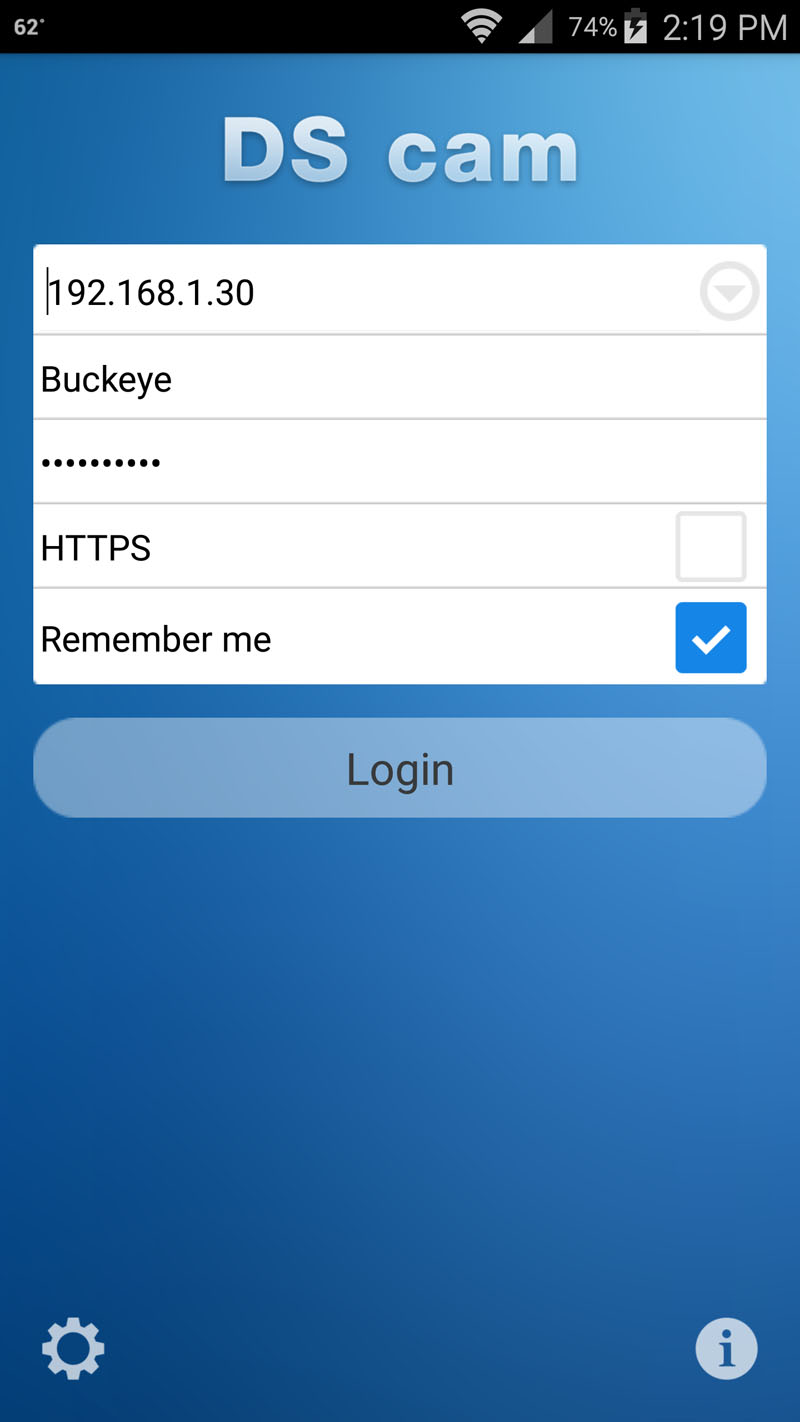
With DS Cam you can log in to your DS416j using your local network, or if you are away, you can use your QuickConnect ID.
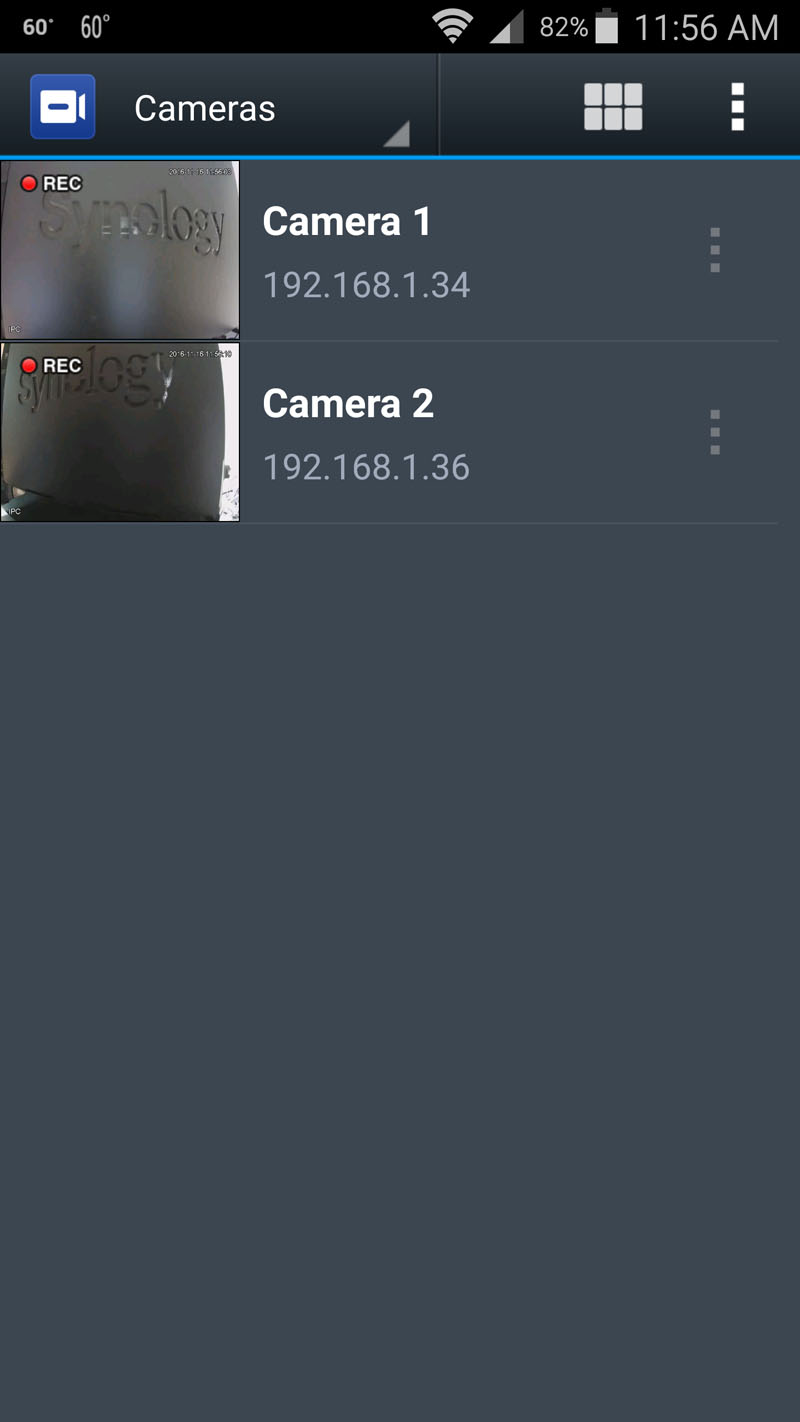
After you log in, you will get a list of your connected cameras.
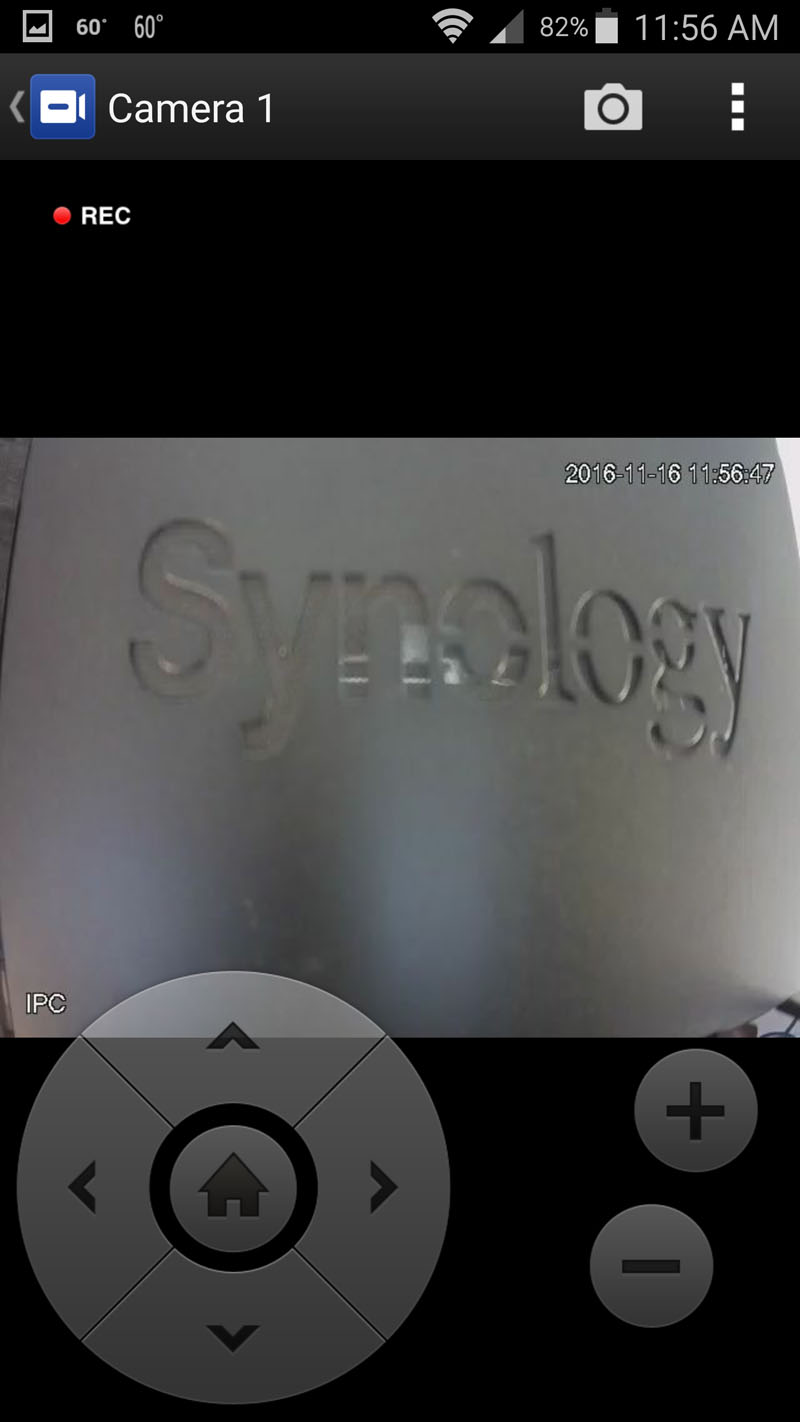
Pressing on one of the cameras gives you the ability to view, pan, zoom and talk over your camera. After you get an alert that an event caused a trigger, bring up your camera and see what is going on, you can even speak through your phone to warn off any intruders or talk with whoever might be there.
Conclusion
The DS416j is our third Synology NAS we have reviewed in the last two-quarters; this one has an improved processor over the 2-Bay DS216j we reviewed earlier so it can better handle four drives in the DS416j.
Although most Synology NAS offerings can be set up as a Surveillance Station, the DS416j offers a good value for home surveillance use. Bundled with two cameras it is easy to setup in a few minutes. The NAS box itself has an industrial look to it so this model and might not be your best choice for a NAS solution that sits next to your media center. Like the DS216j the hard drives are not accessible from the front which offers better security and keeps drives from being unplugged and taken away without consent.
With the same choices of plugins as most Synology NAS offerings, the DS416j can fill many different roles and has the power to handle two cameras in a surveillance station mode. We did transfer files back and forth while we captured two cameras during our 24-hour capture tests and everything went just fine. With just two 2TB drives in our unit we still have plenty of capacity for file/movie storage, mixing capture and file storage duties would just limit one or the others storage abilities. With 25 days of estimated 24-hour non-stop capture, this a relatively long time for our two drive setup. Expanding the unit to four drives increases the DS416j capabilities a great deal.
The Amcrest 1080P PAN/TILT WI-FI Pro/HD Cameras were fantastic; video quality was quite good even on our 4K workstation display. The abundant control options and settings can take a while to go through and decide just what you need and don’t, but with default settings they are quick to setup and use.
Our focus on this review was a Synology Surveillance Station using the new Surveillance Station Beta 8.0. There are a fair amount of steps to go through to get it all up and running. The process was simple even for a first time user of the software. Once up and running, it was very simple to go through the settings, try out things and settle in on what was necessary for our use. In a home setup, it could be used to monitor the baby’s room with a tablet at your side or keep an eye on who’s at the front door while you are tied up at the other end of the house. If something is out of order at the front door, you can speak to whoever might be there, even warn them off if they are doing something suspicious. While away alerts can notify you and with QuickConnect you can log in and check things out, even use audio.
Small business can use this for monitoring back doors, inventory, cash registers and other places that you need to watch. With the DS416j you can use two cameras out of the box, it does have a maximum capacity of 16 cameras with extra licenses. For more critical needs there is Evidence Integrity Authenticator; a Windows/Mac application that validates and confirms that the recordings and screenshots made by Synology Surveillance Station have not been tampered with since its original recording. Other than approve the recordings’ embedded digital signature, this tool also displays the exact recording time and DiskStation serial number.
Overall the Synology, Amcrest and Seagate Surveillance Station bundle is extremely powerful and easy to use.


During recording, what was the typical CPU load and memory usage on the DS416j? Were the file transfers able to still hit 100+MB/s while recording?
Comments are closed.