
Although the Supermicro C7X99-OCE motherboard has been out for some time now, this is our first look at this motherboard. We had an interest in a single socket workstation setup and decided to use this motherboard for our first Windows 10 testing. The C7X99-OCE is a single socket LGA2011-3 motherboard based on the X99 chipset. As for single-CPU sockets available now, the Intel X99 chipset is the high-end platform. Supermicro is making a more aggressive push into the consumer and overclocking segments and the C7X99-OCE comes from the higher end of those efforts.

Supermicro C7X99-OCE Key Features
- Single socket R3 (LGA 2011) supports Intel 4th gen. Core i7 series, Xeon processor E5-2600 v3, E5-1600 v3
- Intel X99 chipset
- Up to 64GB non-ECC UDIMM DDR4, frequency up to 3300MHz (OC); 8x DIMM slots
- 4x PCIe 3.0 x16 (run at 16/16/NA/8 or 16/8/8/8), 2 PCeE 2.0 x1 (in x4)
- Intel i210-AT dual port GbE LAN
- 10x SATA3 (6Gbps)
- 1x COM, 1x TPM, 8x USB 3.0 ports (6 rear + 2 via header)
- HD Audio 7.1 channel connector by Realtek ALC1150
- Supports 2/3/4-Ways NVIDIA SLI
- ATX form factor 12” x 9.6” (30.5cm x 24.4cm)
Many of the features of the motherboard are targeted for gamers with SLI and Overclocking abilities which this board should be more than capable to fit into this market segment. We also feel this board makes a capable workstation motherboard with server quality components used in the build and this is how we will be reviewing this board today.
Close look at the Supermicro C7X99-OCE
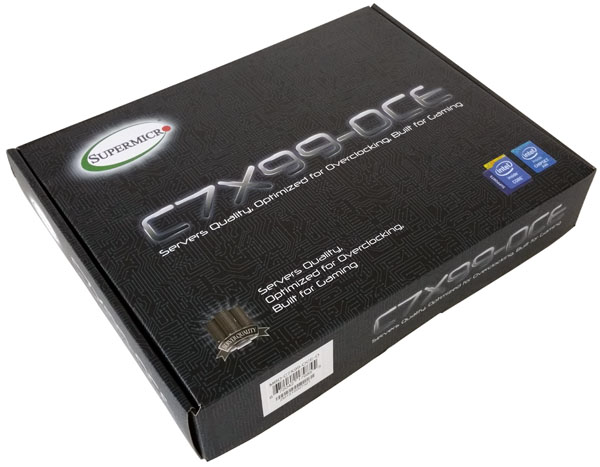
Lets start off this review by taking a look at the retail package.
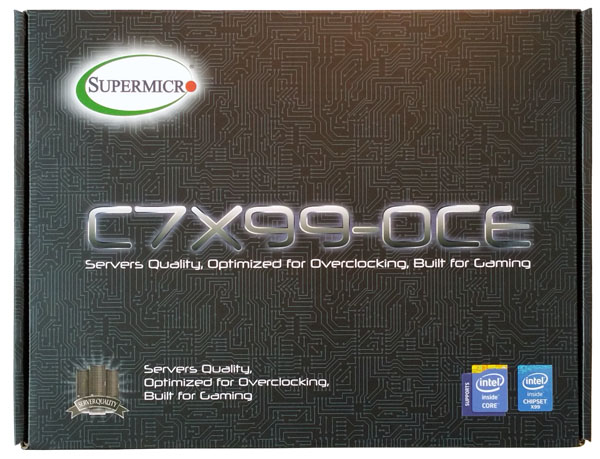
Normally when looking at Supermicro retail boxes we find the same box used with just about every board with only a label to let you know what is inside. In the case of the C7X99-OCE, Supermicro came up with a differentiated look that will help it stand out on a retail shelf. We also see on the front three main selling points of the C7X99-OCE, “Server Quality components, Optimized for Overclocking and Built for Gaming.”
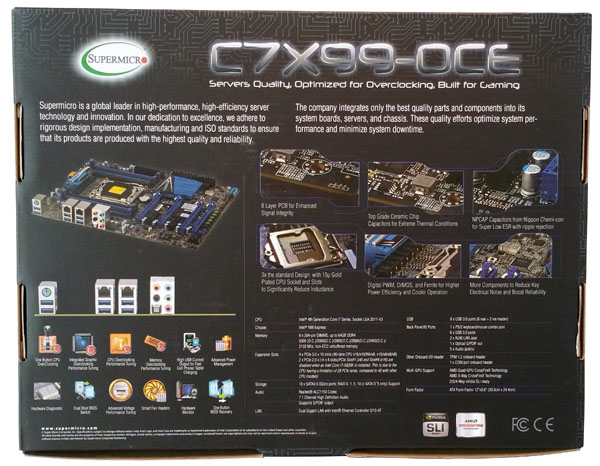
The back of the box shows off the key features of the C7X99-OCE.
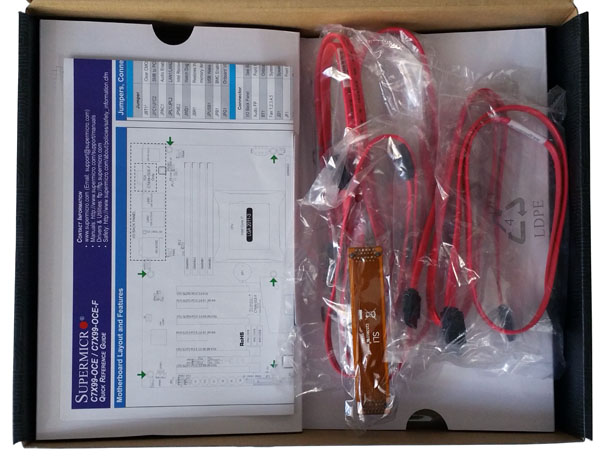
After opening the box we see the contents in the initial partition. Included is a nice quick reference sheet that goes over motherboard installation and features.
The accessory content of the retail box is what we consider bare minimum.
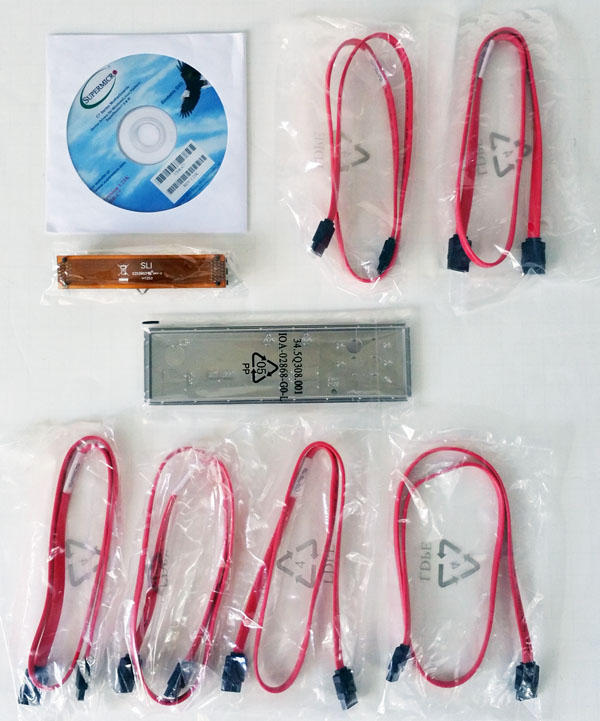
You get a driver DVD, SLI bridge, IO back plate and 6x red SATA cables. These are the same SATA cables we normally see in Supermicro server and higher-end workstation motherboards.
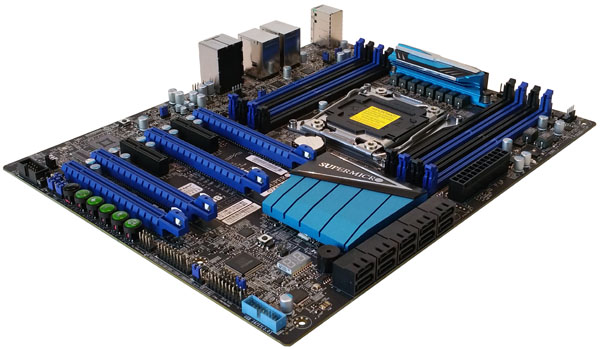
The motherboard itself is black which is unusual for a Supermicro board that are normally green. Following the new color scheme we see blue and black PCIe and memory slots and high tech looking heat sinks that are not overly large.
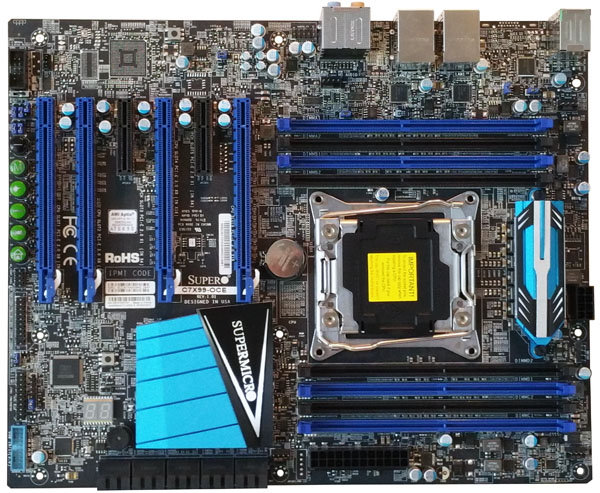
Overall the C7X99-OCE is a nice looking motherboard that would look very good in a case with clear windows which is what many gamers like. We also like the addition of the POST code LED’s at the lower left, this is a handy feature to help trouble shoot startup issues and has become very common to see on motherboards.
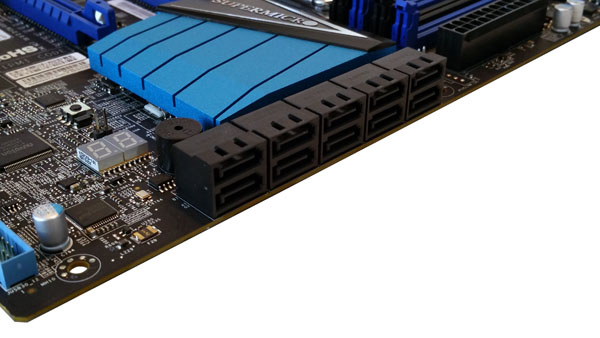
The storage ports include 10x SATA 3.0 ports that are supported by the Intel X99 PCH chipset. Raid 0, 1, 5, 10 are supported on the I-SATA ports 0-5 located on the bottom row.

Looking at the PCIe slots we see 4x (blue) PCI Express 3.0 x16, running at 16/16/0/8 or 16/8/8/8. The remaining two PCIe slots (black) are PCI Express 2.0 x1 (in x4).
The rear IO ports are PS/2 Keyboard/Mouse port with 2x USB 3.0 ports. The next are 4x USB 3.0 ports and 2x Gb LAN Ports and the last stack is the HD Audio ports.
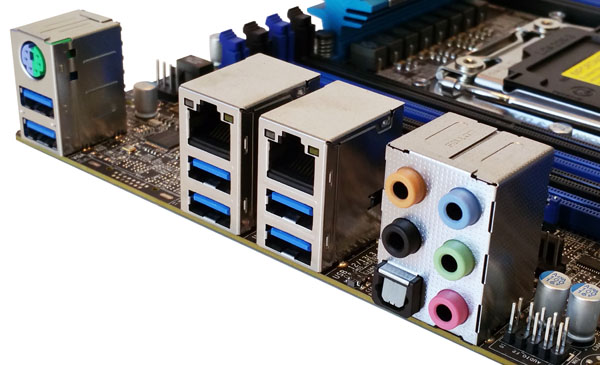
To note that on model C7C99-OCE-F there is a VGA port located in the space between the PS/2 stack and the USB/LAN port stack. On this model the first LAN port is also a shared IPMI port.
Directly behind the VRM Heat sink is the 8-PIN CPU power connector. Inserting the power connector is straight forward, the only issue we saw was the release lever faces towards the heat sink.

This was not difficult to access but could be difficult with stiffer power cables. We would like to see this rotated so the locking tang faces the outside edge of the motherboard.
One of the main features we like about the C7X99-OCE is the Over-Clocking Management Buttons which we see here.
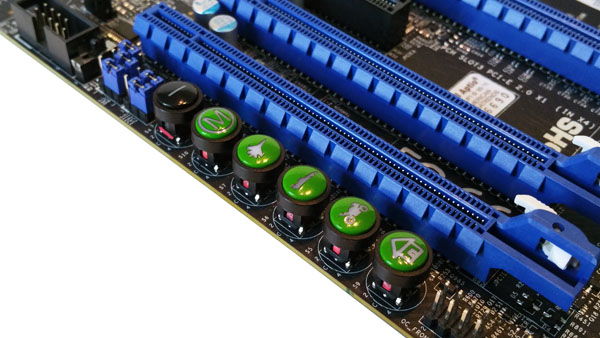
These are listed from back to front.
- Power Button
- Memory Overclocking – what the user sets in the BIOS
- Over-Clock Button 1 (Jet Symbol) – 15% Over-Clock
- Over-Clock Button 2 (Race Car Symbol) – 20-25% Over-Clock
- Over-Clock Button 3 (Motor Cycle Symbol) – User defined Over-Clock (OC3) set in the BIOS
- Reset to Default (Home Symbol) – No Over-Clock
Driver DVD
Included with the C7X99-OCE is a driver DVD. All of the required drivers can be found on this DVD.
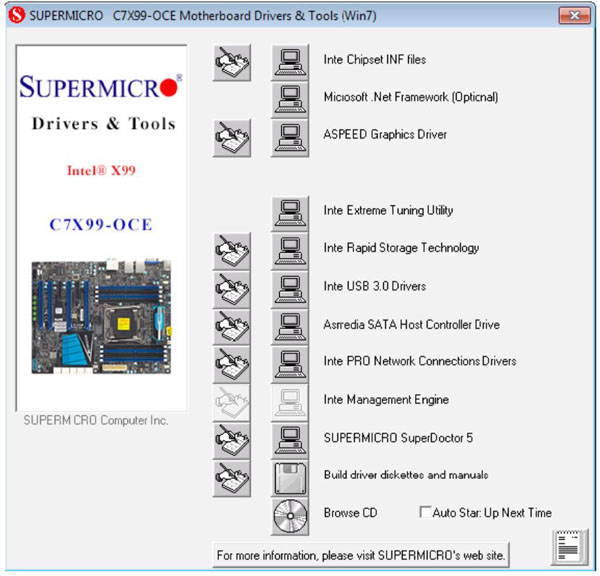
Just to note, when using Windows 8.1 and 10 we had to manually install all drivers by going to the Device Manager and selecting each device to manual update or opening up the disk and finding the needed driver installer.
For the most part, during the install process, Win 8.1 and 10 installed everything we needed so there was no need to use the Driver DVD. However this disk includes utilities such as SuperDoctor and others. We do suggest using the DVD to install drivers that may not match up well with what Windows installed, or head over to Supermicro’s website and download the latest drivers for a more complete OS setup.
BIOS
On startup press the “Delete” key to enter the BIOS. Here we see the C7X99-OCE UEFI BIOS home screen. This is the first Supermicro UEFI graphics BIOS screen we have seen and so far we like it very much. For the most part all the options are self-explanatory, we also see the Over-Clocking Button and an Expert Mode Button at the top.
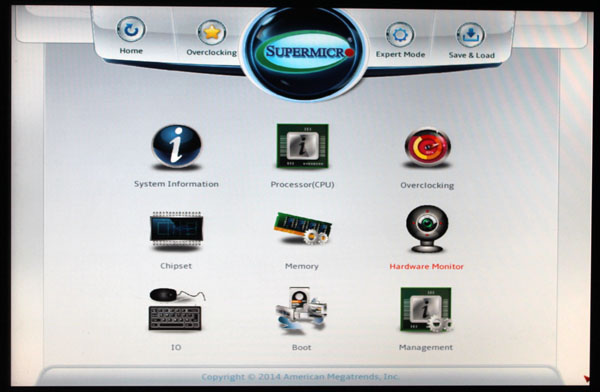
While inside sections like Overclocking and pressing the Expert Mode Button additional advanced options will appear. These will allow you to have more control on different settings. We did note that while in the BIOS our mouse pointer did move slow, we would like to see the mouse pointer speed increased in future BIOS updates.
Overclocking
Overclocking the C7X99-OCE using its pre-defined settings is rather easy to do. Enter the BIOS and press one of the buttons to achieve the desired Over-Clock, the system will reboot with the new settings and start to load the opterating system.
Again these are.
- Over-Clock Button 1 – 15% Over-Clock
- Over-Clock Button 2 – 20-25% Over-Clock
- Over-Clock Button 3 – User defined Over-Clock set in the BIOS
Our goal was to achive an Overclock of 4.0ghz using the predefined buttons and to achive this we used the Over-Clock Button #2 which as a Race Car symbol on it. We soon found our motherboard gving us the over heating warning beeps on startup.
We discovered after re-entering the BIOS that this OC Button had set the CPU Voltages too high.
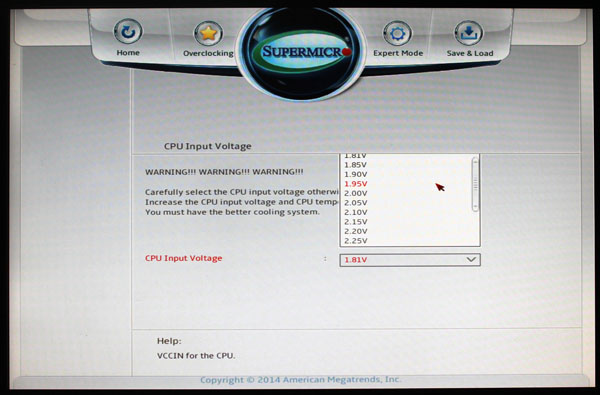
We brought up the CPU Input Voltage Menu and found the lowest setting that we could set was 1.81v which we feel is too high.
We then began to look for other means to lower the CPU Voltage. We found the needed CPU Voltage controls in the CPU Over-Clocking section and turning on the Expert Mode.
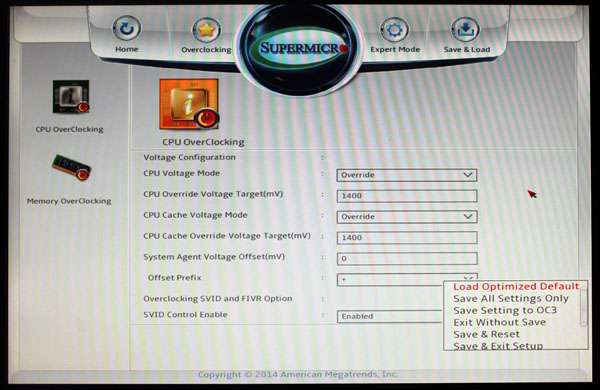
We see two settings we need to change. CPU Override Voltage and CPU Cache Override Voltage, both of these were set to 1400.
We adjusted these two settings to read 1300 then under Save & Load at the top we selected Save Settings to OC3 and then Save & Reset. When the system started up again we hit the Delete key to bring us into the BIOS. Now we pressed Over-Clock Button #3 which has a picture of a Motor Cycle on it. This rebooted the system to the new OC settings that we just defined for the OC3 button.
Now we did not receive any overheating beeps and the system was able to pass all our tests using these settings.
Note about Overclocking: Our testing used the built in OC settings and the one we used and adjusted could have additional fine tuning done to locate the lowest voltage setting. This is true for any Overclocks that are higher than this which we think this motherboard can do with ease. Better cooling like water cooling might be needed to go for an Overclock higher than what we used.
Test setup
For testing we used:
- CPU: Intel Core i7-5960x (8 core)
- Motherboard: C7X99-OCE
- Memory: Crucial 8x 16GB ECC RAM DDR4 (128GB Total)
- Cooling: Noctua NH-U9DX-i4 heat sink
- Storage: Micron P400e 200GB SSD
- GPU: Nvidia Quadro K5200
- OS: Windows 8.1 and Ubuntu 14
To note that Memory listed on Supermicro’s website is Up to 64GB non-ECC UDIMM DDR4, frequency up to 3300MHz (OC). We used Crucial 8x 16GB ECC DDR4 kits which gives us double the rated 64GB RAM limit and is ECC RAM. We had no issues with using these memory kits but they cannot be OC’d so we see the 2133MHz speed in the tests we ran.
AIDA64 Memory Test
AIDA64 memory bandwidth benchmarks (Memory Read, Memory Write, and Memory Copy) measure the maximum achievable memory data transfer bandwidth.
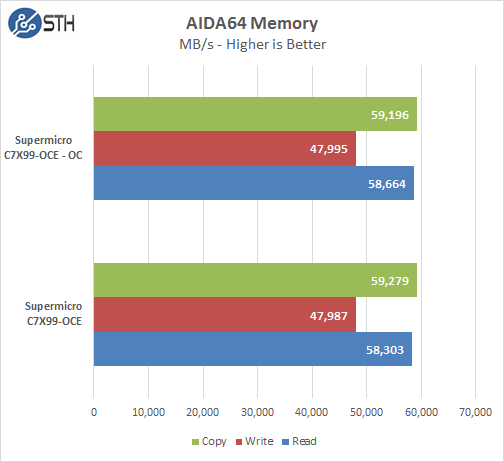
Memory Latency ranged at ~69.9ns and with 8x 16GB (128GB Total) DDR4 memory sticks installed we saw memory speeds of 2133MHz. We did not see any improvements in benchmarks when running the CPU in Overclocked state using the memory kits we selected for our tests.
Linux-Bench Test
We ran the motherboard through our standard Linux-Bench suite using Ubuntu as our Linux distribution.
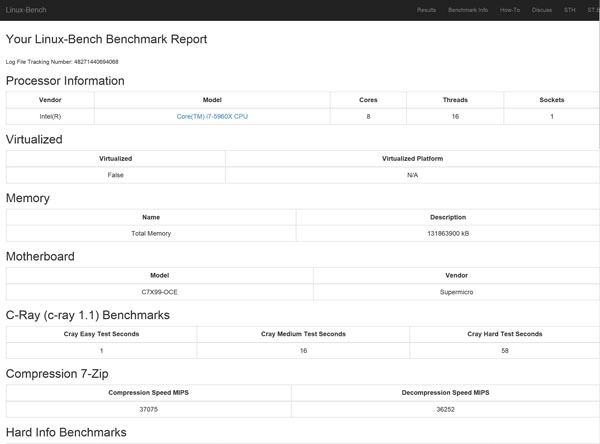
The example test results for our Linux-Bench run can be found here. Supermicro C7X99-OCE Linux-Bench Results and Supermicro C7X99-OCE Overclocked Linux-Bench Results
SPECwpc
SPECwpc_v1.0.2 is a workstation benchmark that measures key aspects of workstation applications.
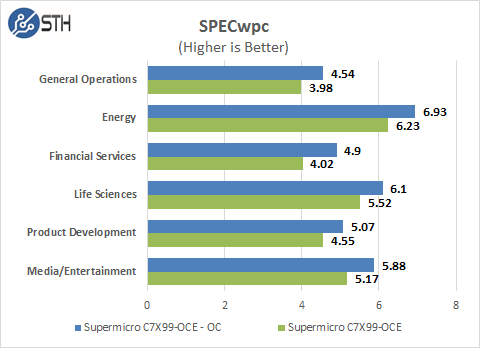
SPECwpc results can vary by a large amount depending on the GPU and Storage drives used. Several results can be boosted by using a higher end GPU. We ran this benchmark with default and Overclocked settings and we can see a good boost to scores using an CPU that can be Overclocked.
SPEC CPU2006
SPEC CPU2006v1.2 measures compute intensive performance across the system using realistic benchmarks to rate real performance.
In our testing with SPEC CPU2006 we use the basic commands to run these tests.
” Runspec –tune=base –config=servethehome.cfg ,” then ” int ,” or ” fp .”
To do multi-threaded, we add in ” –rate=16.”
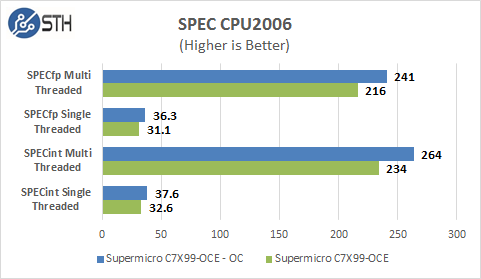
Our CPU2006 test results are also impressive for a system like this. Single threaded results are a bit faster than a dual CPU system we normally run in the Lab, after Overclocking the system we see a large boost to scores.
Power Tests
For our power testing needs we use a Yokogawa WT310 power meter which can feed its data through a USB cable to another machine where we can capture the test results. We then use AIDA64 Stress test to load the system and measure max power loads.
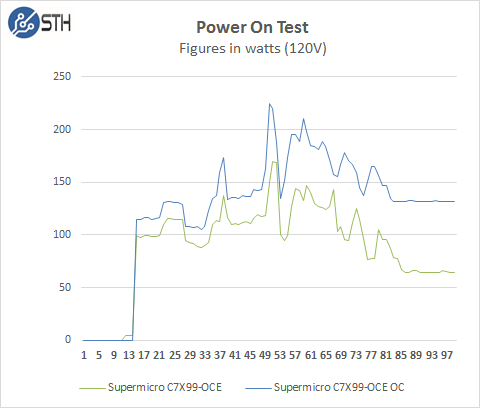
Boot up power use on single socket workstations is much lower than our Dual CPU rigs, we only see about 169watts at peak usage for our default BIOS tests, but at OC settings we see a boost of ~55watts more and peak use of 224watts on start up. Loading the system up with 3x GPU’s would also increase these numbers but the main thing to look at is the increase in power use when Overclocking.
Fully Loaded Stress Tests Power Use
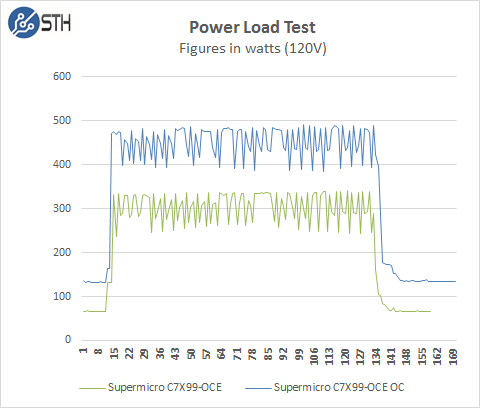
For our tests we use AIDA64 Stress test which allows us to stress all aspects of the system. At default BIOS settings we see ~333watts at max usage, but with the OC settings we jump up another 148watts to a peak of 481watts.
Conclusion
Single socket workstations that allow Overclocking allow for clear advantages in reducing compute times with faster CPU speeds. We only upped our Overclock to 4.0 GHz and used air cooling, switching out to a AIO water cooling setup or a more advanced WC system will allow for even higher Overclocks to push performance even higher.
In our testing we found the C7X99-OCE to perform very well and gave us a very responsive system that has more OC headroom available if you want to push the system more. Features like server quality components are just what we look for in workstation motherboards, they tend to be more reliable and last longer than enthusiast motherboards do and often we pay a premium for these parts. Looking at price points for the C7X99-OCE we find it in a very good position to offer a highly reliable workstation motherboard for high performance workstations.
The C7X99-OCE is also targeted at gamers and we feel it competes very good but does lack some features that are normally found in this segment, such as number of USB ports and the odd PCIe layout. None the less this board is more than capable in both gamer and workstation areas. It can still run 2x dual GPU graphics cards for Quad-SLI or 3x Single GPU’s for Tri-SLI and with CPU horse power to handle this GPU load out with an Overclocked Intel Core i7-5960x, it will rival many similar motherboards in performance.

We installed our C7X99-OCE in our Supermicro SC747BTQ-R1K62B 4U Server/Workstation chassis. For GPU’s we used a Nvidia Quadro K5200 for our video source and another K5000 and Tesla K40 for compute needs. Ok sure, two K40’s might have been better or even 2x K80’s and perhaps a new Quadro K6000, but we used what we had on hand. The PCIe slot layout are some what different than we see on other boards, for SLI setups which we think is the most common for gamers the first 2x PCIe (Blue) x16 would be used. This leaves the remaining 2x PCIe (Blue) x16 slots to be used for other things. These slots are single spaced so only a double wide card can be used or 2x single wide cards. This actually works out well if you want to use a PCIe SSD in the last slot which we did with a Intel P3700 PCIe SSD for our OS drive in some of our setups.
From here we decided to give Windows 10 a try and see how everything worked.
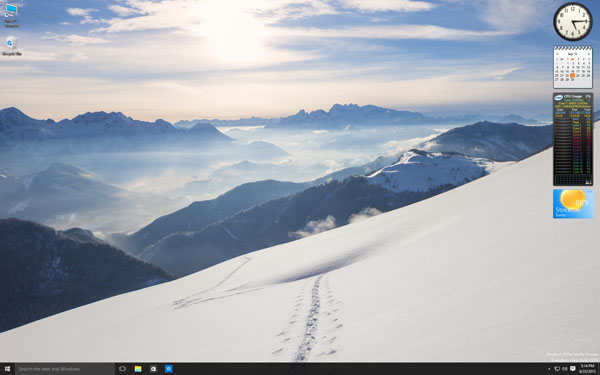
The Windows 10 install went very smoothly with no issues to speak of. After all that was complete we added 8GadgetPack for gadgets we like to use. There is also a Windows 10 version out for 8GadgetPack. We went to Nvidia’s website and downloaded the required drivers, installed them and soon had a very capable system up and running.
Is the C7X99-OCE ready for Windows 10? We say yes.
In closing we would like to add the C7X99-OCE is a very capable motherboard to build either a gaming system or high end workstation, it can perform in either role very well. We feel the BIOS could use a little more work but we think Supermicro has come up with an functional UEFI BIOS GUI that is easy to navigate and has all the features you will need to customize your system’s needs.
If your workstation needs IPMI and onboard video then the C7X99-OCE-F would be the board to get, these features are not found on many motherboards of this type and offers the use of all PCIe slots for compute only cards.


The lack of an Ultra m.2 is a major turn off at that price point.