
As we move on through our series of 2 Bay NAS reviews we come to the QNAP TS-251. The TS-251 is capable of handling small office or home office environments. It can take center stage as a media entertainment server with offline or online video transcoding which can output through an HDMI port right to your main viewing screen or TV. This is an extremely capable NAS loaded with features.

It offers typical NAS functions such as data backups, file transfer and synchronization, remote access and cloud features and solid performance that we will see in this review.
QNAP TurboNAS TS-251 – 2 Bay NAS Specifications
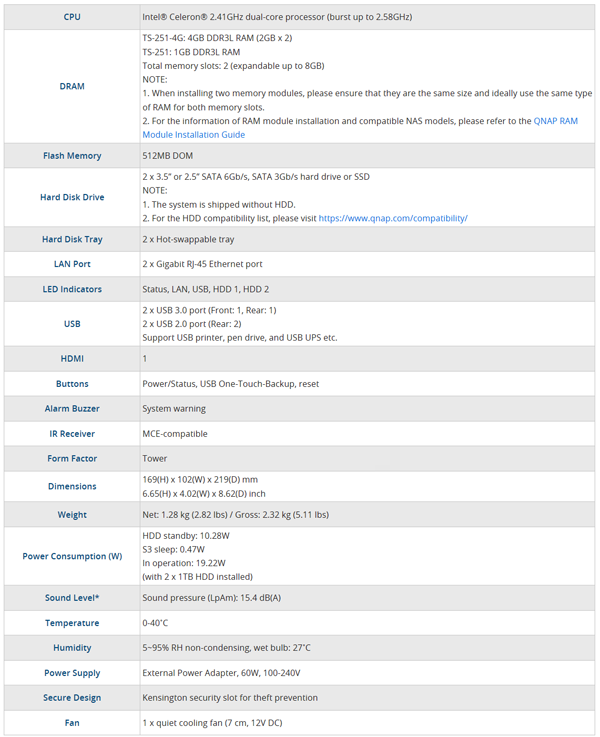
- CPU: Intel Celeron 2.41GHz dual-core processor (burst up to 2.58GHz)
- RAM: 1GB DDR3L RAM
- Number of Drives: 2
- Drive Interface: SATA 3, 6 Gbps
- Maximum Internal Raw Capacity: 20 TB (10 TB HDD x 2) (Capacity may vary by RAID types)
- Maximum Single Volume Size: 10 TB Supported RAID: 0/1/JBOD (Individual Disks)
- Dimensions: (Height x Width x Depth): 169 mm x 102 mm x 219 mm
- Weight: 5.11 lbs. with drives / 2.82 lbs. empty
- Power Consumption: Max 60W
- Power Supply: External AC 100-240V Universal, 50/60Hz
QNAP TS-251 – 2 Bay NAS Overview
When we received our QNAP TS-251 from Amazon.com (cost us around $250)

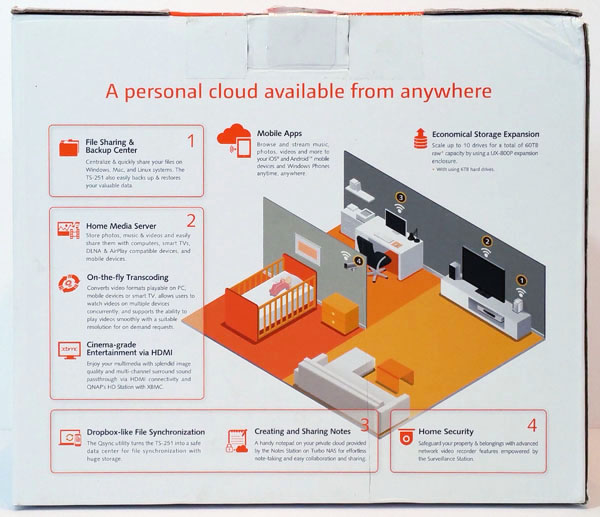
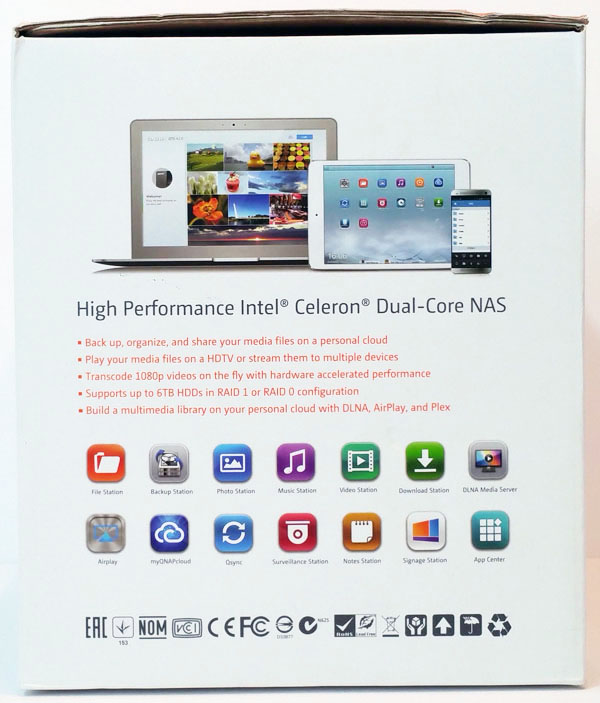
The front and back of the retail box gives you the rundown of the capabilities of the TS-251 which comes with an Intel Celeron 2.41 GHz dual-core processor that can burst speed up to 2.58 GHz. Most low-end 2-bay NAS units utilize some sort of ARM SoC. For example, we saw in a recent Buffalo 2-bay NAS review that the Marvell Armada SoC could not saturate a 1GbE network connection. We expect the QNAP unit to perform much better.
The side gives an overview of supplied applications that come with the TS-251 and more specifications are listed.
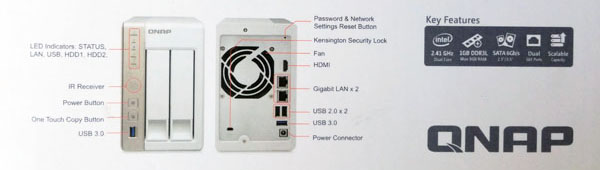
The left side gives us an overview of ports available, buttons and status LED’s and a key feature list. Our QNAP TS-251 came equipped with 1GB DDR3L memory and dual 1 GbE Ports.

After opening the box, we get a nice Thank You from QNAP and pictures showing the contents of the retail box. There are also support resources listed using QR codes.
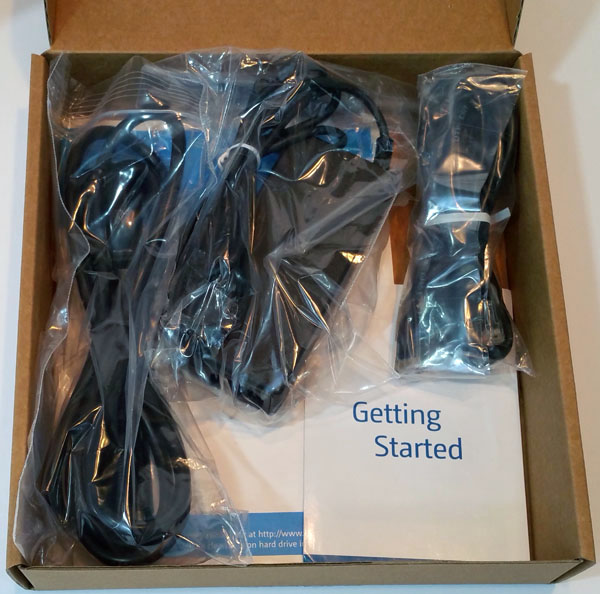
Accessories included with the QNAP TurboNAS TS-251 include
- QNAP TS-251 diskless enclosure
- Quick Installation Guide and Getting Started Pamptlet
- 2x Ethernet Cables
- AC Adapter and Power Cord
- Two sets of mounting screw packages are included, 6x screws for 2.5” drives and 8x screws for 3.5” drives.
The TS-251 itself is also wrapped in plastic and padded with foam inserts that provide added protection.
QNAP TurboNAS TS-251 – 2 Bay NAS Installation
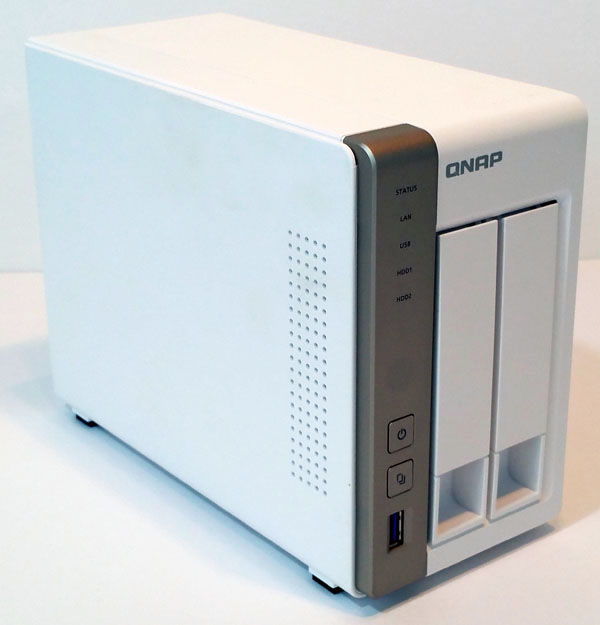
After removing the QNAP TS-251 from the retail box we can now take a look at the NAS. Here we see the front of the TS-251. Each of the drive bays can be access with slide in trays, easy access to the power button and other status LED’s are clearly visible. There is even a front USB 3.0 port for easy access.

The left side of the TS-251 is clean and includes air ventilation holes to help cool the unit.

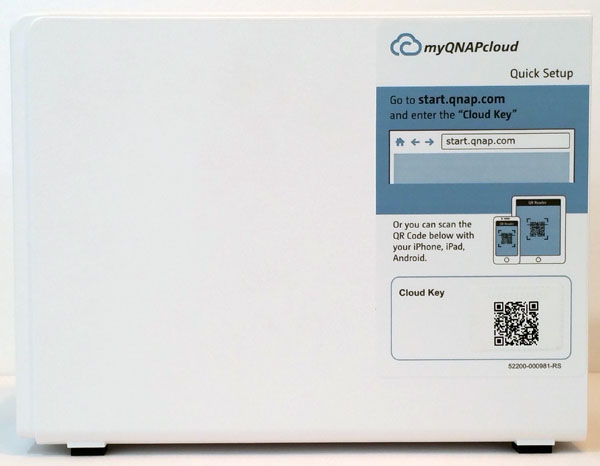
The right side has a large sticker which has your myQNAPcloud key if you wish to use this feature.
At the back of the TS-251 we see a large 7cm cooling fan which takes up most of the space. Two 1 Gigabit RJ-45 Ethernet ports and two USB 2.0 ports just below. With these two ports you can connect USB printers, UPS connections and also a keyboard and mouse when using the HD station. The blue USB 3.0 port can be used for expanding the capacity by attaching additional units with up to 8 more drives.
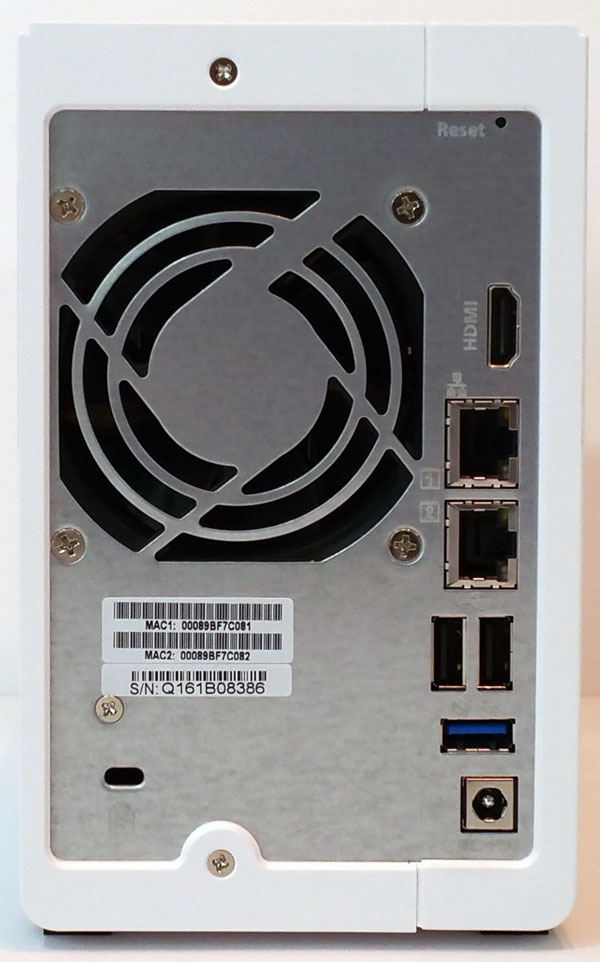
At the top the is a HDMI port, connecting a display to this port allows for media playback and running virtualization systems on.
We did like the fact that he MAC addresses were easy to locate on the unit. This can help when you need to find a unit on a network.
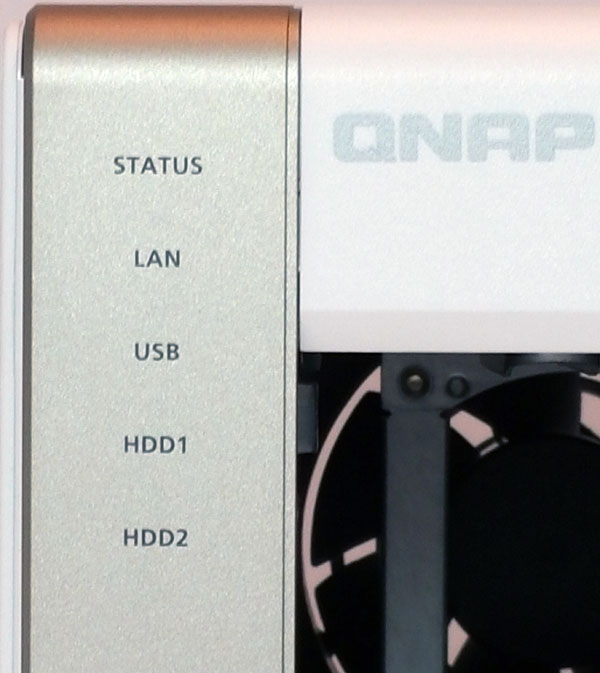
At the top left of the TS-251 we see typical LED status indicators for LAN, USB, and both drives.
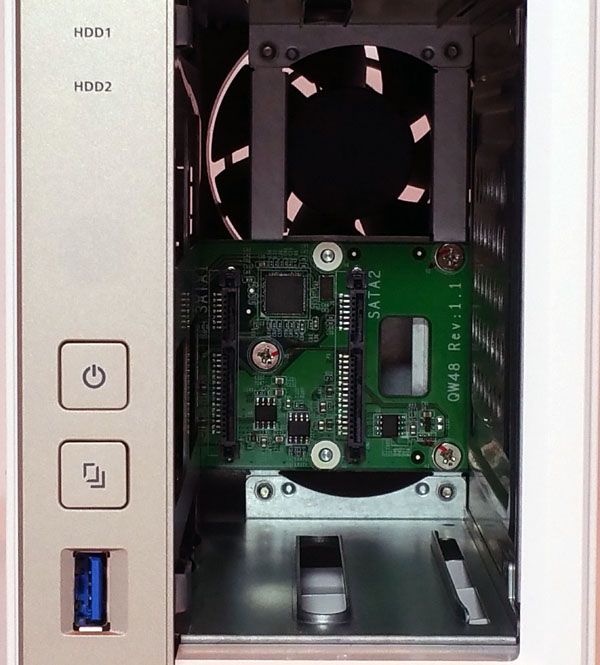
On the bottom left side of the unit we find the Power and One Touch Copy buttons with a USB 3.0 port. Just above these you can spot the IR Receiver which is a slightly gray circle. We also get a view of the PCB backplane that the drives connect to.
Let’s move on to installing the hard drives.

Installing the hard drive onto the drive trays is simple, four screws on the back side will secure the drive to the tray. We would have liked to have seen screw-less drive trays but those are more difficult in units designed to handle both 3.5″ and 2.5″ hard drives.
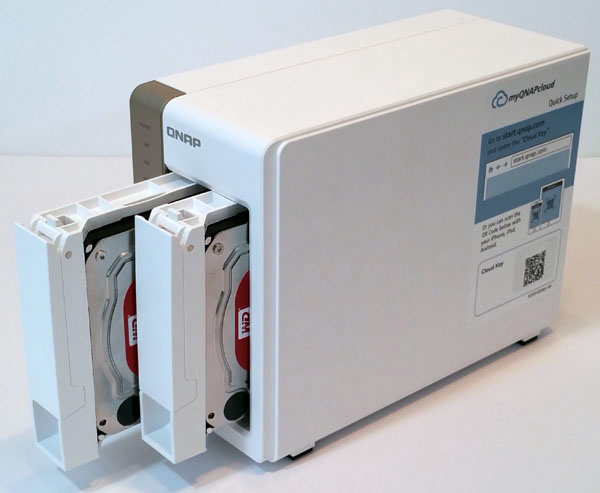
The drives simply insert into the TS-251 and lock into place. The drives do not have a key locking mechanism but rather an arm that keeps drives secure.
QNAP TS-251 – 2 Bay NAS Management
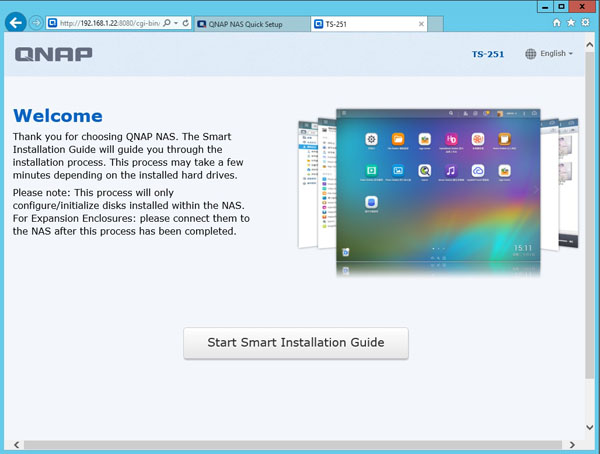
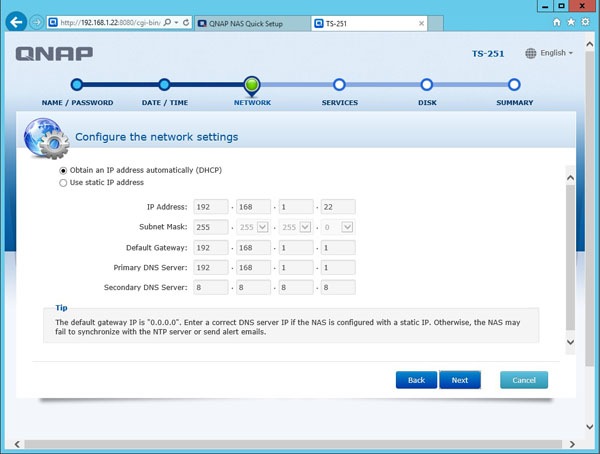
Connecting the QNAP TS-251 to our network and then turning the unit on we bring up our web browser and enter “start.qnap.com” and we see the first loading screen. This is just about the easiest way to get started with no client software to install (however there is optional client software that we will show.)

Here simply select the number of drive bays and the model number and select “Start Now”.

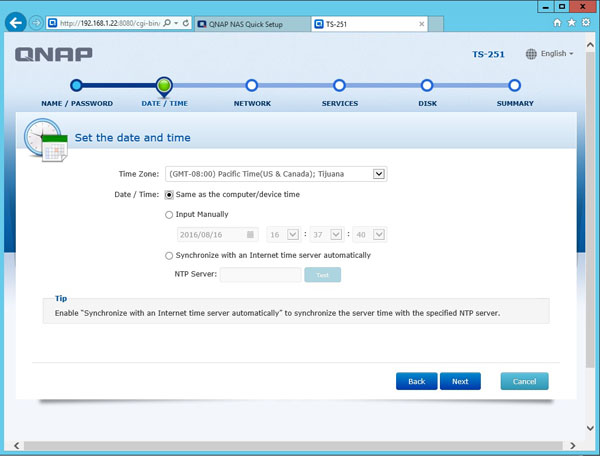
The next page is rather long and shows all the details about operating the TS-251. Hopefully you have already installed disks in the unit at this point.

The first step shows detailed instructions on how to install your hard drives. We have already completed step number one so we will move on to step two “Installing Firmware”.
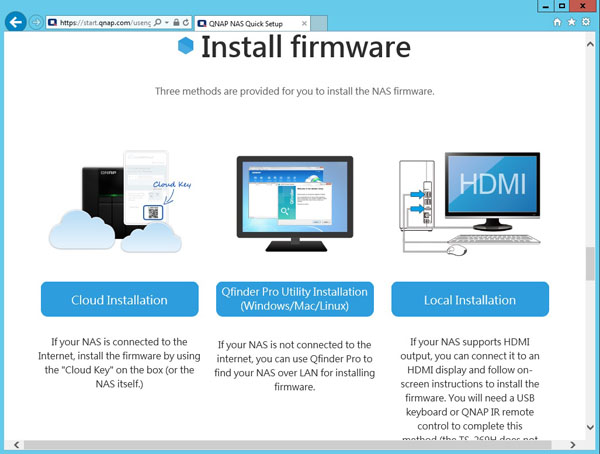
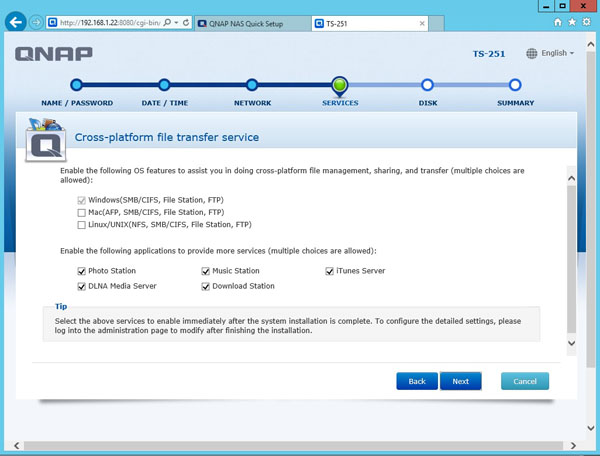
Here we have several options for Installing Firmware depending on how you want to use the TS-251. We went with the middle option to set everything up on our workstation.
With this step we need to download and install Qfinder Pro so we continue on with that.
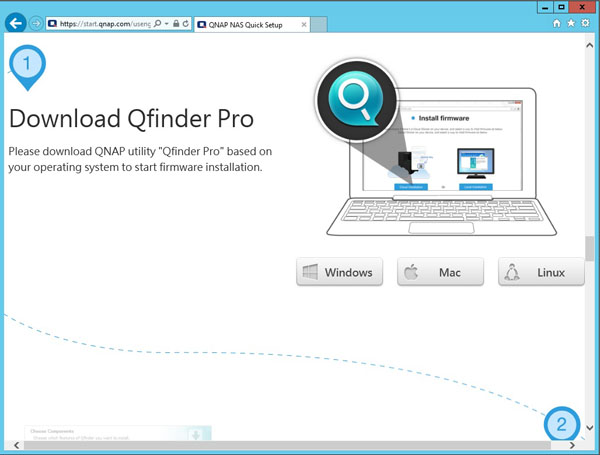
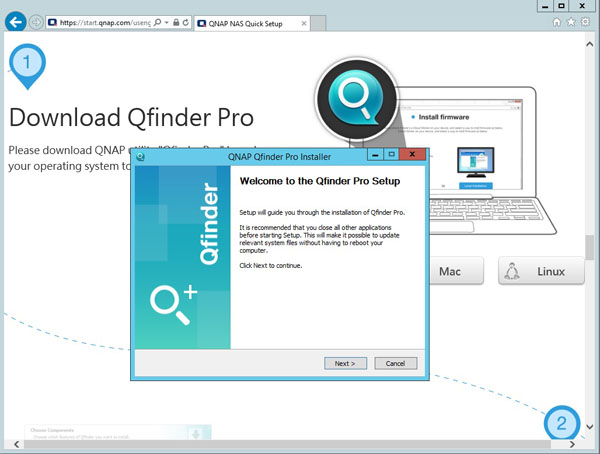
We selected the Windows download and proceeded with the installation.
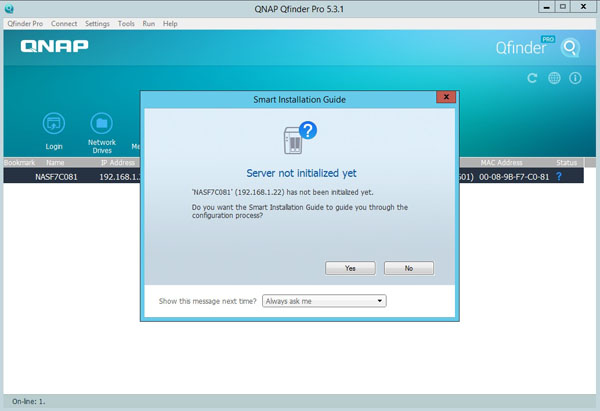
After Qfinder Pro was installed the next step is to initialize our NAS by selecting Yes.

Here we enter the password we will use for the admin account and continue on.
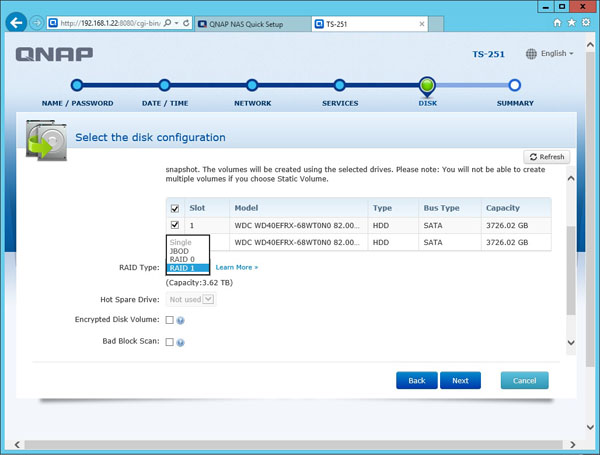
Here we can setup how we want the hard drives to be configured, JBOD, RAID 0 or RAID 1. If you do not know what you are doing, select RAID 1 as that will provide redundancy and protection against a single drive failure. Hard drives fail at approximately 5% per year so it is good to be prepared.

And we can confirm our settings before moving on and then selecting Apply to get it started.
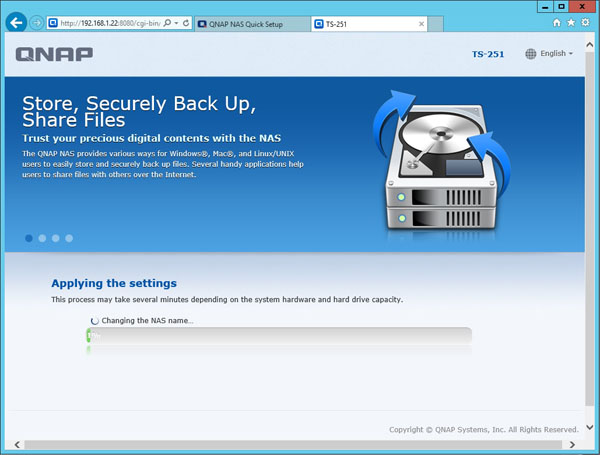
A few minutes later after the NAS has initialized we are presented with this screen and it states setup was successful. Now we can move on to the NAS Management screen.

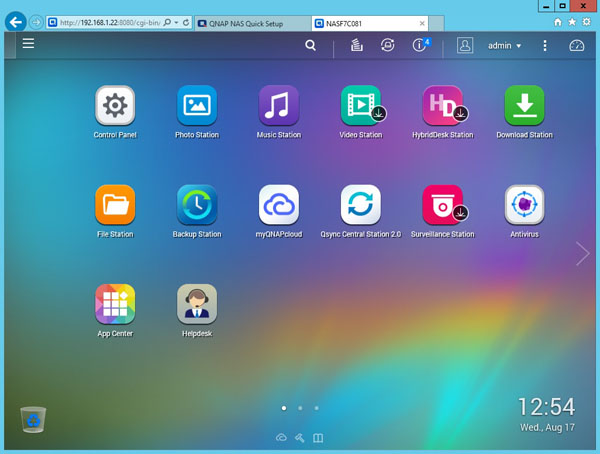
After logging into the management screen we can see the TS-251 management desktop. This is very similar to what we see even on QNAP’s higher-end data center NAS units. It is great that QNAP enables such a large feature set even on lower-end NAS units.
At the bottom of this screen we three small dots and then an arrow on the right hand side of the window. This shows that we actually have two more screens that we can use to make desktop shortcuts on, very much like how you would use your smartphone.
Desktop icons can be double clicked on to bring up apps or at the top left there is a small icon with three lines that bring up the control panel that allows apps to be run from these windows.

The top right of the menu bar has a Resource Monitor that shows details about the TS-251 while its running.

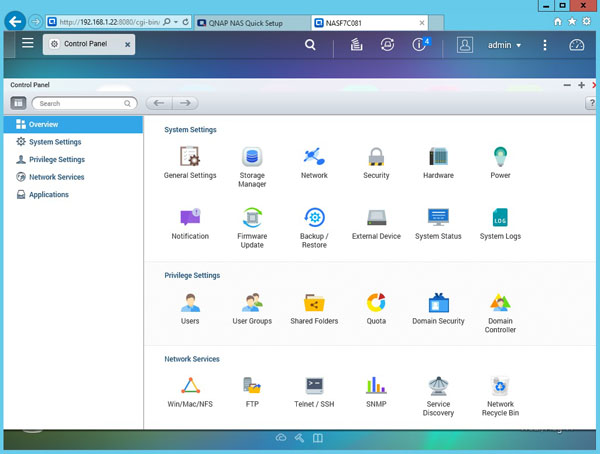
If you want to change the configuration of the NAS hard drives you can do so Storage Manager. There are no clunky CLIs to navigate, just simple graphical user interfaces that even a novice user can navigate with ease.
QNAP TS-251 – 2 Bay NAS Performance
Our QNAP TS-251 can be setup to run in three different configurations JBOD, Raid 0 and Raid 1. For our testing we will configure the TS-251 in each of these different Raid types and run our tests.
The performance benchmarks we will use are Intel NAS Performance Toolkit and ATTO Disk Benchmark. This is not the full test suite we run on larger rackmount systems, then again, these are not systems designed to deliver millions of IOPS in a data center. Instead, these systems are meant to provide file sharing, backup, media streaming and other features directly from
Our network consists of a Quanta LB4M 10GB Uplink Switch that connects our TS-251 to our workstation. This is not a consumer switch, however it was a very popular 1GbE/10GbE switch for large cloud providers. For hard drives we will be using two Western Digital 4TB Red NAS drives.
Intel NAS Performance Toolkit
The Intel NAS Performance Toolkit (Intel NASPT) is a file system exerciser and analysis tool designed to enable performance comparisons between network-attached storage (NAS) devices.
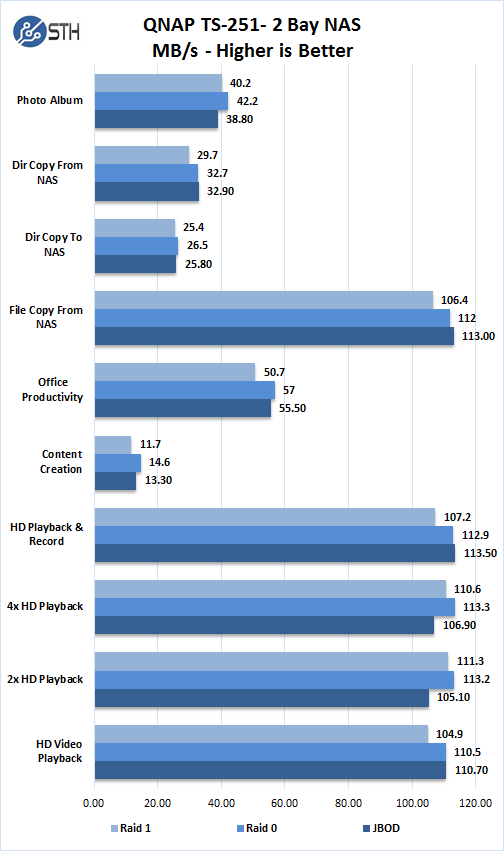
In each of the three different Raid configurations we notice the numbers are relatively close, the main consideration is how you want your data stored, with protection or not as the deciding factors. RAID 0 and JBOD modes do not offer protection against drive failures, RAID 0 gives the highest storage capacity. RAID 1 offers protection but halves the storage capacity and is slightly lower in performance.
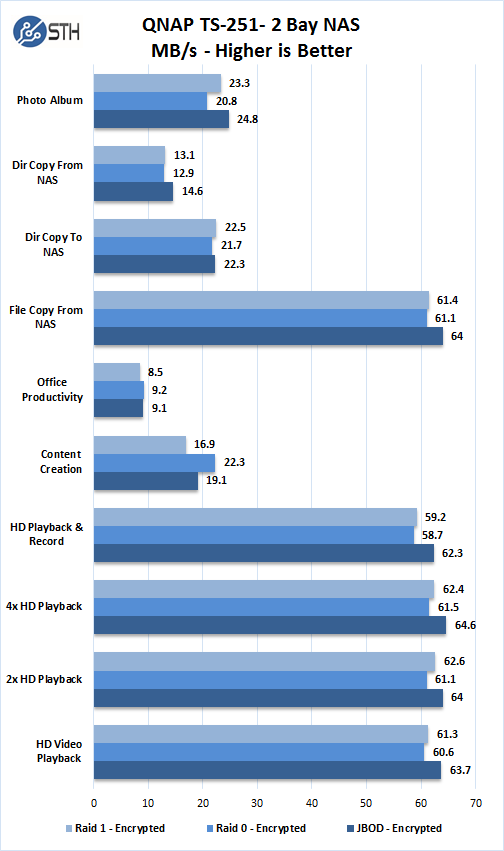
When setting up the storage options we also find Encrypted Disk Volume as an option for those who need extra security. We ran all our tests again with this option set. There is a performance hit when doing this which is about half of what you might see without encryption turned on. For environments where sensitive information is stored and there is a high risk of physical theft, we would suggest using encryption to protect your data.
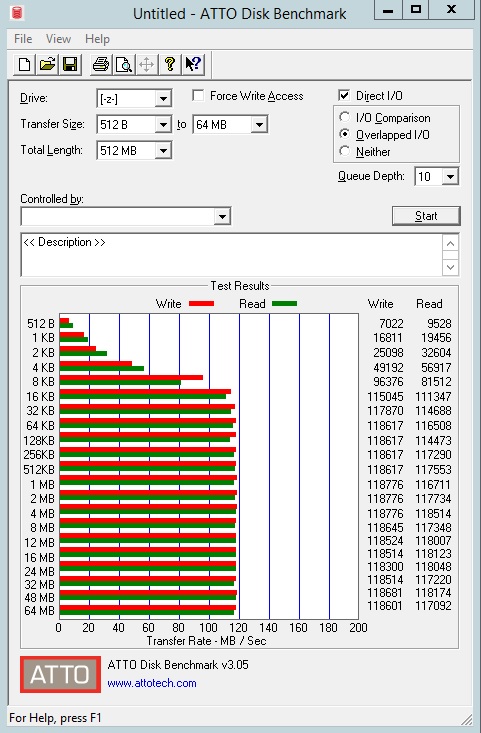
ATTO Disk Benchmark
ATTO Disk Benchmark identifies performance in hard drives, solid state drives, RAID arrays as well as the host connection to attached storage.

In a JBOD configuration we see max transfer rates of 118 MB/s reads and 118 MB/s writes. We are using our network ports in a fail over capacity since not all of our two bay NAS units have dual 1GbE like the QNAP TurboNAS TS-251 and many home/ SMB administrators are going to pass on the complexities of setting up LACP.
Our QNAP TS-251 Raid 0 results are fairly close to JBOD numbers, we see max transfer rates of 118 MB/s reads and writes.
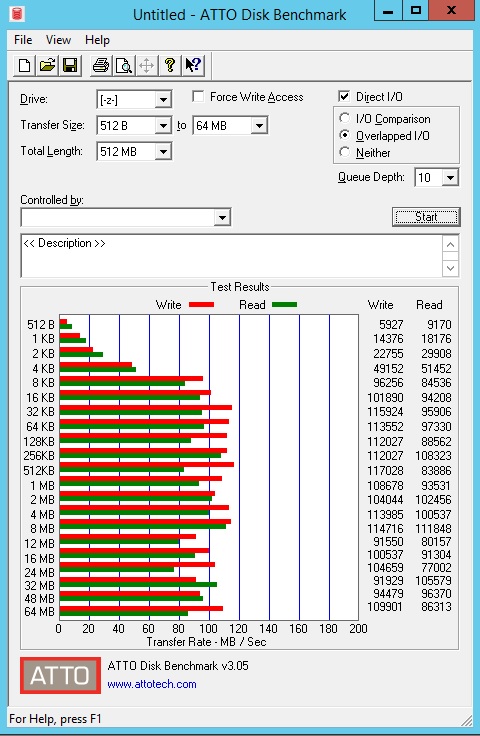
Performance drops a bit in RAID 1 and we see max transfer rates of 111 MB/s Reads and 114 MB/s Writes.
Power Consumption
For our power testing needs we use a Yokogawa WT310 power meter which can feed its data through a USB cable to another machine where we can capture the test results.
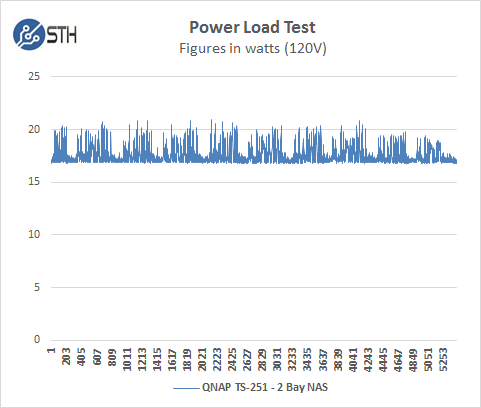
The QNAP TS-251 idles at around 16.73 watts and under max load during our tests we saw a peak of 20.96 watts. That is certainly low enough power consumption to have a de minimis impact on power bills.
QNAP TS-251 Software
The QNAP TS-251 includes a wealth of software support and features that enable the user to setup the unit in many different ways. We wanted to share several views to give one a glimpse of managing the unit.
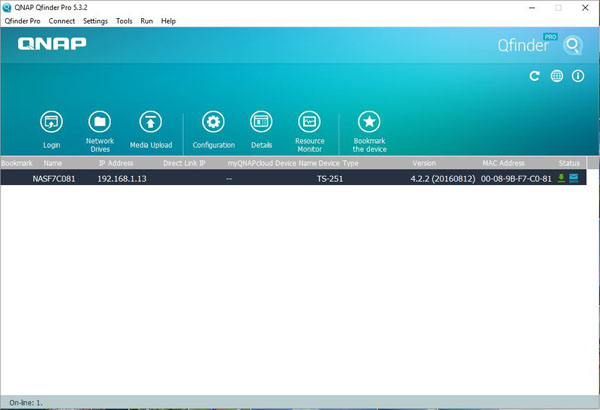
Here is the main portal to the TS-251 is Qfinder Pro.
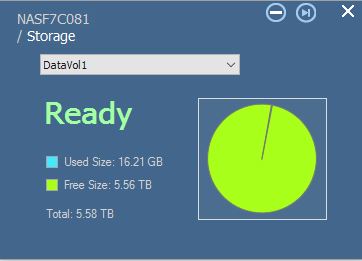
The resource monitor gives you a quick overview on how much used and free space is available.
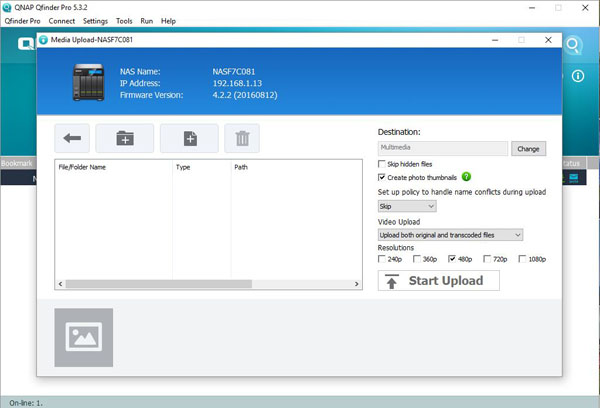
Uploading data can also be completed through Qfinder.
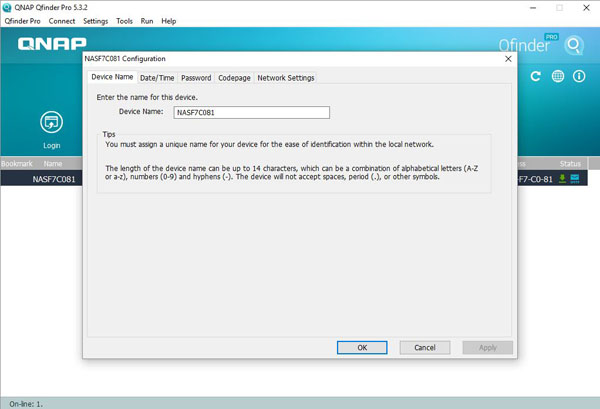
Additional configurations such as changing device names can be changed here.
Accessing control applications can also be done through a drop down menu.

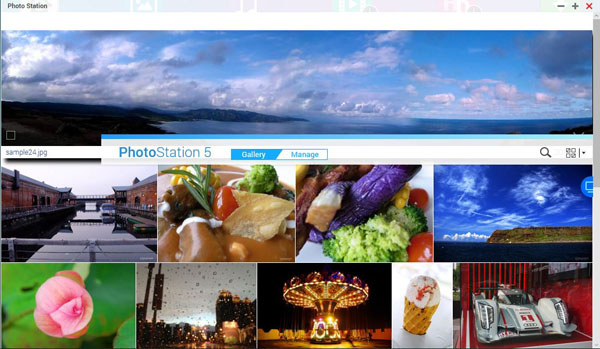
The PhotoStation allows you organize and manage photos.
The key Music Station abilities are shown here. They allow you to share and stream your music library on the network.

Similarly, the QNAP Video Station allows one to store video on the NAS and share the video over the network.

The QNAP Download Station Interface allows you to offload downloading large files to the NAS. For example, when have used the Download station to download Ubuntu Linux via a torrent while we packed up and went to a lunch meeting. There was no need to have our laptop on a network connection for downloading the software.

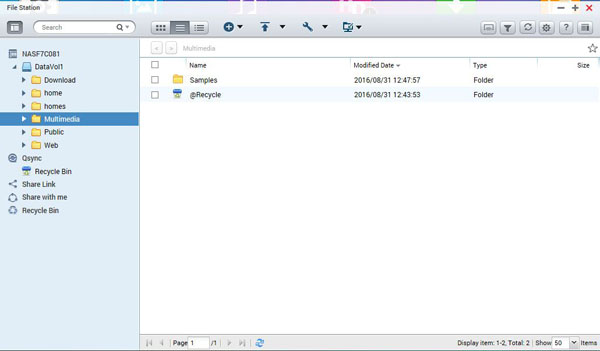
You can add folders, upload and sharing files through the QNAP File Station interface.
The Backup Station provides a wealth of options for backing up your systems. As more of our lives become digital, backups become more valuable.

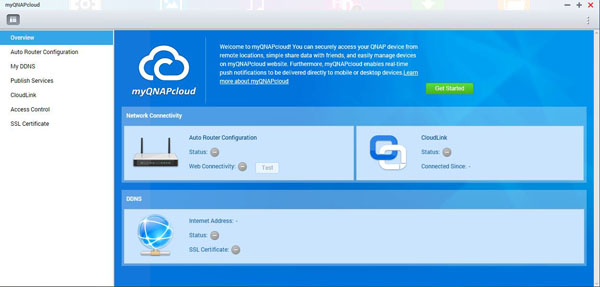
Your cloud options can be found under myQNAPcloud. QNAP provides cloud management functionality to compete with services like Dropbox at a lower cost.
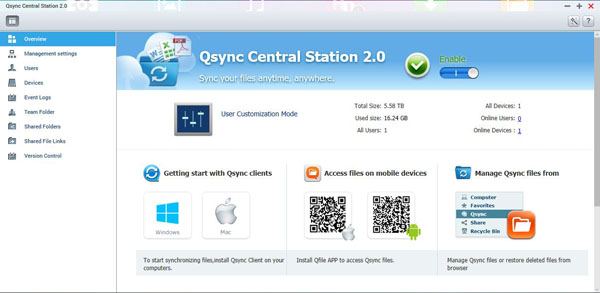
Getting all your devices and users in sync can be done under QNAP Qsync Central Station 2.0.
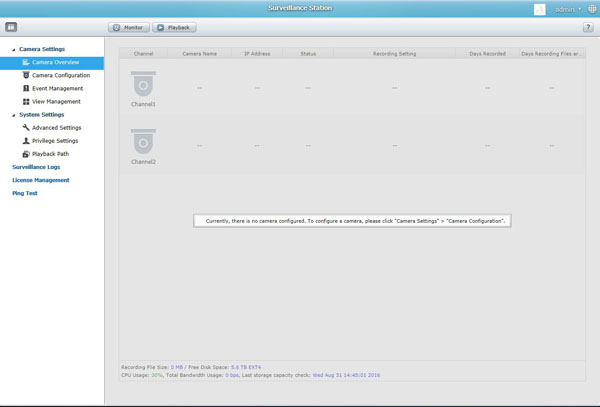
The Surveillance Station allows you to monitor and setup security cameras.
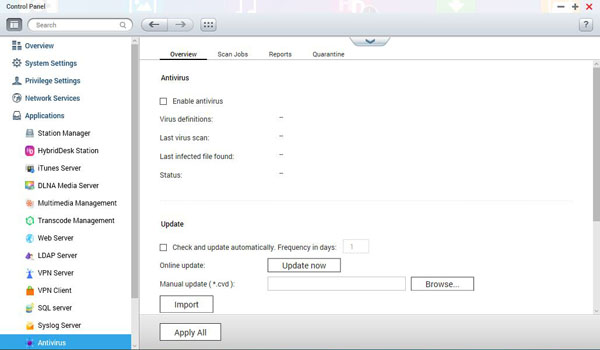
Antivirus options can also be set in the control panel.
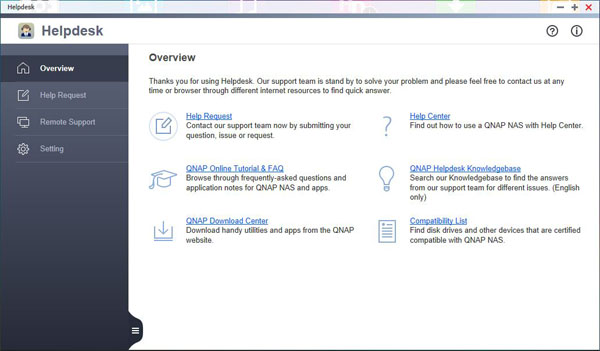
There is a convenient help desk to aid you in you are looking up options and how to configure the TS-251. We do like the ability to have contextual help for users that are less versed in NAS administration.
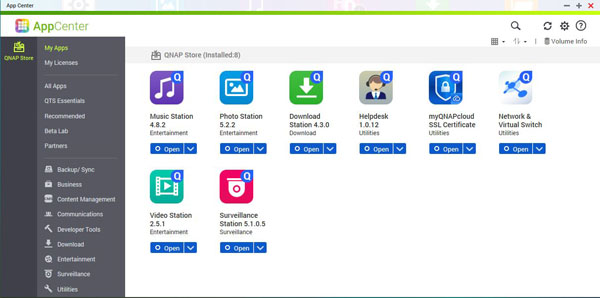
The QNAP AppCenter has a huge number of applications to browse through and install if you decided to use these.
The HybridDesk Station allows you install applications that can be used if you want to connect your TS-251 as a media center through the HDMI interface and attaching a keyboard/mouse for operation.

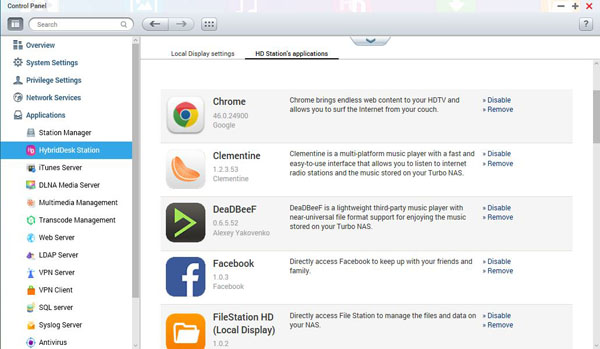
Generally we would advise against using your NAS as a PC, however there are situations where this may be necessary.
QNAP QCenter supports VMware ESXi, VMware Fusion 7, VMware Workstation 11 and Microsoft Windows Server 2012 R with Hyper-V. If you have small set of onsite servers, this can be useful. We have even seen these units providing network share and backup duties at low cost colocation facilities.
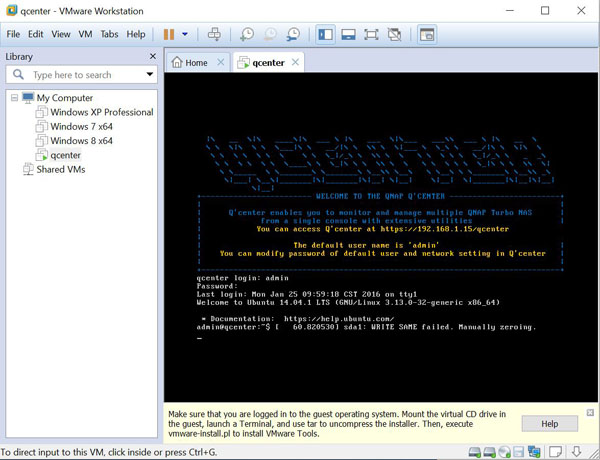
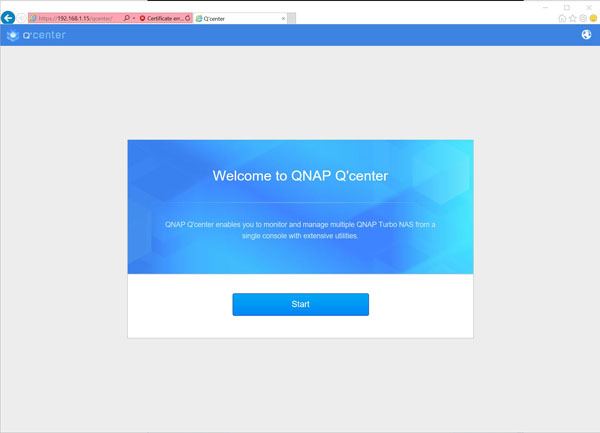
We downloaded QCenter for VMware Workstation into a folder and turned it on. The message says to use https://192.160.1.15/qcenter for our system which we did and received the Welcome Screen.
After pressing Start we can now see all the options for QCenter.
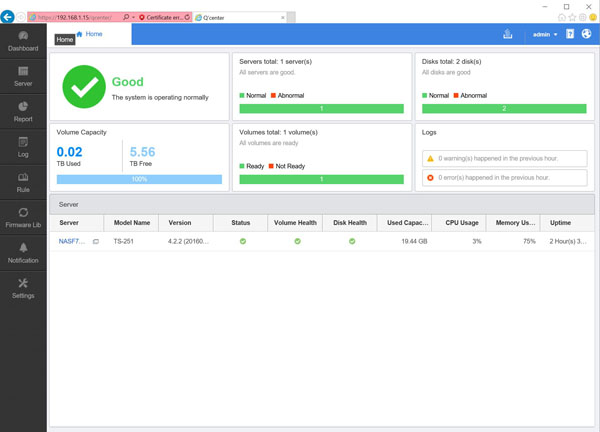

More advanced users or small business will find that QCenter is a great way to manage your storage network that uses several QNAP products.
In addition to all the features we have just shown there are also apps you can download for your cell phone to control and monitor your QNAP NAS. We use a Samsung Galaxy Note 4
We selected and installed the Qmanager which found our TS-251 right away, we then logged in and found the home screen.
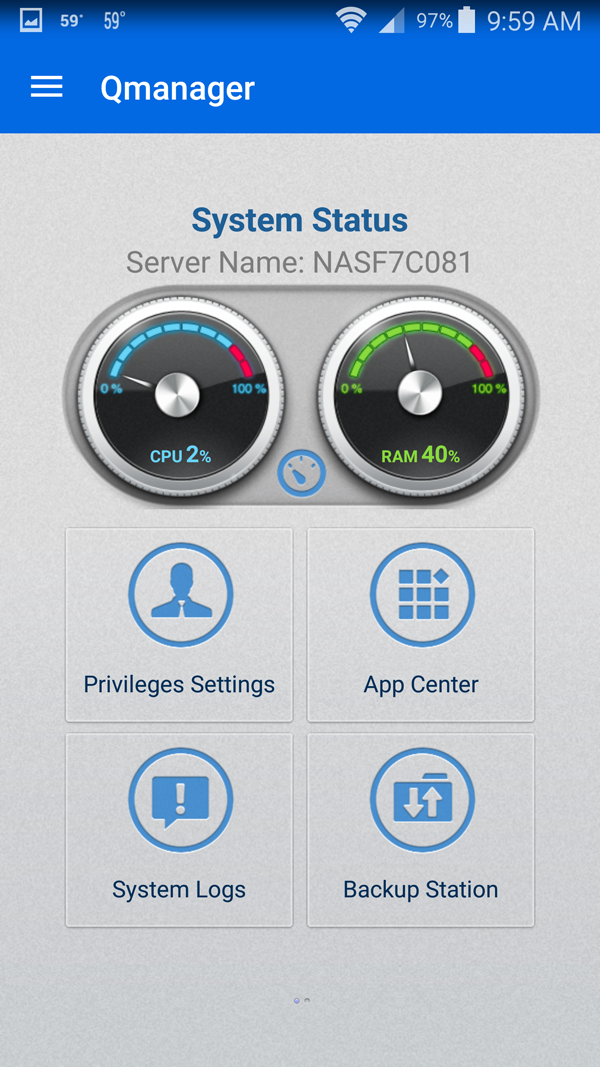
From here we can enter any of the listed sections.

From here we can turn on or off any of the listed applications or even start Backups from the Backup section.
Conclusion
The QNAP TurboNAS TS-251 2-bay NAS is a powerful box that can be setup to run a whole host of different functions. From simple file sharing to cloud based and media center functions, the TS-251 can tackle them all.
Equipped with an Intel Celeron 2.41GHz dual-core processor it has ample performance to tackle a wide number of tasks. We wanted to test out Virtual Machine support on the TS-251 but we found that our unit came with only 1GB of DDR3 and this was not enough to run VM’s. Expanding the RAM to 4GB or 8GB would have made this possible. It is not an easy task to expand RAM yourself and requires that you disassemble the box down to the motherboard level to access the RAM slots, even though this is not hard to do it is a fair amount of work to complete. We hope to have another unit with higher RAM capacity in upcoming reviews but you can see this feature at work (as well as QNAP’s Docker functionality) in one of our previous reviews.
The QNAP TS-251 is a great unit to build up your multimedia center to include streaming and has the apps to support DLNA, AirPlay and Plex even through a personal cloud. It’s powerful enough to transcode full HD videos on-the-fly or offline. Using the TS-251 as a direct media center with HDMI output that can play 1080p videos with 7.1 channel surround sound. You can connect a monitor or TV via HDMI, add a keyboard and mouse and you have a fully functional PC running Virtual Machines or the run the HybridDesk Station and browse the Internet.
As time goes on and you feel the need to expand your storage capacity you can connect the TS-251 to another QNAP NAS via USB 3.0 cable which is a nice touch. We have seen plenty of cases where users start with a 2-bay NAS and then find the need to upgrade not long after.
For enthusiasts and small business we find the QNAP TS-251 to be more than capable to handle storage and media needs and even provide basic shared storage for higher-end virtualization setups. The real strength in the unit lies in its software stack which we highlighted in this review. There are certainly more software capabilities available from QNAP than we can share here as this review has over 60 images! This is also a great starter platform to try in the event you are looking to try QNAP’s management interface before investing in a larger system.


Thanks for the review. Noticed a typo at the top where you are missing a ‘not’: “for simple file sharing and media use but for advanced users.” should probably have a “not” before advanced users.
Thanks for the catch Nick!
Comments are closed.