
Installing Proxmox VE 5 is extremely straightforward. Boot a server from the installation ISO, answer a few quick questions like which disk to use for installation, network settings, and what password you want to use and the Debian Linux based virtualization solution will install. Unlike VMware, Proxmox VE will boot and have a few more steps you want to take. For the past few years, we have had initial installation checklists for Proxmox VE 3 and Proxmox VE 4 in the forums, the steps are largely the same, but here is our Proxmox VE 5.x initial installation checklist.
Proxmox VE 5 Initial Installation Checklist
A common task admins use when installing an OS is to update the system as components can become outdated over time. Proxmox VE is slightly different than other platforms since it will not update properly out of the box, despite being based on Debian Linux. One of the key reasons for this is that Proxmox VE is setup out of the box to use enterprise repositories that are part of a paid support pack. If you are just trying Proxmox VE out, then you may not have a paid subscription and will want to do a few quick steps to ensure you can update the system and install software from the package manager.
Initial Proxmox installer GUI tips:
- If you can, mirrored boot is a good idea. I have been using ZFS RAID 1 since Proxmox VE 3.4 and it works well.
- On the network settings screen on the installer pick something other than pve.x.x as your hostname. If you leave defaults, it will get confusing later. Also, set a static IP and remember your password.
- Ensure you will have a way to resolve hostnames in your setup. Proxmox likes this
Upon first boot:
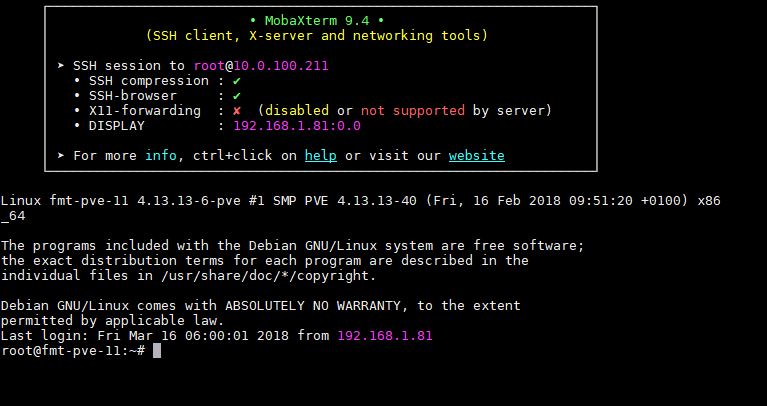
1. Login via SSH/ console and get the right packages/ repos setup. Use the IP address set in the GUI installer. By default, Proxmox will try to use the enterprise repos. To fix this first add the no subscription sources:
# nano /etc/apt/sources.list
add:
deb http://download.proxmox.com/debian stretch pve-no-subscription

If you are using this as a “free” platform, without licensed enterprise repos, then remove the enterprise source:
# nano /etc/apt/sources.list.d/pve-enterprise.list
comment out (add a # symbol in front) of this line:
# deb https://enterprise.proxmox.com/debian stretch pve-enterprise

2. Update and upgrade to get the latest packages installed and ensure that you have all of the repos setup properly:
apt update && apt dist-upgrade -y
3. Reboot – I ran into an issue with ZFS RAID 1 after updating, ensure you can still boot the server!
I like to ensure that I have IPMI up for any server I am doing this with just to troubleshoot reboot issues.
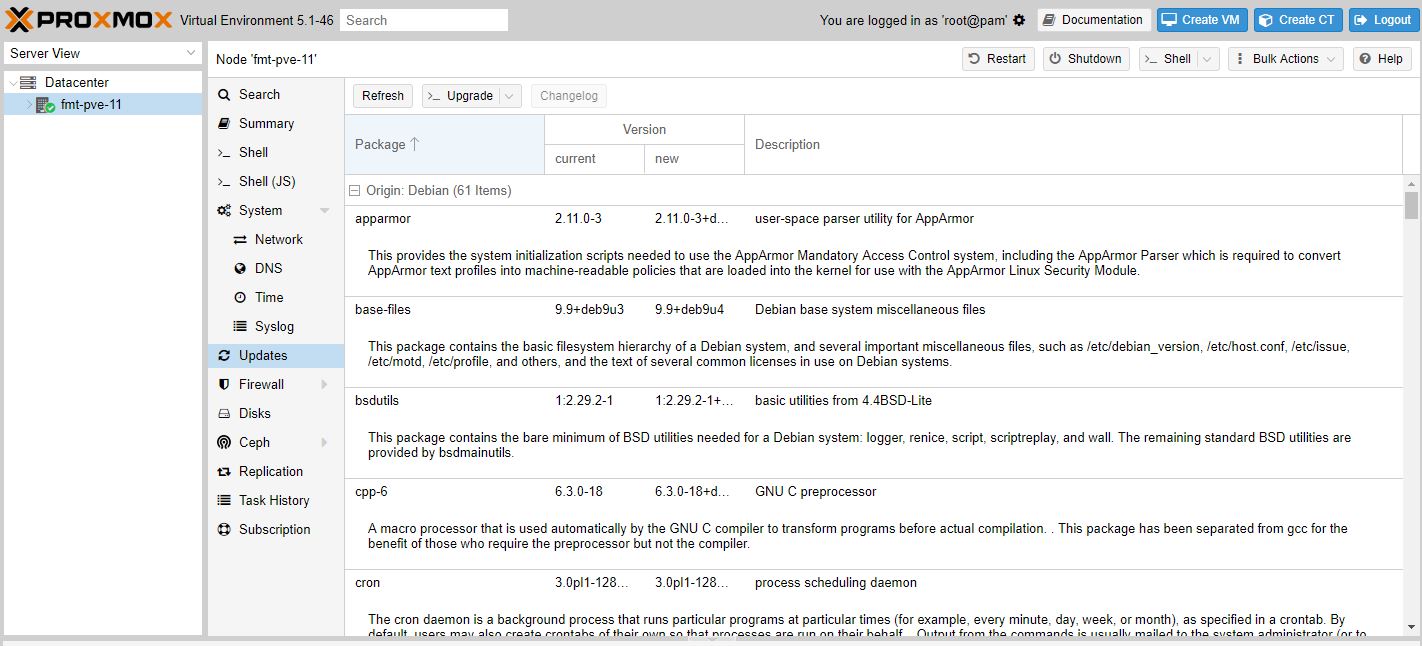
4. Login to the web interface at https://<<IP ADDRESS>>:8006. Note the IP address is what you assigned as a static IP. You also need to use HTTPS and add 8006 as the port to be able to reach the login page.

Now login with “root” and the username you selected and you should see the dashboard:
At this point, you should be able to add storage, create VMs and templates, create containers, set backups, and networking. Since the repositories are properly set, you should be able to update the system from the web interface.
Beyond the Installation Basics
Beyond the initial setup, there are a few quick tips we have. First, if you want to utilize Open vSwitch, you will want to do that just after setting up the package manager. Changing to OVS after you have already joined the machine to a cluster and loaded VMs is much more difficult than doing it at the outset. Here is a good set of Proxmox VE OVS setup instructions from our forums.
Final Words
Bookmark this page as it will come in handy not just for your first installation, but for subsequent installations as well. If you want to use HA clustering you will want at least one more node but preferably at least two additional nodes. We also recommend for features such as Ceph you try using larger than the minimum recommended cluster sizes to start. As you get into these more advanced features, having this guide handy will help you deploy new machines faster than a VMware ESXi installation.


Under step 1, the URL address is incorrect. You will get this error message in the task viewer window:
W: GPG error: http://download.proxmox.com/debian jessie InRelease: The following signatures couldn’t be verified because the public key is not available: NO_PUBKEY C23AC7F49887F95A
W: The repository ‘http://download.proxmox.com/debian jessie InRelease’ is not signed.
Incorrect URL:
deb http://download.proxmox.com/debian jessie pve-no-subscription
Correct URL:
deb http://download.proxmox.com/debian/pve stretch pve-no-subscription
Are you guys planning a expansion on this guide, for example, a ZFS storage best practice for Proxmox guide.
I can never find 2 guides that give the same advice on this like cache settings, block sizes, zvol vs mounted Zvol+QCow etc etc. and the advise seems to differ for HDDs and SSDs.
I concur with Ferdie ^^^. There are a ton of conflicting best practice guides, even on the Wiki of Proxmox itself.
Ferdie and Mark – we are doing these in chunks. Next is likely to be initial networking setup. We have a few guides for common ZFS issues (e.g. when your ZFS rpool will not boot.)
Thanks for the reply Patrick, looking forward to the upcoming guides.
I understand it’s a pretty specific topic with many variables to cover, but I hope you’ll get around some day to making a ZFS/storage best practices guide for a few common scenarios such as: spinning rust + SSD cache/ZIL, pure SSD storage, Optane storage.
IO has a lot of impact on system performance, I’m sure there are a lot of people who feel they aren’t making the most of their systems because of lackluster IO performance.
What I basically do first on such ProxMox Servers is creating a file:
nano /etc/modprobe.d/kvm-intel.conf
and enter following row:
options kvm-intel nested=1
This allows me to spin up other virtual machines, which are allowed to do nested virtualisations ( OpenShift , libvirt … you name it)
@Patrick – I think you would be surprised at the number of power users who are new to Proxmox/ZFS, but are interested in building a NAS with Proxmox/ZFS. Doing a walkthrough on the basics of zpool creation and maintenance would generate a good number of pageviews from Google search results.
I can speak from my own experience – I was looking at FreeNAS, but paused once I saw some of the issues that FreeNAS 11.0/11.1 release has had. It just seems that Proxmox has the stronger development bench and I’m more comfortable with Linux.
Alex – certainly aware and have content already in the pipeline. We are a bit bandwidth constrained at the moment. I would love to get a ZFS editor working on this stuff one day. For now, I am doing these myself.
Count me in on the NAS+Hypervisor part. Bought a T320 last week, and been doubting which flavour to use.
Promox or FreeNAS. Most of my VM’s will be Linux based, so Proxmox makes sense to me, as FreeNAS is FreeBSD based and iirc support for Linux VM is not super great?
But more importantly, it’s a home setup so it must be stable and easy to update and upgrade without the risk of losing all the data.
On March 20, 2018 at 6:31 am, Alex K. wrote:
“@Patrick – I think you would be surprised at the number of power users who are new to Proxmox/ZFS, but are interested in building a NAS with Proxmox/ZFS. Doing a walkthrough on the basics of zpool creation and maintenance would generate a good number of pageviews from Google search results.”
On March 20, 2018 at 8:13 am, Patrick Kennedy answered:
“Alex – certainly aware and have content already in the pipeline. We are a bit bandwidth constrained at the moment. I would love to get a ZFS editor working on this stuff one day. For now, I am doing these myself.”
04 months later, any update on Proxmox VE + ZFS best practices ?
I think this relevant topic deserves appropriate attention for the quality focus and content that ServeTheHome (STH) wants to provide.
For me, as a supporter and reader of STH, I am seriously more interested in practical and usable best practices content. Rather than having all the latest –very detailed– analysis on Intel Xeon vs. AMD EPYC processors.
My apologies if I’m a little too direct here…
I am using Proxmox VE 5.3-2 but I don’t see any Proxmox lines in /etc/apt/sources.list. Mine looks like this:
deb http://ftp.us.debian.org/debian stretch main contrib
deb http://ftp.us.debian.org/debian stretch-updates main contrib
deb http://security.debian.org stretch/updates main contrib
Comments are closed.