
In our Lenovo ThinkCentre M710q Tiny guide and CE review we will see how this unit stacks up. This is an interesting system because this generation marked a major change to how Lenovo constructs systems in this ~1L space. We also have competitive systems that are from the same generation and use the same Intel Core i5-7500T that our system has, so we are able to see some differences to help guide our readers to decide what to look for in this space.
Project TinyMiniMicro Lenovo TinkCentre M710q Tiny Video
As part of this project, we are releasing videos with some additional looks at the systems and some more candid thoughts. Here is the video for this:
This article will have a bit more since there are some facts and concepts easier to convey using text rather than video. You can also see the full video series using this YouTube playlist. Our suggestion is to open the video and play it in the background to listen.
As a fun one, we have a few shout-outs including a great resource cataloging TinyMiniMicro nodes in the STH forums.
Project TinyMiniMicro Background
In Project TinyMiniMicro we are purchasing a large number of these devices from different sources. While a standard STH review is of a new product, these TMM nodes occasionally have specs that differ from what one would expect. In all of these pieces, we are going to talk about what makes the nodes unique. We are now well over 20 different nodes to increase diversity. We are testing these on a more circular economy/ extended lifecycle basis to see how they can be deployed after their initial use as corporate desktops.
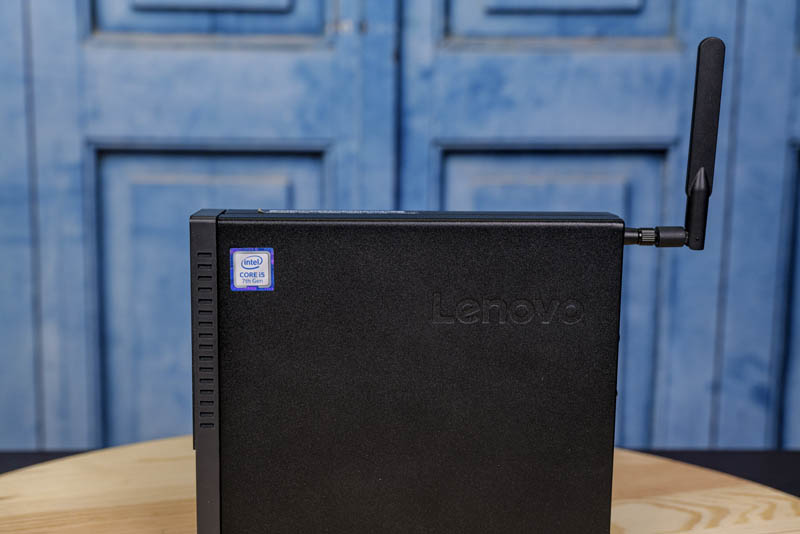
For our $297, we received a node with an Intel Core i5-7500T CPU, two 8GB SODIMMs (16GB total) for RAM, and a 256GB NVMe SSD. We even got an embedded Windows 10 Pro license which would have cost us around $140 alone. We even got an Intel 802.11ac WiFi + Bluetooth module installed in this system.
For some data points, we purchased a 1-2 generation older Lenovo ThinkCentre M900 Tiny for around $160 without a SSD and half the RAM. Our Lenovo ThinkCentre M720q we spent under $200 as well for a significantly lower-end configuration. The higher-end and newer Lenovo ThinkCentre M920q Tiny we spent $475 for.
We are going to go into the hardware overview, then into the key specs. We are then going to talk a bit about performance and power consumption before getting to our lessons learned from these units and our final words.
Lenovo ThinkCentre M710q Tiny Hardware Overview
The chassis itself is a fairly standard design for the older ThinkCentre Tiny series. It measures 179 x 182.9 x 34.5mm (7.05 x 7.2 x 1.36in) which means it is around 1L like the other systems in this series.
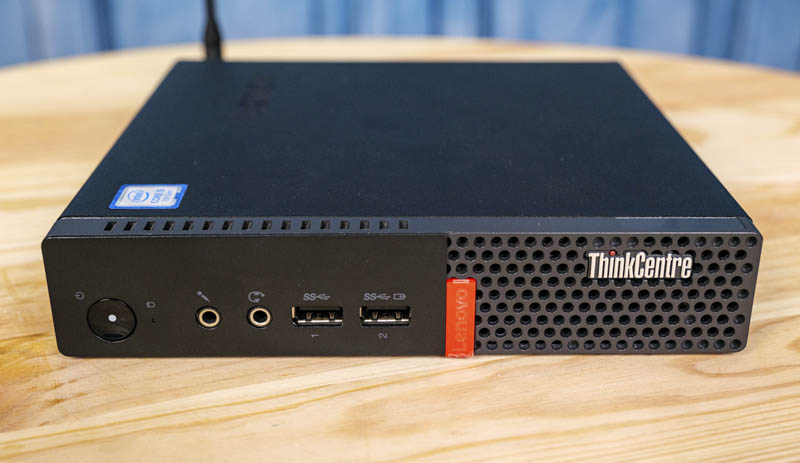
In the front of the chassis, we get headset and microphone jacks as well as two USB 3.1 Gen1 ports. Both of these USB ports are Type-A ports. We generally prefer systems that have at least one Type-C port given how prevalent that is today and some other offerings of this era, such as those from HP in the EliteDesk/ ProDesk lines did provide a front USB Type-C port. These HP systems included three USB front panel ports which added slightly more connectivity than we get in the M710q Tiny.
On the rear of the unit, we get two DisplayPorts as standard. The M920q for example has a DP and a HDMI port instead. There is an optional slot above the NIC where ours has a third DisplayPort. There are two slots (the optional DisplayPort here is in the first of two.) These can also be blank, VGA, DP, or HDMI. The second port is usually a serial port if it is populated. Unlike the higher-end units, the motherboard PCB does not have a populated PCIe riser connector, so this limits some of the more unique options that can be added in this customizable area.
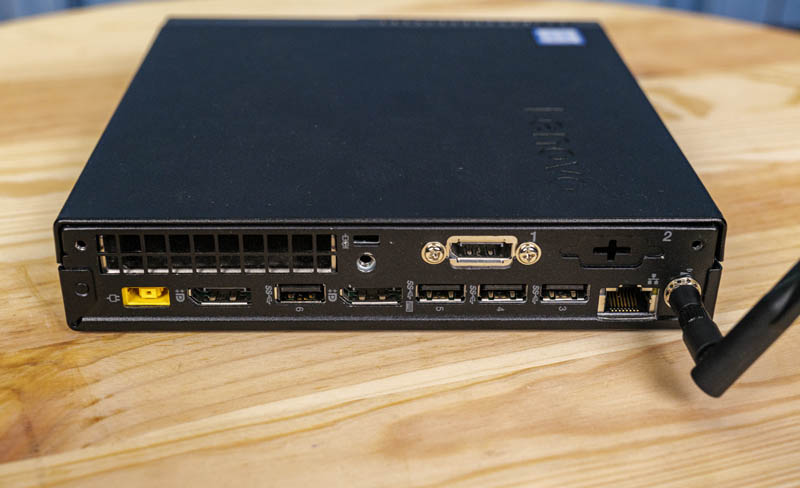
We also have four USB 3 Type-A ports. Some systems of this era used USB 2 ports, but by the time we hit 7th Gen Intel Core CPUs, those USB 2.0 systems were falling out of favor. All four of the ports are USB 3.1 Gen1 ports. In later generations, we get Gen2 10Gbps ports but this was before that era. For networking, we can see the 1GbE port. This is an Intel i219 NIC. In our unit, we have a WiFi antenna since ours was populated with WiFi. If you do want WiFi, it is usually easier to get one already populated with the WiFi card than it is to add it after the fact since Lenovo only has this header and wiring if the unit ships with WiFi. You can add it later, but then you are having to buy extra parts.
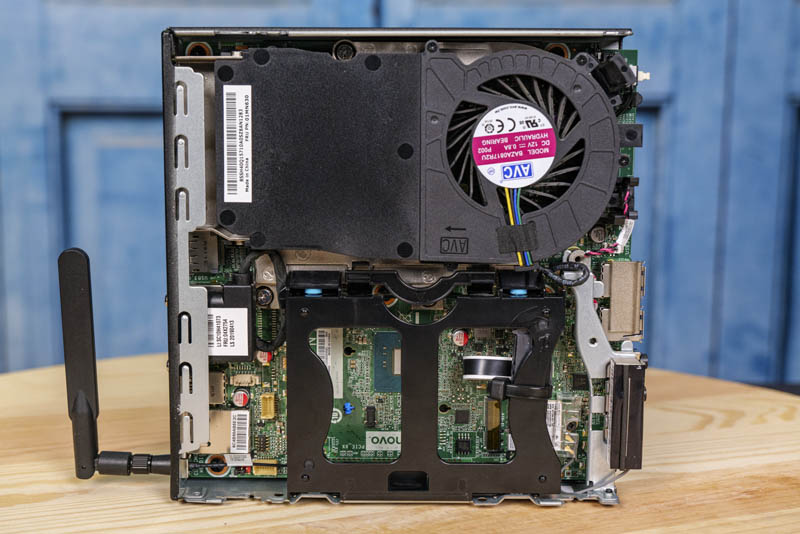
Opening the system is done via a single screw. Lenovo’s design, unlike HP’s for example, does not retain the screw on the chassis. As a result, one has to keep track of it when working in the unit. The fit and finish for the M710q Tiny are very good. Once the system is open, we can see significant serviceability upgrades versus the M900 Tiny as well as some of the contemporaneous HP Mini solutions.
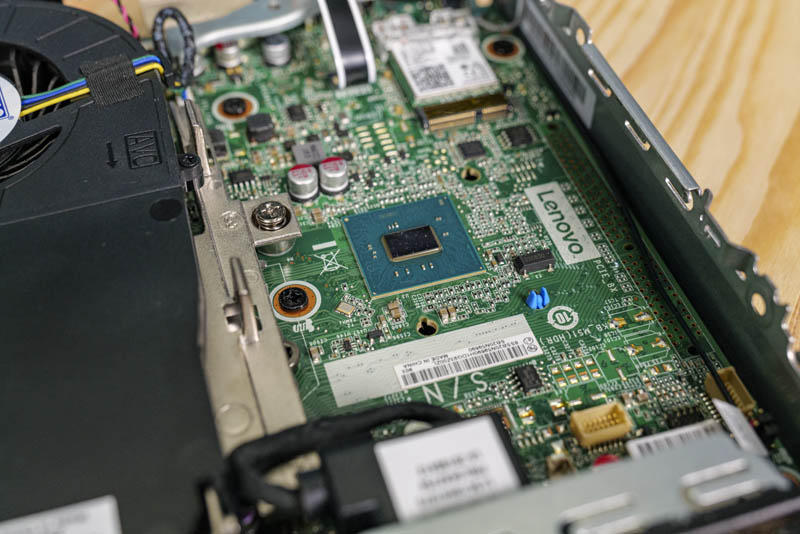
Inside the system, we see the CPU on top and the expansion slots below. There is a 2.5″ drive tray system that sits in the chassis. Unlike older generations, this is tool-less. One can simply snap the plastic drive carrier out, then the 2.5″ drive is held in by pegs in the carrier. This is ultra-simple to service. Instead of hard-mounted SATA data and power connector like in the M900 Tiny, there is a thin ribbon cable inside the system that connects the drive to the motherboard. This is certainly a stark contrast to enthusiast systems that use relatively massive cables.
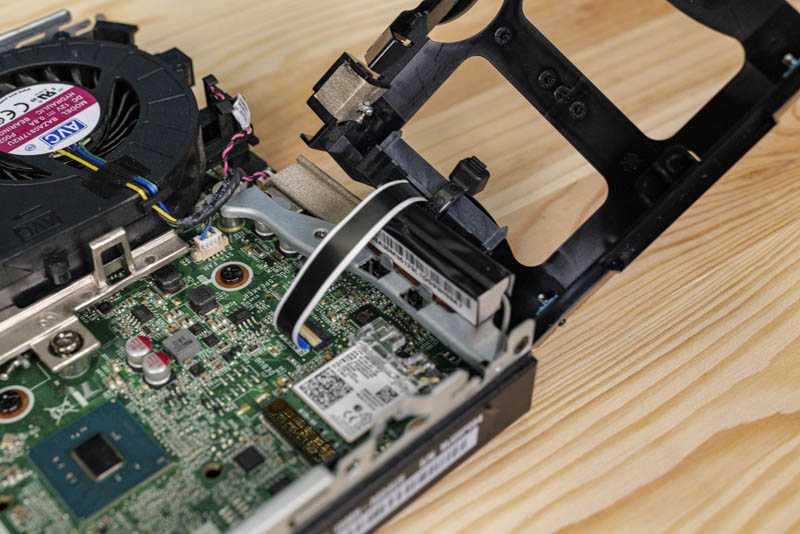
The final feature we wanted to point out in this part of the system is the M.2 WiFi card slot. Ours is populated with an Intel 802.11ac adapter but there are Qualcomm options as well. You can also find many of these systems that are saving the negligible cost to add WiFi and Bluetooth (even a modern WiFi 6 Intel AX200 with antennas and wires is around $25 new) in which case this slot is blank. If you want WiFi, it is much easier and more cost-effective to find a unit with them. Unlike with the M9x0 Tiny series, the M710q does not support Intel vPro with its B250 chipset, so you do not necessarily need an Intel adapter to enable vPro over wireless. It simply does not have this feature.
Lenovo’s design we really like. Once the top cover is off, one can remove the bottom cover by simply sliding the cover off. Underneath, we find the memory and NVMe storage expansion.
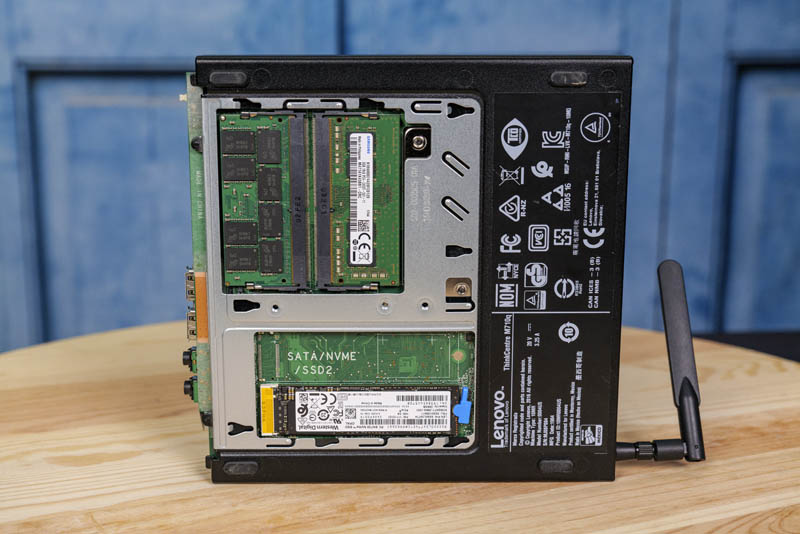
Our unit came with two 8GB DDR4 SODIMMs which is an option many of our users will target for a 4-core unit like this. Upgrading to 32GB we would prefer to have a single 16GB SODIMM making an easy upgrade path to 32GB unit by simply adding a second DIMM.

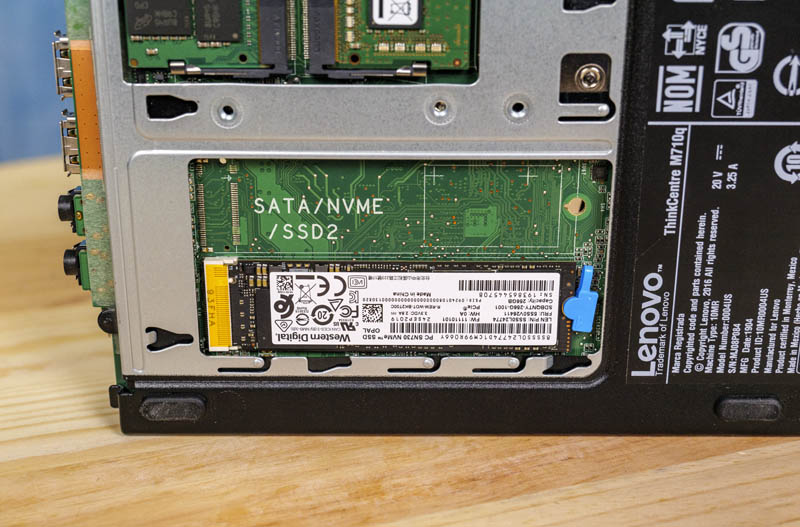
For NVMe storage, there is a single M.2 drive slot. One can see the section is made to house a second drive, but the components for the second slot are not populated on the M710q Tiny’s motherboard. Also, the M.2 retention mechanism is a blue tool-less design in the M710q Tiny. After servicing a few dozen of these nodes, having everything tool-less is a major design win for us. Our unit came with a Western Digital 256GB NVMe SSD.
Working with dozens of these TinyMiniMicro nodes, the Lenovo designs of this era marked a new level of serviceability. In other solutions, getting to the NVMe slot and SODIMM slots means removing top-side components such as the 2.5″ drive or fan in both Dell and HP systems of the era. Lenovo has a differentiated design here.
Next, we are going to look at the key specs we have been able to pull from a number of different sources to get you some idea of what to expect in terms of configuration diversity. We are then going to get to performance and power consumption.


What is the watt consumption in idle? :)
Hi Patrick,
I got one of these as a barebone, new, unused, with a 90W original Lenovo power brick.
I popped in a 7700T (which I was using on an Optiplex 3050 Micro which gave up the ghost). Popped in 2x8GB DDR4 2666 (have 2×16 on order), and a 1TB SSD. Windows install was a breeze and I was up and running in no time.
All was fine and dandy until I noticed that the CPU does not boost over its base speed of 2.9GHz. I’ve tried everything, from Windows power plan to BIOS settings, but nothing seems to allow the CPU to turbo boost.
HWInfo is not reading any throttling of any kind.
I have another 3050 where I tried the CPU and it boosted correctly (3.6 on all cores), but the fan would get uncomfortably noisy.
Did you notice a similar behaviour on your node? (even if it was a 7500T, it would still boost)
Paul, mine did boost, but I did not have the 7700T
Hi there,
Thinking of getting one of these for an educational/experimental project and ended up here looking for compatible CPU specs. I wonder why you say: “…If you are looking for Intel HD 630 graphics, you will want the Pentium G4600T or the 7th generation Intel Core series parts…”.
Could you bother to explain – is it “just” that the others “only” have Intel 530?
And another question, if you would indulge my ignorance :)
In the intro video on Youtube (Lenovo ThinkCentre M710q Guide and Review, from 2 Nov 2020) there is a CPU benchmarking info image inserted, which includes the i5-9500T, but in this post that particulr CPU is not listed in the compatibility section. What am I mistaking here?
Can anyone confirm if adding a new SATA NVMe/M.2 connector with “Amphenol MDT420M03001” will work as secondary storage?
@MasKARJ0
indeed, this is good question, but not reviewed much. as m710q getting old, everybody is focusing on m920xyz, but their price is like double.
m710q is p/p.
I just ordered one of these gems for just 90 euros today! Mine has the i5 7400T CPU, but has also 16GB ram and an 240GB ssd. It doesn’t has wifi card and antenna, but I have a combo bluetooth/wifi card from another laptop, so I will use the antenna from an old router to wire it on it. I have a question only. Does the fan comes loud when it run high enough to spin it? I hope it doesn’t make too much noise…
Sweet!
I have 64GB (2x32GB DIMM’s) in mine.
thankyou very much!
Comments are closed.