Installing Ubuntu 18.04 Bionic on the Chromebook
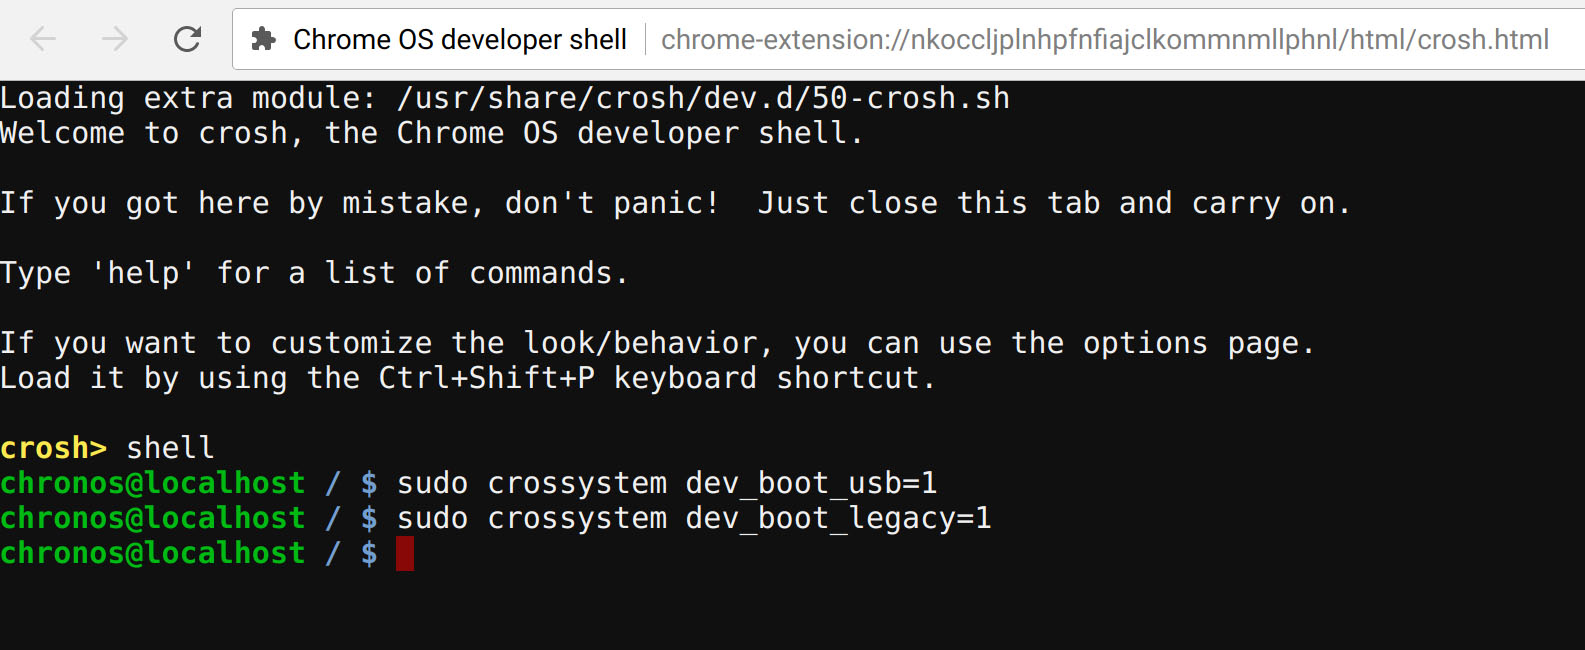
If you want the full glory and functionality of the Ubuntu 18.04 Bionic Beaver installation on the Google Chromebook Pixel, installation is extremely easy. The first step is to use Ctrl+T to get into crosh then shell from there to get into a normal shell. Now you will want to enable USB boot and legacy boot.
Now you can restart the system. Insert a USB drive with an Ubuntu 18.04 ISO burned via either dd or a Windows tool like win32diskimager. You will want to hit Ctrl+L to get into SeaBIOS and select your USB. It should actually boot to the USB after hitting Ctrl+L but if not, you can use the ESC key to select the boot device. From here, simply install the OS as you would normally. All of the hardware including WiFi, touchpad, touchscreen and etc are all automatically detected. That is a key benefit of using hardware that has been out for several years.
The GUI installer is simple to use, just remember to erase the SSD and use the entire SSD on the partitioning screen which also means you are deleting Chrome OS.
Another reboot and you will be running Ubuntu 18.04 Bionic Beaver on your Google Chromebook Pixel. Even features like swiping up on the touch screen to start the login process works.
This entire process takes only a few minutes and can be done with a minimal knowledge of Linux. The only “issue” you will have is that many of the Chromebooks top buttons are actually function keys but they have Chrome OS-specific functions depicted on them. The other difficulty some will face is the lack of buttons labeled insert, delete, home, end and etc.
Final Words
Overall, this is an extremely simple way to repurpose older-generation hardware. While the CPU, RAM, and storage should give you some pause, the benefit is really that you get a portable system that has excellent user interface features and build quality. This design and interface excellence are not present on other $319 options in the market for Ubuntu laptops.


This is a fantastic post. I “discovered” these fire sale Pixels about a year ago. They turned out to be excellent travel laptops too. Highly recommended if they’re still at the ~$300 price point.
+1 for the great build quality. You don’t need more if you’re mostly using it as a ssh and scp box. You didn’t mention the SD card slot so you can add more storage via SD or USB.
+1 for using chromebooks as admin boxes. They work surprisingly great!
I went ahead and bought a 2013 Chromebook Pixel and installed 18.04 LTS on it and you are right, it does make for a nice, cheap laptop! It runs 18.04 nicely. I did run into one maddening issue though. Suspend does not work when closing the laptop lid, instead the system halts. After some searching I found a chromium bug report that explained the issue: https://bugs.chromium.org/p/chromium/issues/detail?id=221905
To get suspend working normally I had to add GRUB_CMDLINE_LINUX_DEFAULT=”tpm_tis.force=1,tpm_tis.interuppts=0″ to my /etc/default/grub file and roll my kernel back to 4.12.14. Seems to work fine now. I’m not sure if there is a more recent kernel that handles suspend properly on the pixel – I’ll try a few and report back if I find any.
The best thing to do to fix suspend and most other issues is to put in developer mode, remove write protect screw then flash custom efi core boot sea bios available on mr Chromebox website. It makes the pixel a linux laptop with no more chrome os and ctrl-L during boot ups etc. Works great.
how do i start bionic once loaded? enter-chroot? what next? like startxfce4 or startunity…..
Greg
does anyone look at this site to answer questions?????????????
@greg I have the exact same issue. If I find out, I’ll let you know.
@greg, if you used the install instructions above, it just created a cli install. If you want to install a desktop environment, you need to target it. For example:
sudo sh ~/Downloads/crouton -r bionic -t lxde
You can get a full list of the available targets by entering:
sh ~/Downloads/crouton -t help
Wanted to report back that kernel 4.15.16-041516-generic also appears to work without any suspend issues for people looking for a more recent kernel.
If flashing a custom bios as Bob suggests allows the issue to be avoided completely it would certainly be more convenient. I may give that a shot down the road.
Anyone got any tips for battery life on this thing? That is currently my biggest complaint. I only get 3-4 hours out of it. I tried tlp but it seemed to cause other issues while not improving battery life much. I’d dance a little jig if I could get 5 out of it reliably!
I want to install 18.04 with its default (gnome) desktop environment. I followed the above process. I then did sudo apt-get install gnome (I think) which installed the Gnome DE but it was the default Ubuntu Gnome DE that comes with Ubuntu.
Is there a target that will install Ubuntu 18.04 with its out-of-the-box DE? Thanks!
Tom
EDIT to above: I made a typo. When I did sudo apt-get install gnome, I did NOT get the standard Ubuntu (Gnome) desktop. I got the standard non-Ubuntu Gnome desktop like Fedora comes with.
I want the standard Ubuntu experience, if possible. Im sorry if I didn’t make that clear in the first post.
Thanks!
@Tom try this : sudo sh ~/Downloads/crouton -r bionic -t gnome
This may seem like an incredibly stupid question but I cannot figure it out–how do I type ~ on my Pixelbook?
@JSM just copy and paste ~
@JSM or, if u have an English keyboard its: shift + key under esc
How do we uninstall it?
Has anyone tried this on a Chromebook Pixel 2 (2015) ? We are still waiting for the Crostini support from Google.
How can I enable USB boot if I can’t get into developer mode to enable it?
FYI, I am using the latest 4.x firmware (4.20.17-042017-generic) under ubuntu 20.04 and I can report that suspend still works, with the line:
GRUB_CMDLINE_LINUX_DEFAULT=”tpm_tis.force=1,tpm_tis.interuppts=0?
added to the /etc/default/grub as reported by Chris.
Hope this helps with others.
Lost touch screen and touch pad. Any one have a fix for this ? Thanks
Comments are closed.