
Continuing with our X399 AMD Threadripper motherboard reviews, we have the Gigabyte X399 Designare EX in the lab. AMD Threadripper has proven to be a powerful processor well suited for workstation type setups and AMD did a great job fitting the platform with plentiful I/O and expansion options. Gigabyte has taken advantage of this new platform and built a high-end workstation motherboard around Threadripper.
When designing the Designare EX, Gigabyte set out to create a motherboard with content creators in mind. Not only does the Designare EX have aesthetic value in its design, but its also crafted with metal heat-sinks across the board for cooling. Every slot protected by what Gigabyte calls Armor gives much needed extra support for large heavy graphics cards and protection of memory slots.
Gigabyte’s X399 Designare EX motherboard has style, feature rich and well built that puts this motherboard in the high-end premium class. Let us take a look at this powerful motherboard.
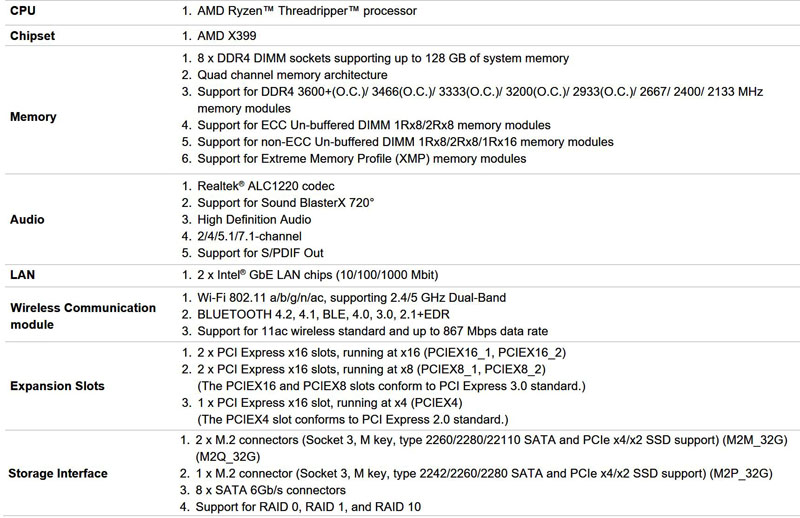
Gigabyte X399 Designare EX Motherboard Specifications
Before we get too far, here is an excerpt of the specs from Gigabyte on the Designare EX:
Gigabyte X399 Designare EX Motherboard Overview
The retail box for Gigabytes X399 Designare EX motherboard is impressive, this motherboard is in the premium class, and thus a premium retail box is deserved.
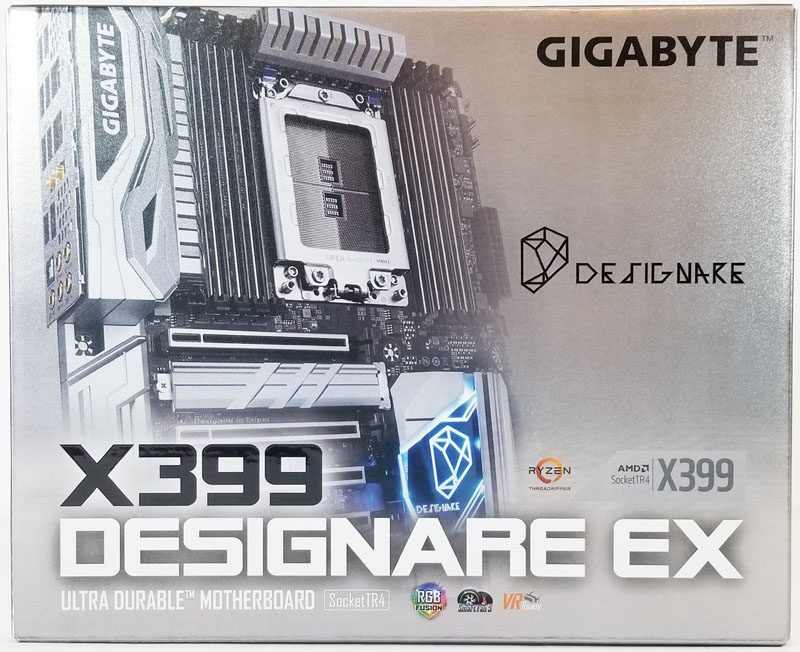
With a silver metallic coating and well-placed graphics, the box design will stand out well on retail shelves.
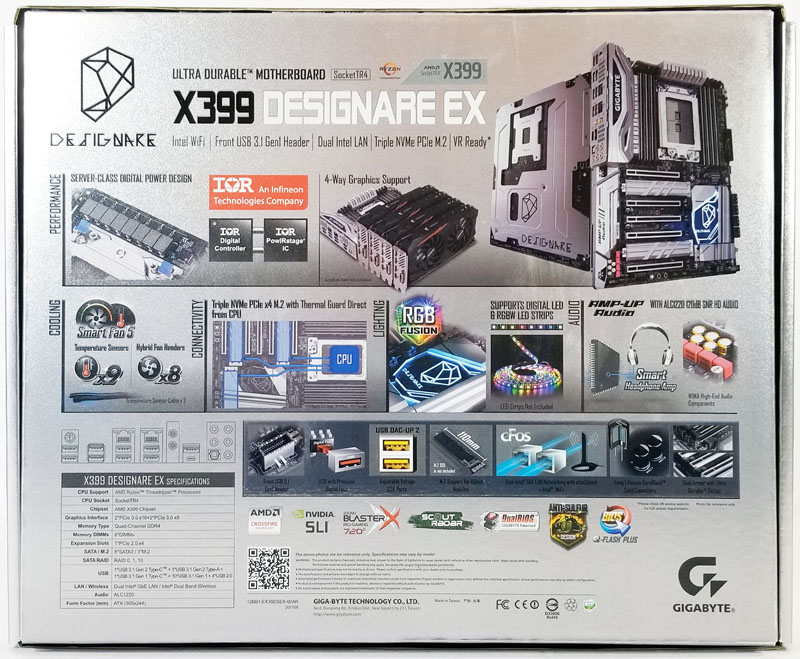
The back of the retail box lists specifications and graphics that display the capabilities of the X399 Designare EX motherboard.
Let us open up the retail back and take a look at the contents.
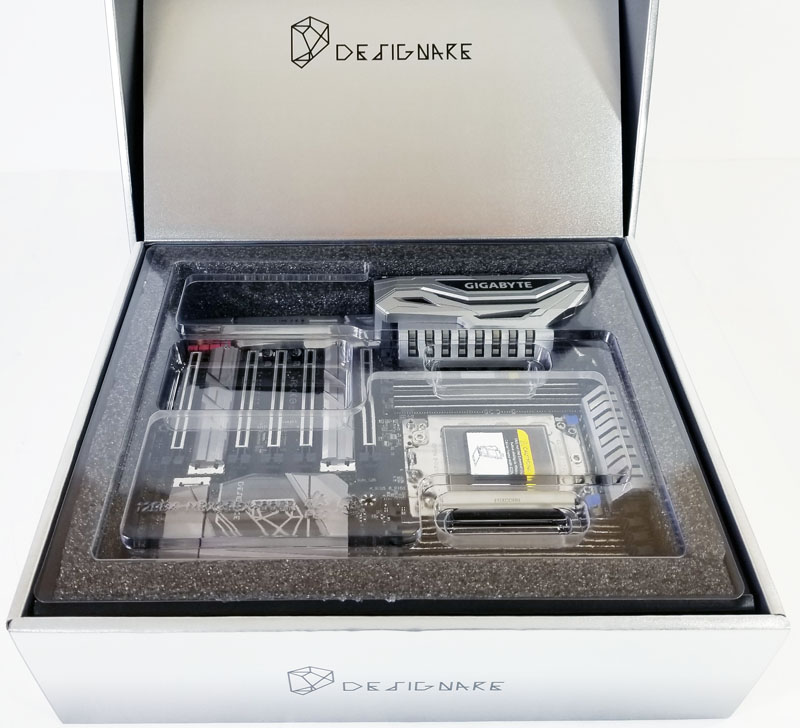
The premium experience improves when opening up the box; a silver coated display folds back at an angle which showcases the Designare logo. Next, we see the motherboard under a transparent plastic protective covering. No anti-static bag wraps the motherboard; the board viewed through the clear plastic covering looks bright and shiny.
Removing the motherboard section will open up the box to a separate section that contains the accessories.
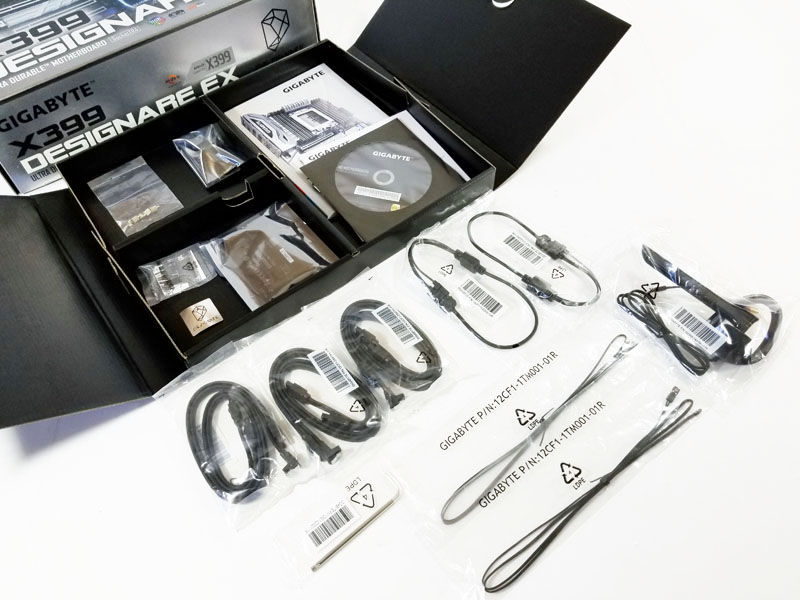
The Designare EX accessory loadout is not lacking by any means; you get everything you need and then some. Here is a list of the included accessories:
- Motherboard driver disk
- User’s Manual
- Quick Installation Guide
- 6x SATA Cables
- 1x Wi-Fi Antenna
- 1x SLI Bridge Connector
- 1x GC-M2-U2 Card
- 1x G Connector
- 2x RGB LED Strip Extension Cables
- 2x Velcro Cable Ties
- 2x Thermistor Cables
- 1x M.2 Screw Kit
- 1x T20 Star Wrench
Let us take the Designare EX out of the box and explore this feature-rich motherboard.
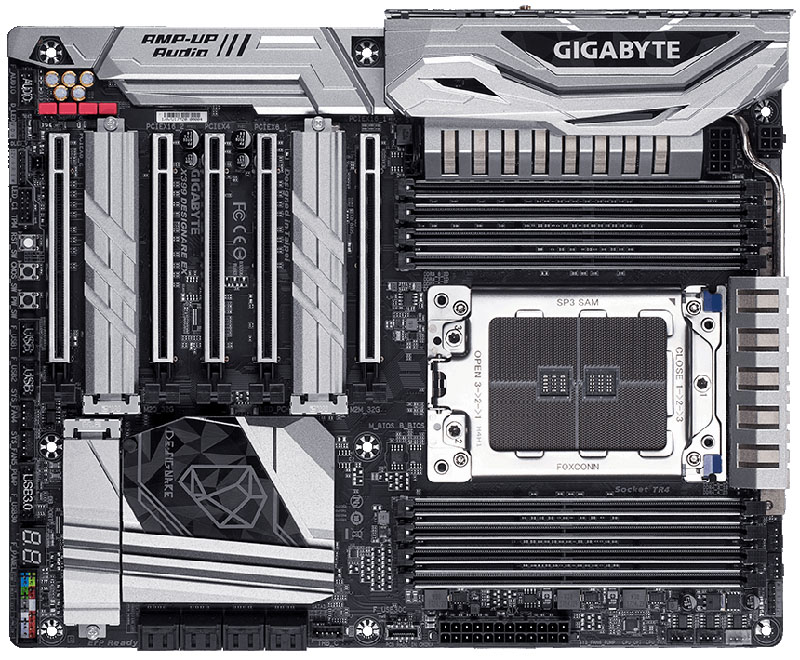
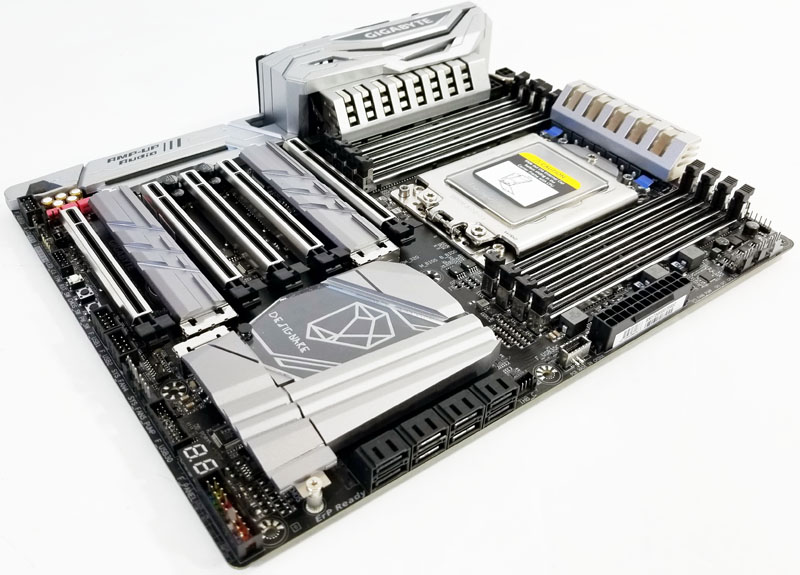
With aluminum heat sinks covering the motherboard, it is not lightweight by any means. Large heatsinks cover all M.2 slots with Gigabyte’s Thermal Guard to help lower operating temperatures. Chipset and power circuits have heatsinks made of aluminum to help cool these components. A small fan housed inside the cooling shroud that covers the back I/O circuits that cools this area.
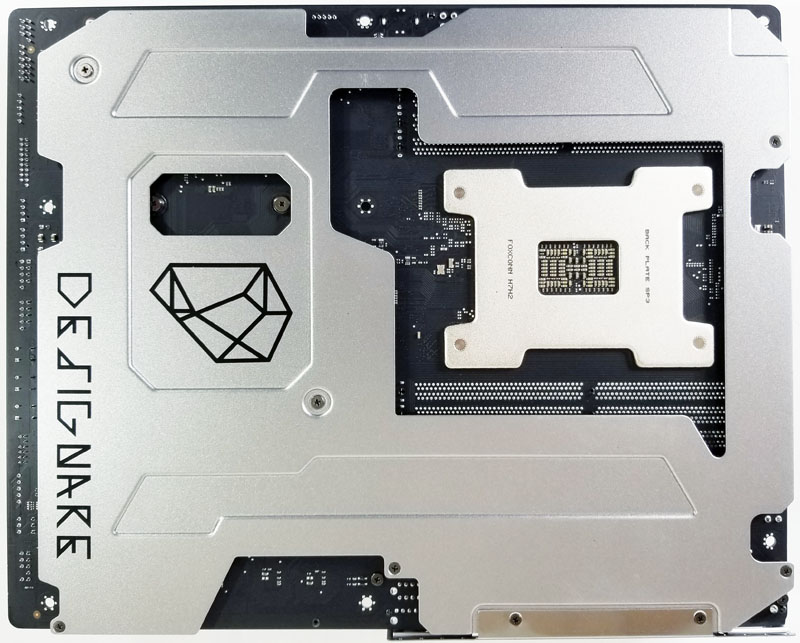
Flipping the motherboard over we find an integrated base plate which adds support for large massive coolers and graphics cards. Another great advantage is that this shield can help prevent inadvertent shorts when installing the motherboard.
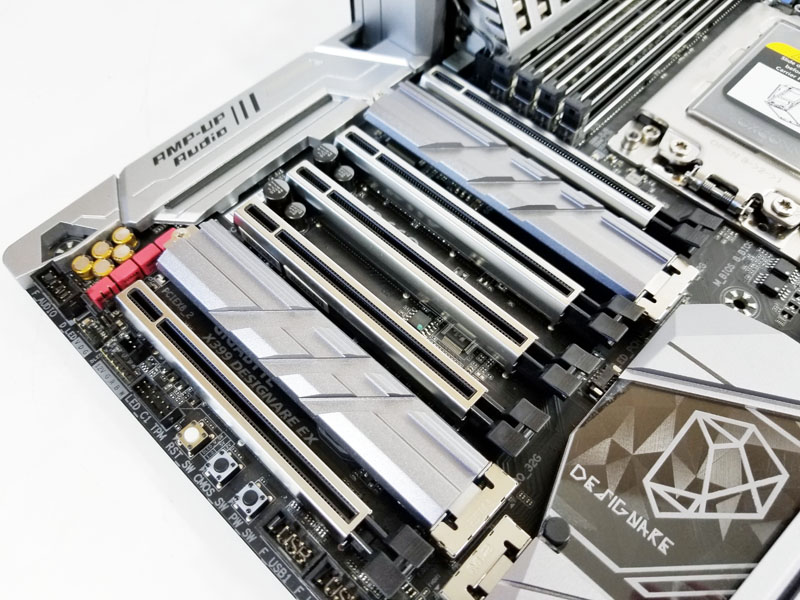
PCIe slots are arranged to provide 48 lanes from the CPU, enough to support single, 2-way and 4-way graphics card setups in x8, x16, x8, x16 configurations.
In between PCIe slots, there are two M.2 slots, each with its heatsink for cooling.
Moving to the top left corner of the motherboard, we find the Sound BlasterX 720° High Definition Audio, Realtek ALC 1220 SNR HD Audio with Smart Headphone amp.
The chipset heat-sink has an attractive design utilizing the Gigabyte Designare logo and is also backlighted by LEDs.
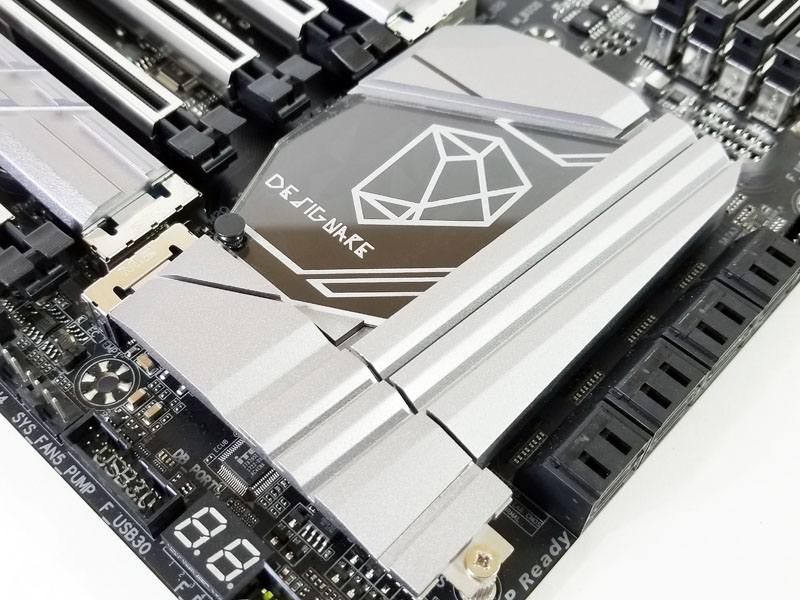
We also find the third M.2 slot next to the chipset, also supported by its own heatsink.
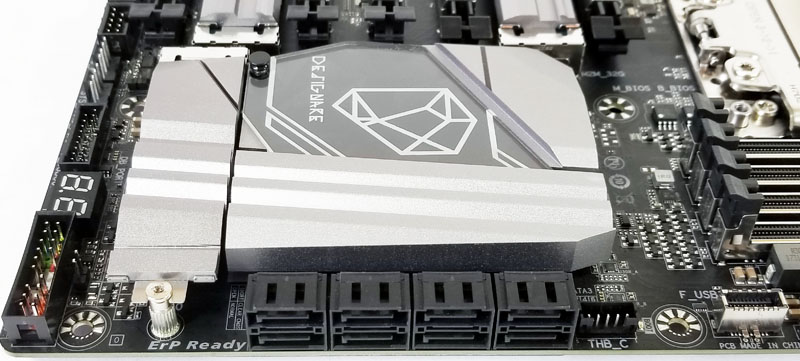
Storage connections include eight SATA 6Gb/s connectors. Just off to the right at the edge of the photo, we find a USB 3.0 Type-C port for front panels.
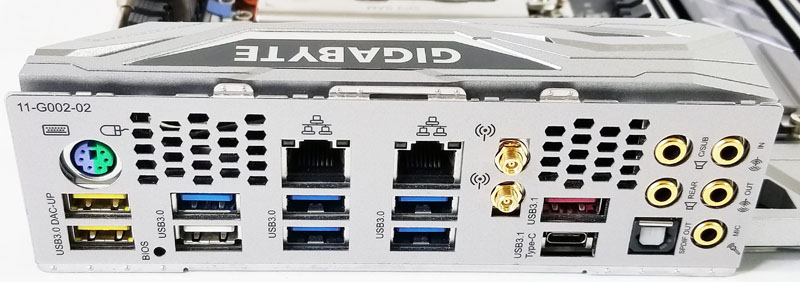
A new feature we are starting to see on the latest motherboards is a built-in IO back-plate. Gone are the days of the flimsy backplate that is hard to fit and this is something we really like. Ports are labeled to aid you with connecting external devices. Audio and Wi-Fi ports are gold plated for improved connectivity and signal conductivity. To help cool the VRM’s under the IO cover there is a built-in fan to help out with cooling.
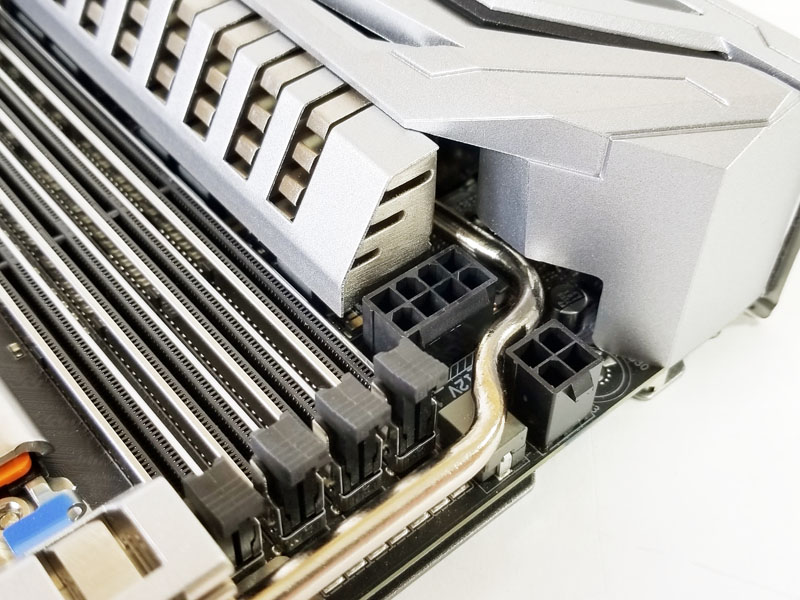
Tucked away near the rear I/O area are a single 8-pin and one 4-pin ATX 12V power connectors. We see a heat pipe that weaves its way between these power connectors. Space is tight here, but we had no issues unplugging the power connectors.

There are plenty of fan headers on the Designare EX motherboard, up front, we find or CPU Fan and Pump headers at the right-hand corner. Most of AMD’s recommended coolers for Threadripper involve watercooling so this is more practical than one may otherwise think coming from previous generation workstations.
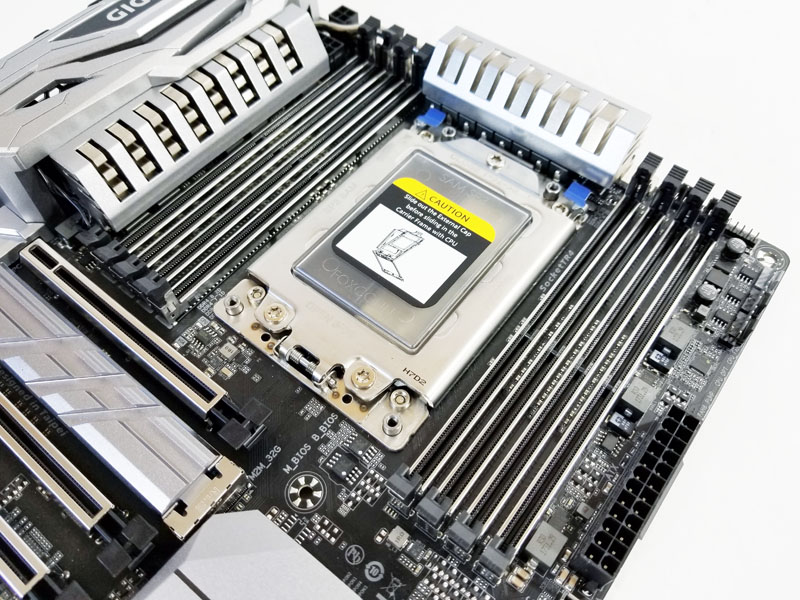
We find four memory slots on each side of the massive TR4 socket. These provide Quad channel memory speeds and up to 128GB of RAM. Gigabyte uses what it calls Ultra Durable Memory Armor, this protect these slots from twist damage when inserting memory sticks and plate bending. We also see PCIe slots protected by Ultra Durable PCIe Armor that gives added strength to slots to protect them from heavy graphics cards.
Gigabyte X399 Designare EX Motherboard BIOS
We find Gigabyte’s version of its UEFI BIOS after hitting the DEL Key on startup. The first screen you will see when entering the BIOS is the System Tab seen below.
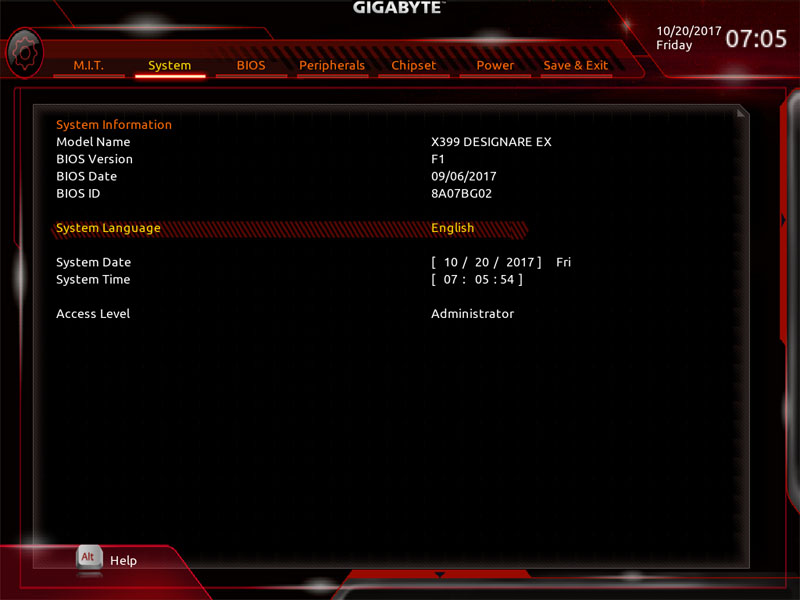
Here we find necessary information about the system.
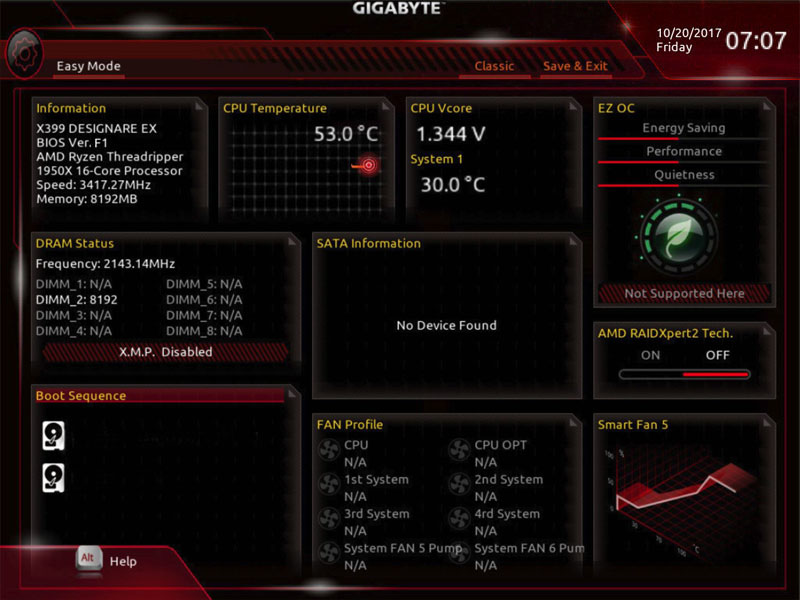
By Pressing F2, we can switch to Easy Mode.
Going back to Advanced Mode we can mode to the M.I.T. (Motherboard Intelligent Tweaker) tab and get to the heart of the overclocking settings.
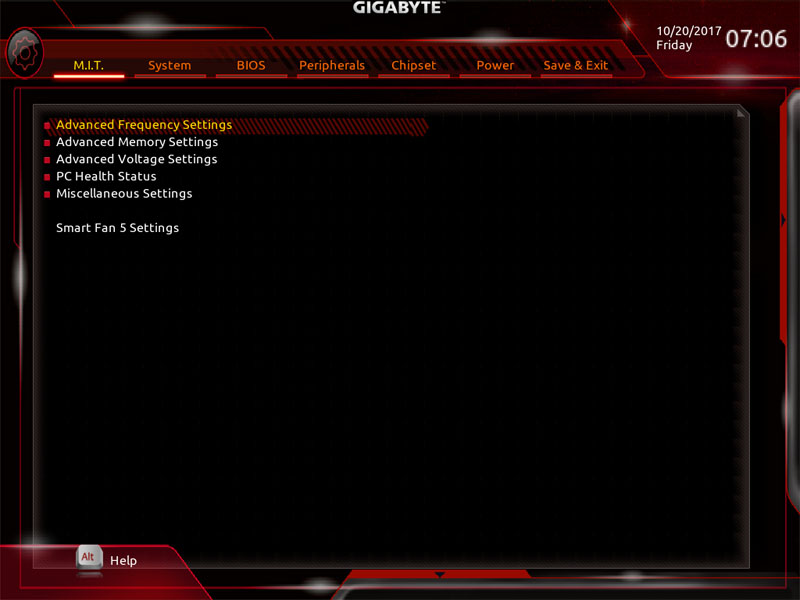
In the M.I.T. Tab, we can now see menus that allow us to adjust system settings that will control our overclocks.
We run our benchmarks using optimized defaults and then again at 4GHz, we will show the settings that we changed next.
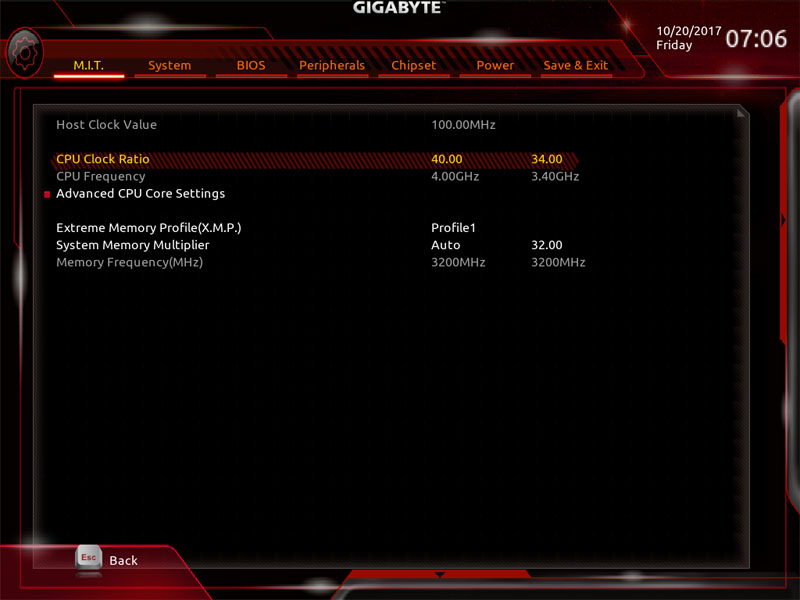
We adjusted the CPU Clock Ratio to 40 which will give us the 4GHz overclock. We also set Extreme Memory Profile (X.M.P.) to Profile1 which brings us to our memory rated speed of 3200MHz.
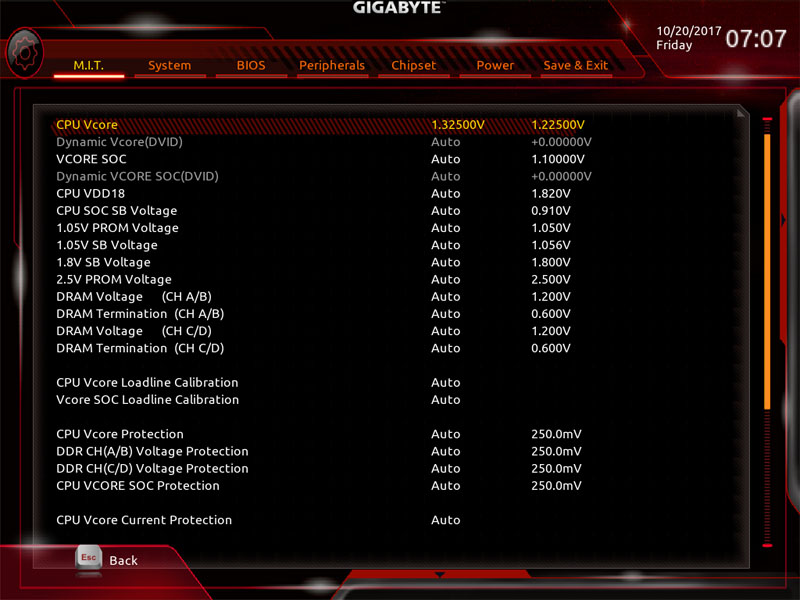
The last setting we will need to adjust is CPU Vcore, this we set to 1.325V which is a good starting point for a 4GHz overclock. Depending on your CPU and other factors you might need to adjust this lower or higher to achieve a stable system.
Gigabyte X399 Designare EX Motherboard Software
The supplied DVD contains drivers and software for your use on the Gigabyte X399 Designare EX. We will note here that the AMD Threadripper platform, and thus the Gigabyte X399 will work with popular Linux distributions but the drivers and utilities come from a Windows code base.
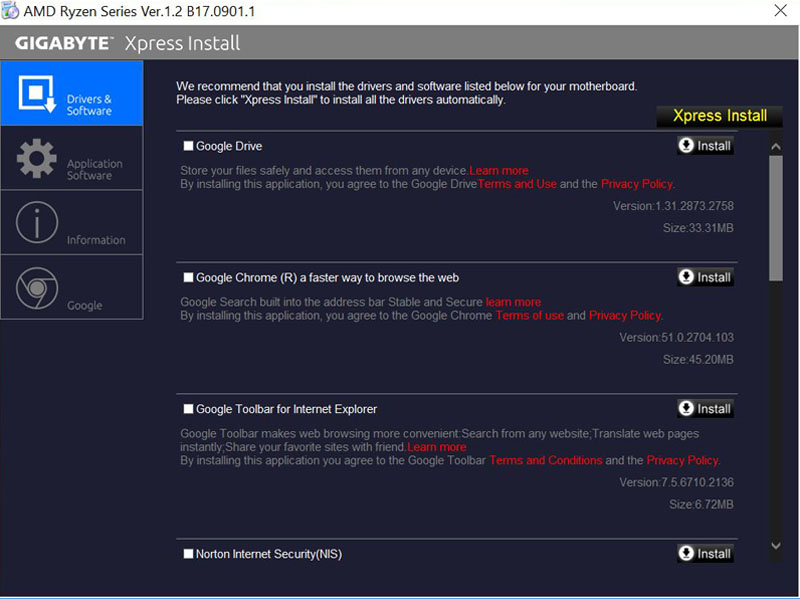
Xpress Install might install several software packages you will not need, be sure to uncheck the ones you do not wish to install.
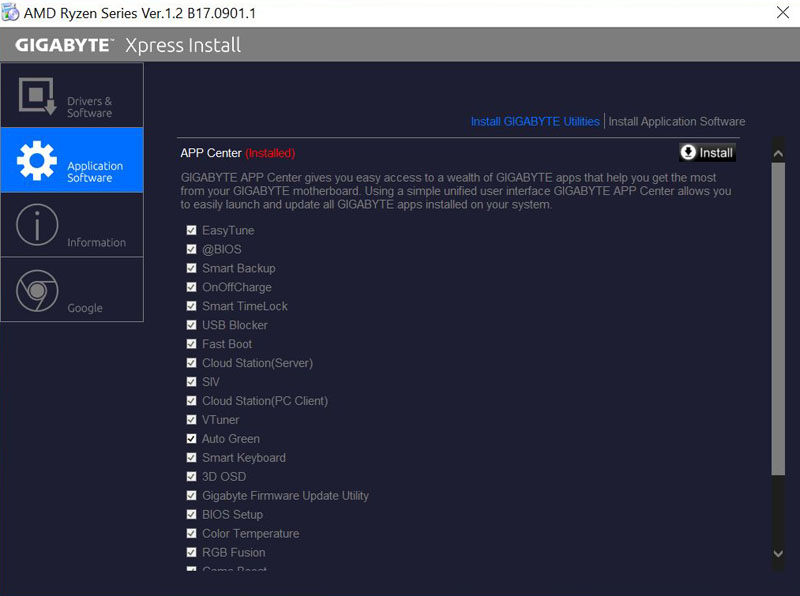
The Gigabyte X399 Designare EX has an extensive list of Application Software, uncheck the ones you do not want to use and continue with the install.
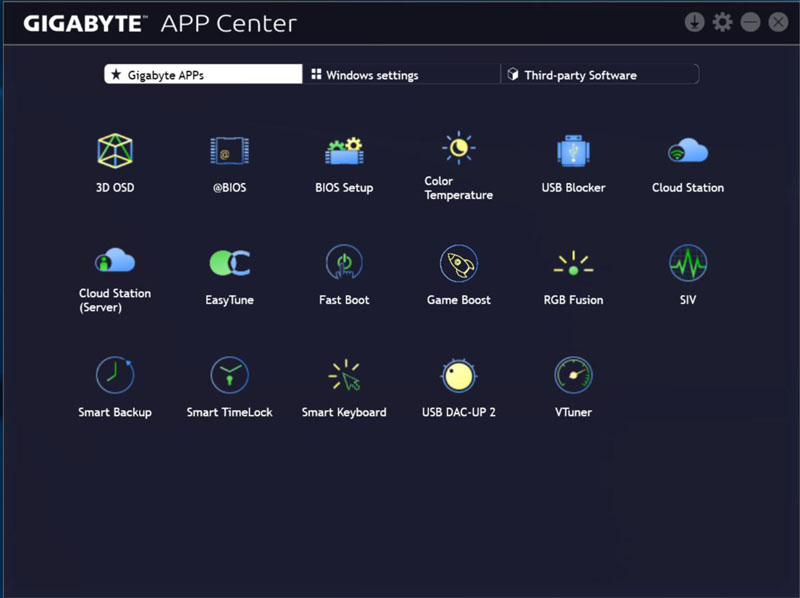
On the desktop, the App Center is a central place to access your installed apps. The first tab shows Gigabytes applications.
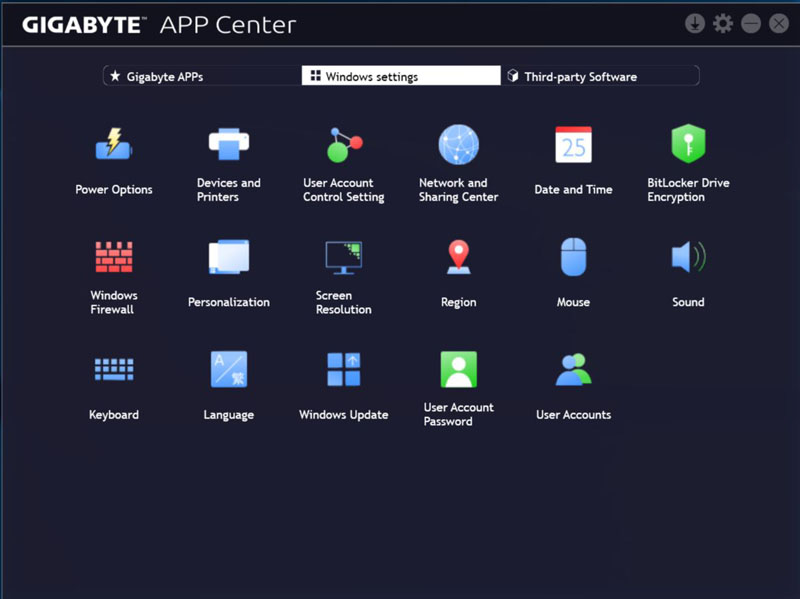
The next tab shows Windows Settings and off to the right is Third-party software.
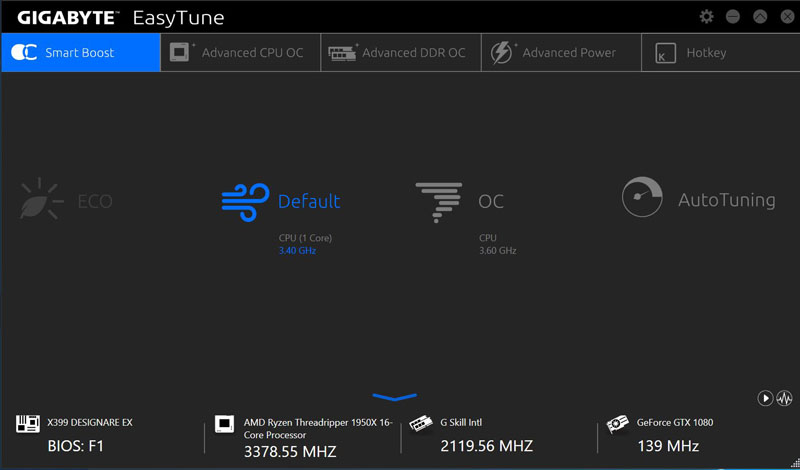
Gigabyte EasyTune allows for simple to use overclocking functions; one click sets the desired OC to suit your needs on the fly. The far right we find the AutoTunning button, we ran AutoTune, this achieved an overclock of 3.8GHz which is a reasonable OC that keeps heat loads and system fan noise down to a minimum and provides an excellent performance boost.
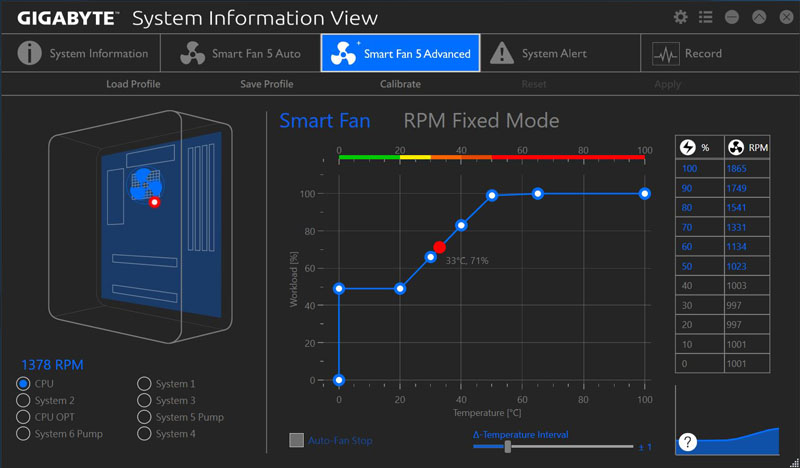
Gigabytes Smart Fan allows for simple and easy to use fan speed adjustments which can improve system performance and reduce fan noise.
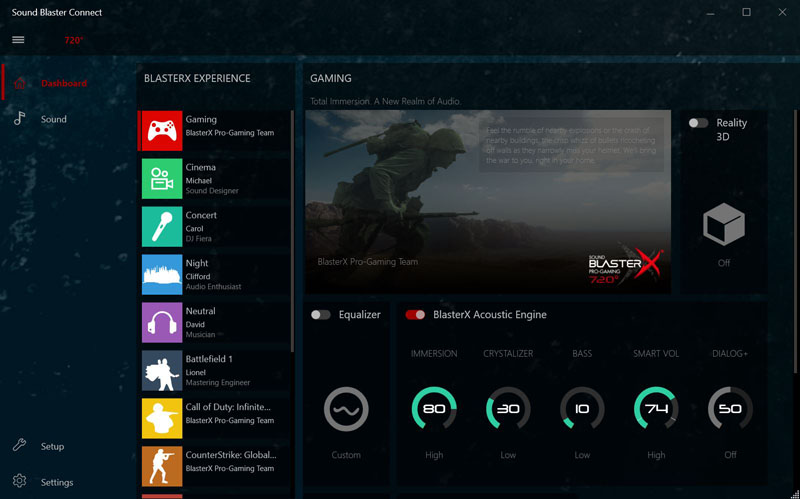
The Designare EX uses Sound BlasterX 720° for audio. This control panel allows you to customize your audio experience fully.
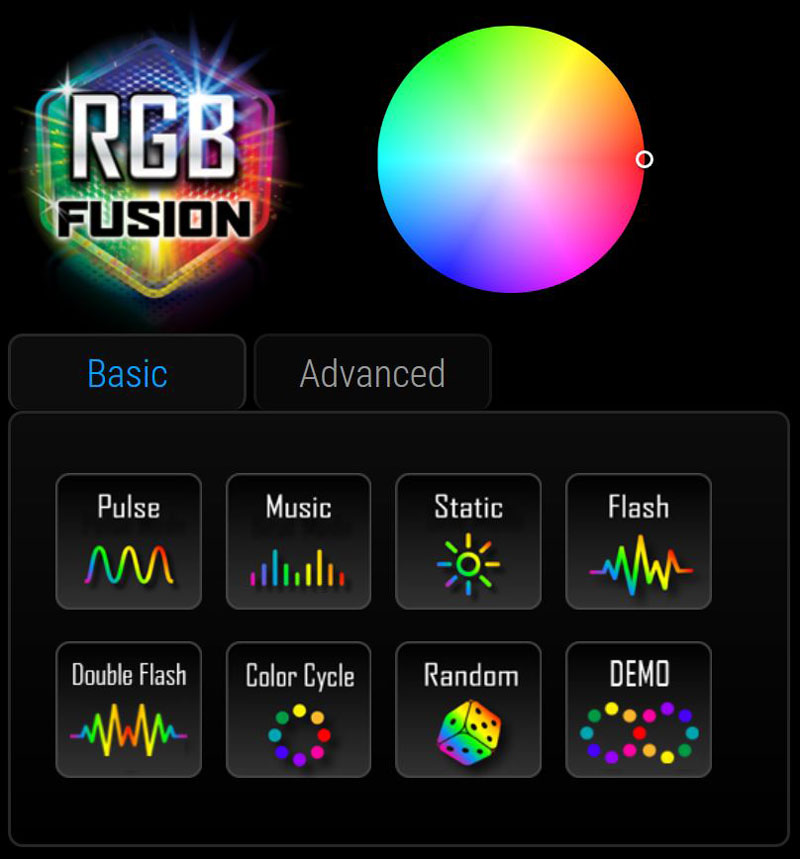
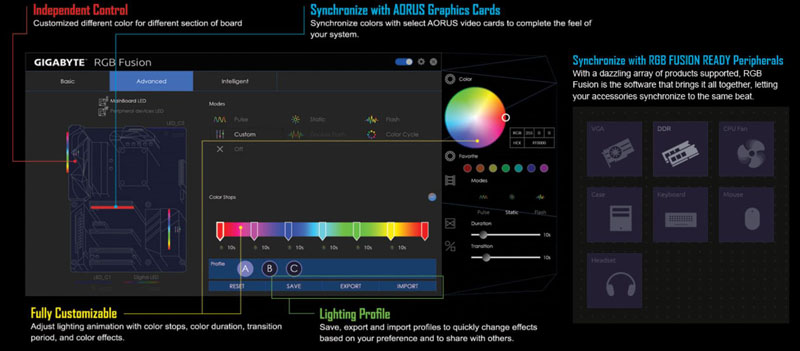
The Designare EX motherboard itself has few LED’s to light up, found on the chipset heat-sink and Designare logo. For those that want to use LEDs the Designare EX provides a dizzying amount of LED options. LED headers on the motherboard and supplied cables allow you to connect everything from Digital LEDs to RGB/UV LED and True White strips, all controlled through RGB Fusion.
Gigabyte X399 Designare EX Performance
While the motherboard may have extensive features, the next step in our review is to take a look at performance.
Test Configuration
- Our basic test configuration for this motherboard;
- Motherboard: Gigabyte X399 Designare EX
- CPU: AMD 1950x (16 core) Threadripper
- Cooling: Thermaltake Water 3.0 Ultimate AIO
- RAM: G.SKILL TridentZ DDR4 16GB(4 x 4GB) 3200MHz
- SSD: OCZ RD400
- OS: Windows 10 Pro

Here we see CPUz showing our system running at default settings.
Overclocking the Gigabyte X399 Designare EX Motherboard
There are several places you can select preset overclocking profiles, in the BIOS or through EasyTune. To maintain consistent results across our reviews which use a 4GHz OC baseline, we set this speed of 4GHz in the BIOS as shown in the BIOS screens.
Let us move on to our benchmark results.
AIDA64 Memory Test
AIDA64 memory bandwidth benchmarks (Memory Read, Memory Write, and Memory Copy) measure the maximum achievable memory data transfer bandwidth.
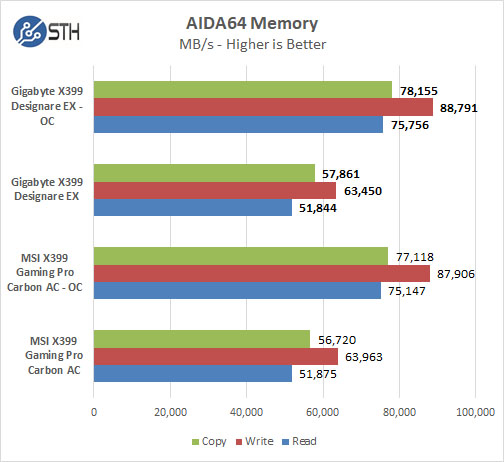
AIDA64 Memory benchmarks show comparable numbers with other systems in both default and overclocked settings.
Cinebench R15
This is a well-known test that runs extremely well on AMD architectures to the point that AMD marketing utilizes Cinebench R15 at every Zen based architecture release. We were able to break Cinebench R15 using a modern server (~11500 score) to the point that it could not reliably provide numbers. For the single socket workstation market, it still functions.
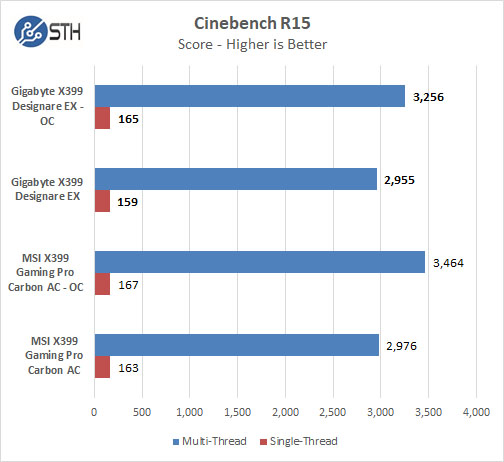
While defaults settings are relatively close, overclocked settings fall behind by about 200 points. The results could be lower from thermal throttling with a higher heat load with the 4GHz overclock.
Geekbench 4
Geekbench 4 measures the compute performance of your GPU using image processing to computer vision to number crunching.
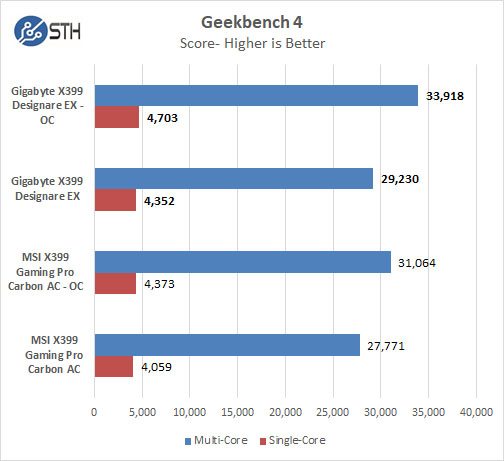
Geekbench 4 is overmatched as a benchmark with these new workstation class CPUs. At the same time, we can see that the Gigabyte motherboard performs extremely well.
PCMark 8
With PCMark 8 you can test the performance of all types of PC, from tablets to desktops. With five separate benchmark tests plus battery life testing, PCMark 8 helps you find the devices that offer the perfect combination of efficiency and performance. PCMark 8 is the complete PC benchmark for home and business.
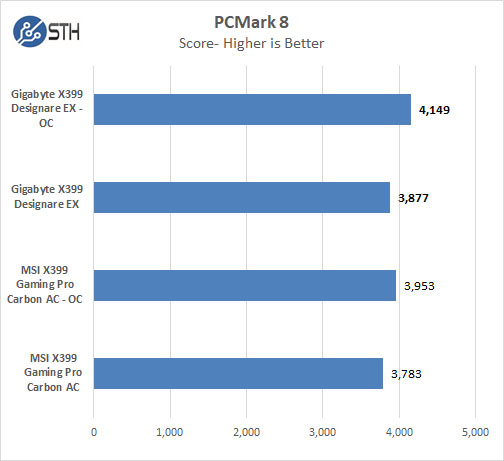
Results with PCMark 8 are very close in both system settings.
PassMark 9
PassMark PerformanceTest allows you to benchmark a PC using a variety of different speed tests; it tests the entire PC and all its component’s.
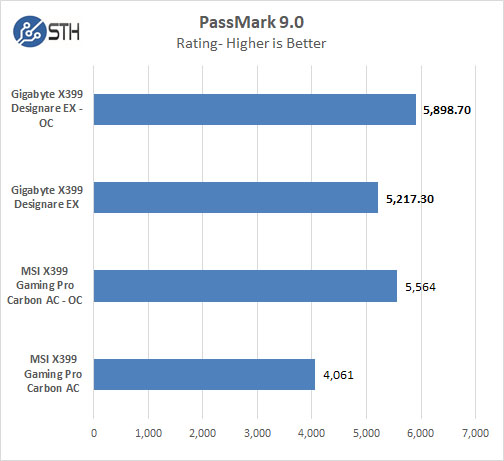
With PassMark 9 the Designare EX shows a definite improvement in results, default settings seem to be dialed in very well.
Gigabyte X399 Designare EX Motherboard Power Consumption
Power consumption can vary a significant amount depending on processors used and the number of HDDs/SSDs/Expansion cards used. Here we test just basic system.

For our tests, we use AIDA64 Stress test which allows us to stress all aspects of the system. We do not stress-test the GPU in these tests.
While default settings are close with the Designare EX 16watts lower, at full 4GHz overclocks using our OC presets we see almost 200watts higher on the Designare EX. If we spent the time to fine-tune our Vcore settings, it’s possible to get a lower number. This shows how motherboard manufacturers can pump the power consumption in order to achieve higher stable performance.
Conclusion
Gigabyte took the Designare EX to a whole new level, everything from metal heat-sinks to accessories, cables included for RGB strips, M.2-U2 card, and even a T20 star wrench plus all the other extras we would expect. The premium feel of this kit is about the best we have seen so far; the quality metal base plate was a surprise, it improves board strength to support heavy graphics cards, and metal heat-sinks cover every major component that needs cooling.
While some of us prefer motherboards not covered with LED’s, the Designare EX uses tasteful LED’s that have minimum impact on board lighting; it also gives the maximum flexibility for those who want to light up their systems fully, Gigabytes RGB Fusion makes controlling all your LED’s a snap.
We also like EasyTune features, changing overclock profiles with a simple click take effect in an instant. EasyTune Smart Boost and setting to ECO or Default is useful when doing non-stressful operations like Office and web work; this lowers heat output and not. When demanding applications are needed, click OC to boost processor speeds and increase application performance.
The list of Gigabytes applications is quite long; many could use a full write up describing what they do. With that said, just about every one of those apps is useful, so they are worth exploring to see if they fit your workday needs.
Gigabyte has created an excellent motherboard with its X399 Designare EX, it has high-quality design and will serve you well as a centerpiece of your workstation.


How was the linux compatibility (e.g. with Ubuntu 16.04 LTS)?
Will it run ESXi?
What about OpenSuse 42.3 Leap or Tumbleweed Compatibility?
Starting from kernel 4.14 and up you should be fine. The only detail is the temperature sensors but those will be fixed on 2018 and, who knows, maybe on dec 2017. I would spect some patches for lower kernels too down the road.
Comments are closed.