
There are several ways to convert a Virtual Machine. You can do this the hard way by rolling out a new virtual machine with similar specifications and software components, migrating the data, exporting merging registry keys, Active Directory backup and restores, SQL Database backup and restores, File server backup and restores while utilizing Microsoft Distributed File System for a file server migration, IIS Metabase backup and restores, and the list goes on and on and on. What a pain in the neck!
The key to any successful project is planning. You know what you want your end result to be, but you don’t know exactly how you’re going to get there. If you document your environment, walk through each piece of your environment’s settings for both the old and new hyper-visor, you’re going to have a good idea of what needs to change.
Physical to Virtual – Virtual to Virtual Conversions
One way to achieve this is with third party tools that will do all the heavy lifting for you. You can do live and powered down migrations of your Virtual Machines with Physical to Virtual (P2V), and Virtual to Virtual (V2V), with free conversion utilities. This is an excellent way to do things if you don’t have access to the entire network infrastructure or your single responsibility is managing Virtual Machines. For these cases I use a free piece of software, the VMware vCenter Converter Standalone Client.
VHD – VMDK – IMG Conversions
There are many P2V (Physical to Virtual) pieces of software in the wild. They all can do a good job, but not necessarily where the job really counts, time. The speed of converting a VM with P2V software can be excruciatingly slow. There is a universal truth across any project. Time is money. I am not necessarily in a hurry in this case; rather I prefer spending my time doing many things at once. I like to work smart, not hard, and if I can speed things along while doing multiple tasks at once, I am all for it. This can be achieved by converting the Virtual Hard Disk Drives, then adding them to your newly created Virtual Machines in your new ESXi environment. This may seem a bit daunting at first, but this won’t always be the case. If time is of the essence, and you documented all your Virtual Machines and infrastructure prior to your migration, this can be the fastest way to go. For these cases, I use Starwind V2V Converter. It is a free utility from Starwind Software that performs sector to sector copies of VMDK, VHD, and IMG virtual disks in all three directions.
[Ed. I have also used the Starwind converter quite successfully to convert VMware images for my Windows 8 Hyper-V machine.]
Migration Configuration
I am going to share a universal truth. You’re only as good as your last backup. I can’t stress this enough. I have seen some very nasty situations where clients have failed to implement and test a Disaster Recovery Plan. Data recovery is costly, time consuming, and stressful. Make sure you have a tested DR Plan. A good DR Plan will have documented your entire Network Environment, every device, every setting.
We will document all the Hyper-V virtual machine settings, CPU, Memory, Network Cards, IP Adresses, ETC prior to the migration. This will make it easy to create the new Virtual Machines in ESXi upon its installation and configuration.
Items needed for the migration:
- Disaster Recovery Plan
- Starwind P2V Converter
- VMware ESXi 5.1 installable media, and a basic understanding of installing and configuring ESXi
- VMware vSphere 5.1 Client installed on a workstation
- Network Storage
- Server
- Workstation
napp-it storage appliance with 3 TB of usable space:
- CPU: Intel Core i3-2100
- Motherboard: AsRock Z77 Pro4
- Chassis: iStarUSA D-416
- Drives: 1x Seagate 500 GB 7200.11 boot drive – 4x Seagate 1TB 7200.12 RAIDZ1
- RAM: 16 GB Elpida
- Add-in Cards: Intel Dual Port Server Adapter
- Power Supply: Raidmax 550W
- Other Bits: 2x Supermicro 5 Bay disk enclosures
- OS: Openindiana 151a7 and napp-it V.0.9a1
Hypervisor Server Config:
- CPU: Intel Xeon E3 1230
- Motherboard: Supermicro X9SCM-F-O
- Chassis: Rosewill RSV-L4411
- Drives: Crucial M4 64GB Boot Drive – 8x 2TB Hitachi 7K3000 – 4x Western Digital 500 GB RE3
- RAM: 16 GB Kingston ECC UDIMM
- Add-in Cards: IBM ServRAID M1015 flashed w/ LSI SAS9211-8i IR mode – 3Ware 9650SE – 2x Intel Dual Port Server Adapters for MPIO
- Power Supply: Antec EarthWatts EA-650 GREEN
Workstation Config:
- CPU: Intel Core i7-3770K
- GPU: 2x PNY GTX 570 in SLI
- RAM: 16 GB Corsair Vengeance 2133MHz
- Motherboard: ASRock Fatal1ty Z77 Professional
- NIC: Intel Gigabit CT Desktop Adapter
- SSDs: 2x Crucial M4 128 in RAID 0
- Cooling: Corsair H70 Liquid CPU Cooler, 5 Corsair SP120 High Performance Edition fans
- Optical: LG DVD RW
- Power Supply: Corsair HX1000
- Case: Corsair 700D with the 800D windowed side panel
- OS: Windows 7 Pro 64bit
A conversion utility is needed for the destination Virtual Machines. In this case we will be using Starwind V2V Converter, forgoing any other conversion utility.
Using Starwind V2V Converter for Hyper-V to ESX Conversion
Starwind V2V Converter (available here) is very easy to use. It is wizard driven, walking you through the process of converting your virtual disk images. Converting images is pretty straight forward. Power off the Virtual Machine, launch Starwind, point to the virtual disk image, select the destination image type, and then select the output file. Install Starwind V2V Converter on both your Hyper-V server and a Workstation. Share your Hyper-V virtual disk folders so that they can be accessed by the Workstation. If you run the conversion utility on both machines at the same time, you can have all your machines converted fairly quickly, depending on the size of the disks being converted, and your network bandwidth.
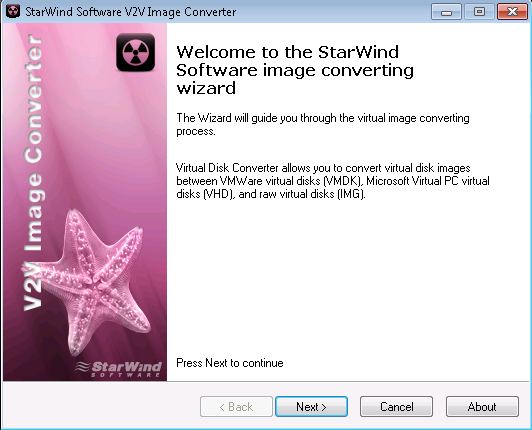
Upon launching the Starwind V2V converter, you are presented a conversion wizard to assist you in the conversion of your virtual disk images.
The first step is selecting the source image. For this, you want to select the Hyper-V .vhd that you want to convert.

The next step is selecting the destination image type. Since we are converting from Hyper-V to ESXi free, we will select the VMware ESX server image. Note, the Hyper-V image used was growable, but we are selecting a non-growable image for the ESXi version. You do have the flexibility to do this easily at this point.

The next step is selecting the output file to convert the Hyper-V .vhd into the VMware ESX .vmdk format.

This will take a few minutes, but once complete, the converted will let you know that it is finished.

As you can see, the conversion process is fast. This was converting 35.2 GB of data on a growable 40 GB Microsoft VHD to a pre-allocated 40 GB VMware VMDK across a gigabit network connection in seven minutes and four seconds!
After converting all your Virtual Machines
This process can be repeated for all Hyper-V VM images that need to be converted. Once complete you can follow the following steps to move them to the new ESXi server.
- First ensure that you install and configure ESXi
- Create your new Virtual Machines without hard disks
- Upload the appropriate VMDKs to each ESXi Virtual Machine Store
- Attach the VMDKs to the Virtual Machines
Conclusion
In closing, the total time for me to recreate my environment from Hyper-V to ESXi was less than four hours. I had a total of six Virtual Machines to convert which took the majority of the time, and had to install and configure VMware ESXi 5.1. I now have a bare metal hypervisor without the overhead of Windows and the supporting features and roles utilizing valuable resources on the server.
I don’t want to give the wrong impression, I think that Microsoft Hyper-V is a great product. My needs for this server with the installed hardware resources required a smaller footprint, calling for VMware ESXi 5.1.
Resources:
- VMware vCenter Converter Standalone
- VMware ESXi
- Starwind P2V Converter
- Microsoft Hyper-V
- Openindiana
- napp-it


Having run into a variety of the shortcoming with VMware Converter, this was a wonderful and very helpful read. Thank you!
I was migrate few xenserver virtuals to vmware with vCenter Converter Standalone and I have been surprised how easily that process went.
I am glad that you found this article useful!
It is a simple process, one of my goals with this article is to take the mysticism out of migrating hypervisors.
Hi, i had converted and attached the Vmdk file on ESXi 6 as mentioned above. When started the VM got the windows 7 screen and immediately getting a BSOD.
BSOD – STOP: 0x0000007B (0xFFFFF880009AE928, 0XFFFFFFFFC0000034, 0x0000000000000000, 0x0000000000000000)
Remove any newly installed Hard drives or hard drive controllers.
I converted VHD (IDE Controller) to Vmdk and imported to ESXi, i hope the esxi would accept SCSI controller. How can i change the controller? Can you let me know.
Converted Tool – StarWind – Destination Format – VMWare ESX Server Image
Comments are closed.