Step 4: Create the VM you want to use
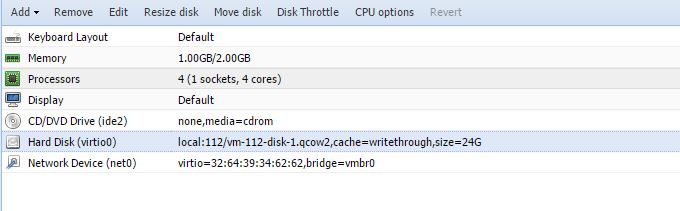
At this point, we wanted to create a VM that we are going to use with the image we transferred. Here the key is to ensure that you make a VM that mirrors the Hyper-V VM in terms of CPU, RAM, network and disk options. Most modern OSes are supported via KVM so you should have little issue getting things to work, especially with Linux guests.
Step 5: Find the VMs qcow2 image
There are a few different ways you can do this, including creating the VM and attaching the disk after converting the vhdx. Since we want to keep Proxmox VE’s naming convention (and make the process easy), we are going to simply overwrite the qcow2 image that the virtual machine wizard created. First, we need to find the VM.
Since you can see that the disk in the shot above is named vm-112-disk-1.qcow2, we can search for that on our Linux/ Proxmox VE host.

Now that we know the location, we can set the output of the conversion operation to overwrite the empty disk.
Step 6: Convert the vhdx to qcow2 and verify
The command to convert our image and overwrite the empty qcow2 is very simple. We are going to use qemu-img convert, specify the output type and then the vhdx followed by the full path to the qcow2 image.

Here is the command you can adapt to your setup:
qemu-img convert -O qcow2 Bench-Dev.vhdx /var/lib/vz/images/112/vm-112-disk-1.qcow2
We also validated that the disk is indeed written int eh correct place.
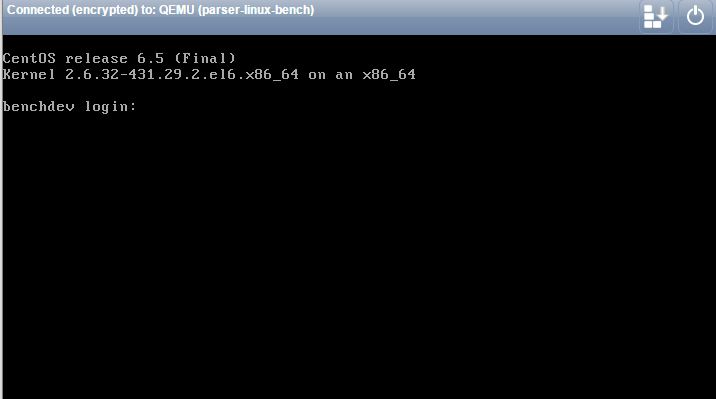
Step 7: Boot the VM
At this point, you should be able to boot the VM. There are still some tasks that will need to be completed. For example, updating network settings. Generally, this type of conversion will yield a different network interface so there are likely steps like setting that up in the guest OS that will need to happen. Platforms like Proxmox VE have built-in console viewer applications so we were able to do this post-transfer. Another option is to complete these steps before transferring/ converting the VM so that you can power-up and verify that the operation works.
These 7 quick steps take only a few minutes (save for the inter-data center transfer) and helped us move our Hyper-V VMs to KVM quickly and painlessly.


Why the step with qcow2 when you want to use ceph anyways (where one would typically use raw format)?
Nice guide but I don’t think it covers Windows 2012 Server conversions completely.
Hi, followed the guide but it appears that the disk isn’t bootable. I converted using qemu-img on Windows (https://cloudbase.it/qemu-img-windows/) prior to transferring the files to Proxmox as I was getting an error as indicated below:
root@proxhost:/var/lib/vz/raid1/temp# qemu-img convert -O qcow2 sourceimage.vhdx /var/lib/vz/raid1/images/105/vm-105-disk-1.qcow2
qemu-img: error while reading sector 24641536: Input/output error
I’m running qemu-img 2.2.1, is a newer version required in order to accomplish this conversion?
J Copeland You need to convert file in Linux using qemu-img, not Windows. Then it will work fine.
I tried this. My UEFI Linux VMs came across fine, but the UEFI 2012 R2 servers just blue screen on startup (came from Hyper-V Server 2016).
Blue screen? Than you uses from harddisk controller in your Proxmox VM config. Switch to IDE0 for your boot drive.
Not booting? Note that your VHDX contains a UEFI partition, so you need to change that BIOS in your Proxmox VM setup to UEFI Bios (standard it uses a normal BIOS)
We need an updated guide for the latest Proxmox. It seems that RAW disk format is the prefered now and you cant change it to QCOW when you create the VM.
Maybe
$qm importdisk 101 serverimage.qcow2 local-lvm could
help nowadays, I’m trying it at the moment. Seems to work with vhd and vhdx too (?)
To be honest: Who needs a manual like that should not convert any kind of VM.
To be honest again: This doesn’t cover hyper-v generation 2 with UEFI. Those kind of machines will always end up with a bluescreen following this guide. For generation 1 it is not necessary to first create a machine and then override it’s qcow2 or raw.
“To be honest: Who needs a manual like that should not convert any kind of VM.”
That is an obnoxious, elitist, ridiculous statement. I’ve used Hyper-V for a while but am switching to Proxmox. It’s for my own uses, not in a corporate or production environment, and I want to learn — and there’s a ton of stuff *to* learn.
If you are moving a Gen2 VM from Hyper-V, you will need to set the bios to OVMF to use UEFI. Then add an EFI disk.
– When the vm starts after importing the disk, hit ESC to go in and disable Secure Boot for the time being. You can turn that back on after if you want.
– The main issue the VM won’t start is because it doesn’t have the virtio drivers and it won’t see the disk. Even though we imported them above, they still won’t work, at least they didn’t for me. Once you load them into the vm using the dism tool, it should recognize the disk and boot.
Comments are closed.