
Recently, I was invited to do a Linus Tech Tips video with a neat objective: create something that one can edit video on that is cheaper and faster than a Lumaforge Jellyfish. We called it the “Jellyfish Fryer.” The Lumaforge Jellyfish is a CentOS ZFS-based hard drive storage server designed for video creators. It comes out of the box and works. Further, it is supported by a company that provides warranty and support. Without question, this has value that Lumaforge should charge for. At the same time, the premise of our video is that one can build a faster, lower power, more reliable system at a lower cost if they are willing to support the project themselves.
In this article, we are going to show how you can accomplish many of the same things as the Lumaforge Jellyfish offers at a lower cost. In the event you have not seen it, here is the video we are going to talk about:
Let us begin!
Problem Statement: Fry Jellyfish
When Linus and I discussed this project over a stroll in Taipei, he described to me the Jellyfish and I have to admit, I was shocked. If you have 1-2 users, then using a NAS in a direct attach setup is easy, and it is something that we see many users do to avoid the cost of a switch. Once 3-4 clients are added, the cost of a switch becomes relatively low. If you saw our MikroTik CRS309-1G-8S+IN Overview and Unboxing there is a $270 completely silent switch that has 8x 10GbE ports. So the cost to move to a switched network is very low.
We set out the following objectives for the Jellyfish Fryer:
- Have a similar capacity to the Jellyfish
- Use inexpensive 4TB class Seagate IronWolf SSDs
- Direct connect multiple clients
- Use FreeNAS on a 45drives Stornado for the project
- End up at the same or a lower cost than the Jellyfish
With those main objectives, we picked a time a few weeks later to build and film the video. Here are the easy steps you can do to get started.
Step 1: Procure Hardware
There are a few ways to go about this. We used the 45drives Stornado as a base. This has Intel Xeon E5-2620 V4 processors and is ready to go out of the box. Linus previously did an unboxing video and installed the drives in the chassis. You can get the Seagate IronWolf drives at your favorite e-tailer such as Amazon. Inserting drives was very easy and requires little to no technical skill. I was absolutely impressed by the chassis and I came away wanting one for my own use (sans the system part since we have plenty of high-end gear in the lab.)
Another option is to buy the FreeNAS Centurion. This is a $24,900 solution that includes the server, either 2x 100GbE or 6x 10GbE ports, and 26x 3.84TB SSDs for around 100TB of raw storage (99.84TB but we can round.) The plus side to this is that you can just buy a pre-configured system and skip the rest of this guide. You also save $10,000 or more over what Linus and I built.
The pluses for the 45drives Stornado:
- Higher raw capacity (up to 32x SSDs)
- A chassis and fans designed to be used in an office data closet
The pluses for the FreeNAS Centurion are:
- Newer/ faster architecture with a lower cost
- FreeNAS comes pre-installed so you simply need to hook it up to your systems/ network
- Warranty on the entire system from iXsystems versus piecemeal warranties
Longtime STH readers and our forum members are likely thinking they can ebay parts at a lower cost. That is fair. If you want to go into the fully bespoke space, the STH forums are where you should go. We also have our Top Hardware Components for FreeNAS NAS Servers resource to help with component selection.
Next, we are going to assume you have a system with storage and show how to set it up.
Configuring a Jellyfish Fryer NAS
In this section we are going to go through a few key steps:
- Installing FreeNAS
- Initial configuration
- Connecting to your Jellyfish Fryer
- A few words on how to do things better
The overall setup should only take a few minutes.
Installing FreeNAS
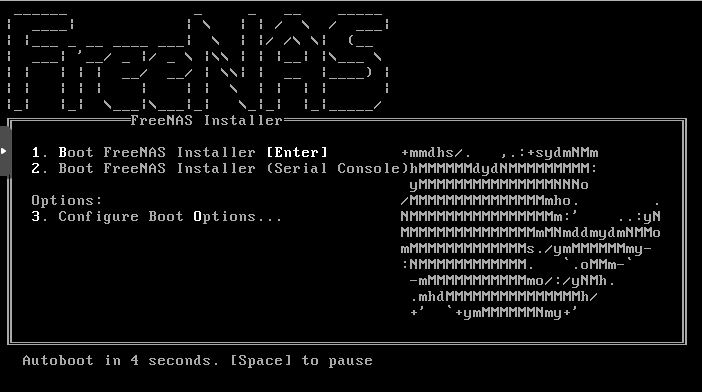
Installing FreeNAS is a fairly simple affair. You can download FreeNAS here. You then can either remote mount the ISO over IPMI or burn it to a USB flash drive and boot from it. Once you boot, you will see this screen. You can hit enter or just let it automatically boot after a few seconds.
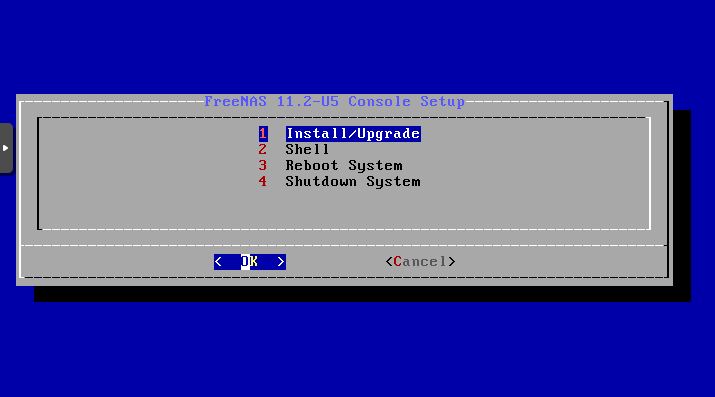
You next select Install/ Upgrade and click Ok.
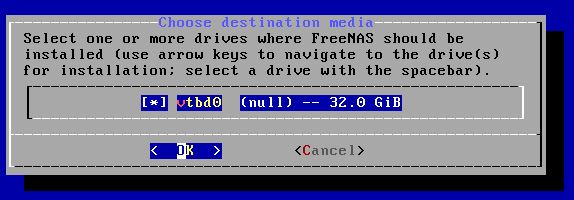
Pick your installation disk. This should not be a data drive and should be its own drive or two. FreeNAS uses a dedicated boot device. Check out our Top Picks for FreeNAS Boot Drives to see some options.
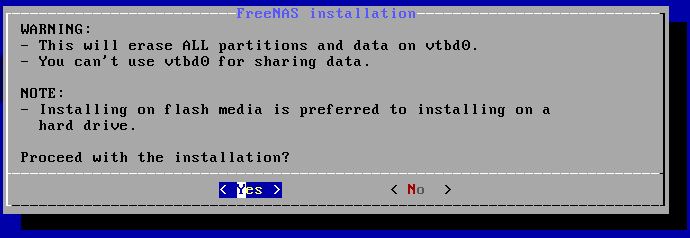
Next, confirm you want to erase the drive and install FreeNAS.
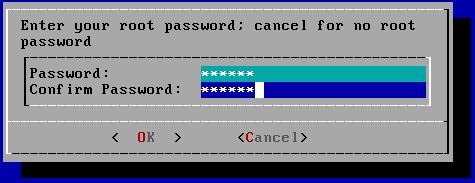
The installer will ask you for a password
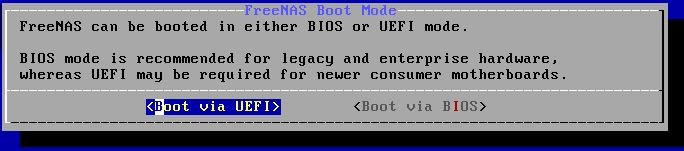
The installer will then ask how you want to boot. If you have an old server, choose BIOS. If you have something newer, use UEFI. The easy way to remember this is BIOS is the legacy technology even Windows 95 PCs used. UEFI is the modern version. Anything that was sold as the new and current generation in 2017 or later, we usually recommend UEFI.
Finally, the installer will ask you to reboot the system.

After clicking OK you may be taken back to the first blue screen above. FreeNAS needs a reboot and shutdown option from this menu but it may take you one more step to select those.
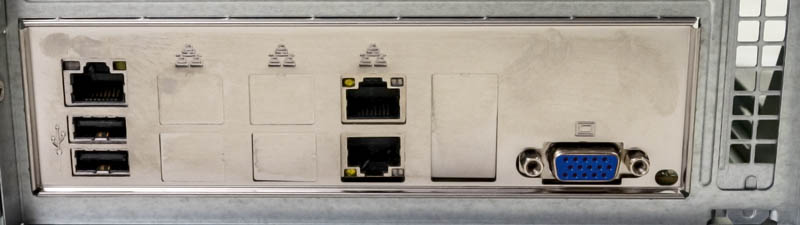
As you reboot the system, here is an important step: connect an Ethernet port to your local network. We typically use the first network port for this, but FreeNAS can use any. On the FreeNAS Mini line, and most Supermicro motherboards this is the bottom leftmost network port. In this shot from our FreeNAS Mini XL+ Review, that is the middle bottom network port. We do this so we can easily logon to the WebGUI after.
After the system reboots you will see a console screen with the IP address of the system. You can simply put one of these into your browser.
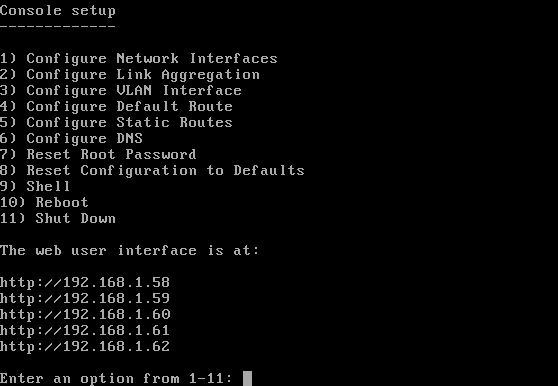
Now you should be able to use “root” and the password you selected to login.
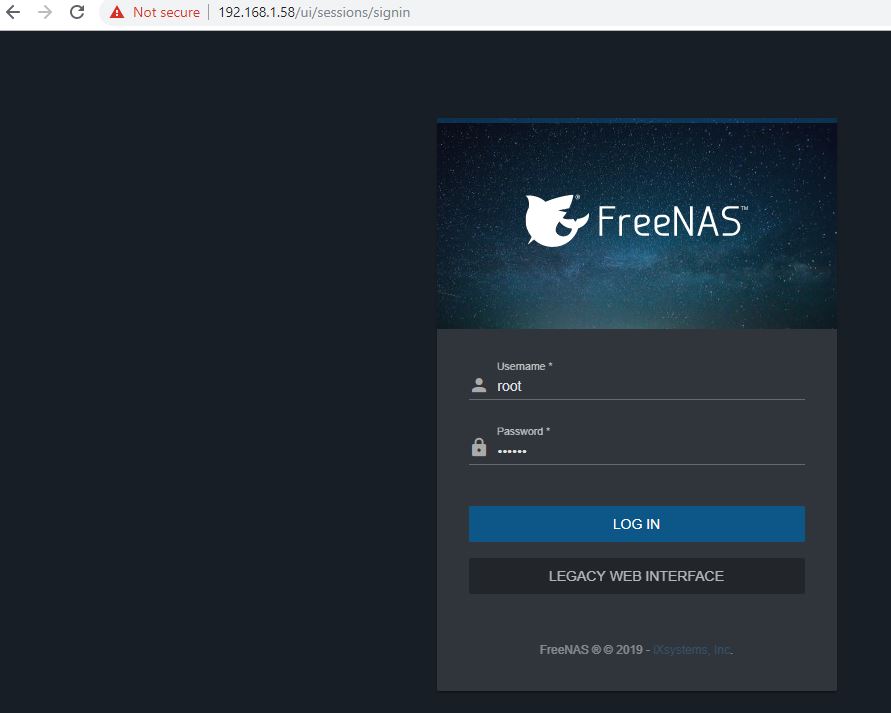
You should now be at the FreeNAS dashboard, and your installation is complete. It is now time to do the configuration and we are only 9 clicks in.


Is FreeNAS any different from a zfs on linux setup?
>Is FreeNAS any different from a zfs on linux setup?
A little more appliancy. Personally ZFSOL has legs. Have a look at what Jim Salter is doing. Next level ZFS.
Tony, they use the same OpenZFS base. At an OS-level, FreeNAS is built on FreeBSD which is different than Linux (some good, some bad.) FreeNAS also has a Web GUI and an active team developing it.
With that said, I personally use a lot of ZoL. More recently our lab has been using a lot of Ceph storage which I am contemplating using at home as well.
Speaking of Ceph, i would really like it if iX implemented Ceph into FreeNAS/TrueNAS, that way FreeNAS could act as a controller for Ceph and at the same time act as a gateway for Samba.
45drives uses Ceph alot, couldn’t they develop a Ceph plugin for FreeNAS, or work together with iX to implement it.
Currently there is very few options to scale a NAS other than UP, would be nice to have an option with horisontal scaling too. Now, Ceph isn’t really ment for NAS:es but hey, atleast it would be an option.
Will probably never happen but there is a huge gap in the market between these single enclosure NAS systems and for example a multi-deployed Isilon “cluster”
But what about ssd trim under zfs ?
It’s worth pointing out that the Stornado can also come with FreeNAS pre-installed. It also comes with support and a warranty packaged into the price.
Interesting video showing the two sides (DIY vs paying an OEM to do it all for you). The SSD storage in the DIY solution sure seems like a no brainer decision though, especially compared to HDDs in the jelly. But MKBHD gave good argument for those who choose the jelly.
Also was nice seeing Patrick on LTT, quite a different audience for STH.
Krzysiek,
Trim is supported in ZFS 0.8.1.
If only SAMBA supported SMBDIRECT…
Incredible the performance of SMBdirect with 2 direct connection over 40GB Mellanox CX3.
Benchmarching a ramdisk exposed as SMB share, nearly 6GBYTES performance on E5 2640 v0 server, IOPS thru the roof…
So putting a large Optane or NVMe cache of any kind wouldn’t help with performance?
Is it possible to set this up on a mac? How different is the process?
Jellyfish fryer…
somehow, this brought to my memory that Video Toaster thing for the good old Commodore Amiga
LOVE this series! I am in the middle of planning a DIY all-flash server for video editing, VFX, and color-grading myself, so am totally the target audience for this. This series couldn’t have come at a better time for me, personally. A few questions I hope to get some input on:
1. I was planning to go with 8 x Micron 9300 Max 12.8TB U.2 NVMe SSDs attached to 2 x HighPoint SSD7120 X16 PCIe HBAs. These are capable of 3.5GBps individually, so massive performance. I would probably do Z+1 and have a good backup strategy. Any comments on this as a good idea / pitfalls / tweaks?
2. Would there be a good Windows Server-based solution to doing this sort of build, or is there no equivalent/good file system + software RAID solution there compared to ZFS? It’s just that I’m much more familiar with Windows as a platform and opens up some additional services / features to me on the host (i.e. run some transcodes on it, etc.).
3. Is there any way to make a Thunderbolt port behave as a direct-connect network so as to negate the need for a Thunderbolt 10G Ethernet adapter if wanting to connect a laptop?
4. Anyone know a good way to determine what level of CPU is needed to run these high-performance NAS systems? I mean, is the CPU a bottleneck so it pays to have dual high-spec Xeons, or when do we hit the point of diminishing returns? I want max performance, and haven’t figured out a good way to avoid over/under speccing the CPU(s).
How can the freenas centurion be cheaper then the stornado?
It has 20Tb less and 6 cores less but the freenas has more ram, more 10gbe ports and a warrenty.
This might be the most commented STH article of all time on here. Looks like a bunch of people just found out what we’ve known – Patrick’s the Server Jesus these days. It was great seeing him on LTT. I hope they’re planning to do more.
G the Centurion uses a standard off the shelf server so that’s cheaper. They’re probably getting a better deal because all the storage is included while Linus and Patrick used retail pricing. You can get lots of 3.84tb drives under $500 now. They didn’t cover Centurion noise but if it’s saving you $15k then that buys a lot of sound deadening. Maybe they’ve tuned fans like on the mini xl+?
This sentence from the article seems…odd. (I read it five times, and am still unsure of the original intent, even if a single word was perhaps skipped, etc…)
“Many of the frustrations we hear from STH readers around FreeNAS the team is working on. ”
Seems like it needs an extra word or phrase to clarify meaning…
I’ve been hearing that using USB flash drives has fallen from favor, and that most flash drives will fail within a month or three…
Yet, the installer still seems to condone/recommend it…or does it?
Is there an official verdict from the FreeNAS/TrueNAS folks?
[quote]This sentence from the article seems…odd. (I read it five times, and am still unsure of the original intent, even if a single word was perhaps skipped, etc…)
“Many of the frustrations we hear from STH readers around FreeNAS the team is working on. ”
Seems like it needs an extra word or phrase to clarify meaning…[/quote]
Insert comma after FreeNAS. ‘Tis a poor sentence though.
Good to see Patrick on LTT :)
I think I’ve gotten more anxiety than fun from watching Linus play like a child with networking. He really needs to read STH more often and learn a thing or two.
Glad you could represent Patrick! Also glad you could do a ‘back-to-roots’ STH post like this. Love me some tutorials and thrifty data management advice.
Ouahh! Great idea this Jelly fryer!!
Funny, I had an online demo session with the lumaforge team 3 or 4 years ago… And it the end of demo I was like…. wait…. but hey!!! That’s FreeNAS behind your system and you are not even mentioning them. I didn’t find that very “Open source friendly”… I get that a turnkey system with warranty and after sales services come at a price… but I don’t won’t to over pay the service.
So I decided I would build my own… although I never really found enough time to do as I also wanted to go down the 100% refurbished lane. More eco friendly ;)
Anyway, I am now ready to proceed and this tutoriel of both STH and LTT couldn’t be better.
I have ONE question if I may. This biggest hurdle for me is to find the right chassis with Direct Attached Backplanes. But do I really need a Direct Attached Backplane if I’m not using SSD’s?
I understand Supermicro offers that option with TQ backplanes.
I will be using 2 x 10 refurbished SAS 3 Drives ( HGST Ultrastar 7K6000 HUS726040AL4210 4TB ) in a Raid z2 in a 24 bay SuperChassis 846TQ-R900B.
HBA: LSI 3008
NIC: Mellanox ConnectX-3 VPI Single FDR
I will also be using 256 GB of Ram and 4Tb PCIe Flash storage for L2ARC.
Any help / tip regarding backplanes / HBA and NIC would be awesome.
Direct Attached or Expander? This really changes the number HBA ports needed. And the overall price. :)
Cheers and thanks for any help. Maybe I can hire your help? I’m not sure how STH actually works. :)
Leigh (@ Ring Ring Ring production and post production shop, Paris, France)
Generally with FreeNAS we prefer direct attach. At the same time, and especially if you are using SAS drives, an expander will likely be fine. Much of the early issues with SAS expanders and SATA drives were in the SAS 1 era.
Thank you very much @Patrick Kennedy for your help.
I think I will go forward with the TQ (as I can’t find a refurbished A) backplane. It’ll be futur prof if I wish to Upgrade the NAS to ALL SSDs. :)
Cheers
Leigh
Hello @Patrick
I have a new puzzling question…
What kind of 40Gbe NIC should (could) I use on a Mac Pro Classic (or hakintosh )? If I have Intel Nic on the Nas server, can I have Atto on the client end?
Thanks for any of your wisdom.
Leigh
Hi Leigh – 40GbE is standardized so you can use NICs from different vendors on each end. What I do not know offhand is which 40GbE cards work with OS X.
Love the idea but the implementation kind of sucks, this could be a lot more compact and not cost 12k dollars.
Comments are closed.