
Today we are going to setup the VMware vSAN cluster for our all flash VMware vSAN. In the previous piece, All flash Infiniband VMware vSAN evaluation: Part 1 Setting up the Hosts, we got our hosts setup for this proof of concept setup. In the next piece, we will setup virtual machines using the cluster and show the performance we are seeing from this vSAN setup.
Creating the vSAN Cluster
The first step is to select Create a Cluster. The red arrow shows you our entry point for this portion of the guide.

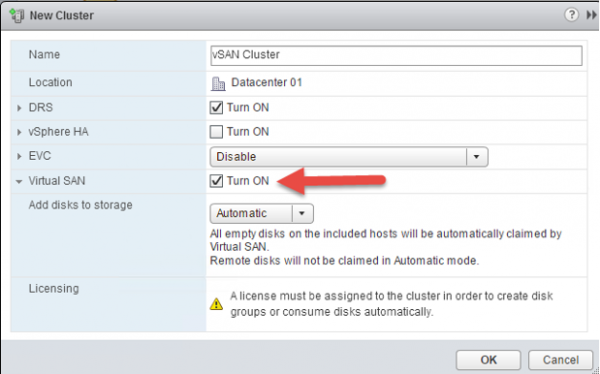
Here we have a number of options, we want to Turn ON Virtual SAN in our cluster. We are also using an obvious name “vSAN Cluster”. You can pick something different here.
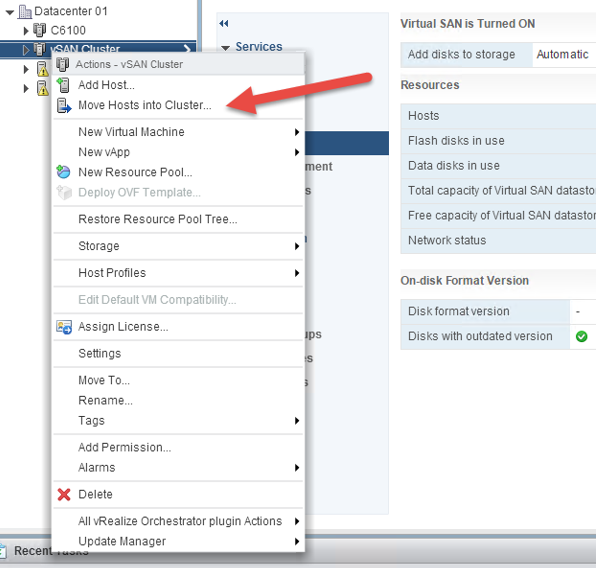
After cluster is created, right click the newly created vSAN cluster and choose move hosts into cluster.
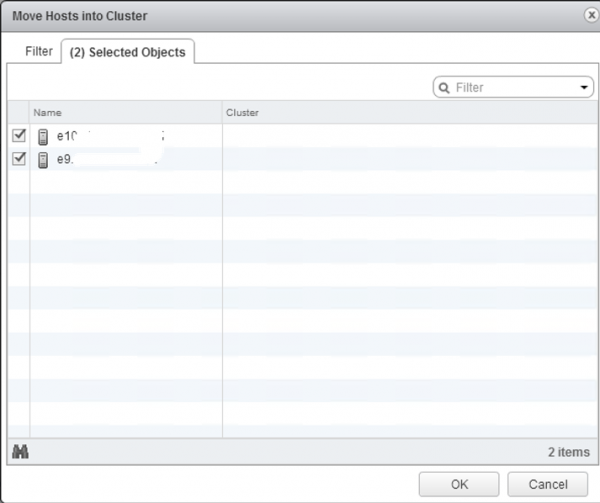
We blocked out the names, but these are the two hosts from Part 1 in this series that we are adding to the cluster.
The next screen allows us to define how we want to treat Resource pools in the cluster.

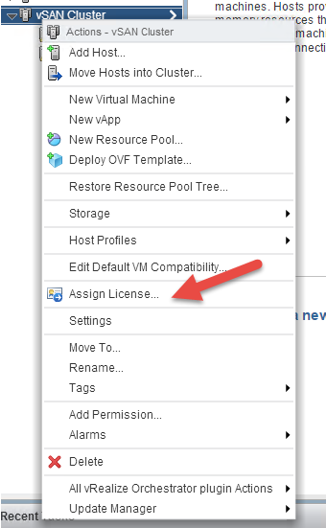
Now we need to assign a vSAN license to enable the feature.
Here we are assigning our vSAN licenses and they validate. For testing purposes, VMUG Advantage is a great place to get the necessary licenses to do something similar.

Since we want new drives to be added to the vSAN, we are going to change this behavior by making a small Edit.
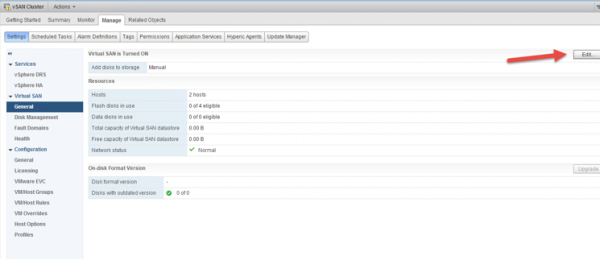
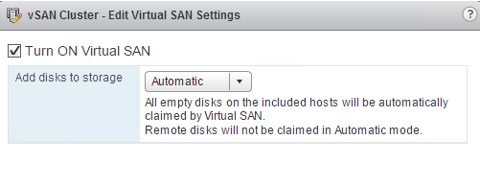
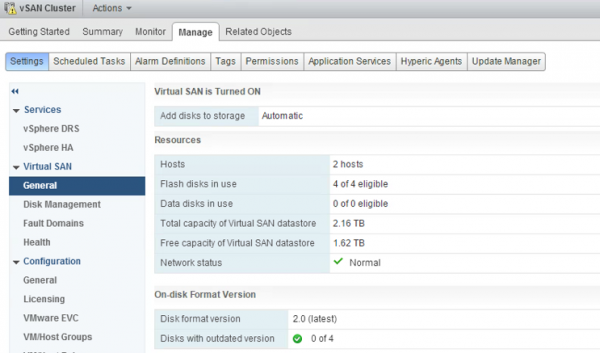
For this guide we are leaving the “Add disks to storage” set to Automatic where empty disks will automatically be added to vSAN.
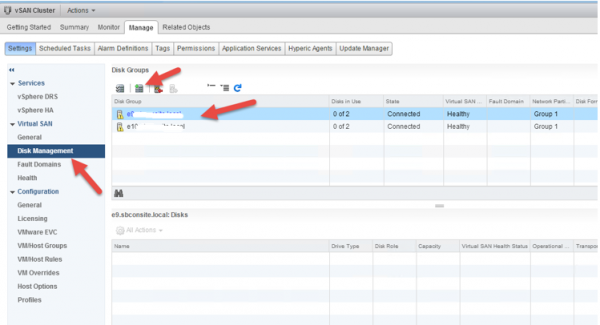
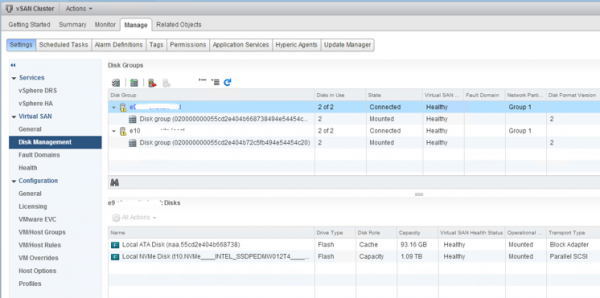
The next step is getting our disks setup for vSAN. We need to go to to Disk Management:
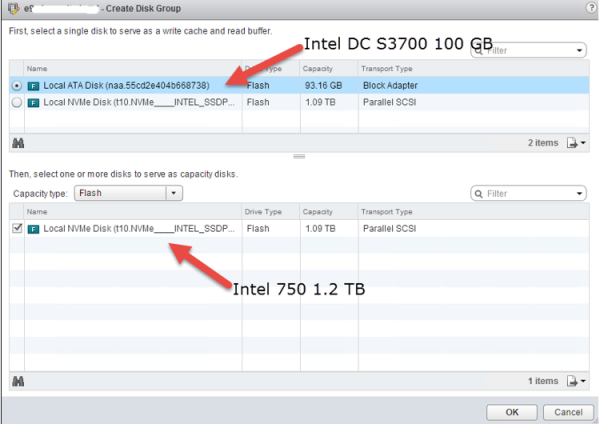
As we Create a Disk Group here, we will use the Intel DC S3700 drives as write cache and read buffer (recommend use enterprise SSD with high endurance). We are also going to use the Intel 750 1.2 TB as capacity disk.
One disk group will ge created for each host.
Now that we have the hosts setup, the cluster setup, vSAN enabled and drives setup, we then need to create a vSAN stretch cluster. Here we are under Fault Domains.

We need to define the Preferred fault domain and the Secondary fault domain.
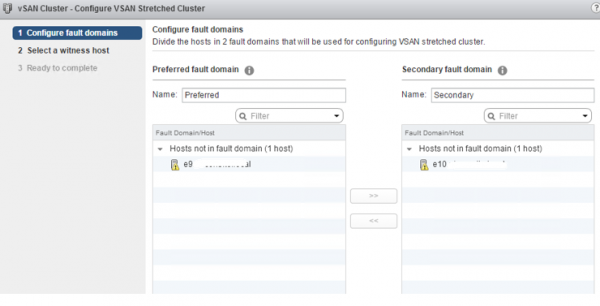
As we mentioned in part 1, since we are using two nodes, we need to use the VMware Virtual SAN Witness Appliance. We do this at the Select a witness host screen. Choose witness host (VMware Virtual SAN Witness Appliance.) It needs access the same VMKernal port as our two physical nodes.

We then can confirm our settings in the Ready to complete screen of the wizard.

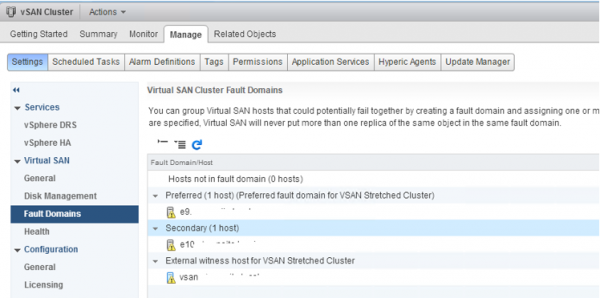
At this pint we are all ready to go with our vSAN cluster. Since many steps were required to get to this point, it is also a good opportunity to pause and verify everything looks right.
We can see our Fault Domains setup with the External witness host.
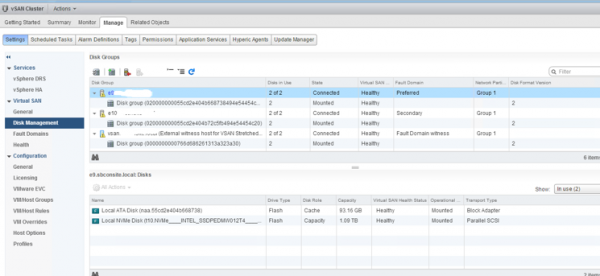
We can see our disks are setup.
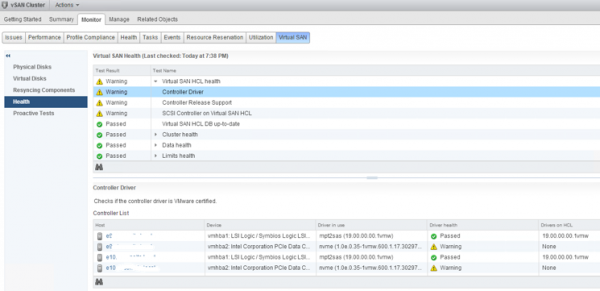
One thing we needed to do was updated the HCL Database which can be done using the Get latest version online button.

Looking at the Virtual SAN section, we can see our two hosts, our disk usage, capacity and network status.
We do have a few warnings with our setup, including for the Intel 750 SSD. Since this is a non-production lab, this is OK but you would want to clear it up for a production instance.
Wrapping-up Part 2
As one can see, there is a lot going on to get VMware vSAN working. On the other hand, it is nice that the layout is fairly intuitive and VMware does have some in-window documentation and Wizards. In the final part of this series we are going to get VMs working on the vSAN storage we setup in Parts 1 and 2 and break out a few benchmarks to see how vSAN is performing.


Does the VMware EVALExperience give you a Standard or Advanced license for vSAN? I noticed in your screenshot it said Standard which I thought didn’t support an all flash vSAN?
https://blogs.vmware.com/virtualblocks/2015/09/23/virtual-san-licensing-and-packaging-for-virtual-san-6-1/
Accordong to this link only Advanced supports All Flash for vSAN 6.1?
Great articles on vSAN!
BW, Good question, but I am not specialized in the licensing. I actually used evaluation license for the demo. The two SSDs I used on the server is served via HBA (DC-3700) and AIC (750). This could bypass some of the limitation from the all-flash vSAN.
Cheers
Comments are closed.