
We are starting up our 10GbE networking reviews again, and for this review, we are taking a look at the TRENDnet TL2-F7080. This is an 8-port 10GbE switch with eight SFP+ ports and some management features. We saw this one as a $199 or so option, making it under $200. It is also the lower port count version of the TRENDnet TL2-F7120 12-port version we reviewed, but that one costs closer to $320 these days for a higher per-port count. Our thought was that, at under $200, this might be an interesting switch to review.
If you just want to find this one, here is an Amazon Affiliate Link to what we purchased.
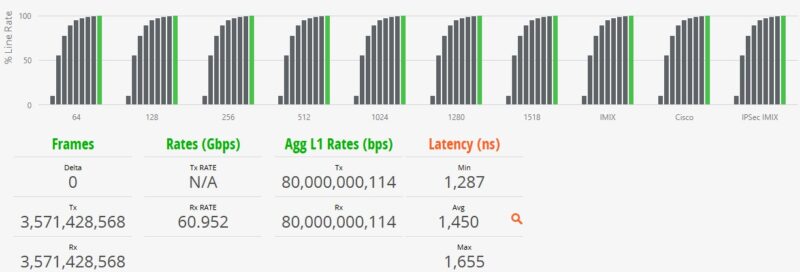
For 2026, we have a new treat that we are going to show off. You may have seen our high-end Keysight CyPerf box.
TRENDnet TL2-F7080 Hardware Overview
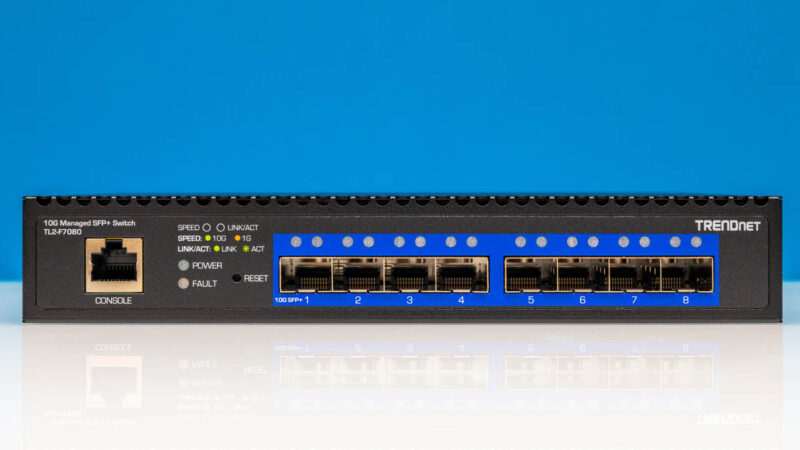
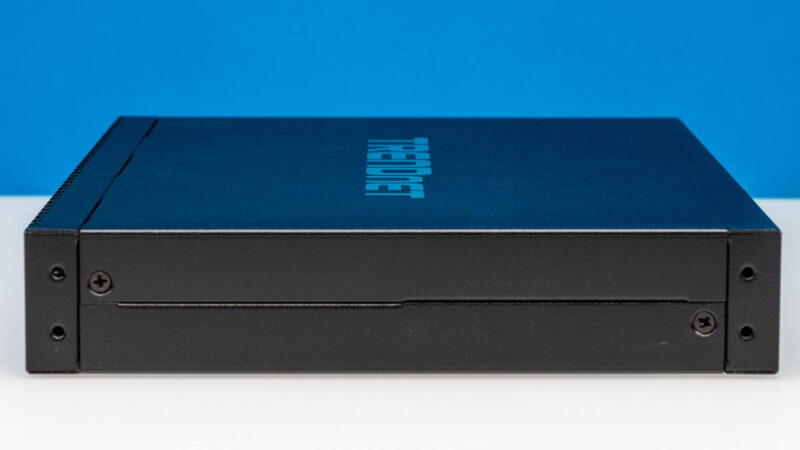
The front of the switch is interesting because it is 210 x 180 x 35mm or 8.27 x 7.09 x 1.38 in.
There is an option that we did not have, to mount two of these in a 1U space using the ETH-F72 kit, but the standard rack ears are offset to put the switch to one side or the other.
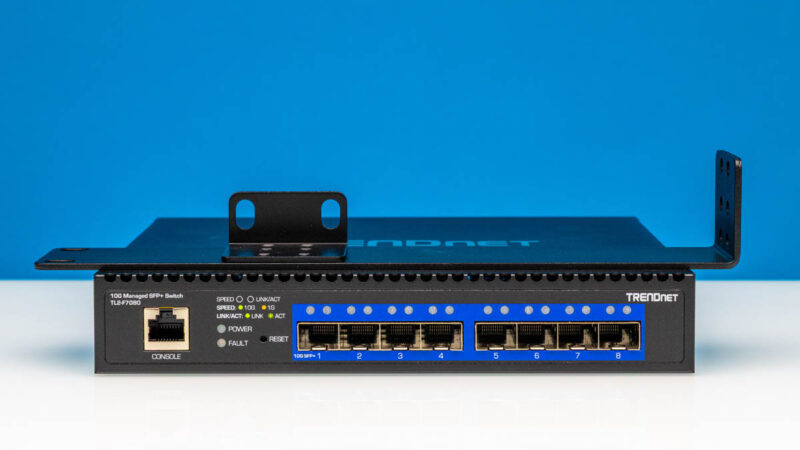
For 10″ rack fans, this is the right size to mount, but you will likely need to fabricate a second rack ear to get it secured in a rack.
One of the big features of the switch is the management, so we get a console port. On a low-cost web-managed switch, most folks will configure via the web GUI instead, since this is not a device meant for Cisco-certified professionals to operate. The vast majority of buyers here are likely to be SMB or home users. In those markets where folks have 1-3 switches, web interfaces are king.

There is a reset button on the front of the chassis.

Then we get eight SFP+ ports. Most will want to use these at full 10Gbps speeds. Still, something to keep in mind is that this is only $199 as we are publishing this. Something like a MikroTik CRS305-1G-4S+IN is often under $140, but it also only has four ports. Perhaps this is the biggest point of this entire switch. You get eight ports.
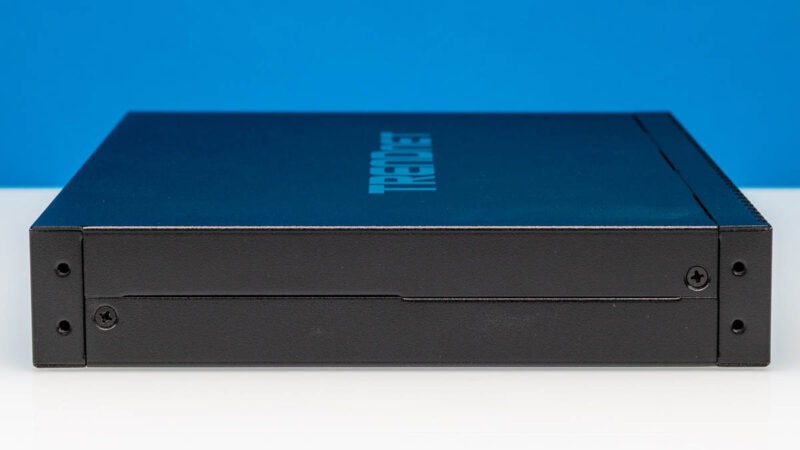
On the side, there are holes for rack ears, but not much else.
The same goes for the other side.
In the rear, we have a fan outlet.
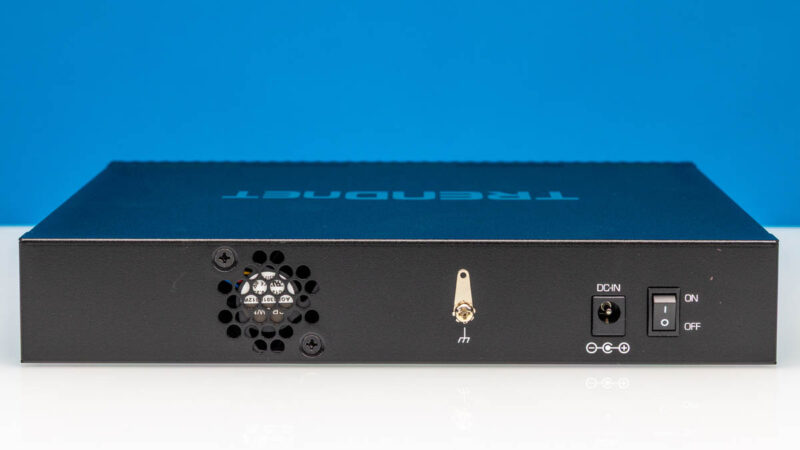
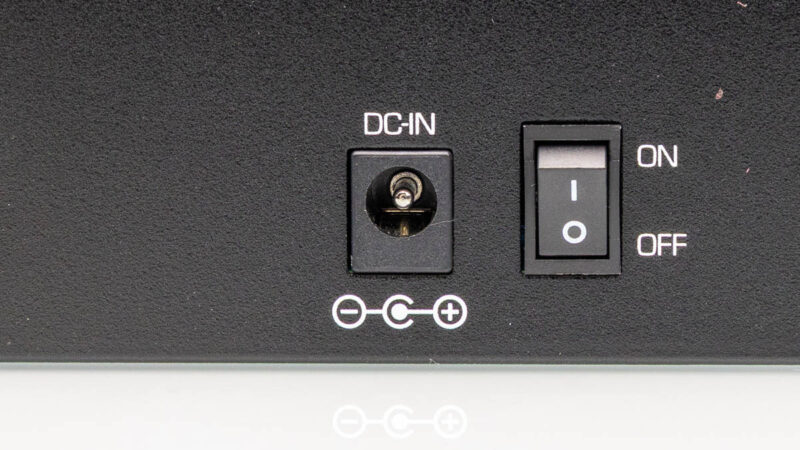
Then there is a DC input for the external power supply. There is also an On/Off switch, which is not standard in this segment, but it is nice to have.
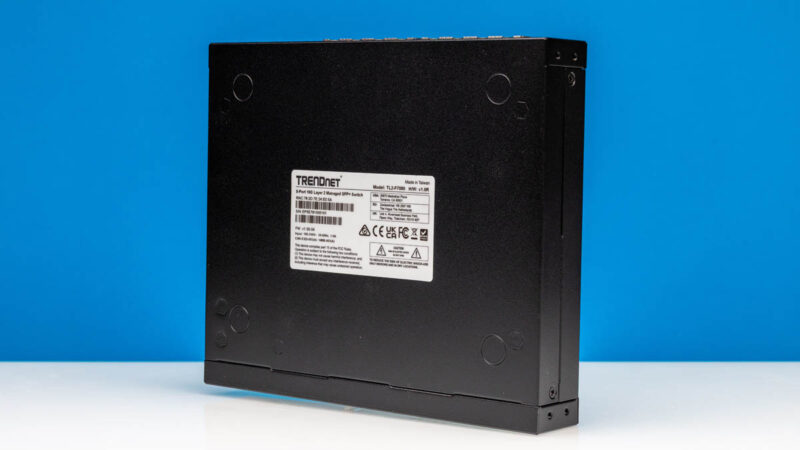
On the bottom, we get the label and markings for where to put rubber feet.
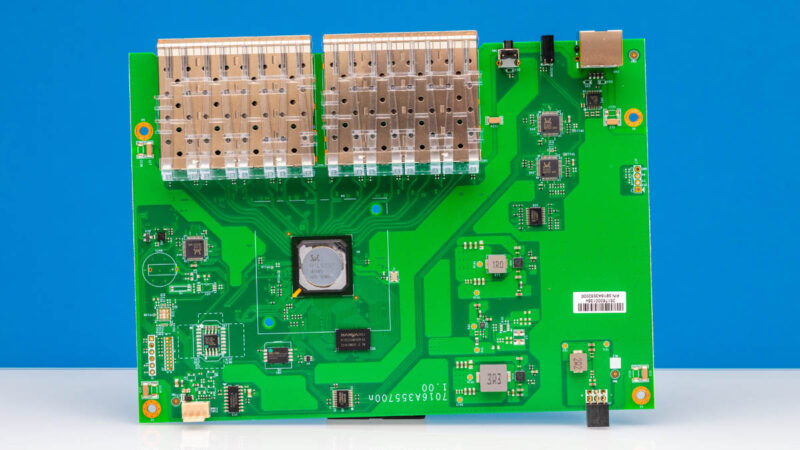
Inside, just due to how the case was constructed, it was a bit difficult to stand up, but you can see a basic single switch chip setup.
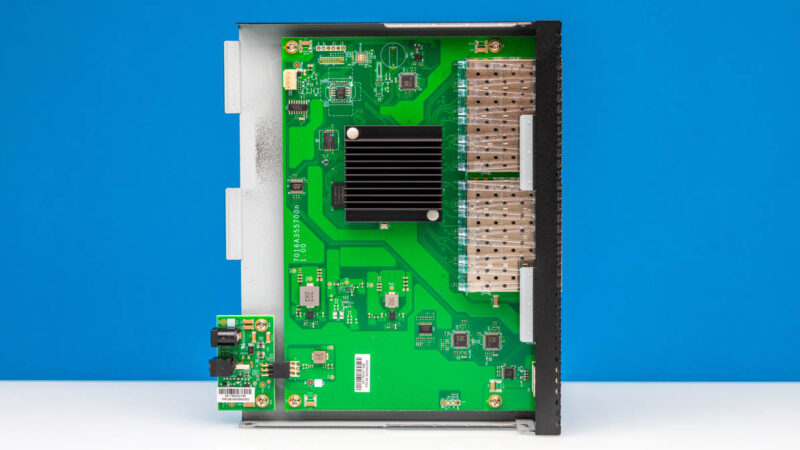
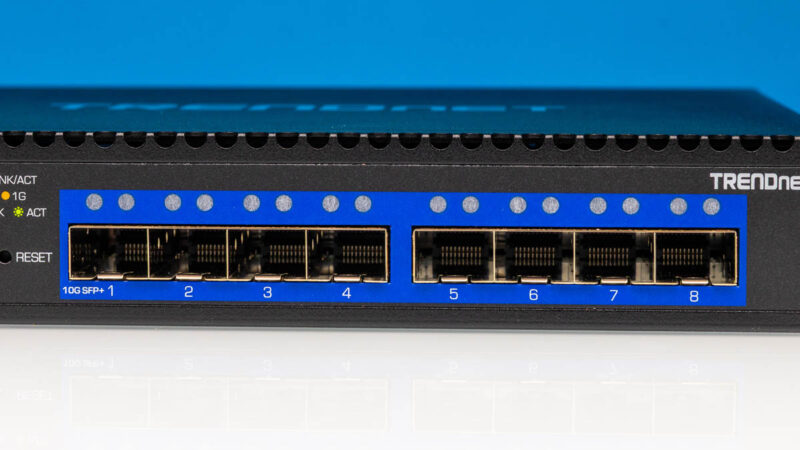
Here are the eight SFP+ ports with their light guides for the status LEDs.

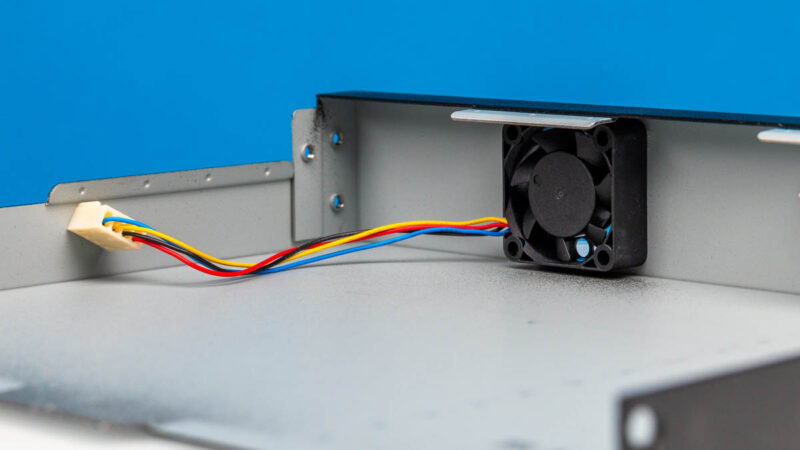
The fan is on the top cover of the chassis, which made this more difficult than it needed to be to get inside. We will get to it in our power and noise section, but chalk this fan up as our least favorite feature.
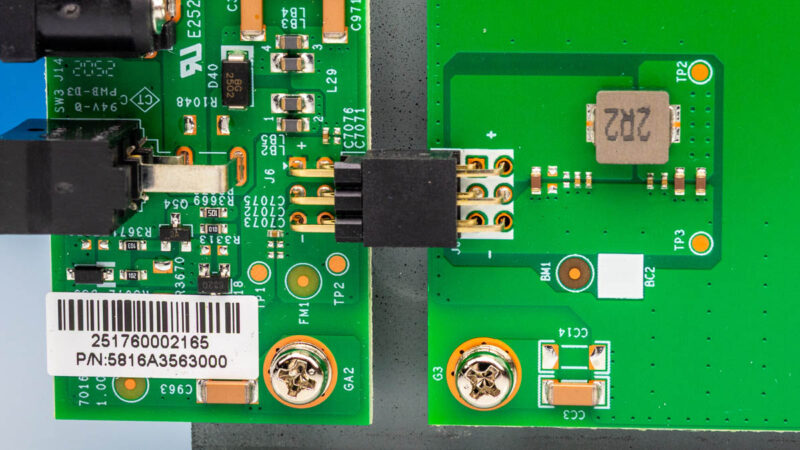
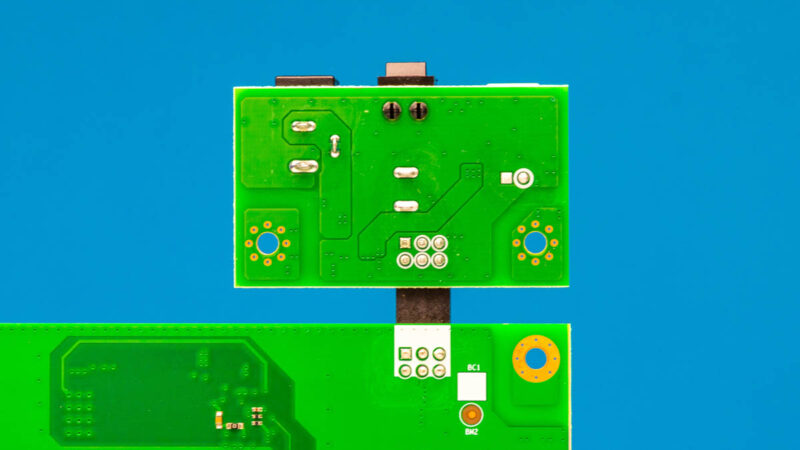
The power board is really interesting. Instead of going directly to the switch PCB, the power switch and DC jack are on their own PCB.

That is attached to the main switch board by this connector. Perhaps if you broke the DC input, you could replace it this way. Let us just call it something we are not accustomed to seeing.
Here is the other side for those that love seeing these things.
Next to the Nanya DRAM package, we have the main switch chip.
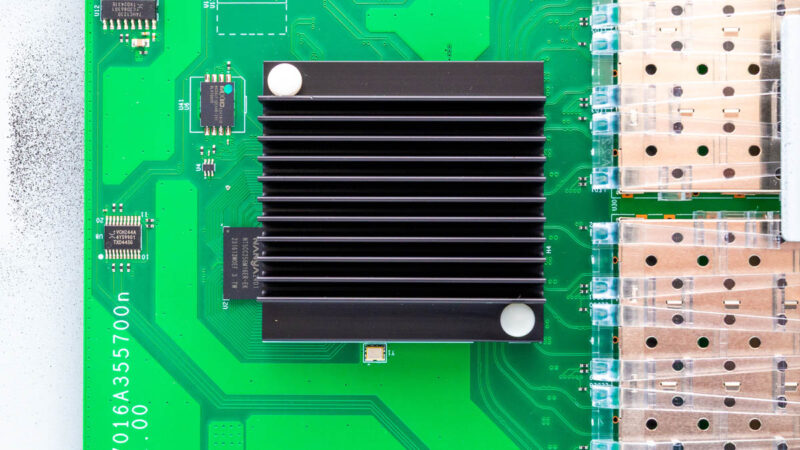
We were able to pop off the heatsink.
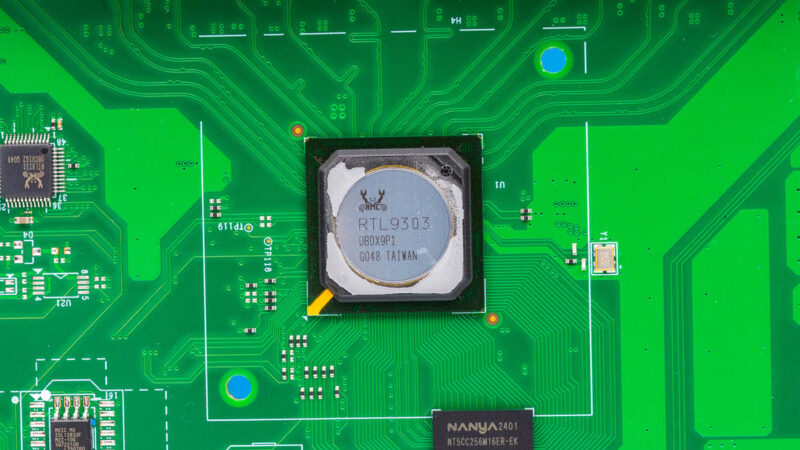
Here we found a Realtek RTL9303, which is an 8-port 10Gbps switch. Since we have SFP+ cages, we avoid the extra cost and power consumption of 10Gbase-T links, making the layout very easy to understand.
There are plenty of Realtek RTL8231’s here. These are usually to make lights blink.
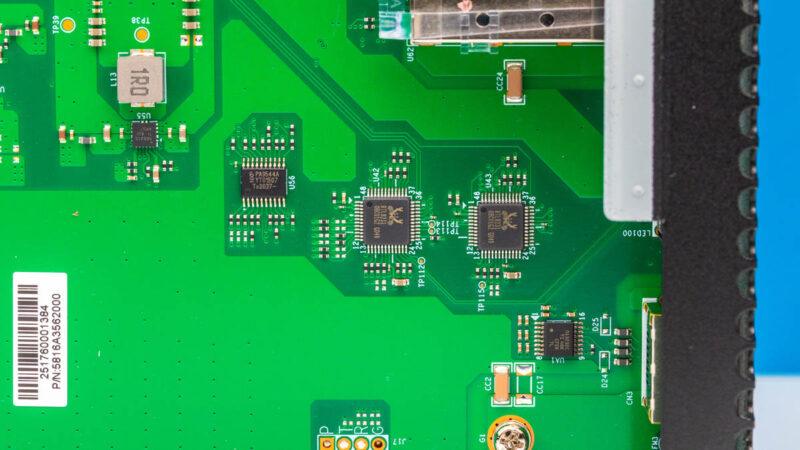
So Realtek provides a lot of silicon for the switch.

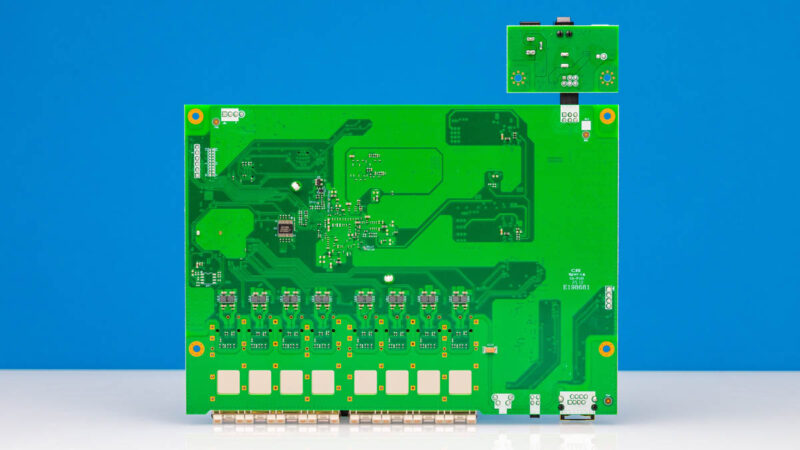
Just for a bit more, here is the back of the PCB.
Next, let us get to the management.


My understanding is that “web managed” means no console and no CLI. This switch apparently has both. So calling it that undersells it significantly.
Seems expensive once you factor in the cost of transceivers? I’d rather buy a 10GBASET switch with a couple SFP+ ports for uplinks. I’m looking forward to your reviews of other options.
I’m in awe at STH’s testing.
If you don’t know, this isn’t something you can just eBay and run for $10K. They’re doing well into $100k+ testing. Ixia uses FPGA based load gen hardware, so it’s many FPGA on a big card in a custom box, custom software. I’m wanting to see the 100G used but it’d be better if they could do 800Gb/s on it
one nice feature is having standard 4-pin connection for cooling fan. easly replaceble with quieter fan.
and if you want to keep sfp+ modules also cool, then you can install/put 2 extra small fans on top of sfp+ sockets.
I can’t understand why people would choose these over mikrotiks SFP switches? They are reputable, solid, and great p/p!
@Bill: I think there’s a major, major difference depending on which side you are approaching 10GbE from.
If you are doing the ebay-and-server-pulls route it’s basically all SPF+; probably-fine DACs are honestly more likely to cost money because of shipping than because they are a hot commodity; and anything but the more exotic and capable optical stuff is also pretty readily accessible; but old top-of-rack switches are relatively thirsty, relatively noisy and you probably don’t need that many ports. For that case all SFP or mostly SFP switches based on contemporary, low power, switch chips that let you go beyond point-to-point links or ‘flat’ unmanaged-only setups are fantastic.
If you are coming at it from the ‘new’ side; and mostly 10GBASET devices, maybe an optical run between wherever your ISP decided that the demarc point should be and where you actually want your switch; filling an SFP cage with copper transceivers is probably the worst available option. They are pretty expensive relative to the equivalent signaling witchcraft built into 10GBASET ports; and they tend to run hot enough that not all SFP cages can take it; if they were expecting optical and DACs. Always good to have a couple in the toolbox; just because you will encounter big fat all-SFP switches that need to have one UPS monitoring card or your laptop or whatever connected to them; but that’s mostly a bodge.
There’s probably a very narrow niche where they are the least-worst option: at one point 10GbE was Very Serious Stuff; so there are SFP switches floating around(though mostly loud and power hungry) built with all the bells and whistles and cost-barely-an-object niceties back when 10Gb was spendy enterprise kit; and it is unlikely that anyone will build the likes of those in 10GBASET, since that’s fundamentally a lower-end tech at this point; but mostly you want to choose the switch that matches your target devices.
Some kind of fan shroud to force the moving air through the heatsink and out the SFP+ ports may have allowed the fan to spin slower, reducing noise.
I initially thought this may be an interesting switch to put by my Netgate 7100 firewall/router, but as this is standing in my livingroom, when I saw the first notes about the noise level, and then especially Patrick’s note about the noise level, this switch isn’t an option for me.
I am a bit sensitive to noise @Dev_Mgr but this is one where I would have to do a fan swap or something. Stay tuned to STH since I think we have a decent option (targeting like 2 weeks until it is live since we did a video.)
On the 10Gbase-T vs. SFP+, there are two other notable wrinkles. First, the ability to breakout from QSFP+/QSFP28 ports is useful in some cases. Second, 10Gbase-T can be useful to deploy in servers because you also get easy 1GbE. If you look even at NVIDIA GB300 NVL72 racks, there are a ton of base-T ports used for management and monitoring. So 10Gbase-T allows you to have a faster interface, but also not have to do any conversion to go into existing 1Gbase-T switches.
Also, on the 10Gbase-T side, we are going to get more into the series tomorrow in a video.
@Ivo – I guess the reason we are doing this is to test that assumption, and to get more useful data than just running an iperf3 test. We are also going to the other end and gathering data for folks asking, “Why buy MikroTik (or Ubiquiti) instead of Cisco?”
Good to see. We need passive 8x 25gb/sfp28 next, hopefully from Mikrotik. Its ten years since they made the 10gb SOHO/condo targeted switches, and 8x is next step.
At work, 1G/10G is purely for mgmt these days. Very very rarely will we provision new 10G long haul at this point. So I view this product as a SOHO option, and in that light, that’s where I don’t understand the SFP+ cages.
Using surplus equipment from eBay makes sense though, I hadn’t thought of that!
This new testing is very welcome and definitely interesting. It’s nice to have a confirmation that the RTL9303 performs well, seeing as it’s used in both cheap AliExpress switches as well as a bit more expensive ones like the USW-Aggregation.
A comparison result from one of the AliExpress models would be interesting as those cost roughly half as much from brands like Horaco, XikeStor or Goodtop when talking L3 managed units. I would imagine that things such as the power supply and certain PCB components are worse in the cheaper models.
This is strange: in the photo captioned “TRENDnet TL2 F7080 Inside 7,” it looks to me like the manufacturer soldered only two of the six pins on the mainboard’s connector to the DC/power switch daughterboard.
Is that right? If so, that strongly implies that four of the pins are unused. But then all six pins are soldered on the daughterboard side. Curiouser and curiouser…
Does anyone have a decent guess as to why that might be?