TinyPilot KVM Software Overview
Perhaps the most important aspect of the TinyPilot KVM is its software. Specifically, this is not a proprietary solution like Lantronix uses. Instead, it is a Raspberry Pi 4 running Linux and there are millions of guides online on how to accomplish various tasks using a Raspberry Pi 4. Further, the TinyPilot part is available on GitHub. That makes this, from a software perspective, the opposite of the Lantronix Spiders we use.
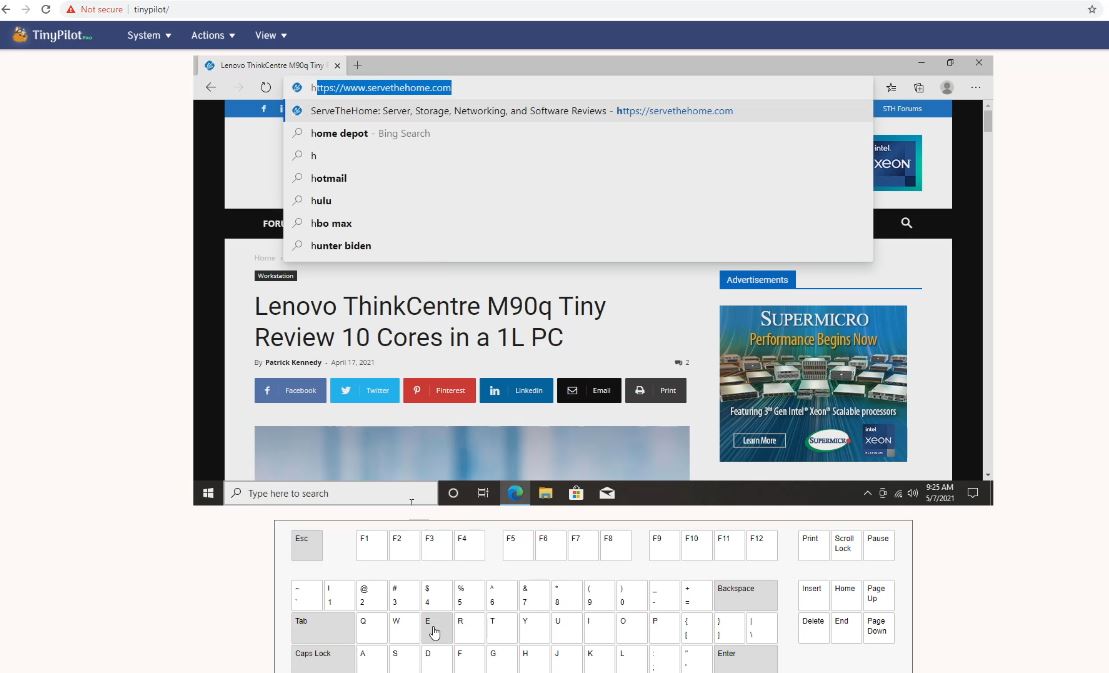
For many users, the majority of the software stack is going to be viewed by simply typing “tinypilot” in a web browser. One can set certificates but we did not on this new image. We then get the simple TinyPilot UI that has the HTML5 video feed and even a soft keyboard on the screen. Just for fun, this is taken connected to the Lenovo ThinkCentre M90q Tiny that is accessing the review of itself.
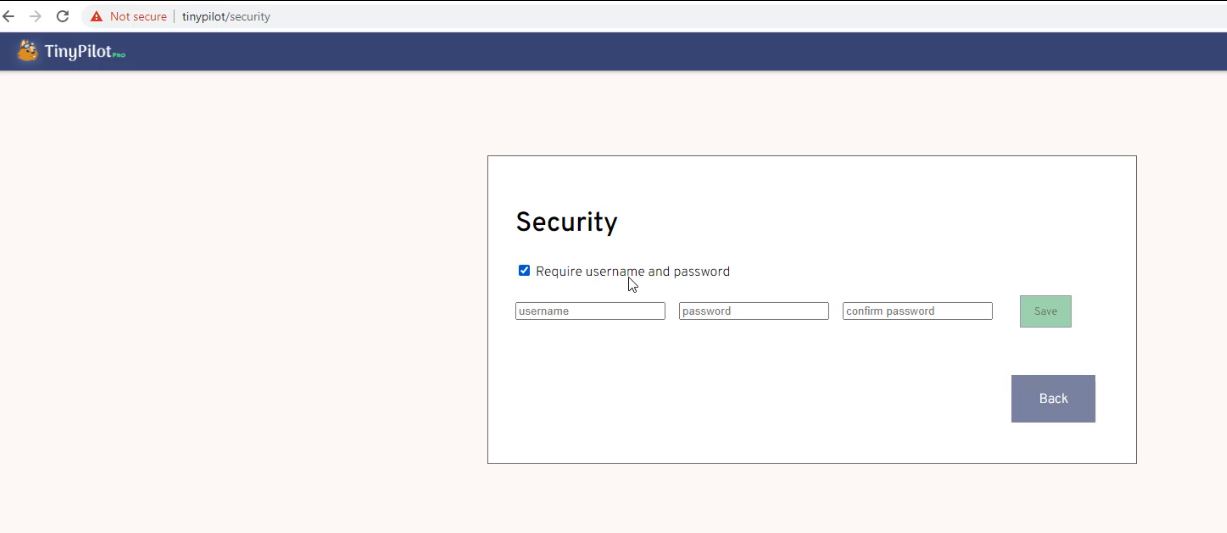
One of the newer features that was added is that instead of just going directly to the KVM page, a username and password can be required. Solutions like the Lantronix Spider have LDAP and RADIUS integrations built-in along with local users with different access levels.
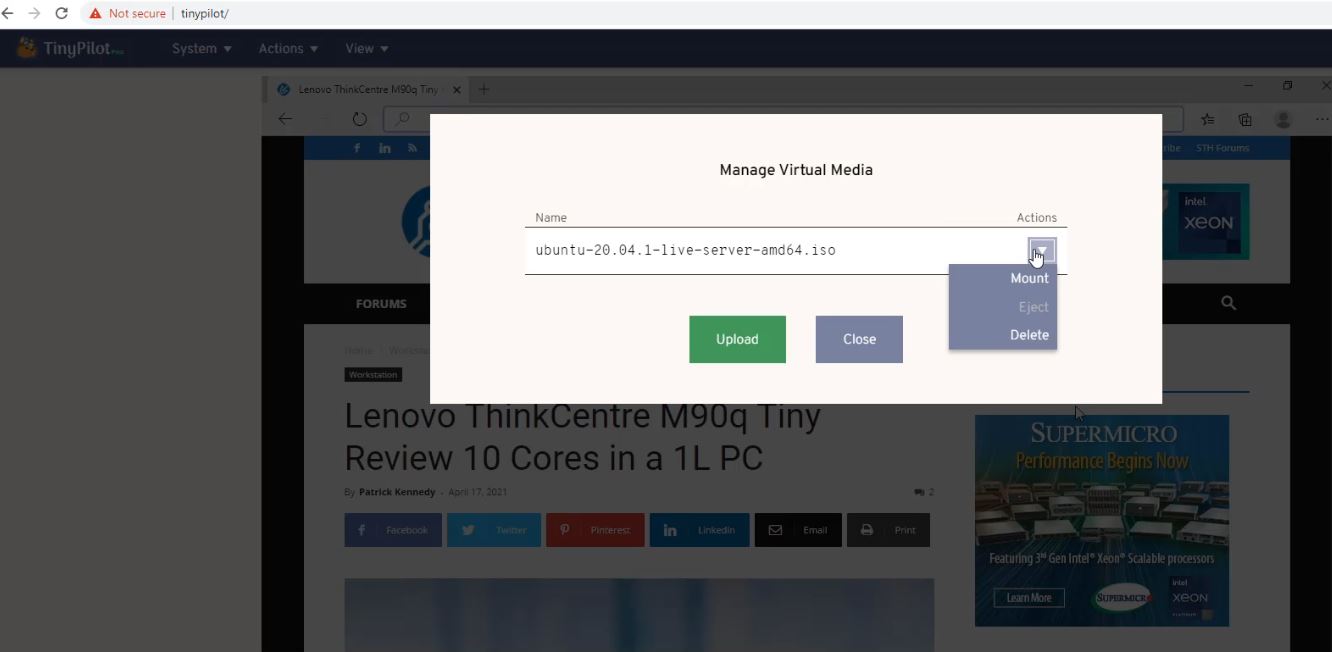
The big new feature and the one that gated this review is the remote media feature. Here we can upload an ISO to the Raspberry Pi 4 base, then it shows up on a list where we can select it as virtual media. One can also add media in a directory via the Raspberry Pi 4 directly.
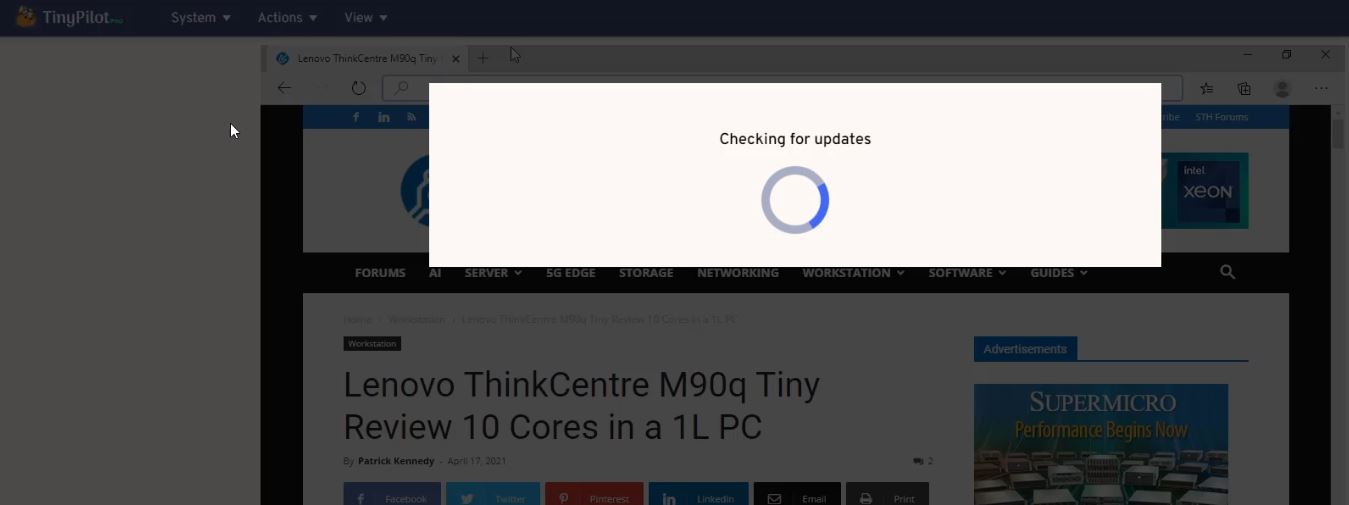
Another feature we did not have when we started using this in November 2020 is the ability to check for updates via the Web UI.
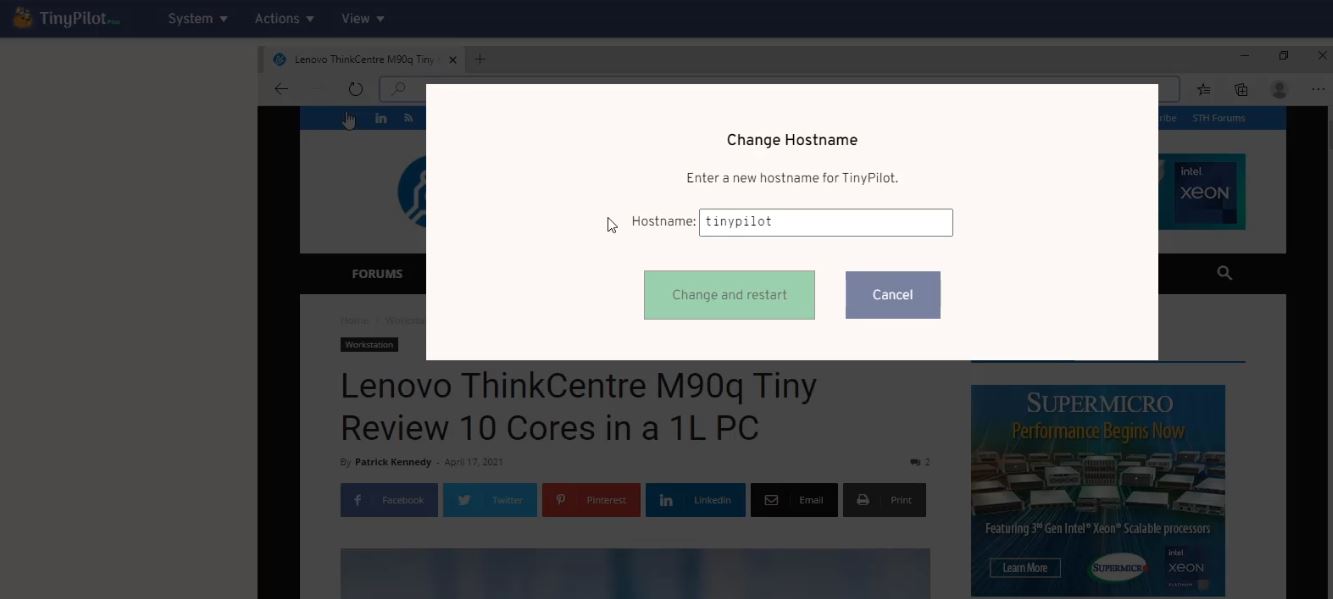
Another nice addition over the past few months is a way to change the hostname from the web interface. As one may imagine, there are cases where several of these will be used so having an easy hostname setting is important.
As one may see at this point, this is a good reason that the authentication mechanisms currently implemented are not great for replacing those colocation provider Lantronix Spiders. Since the authentication is at the page level, not at components like changing hostname and uploading ISOs, a user has full access once authenticated. One would not want a customer to change these settings and that is why Lantronix has a multi-role user management system.
Another huge feature is the ability to change video settings for the underlying uStreamer service, now via the web UI. This is a big deal because it can change the quality of the image, but also the FPS or refreshes per second. Those, in turn, impact the latency and image quality. We have examples of setting the JPEG Quality to 1 in the accompanying video.

The reason one may want to do this is simply because it can have a large impact on bandwidth. On a LAN, having a single device is not an issue, but when one sets quality settings to their maximum and is constantly re-drawing large portions of the screen, this can use over 100Mbps. On lower-end settings, there is a noticeable drop, but one can get 2-3Mbps which is more appropriate for troubleshooting while on a wireless connection on a beach. Still, this setting can cause a huge delta in bandwidth being used.
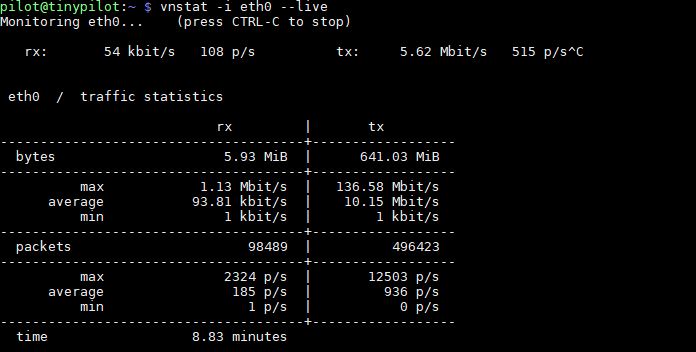
Also, just as a quick demonstration here, the above is using the popular vnstat tool on the TinyPilot Voyager. It is not built-in, but it is an apt get install away. That is a big part of the power of the TinyPilot solution. The Raspberry Pi 4 makes it trivial to add a feature and customize the solution. I would have had to take this measurement at the network port on a managed switch for the Lantronix Spider since one cannot install tools like this.
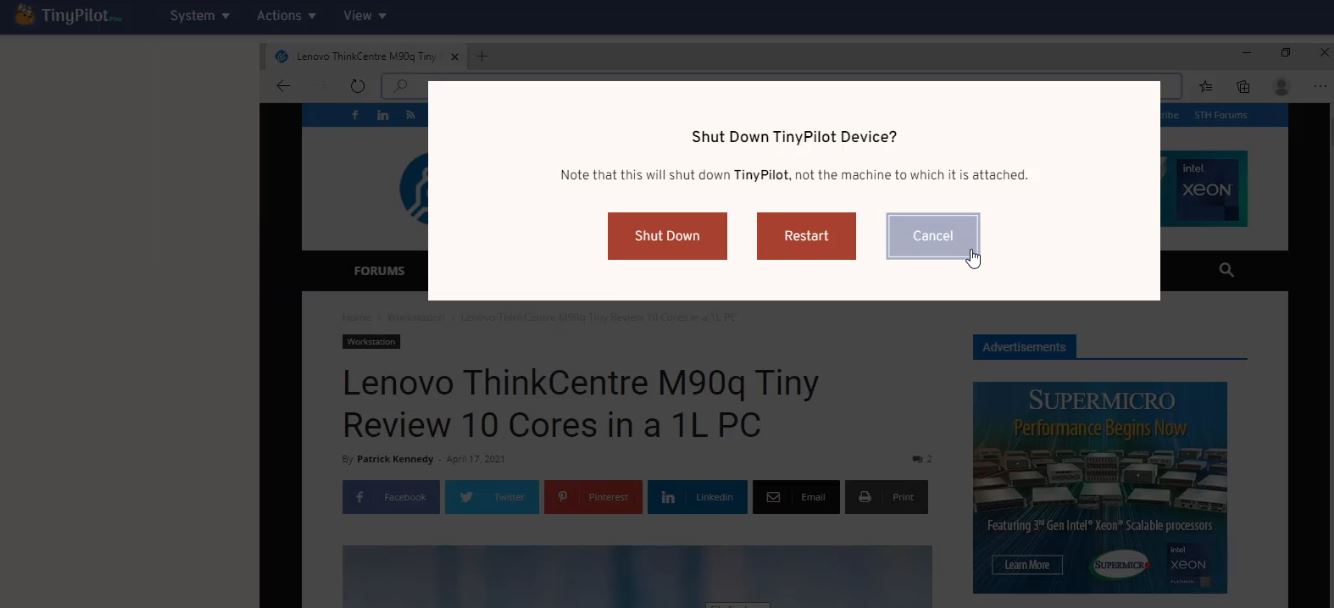
There is a newer interface feature to reboot the TinyPilot’s Raspberry Pi 4 directly from the web UI instead of having to drop to SSH now.
One can take a screenshot, but that is fairly self-explanatory. Perhaps the bigger feature is the ability to change your cursor.
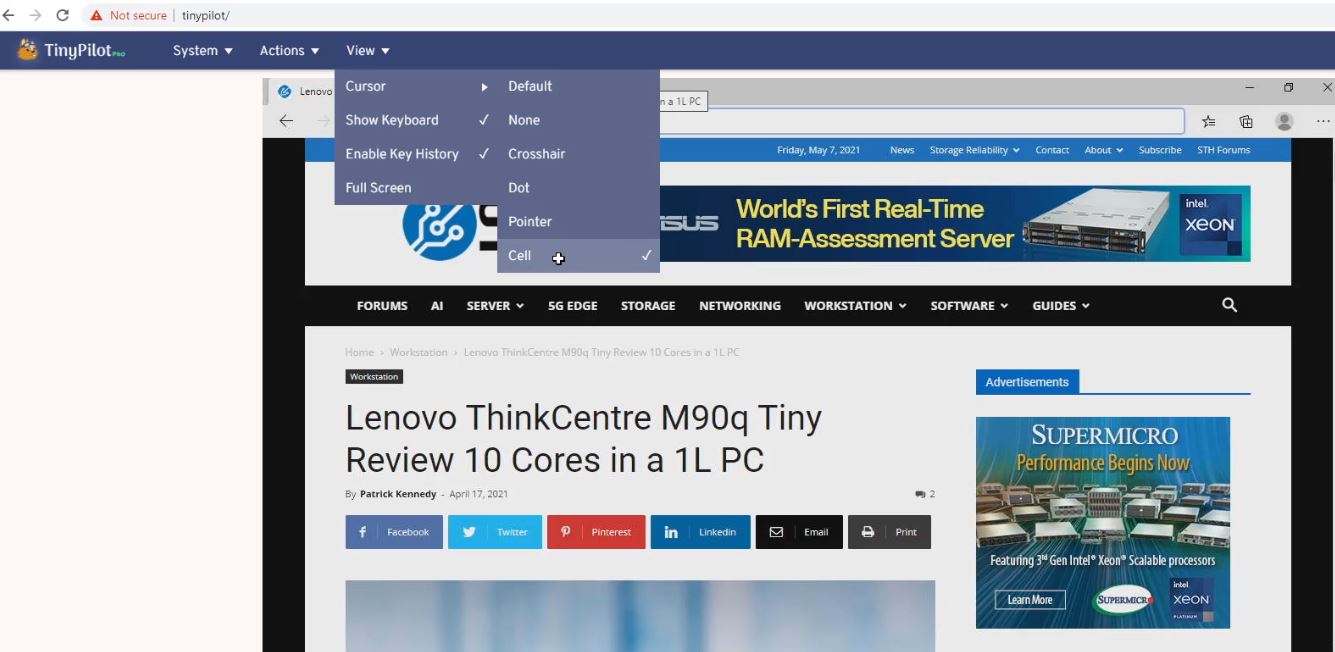
This feature is important, especially with lower framerates and if accessing a system that is far away. One will have a local cursor, but then the remote desktop will have a cursor as well. Changing the cursor allows one to track which cursor is which to avoid misclicks.
A Word on Compatibility
Generally, so long as the cables were connected, this solution worked very well. We did run into one compatibility challenge worth a mention.
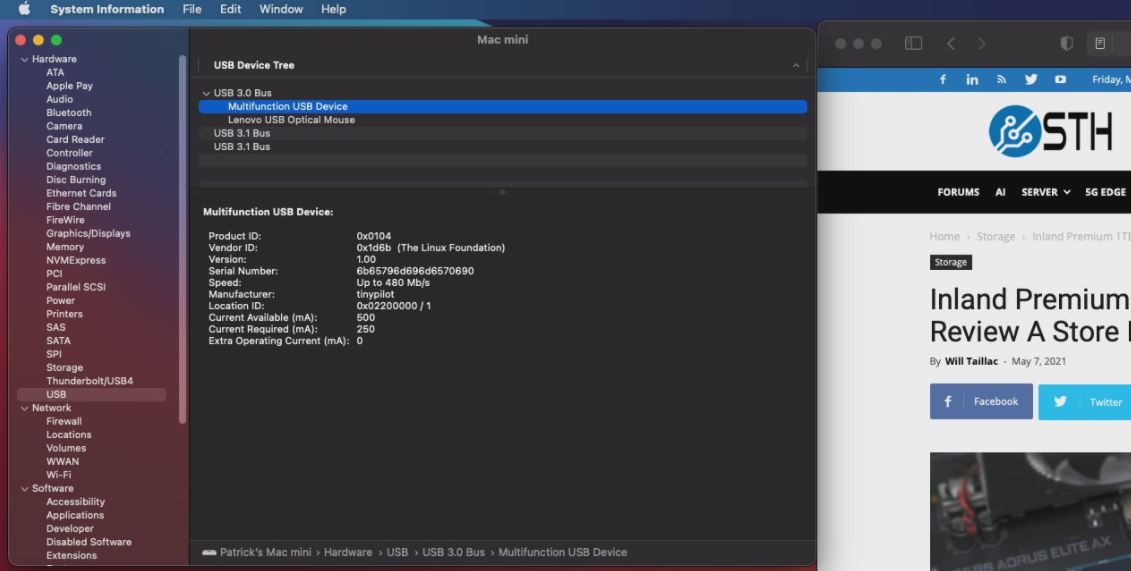
The major compatibility challenge we had was with the Apple Mac Mini M1. We tried both on the early 8GB and 16GB models we had. We also tried on the new 10Gbase-T Mac Mini M1 that just arrived. The solution would usually work with a few caveats. On initial setup, we had to plug in an inexpensive Lenovo USB mouse just so MacOS would continue the setup process, even though the pointer/ keyboard functions were working with the TinyPilot (would that not be a cool feature to be able to change to an onscreen Mac keyboard?!?) Second, the remote media did not work with the new Macs. Again, both can potentially be fixed in the future, but that is the state of TinyPilot with M1 Macs.
Overall, with the remote media, this now has the basic features we want and is easy to use. Still, there is no interface for LDAP/ RADIUS integration and other features. There is a gap but TinyPilot is favoring ease-of-use for necessities rather than the full Lantronix Spider feature set.
Next, we are going to discuss the impact and our final words.


Too much complicated stuff to substitute a simple serial port.
This is a very interesting solution for IP-based OOB remote management for CoLoc/Start-up/SOHO/Home/DIY for servers or systems without BMC/IPIMI. I did not know about the TinyPilot Voyager. Great review Patrick, you made my Saturday :-) TYVM.
As @domih stated, “I did not know about the TinyPilot Voyager”, I have to say likewise…. 25+ years and I too didn’t realize this was out in the field… Great info and review. As always! Thanks for all your hard work.
A similar project at pikvm org
Indeed. pikvm lacks available hardware, but they’re working on that.
But it also supports connecting up to the ATX header for power/reset.
https://forums.servethehome.com/index.php?threads/pikvm-an-open-source-ip-kvm-project-using-the-raspberry-pi.31004/
Pikvm is in a different class compared to this. It has a mature and well designed code base, no features behind paywalls, and handles all kinds of hardware quirks. It also offers options for power cycling the controlled device, along with vnc support too.
i wondering how do perform power down and reset thought this unit ?! i mean it’s basically function as VNC (without bios part)
@Tony: Read the Website.
Does either project have plans for cellular modem support?
I put my pi in a pic slot with poe and a usb c to internal header, also using pikvm.
Not obviously present in the article, at least to me, though it might be buried somewhere or in a link: What is the cost of this TinyPilot gizmo with the gee-wiz 3D printed case (cuz that is all the rage for NerdZ)?
It was funny to read the Lantronix Spider KVM review by STH where they commented about saving $100 on the Dell iKVM feature via the Dell iDRAC thingie…by spending $280 on the Lantronix Spider. LOL LOL LOL LOL
Sleepy there is pricing as well as a screenshot of current pricing/ offerings just before the Final Words.
Couldn’t they put the data/power splitter inside the case in some way? That would significantly reduce the cable nest.
This could also work in the SMB space where KVM’s may already exist but they are java-based or local only. Replace the local console with tinypilot to modernize old hardware.
I have an inexpensive TRENDnet 8-port VGA/USB KVM switch (TR-803R) that I can switch between the 8 ports using keyboard shortcuts.
Does anyone know if I can hook the monitor/keyboard output of this TRENDnet switch to the TinyPilot Voyager for remote console access to the eight computers connected to the TRENDnet switch?
This project seems to be a less technical version of PiKVM.org
Judging by your thoughts on this product, you should try Pi-KVM out. They are on the verge of releasing dedicated hardware HAT.
Already in-touch with the Pi-KVM folks. Please also remember TinyPilot has been out for 2-3 quarters so this is a review of hardware that has been running for 6+ months while Pi-KVM hardware is still not out (and sounds like it will be in tight supply when it first arrives.)
Noted! I was unaware. I am looking forward to hearing your thoughts on PiKVM, with or without the dedicated HAT.
Only 299$ for a Pi4 (35$) + Extra chip and a custom case ( few dollars at best )… Am i missing something?
Benny I think you’re missing the time to put it together, research the right parts, the power splitter, the adapters, the SD card, the cables and so forth. I don’t think anyone is saying there isn’t margin. I think you’re paying for convenience.
Comments are closed.