
We end 2018 year with one final review. This time, a new product from TerraMaster, the F2-221 2-Bay NAS. At first glance, the TerraMaster F2-221 looks just like the previous F2-220 we reviewed before. However, do not let the appearance deceive you, the F2-221 is a complete overhaul of the F2-220 from hardware to the TOS 4.0 operating system. With the updated processor and RAM let us see how much of an improvement the new F2-221 is.
TerraMaster F2-221 2-Bay NAS Specifications
Here are the key specs for the TerraMaster F2-221 2-bay NAS:
- CPU Model: Intel Celeron J3355 2.0 GHz, Turbo up to 2.5 GHz (2 cores / 2 threads)
- Memory: 2GB DDR4 RAM (Expandable to 4GB)
- External Ports: 2x USB 3.0 Ports
- Network: 2x RJ-45 1GbE LAN Ports (1000/100/10Mbps)
- Size: 8.9” x 5.2” x 4.7”
- Power Consumption: 25.6W Access, 2W during hard drive hibernation
- Housing material: Aluminum
- Weight: 5.1 LBS
- System Fan: 80mm X 80mm
This is still a 2-bay NAS, but there is an enormous improvement in this generation’s underpinnings. We see twice the network capacity with dual 1GbE. A second USB 3.0 port has been added. The biggest change: the CPU. While the F2-220 utilized the Celeron J1800, the TerraMaster F2-221 utilizes a J3355. That comes with a few implications. Perhaps the biggest implication is that the J3355 supports Intel AES-NI for hardware crypto offload. In a low power SoC, crypto offload is a must-have feature these days.
TerraMaster F2-221 2-Bay NAS Overview
We received our TerraMaster F2-221 as a complete retail unit which includes all items you would get if you purchased this NAS. After opening the box, we see foam padding to protect the NAS and the accessory box at the side.
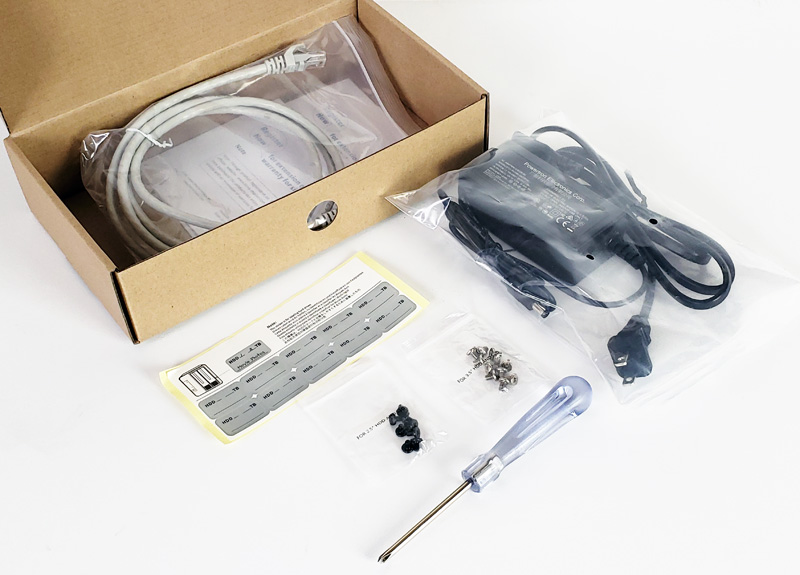
Accessories included with the TerraMaster F2-221 include:
- Quick Installation Guide
- AC Power Adapter
- AC Power Cord
- RJ-45 LAN Cable
- 2x packaged of assorted hard drive mounting screws
- One small screwdriver
There are not many NAS units these days that can truly say they give you everything you need, including the screwdriver. That was a nice touch, especially in the lower-cost 2-bay NAS category that is fiercely cost competitive.
TerraMaster F2-221 2-Bay NAS Installation
After removing the F2-221 from its packing material, we can now take a look at the NAS.
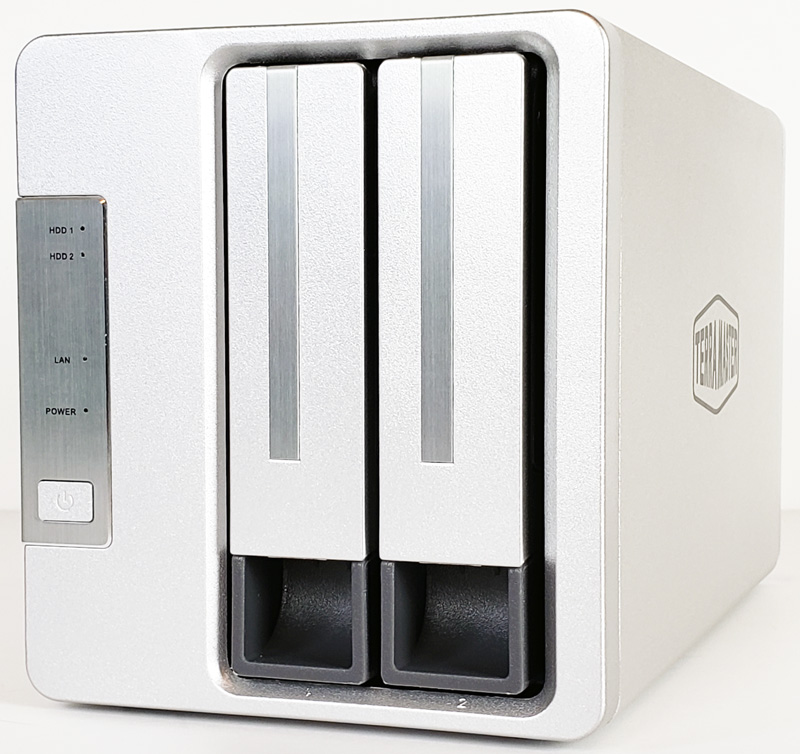
The enclosure of the F2-221 is identical to the F2-220 that we have reviewed before, Looking at the front, we find a silver power button on the left side with status LED’s above.
The back of the NAS has 2x USB 3.0 ports, 2x RJ-45 1GbE LAN Ports, HDMI port and power connector.
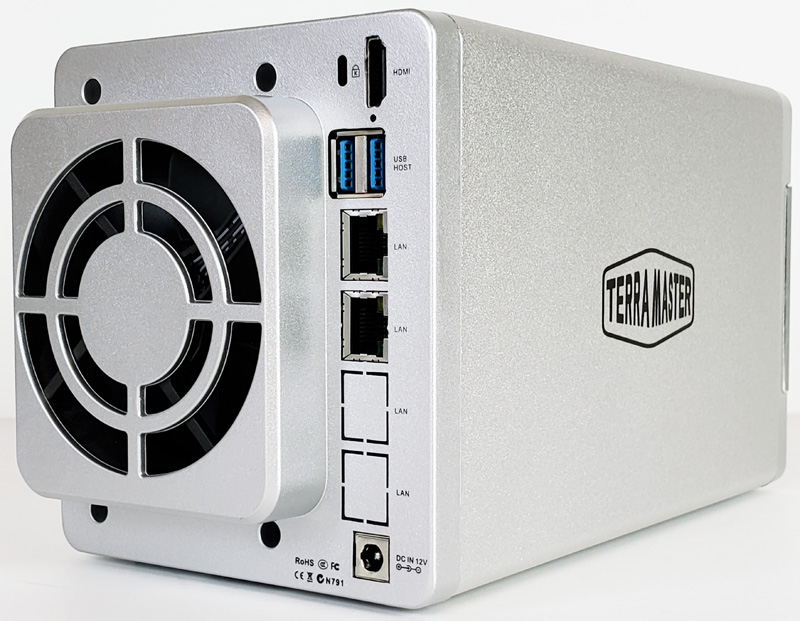
One massive 80mm cooling fan takes up the bulk of the space which provides the primary cooling for the NAS.
Let us move on to see how to install hard drives into our unit.
Each drive bay can accommodate either a 3.5inch or 2.5inch hard drive or solid state drive up to 12TB in size for a total of up to 24TB raw capacity.
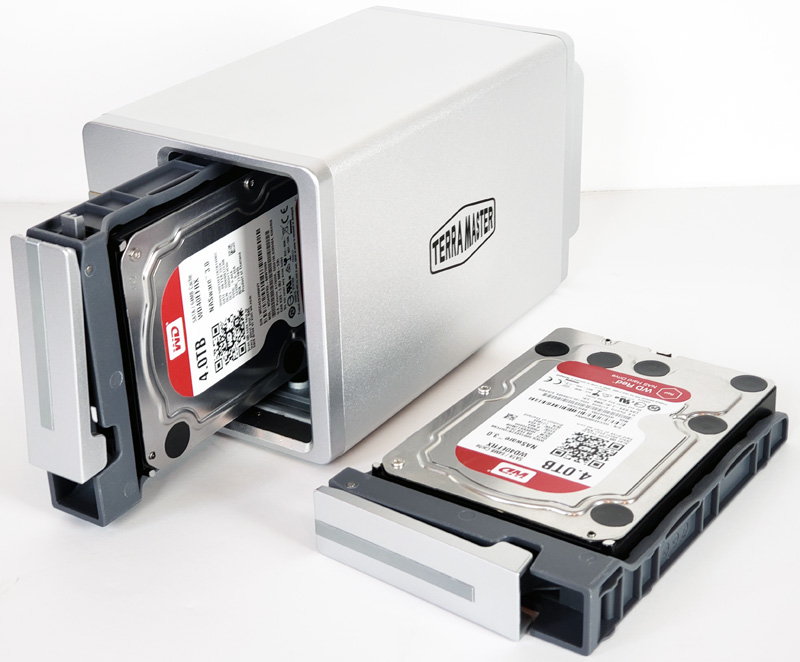
The drive trays are not tool-less and will require mounting screws to secure the HDD to the drive tray. After mounting they slide into the NAS and lock in place.
Next, we are going to take a look at the TerraMaster F2-221 management before getting into our performance testing.


That logo looks like a CoolerMaater logo ripoff.
The device looks nice though.
I have the Terramaster F4-220 that I got on a Newegg flash sale for $189 shipped. I think for the money, it is a good unit, but I do find TOS 4 to be lacking in some features, such as the ability to use rsync modules without authentication. This made for quite the hair-pulling experience as I purchased this device to backup data from my main storage server, which is a semi-custom freenas build. Due to the Terramaster unit requiring authentication for either rsync over SSH or rsync modules and the lack of the ability to define SSH credentials when creating a rsync tasks in freenas, a workaround must be found. I initially generated shared SSH keys between the freenas and terramaster units but found that much like freenas, the SSH keys are erased every time the unit is power cycled. It also took me a while to figure out that the name of the rsync module for the TerraMaster unit is the name of the datastore that you create during the initial configuration. Since you cannot disable rsync module authentication, I ended up having to create a separate datastore in freenas that stored the rsync credentials in a plain text file and then referenced the credentials file in the custom commands section of the rsync task creation GUI. It may sound simple enough but this took me probably 10 hours to figure out in total.
I ended up decommissioning the unit and moved the drives into a Hyve Cygnus server that I bought off of eBay for the same amount of money. It is a much more powerful server and holds 12 x 3.5 inch drives in a 1u chassis. It also allowed me to install a 10 gigabit card and run freenas. It is quiet, has a virtual console, and supports much higher speeds for both iops and sequential transfers. I would highly recommend looking into one of these if you are space confined and looking for a standalone storage server.
Some people have had success installing xpenology on the terramaster units, however, is still quite limited in its utility with such a low power processor and a single gigabit port. I also noticed that the drives ran extremely hot in the terramaster unit. When I first pulled them out to transfer them into my other server, they were so hot that I had to let them sit in their trays for a while and cool down. I’m not sure that the Terramaster units are adequately cooling drives. This might warrant further research on STH’s part.
Comments are closed.