
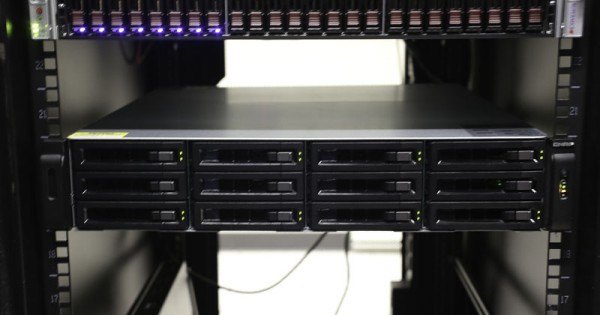
In Part 2 of our QNAP TVS-EC1280U-SAS-RP review we are going to take a look at some of the NAS unit’s features. In Part 1 of our review we took a look at the hardware behind the 2U rackmount NAS. What NAS vendors, such as QNAP, offer today is much more than a simple hardware platform, they now offer a fairly strong suite of applications on their NAS along with solid user interfaces. In our final Part 3 of this review we will take a look at performance, but in this class of NAS, software is often what will make people happy or frustrated with their purchase decisions.
QNAP TVS-EC1280U-SAS-RP Initial Setup
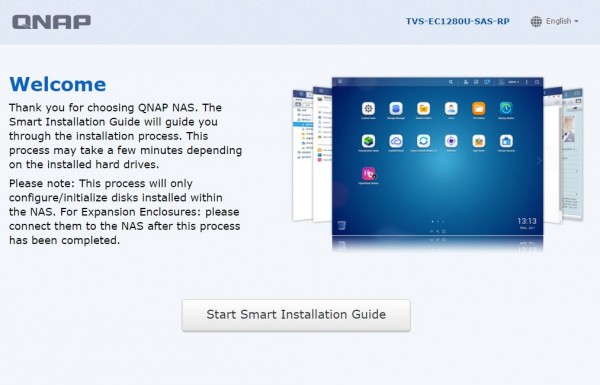
With any NAS unit, the first experience an administrator will have with the NAS is the initial setup. If it is too hard, satisfaction plummets and there are many smaller NAS units that have been returned or abandoned due to difficulties in setup. The QNAP initial setup experience is done through a web browser and was well documented in the browser window itself.
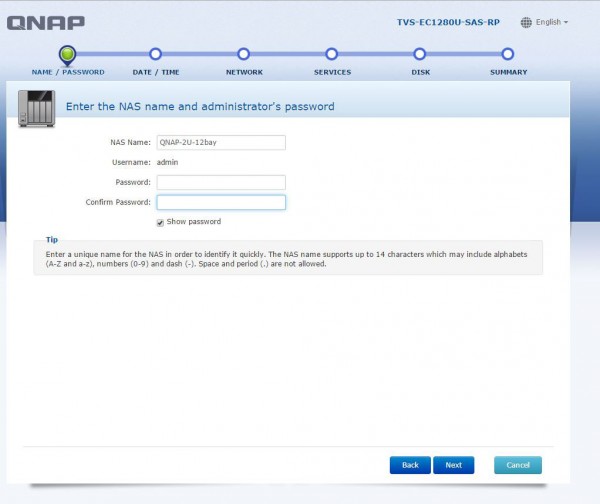
The first step is fairly standard which is setting up the network name of the NAS as well as the admin password.
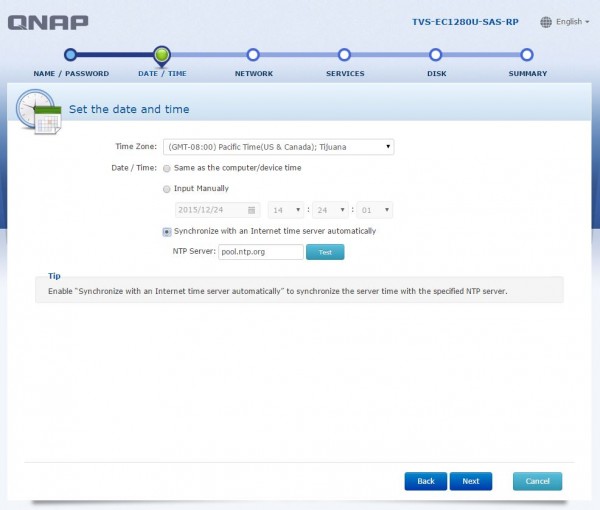
Time zone and date information is very easy to setup, we would suggest using the ntp.org default unless there is good reason not to.
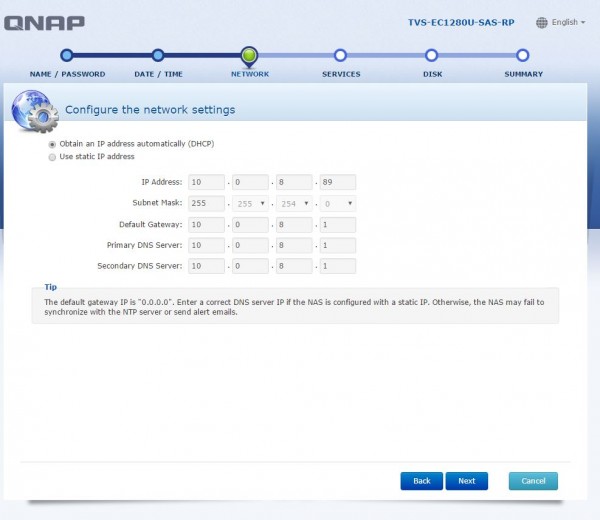
In terms of networking information, the initial setup allows for DHCP or static IP address information. Client PCs generally will use DHCP to get assigned an IP address automatically. Servers will often utilize static IP mappings. We “cheated” a little bit and gave the unit a static DHCP address in our router and firewall so we are using DHCP here.
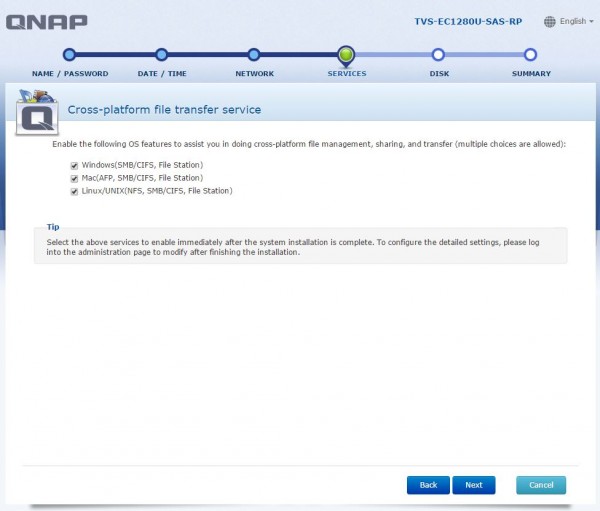
QNAP did a good job on the basic file server services setup. Basically the wizard asks which OSes will be accessing the NAS and then enables the appropriate features (e.g. NFS and AFP) based on the selections. The only way we would change this screen is to simply say “pick the OSes that will be accessing the NAS unit” and then showing the resulting services based on selection.
In terms of disks, one can see we did throw a gamut of drives at the unit. The storage pool setup screen is going to be the hardest to explain and QNAP does link a tutorial. Unlike many deployments we mixed SAS HDs, SSDs and SATA hard drives all into the system. Overall this is one screen that an administrator will spend time on. You can also configure disks later in which case QNAP has wizards to set those up.
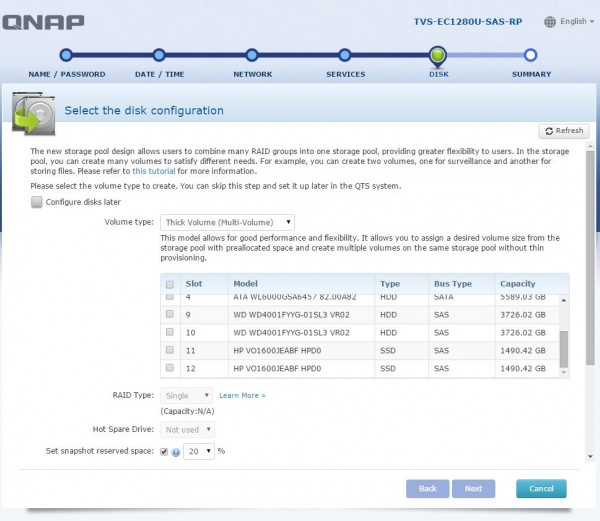
We purposefully used a wide range of storage devices to see if the unit was highly restrictive like the WD Sentinel RX4100 we reviewed previously. Unlike that WD unit, the QNAP was able to utilize just about everything we wanted to see.
The final screen is a confirmation screen that summarizes choices previously made.

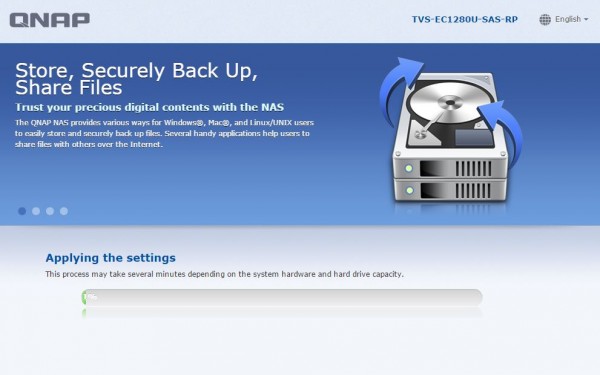
After one clicks apply on the setup wizard’s confirmation page, settings get applied to the NAS. This is a good time to get coffee as the statement “This process may take several minutes…” is very accurate. We did not time the process but as an initial setup time, just know that the setup is not instantaneous.
The next step will be to log into the QNAP web UI using the password previously created.
The QNAP QTS Experience
Logging into the QNAP QTS web interface is very simple and one can quickly start using applications that help in a wide variety of home or business use scenarios or to simply configure the NAS and various network services.
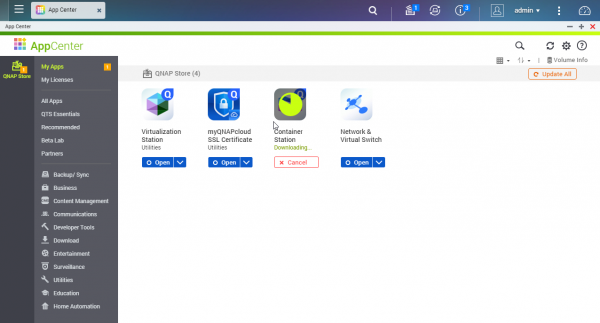
Adding applications and updates
QNAP has a variety of applications available from content management systems, MongoDB NoSQL databases, Surveillance Station for security camera recording, media transcoding and serving (e.g. Plex, iTunes server, DLNA server), ticketing systems, backup systems for Gmail and others. The list is quite large and has an easy-to understand catalog with descriptions of what each one does.
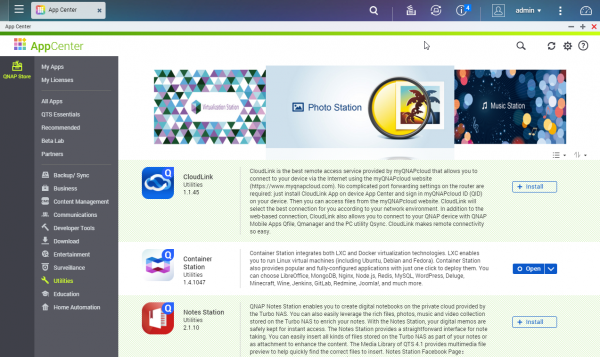
Updating apps is always of prime importance for administrators, and QNAP has an easy interface for doing so:
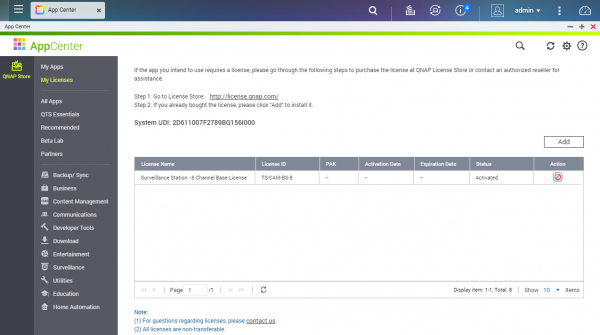
QNAP also has a licencing feature built-in, although it seems primarily used for video surveillance and McAfee anti-virus applications at this point.
Here is an example of downloading Ubuntu Server 14.04.4 LTS using Ubuntu’s torrent method.
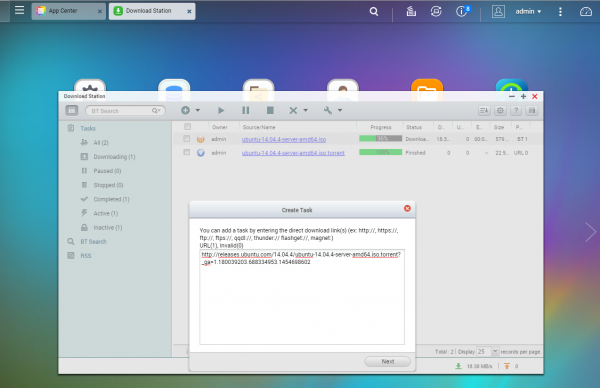
After downloading, the downloaded file is immediately seeded. Our Sunnyvale datacenter lab has a 1.0Gbps connection and we did see quite large seed speeds when we temporarily enabled BitTorrent seeding in our firewall. In terms of download speeds, hitting 40-50MB/s just using a few Ubuntu ISO downloads was very easy.
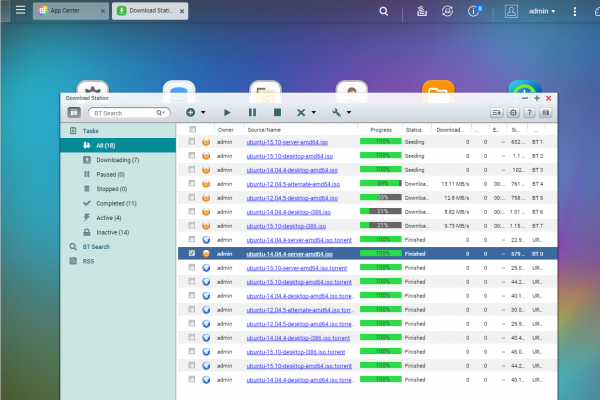
We are not huge BitTorrent users, but having the ability to download directly to the NAS either from HTTP URL, FTP/ SFTP or BitTorrent is nice.
That is just one example of applications that can be installed using QNAP’s standard interface but the list goes on and the experience is very much that of a desktop-like interface in a web browser. There is no command line interface required (although one can enable a SSH shell.)
Adding additional storage
One can get into a more advanced disk configuration. For example, in this video we use 4x RAID 10 800GB SAS2 SSDs then expand the pool using 2x RAID 1 1.6TB SAS3 SSDs and also add some nearline SAS storage to the pool. As one can see, the process is guided the entire time.
As you can see, the process is fairly easy to navigate and there are hints regarding what everything means along the way.
Using QNAP Network Services
QNAP QTS 4.2 has a variety of services including LDAP servers, RADIUS servers, IPsec/ OpenVPN servers/ clients, and etc. Many of these services using a standard Linux machine come packaged in some not-so-user friendly manners. For example, daloradius is probably the nicest WebUI for a complex RADIUS server on Linux but it is far from an apt-get install / yum install setup. QNAP has a simplified UI that makes the process take 5 minutes to get up and running, a huge benefit.

Perhaps one of the nicest features of the QTS platform is the fact that documentation is built-in using QTS help. In this screenshot we brought up the QTS help page for RADIUS and it does provide a nice overview of what the service is as well as what one can do within the QNAP implementation. Compare this to a daloradius 250 page user guide and it is a lot more accessible to even a novice administrator.
Harnessing hardware’s power with QNAP Virtualization and Docker
Our QNAP TVS-EC1280U-SAS-RP 2U server came with an Intel Xeon E3-1246 V3 and 16GB of RAM. The platform only had four 1GbE ports for network I/O so there is an absolute ton of extra compute and memory available for non-NAS related tasks. Many of the higher-end NAS vendors like QNAP have realized that they can start providing All-in-One configurations with virtualization and now containers (e.g. Docker and LXC) in their platforms.
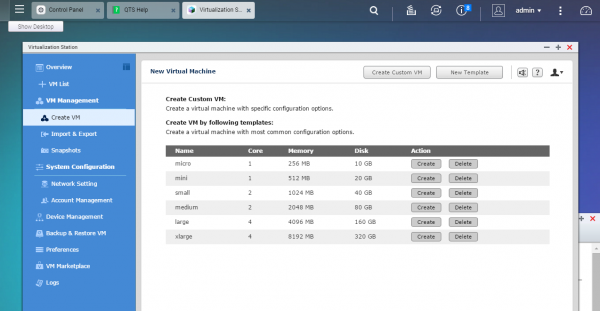
Using Virtualization Station is extremely easy. One has various options including backup/ restore and Import/ Export for VMs. Even during the creation of VMs there are various CPU/ RAM/ Disk size templates that can be used.
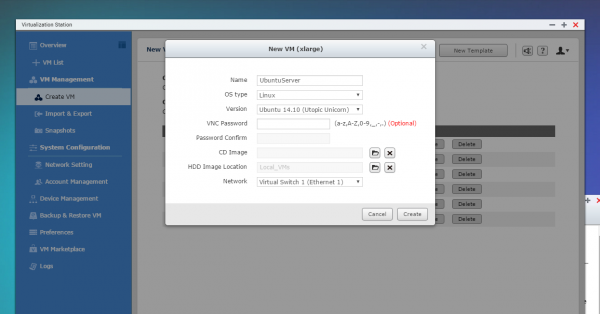
The new VM tab brings up a window that has options that are fairly standard in virtualization GUIs. This is an area where the in-context tips could be expanded.
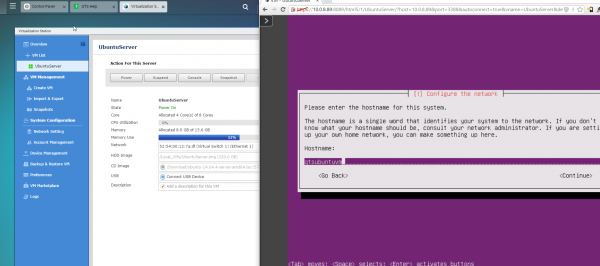
Once up and running, one can access the console via a very nice HTML5 browser application.
Overall virtualization is very easy and is certainly on par, in terms of ease of use, with a single system Hyper-V (either on Windows 8.1/ 10 Pro desktop or Windows Server 2012 R2/ 2016), Proxmox or VirtManager installation and perhaps a bit easier initial setup than ESXi 6.0 for a completely new admin.
On the Container station side we have the ability to utilize pre-packaged LXC or docker containers. This provides a second “marketplace” or source of applications that is not integrated with the main QTS App Center page. There are applications that mirror the QTS App Center like MongoDB but there are also several recommended applications that are significantly different. For example:
- GitLab for a local Git server
- Lightweight virtual desktops via LibreOffice with noVNC
- Minecraft server for gaming breaks
- Registry for a private Docker registry
With the popularity of Docker (and LXC) as well as what is available in App Center, a small startup could purchase one of these QNAP units and have basic services setup easily.
Of course, since this is STH we tried seeing if we could get the Docker version of Linux-Bench running. It was as easy as putting linuxbench/linux-bench-docker in the search box and the QNAP unit found the image on the Docker public registry. Here is a little video of getting it to work:
As one can see, we did have to change a defaulted command and ended up running. We did have to make a small tweak to the Docker script but it now runs on QNAP Docker implementations. We will have results from the CPU benchmarks in Part 3 with performance benchmarking.
Conclusion
At the end of the day, the QNAP TVS-EC1280U-SAS-RP was very easy to setup. Even for a very novice user, the availability of in-context tips and help as well as QTS help documentation makes setting up additional functionality very simple. The easy Web GUI makes setting up some of the more challenging parts such as authentication servers and virtualization/ containers very easy. There is certainly a split between App Center applications that install with great documentation and that are extremely easy to setup and Container Station applications that are for more advanced users. Still, with a streamlined wizard installation process and a large list of applications that can be installed, many users will find this to be a great starter server. For those IT professionals getting started with servicing the high-end SOHO and SMB sectors and are looking to move away from Microsoft/ VMware licensing and low end NetApp storage, the QNAP TVS-EC1280U-SAS-RP can fill a void. In fact, those starting out with QNAP administration can use Linux based technology without having to touch command line interfaces much if at all.
The bottom line is this: QNAP QTS is easy-to-use for even a novice given its GUI and documentation yet is powerful enough to service a large portion of the high-end SOHO and SMB sectors. QTS 4.2 is good enough to be a standalone paid piece of software.


So, I clicked the link in email to look at unit…… Not one picture of it?