
Installing Proxmox VE 7.x is extremely straightforward. Boot a server from the installation ISO, answer a few quick questions like which disk to use for installation, network settings, and what password you want to use and the Debian Linux-based virtualization solution will install. There are still a few more steps one will want to take and this guide will help you through those steps. Specifically, this guide is for those setting up Proxmox VE 7 without an enterprise license. Proxmox has relatively reasonable licensing costs to access its enterprise repositories so we urge our readers to consider that as well.
For the past few years, we have had initial installation checklists for Proxmox VE 3 and Proxmox VE 4 in the forums, as well as our Proxmox VE 5 and Proxmox VE 6 initial installation checklist on the main site. Proxmox VE 7 added some new features to avoid some of the CLI use in previous versions of this guide so there are certainly some changes.
Proxmox VE 7 Initial Installation Checklist
A common task admins use when installing an OS is to update the system as components can become outdated over time. Proxmox VE is slightly different than other platforms since it will not update properly out of the box, despite being based on Debian Linux. One of the key reasons for this is that Proxmox VE is set up out of the box to use enterprise repositories that are part of a paid support pack. If you are just trying Proxmox VE out, then you may not have a paid subscription and will want to do a few quick steps to ensure you can update the system and install software from the package manager.
Initial Proxmox VE 7 installer GUI tips:
- If you can, a mirrored boot is a good idea. Proxmox VE 6 added the ability to use mirrored NVMe ZFS RAID 1 for boot. You do not need huge boot drives, but we have largely moved away from <100GB boot drives for Proxmox VE by PVE 7 just because having more space often helps. We have a test system below with a smaller drive that has seen some extra bits loaded over time due to bad habits and is therefore around 80% full.
- On the network settings screen on the installer pick something other than pve.x.x as your hostname. If you leave defaults, it will get confusing later. Also, set a static IP and remember your password. If you need to change this later, we have a piece How to Change Primary Proxmox VE IP Address that you can reference.
- Ensure you will have a way to resolve hostnames in your setup.
We are going to change our recommendation here. The Proxmox VE team has made it much easier to use the GUI for these tasks making Promxox VE 7 much more user friendly to the novice admin. We are going to focus on the GUI methods for this guide, but still nod to some of the CLI ways you can do some of these tasks. Still, this is a great job by the Proxmox team to allow users to avoid the CLI.
Upon first boot:
- Log into the management URL with a browser. This will, by default be HTTPS, the IP you set during installation and then port 8006.
Change to pve-no-subscription Repo
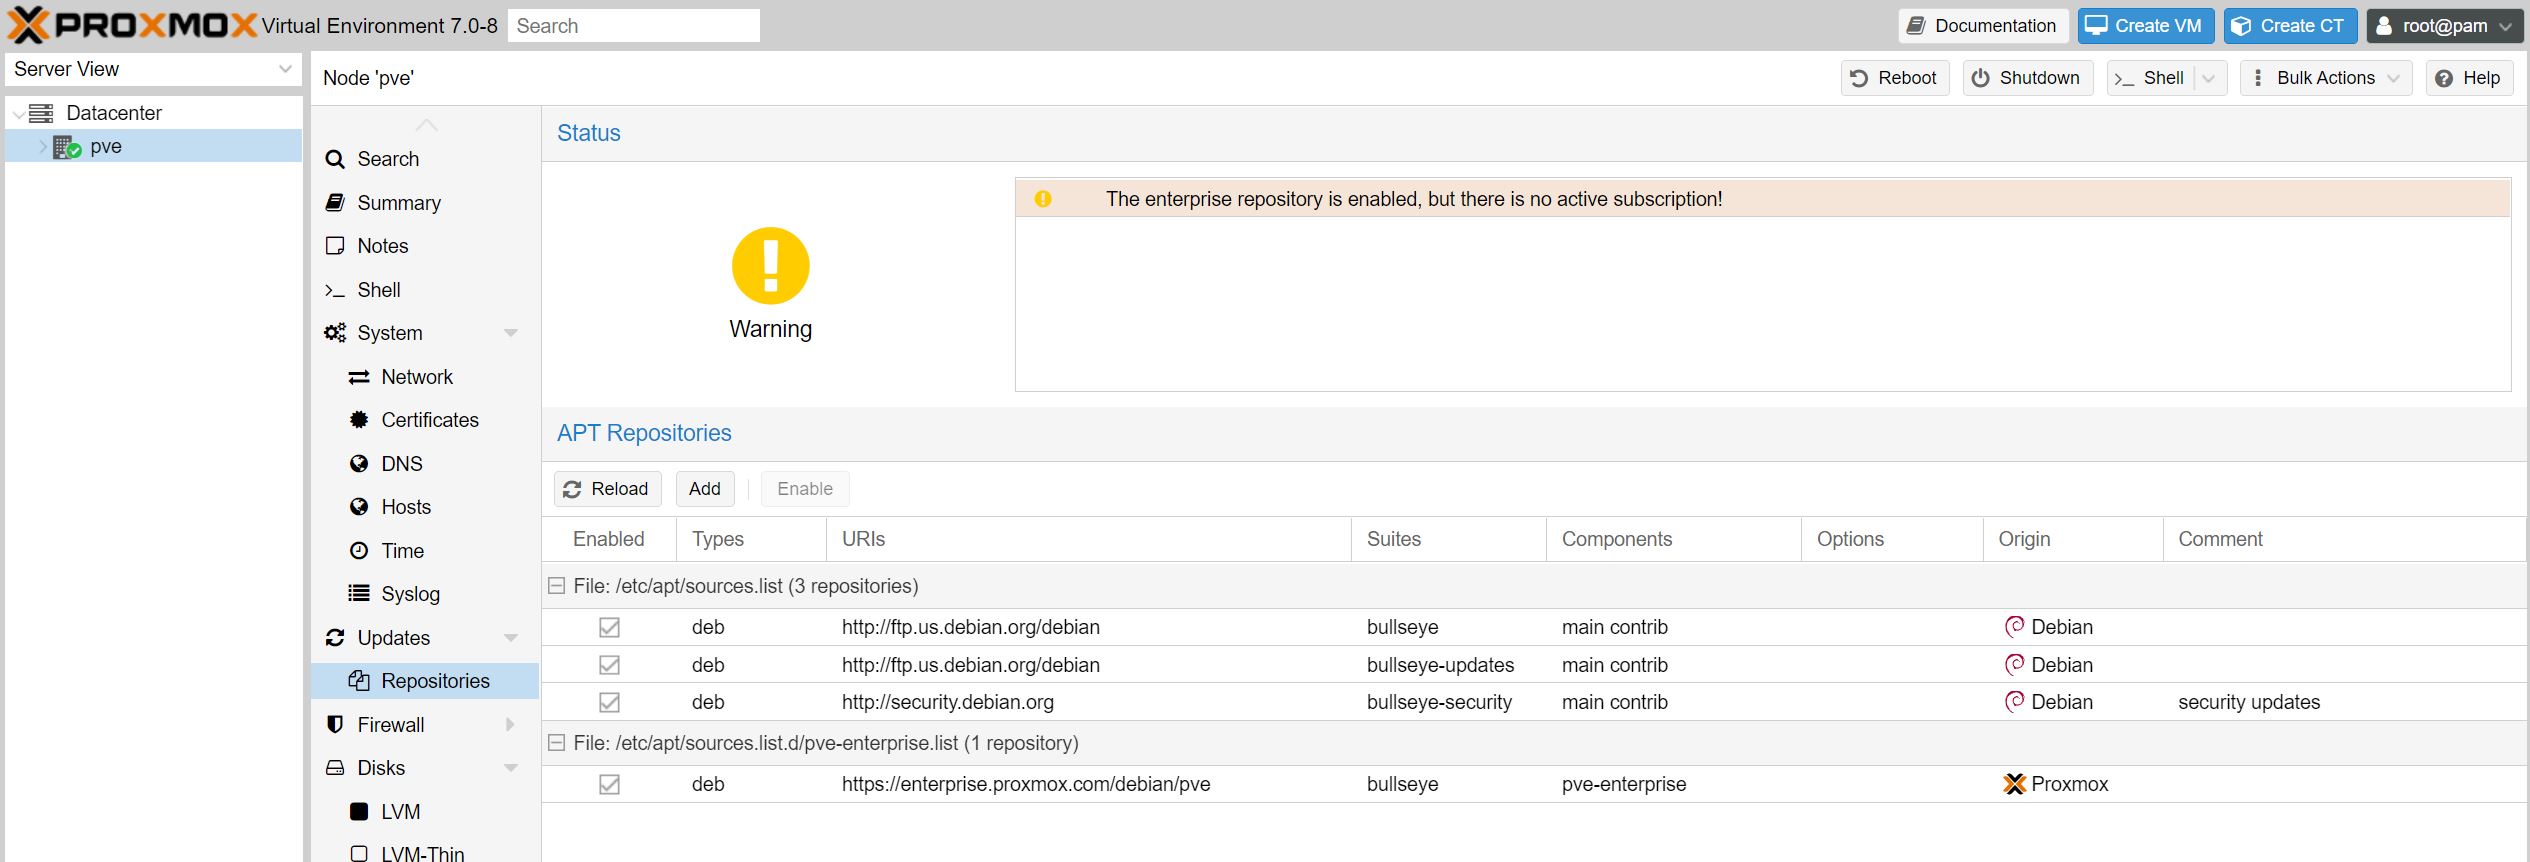
2. From here, generally one wants to setup the no-subscription repositories. By default Proxmox installs pointing at the enterprise repositories and hopes that you have a license. Again, pricing on this is very reasonable, but sometimes to test Proxmox you will want no-subscription repositories. For this, you will want to navigate to Datacenter-> the node on the left. Then to Updates-> Repositories.
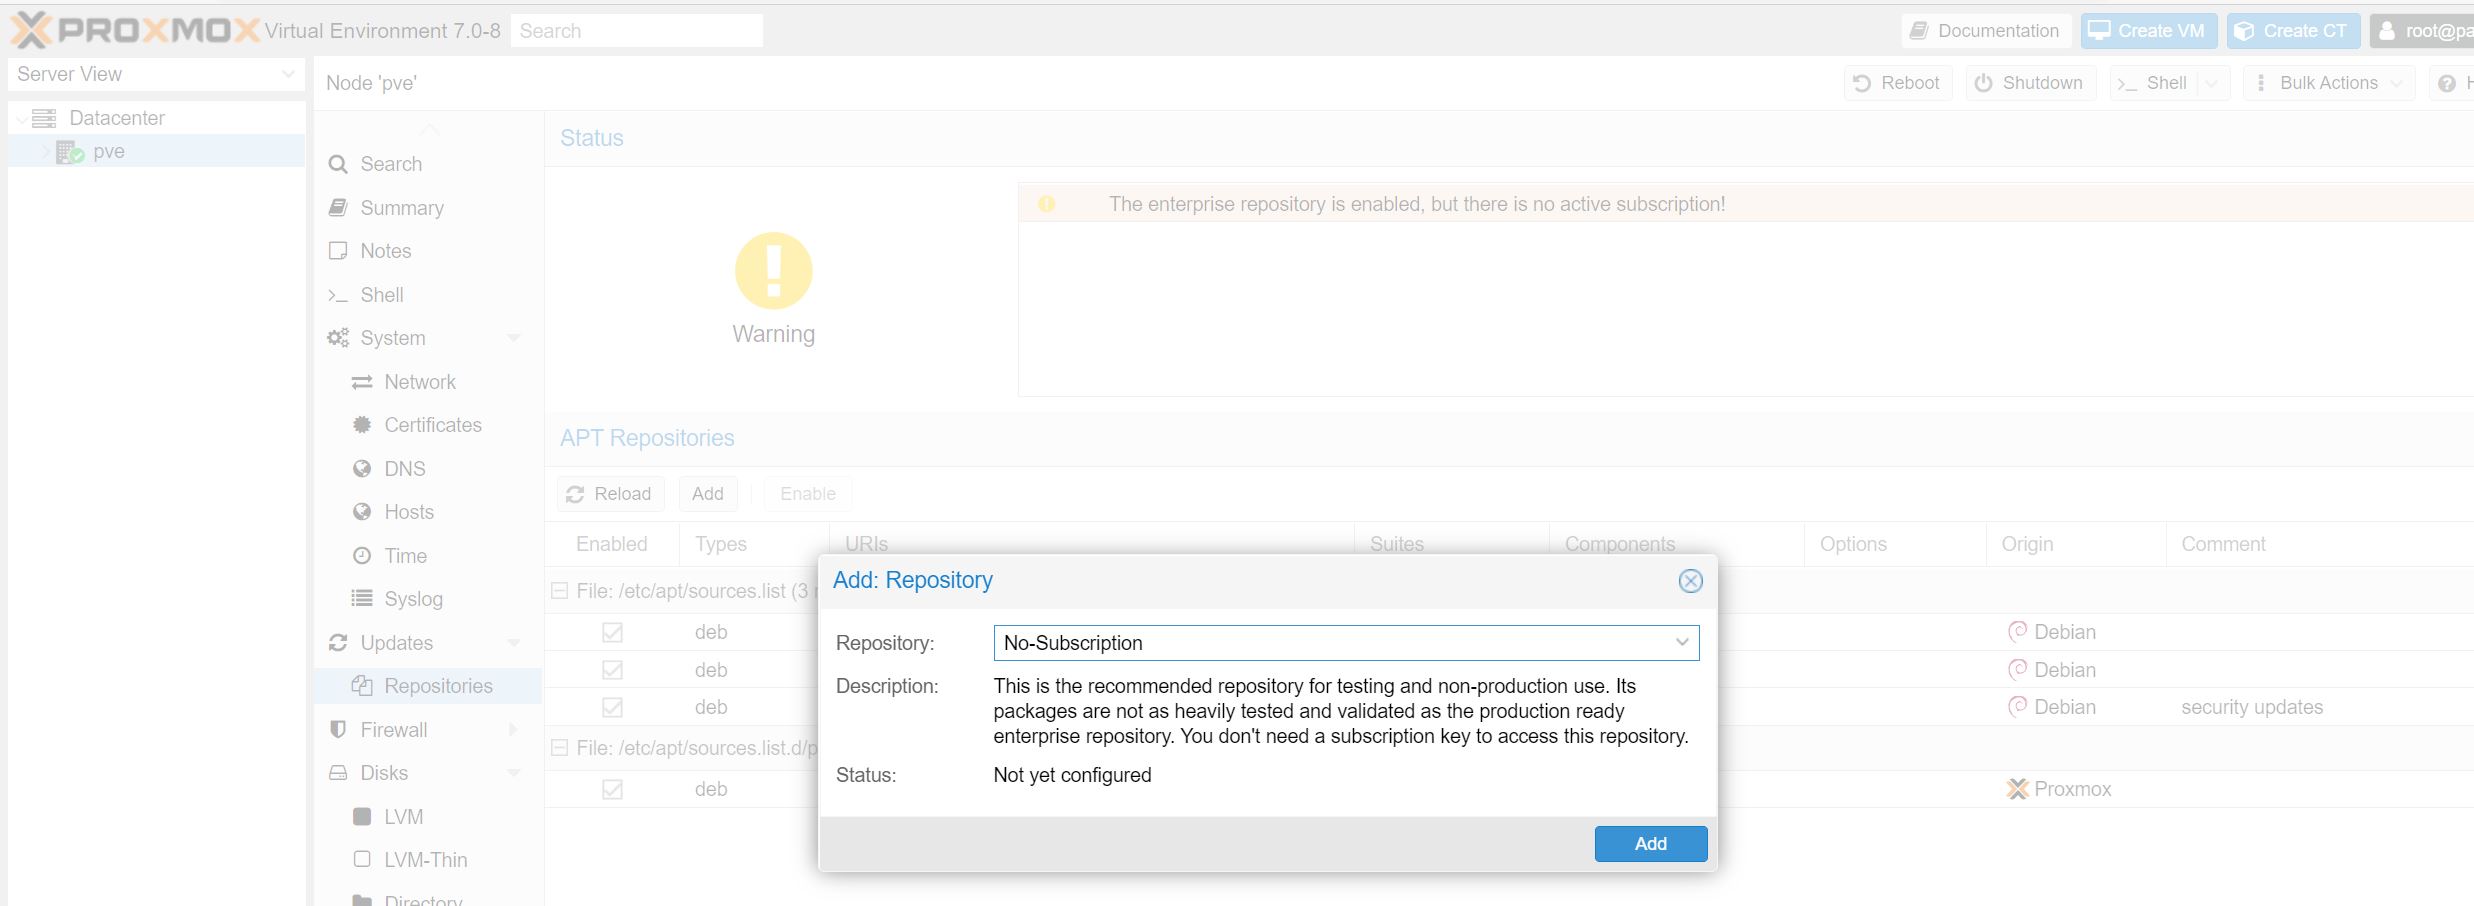
Here you will click the “Add” button and select “No-Subscription” then click add.
After you do that, you will want to click on the pve-enterprise line and then the “Disable” button will activate. Use this disable button to disable the pve-enterprise repo. Again, this is not recommended for production workloads, but that is what we are showing here.
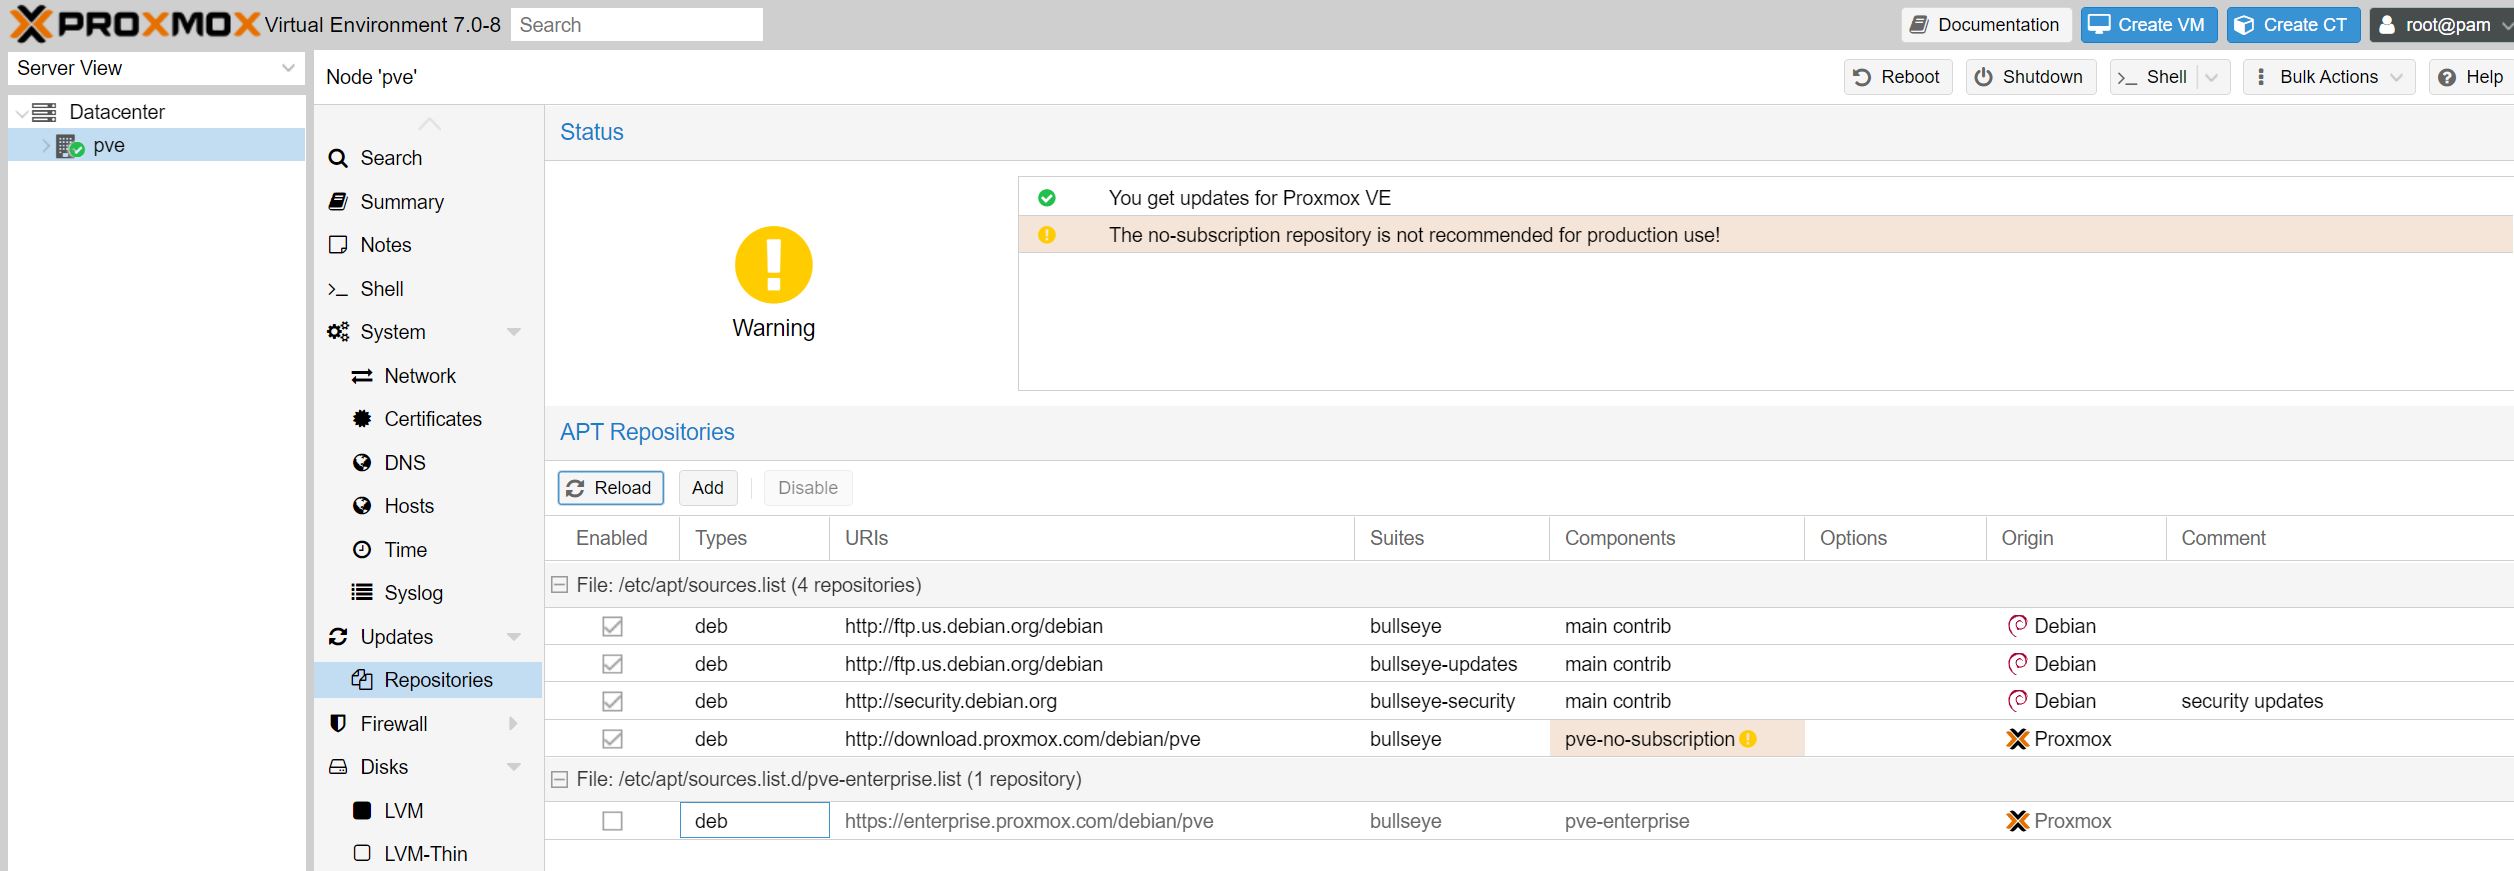
You can now to go updates and check for updates via the GUI.
(Alternative) CLI Method
One can also SSH into the machine or use the CLI web browser shell. fix this first add the no subscription sources:
# nano /etc/apt/sources.list
add:
deb http://download.proxmox.com/debian bullseye pve-no-subscription
Again assuming you are using this as a “free” platform, without licensed enterprise repos, then you will want to remove the enterprise source:
# nano /etc/apt/sources.list.d/pve-enterprise.list
comment out (add a # symbol in front) of this line:
# deb https://enterprise.proxmox.com/debian bullseye pve-enterprise
Now update and upgrade to get the latest packages installed and ensure that you have all of the repos setup properly:
apt update && apt dist-upgrade -y
Basic Housekeeping
A tip that we have learned over the years is that after installing, updating repositories, and installing components, always reboot. We ran into an issue with ZFS RAID 1 after updating before, so ensure you can still boot the server!
I like to ensure that I have IPMI up for any server I am doing this with just to troubleshoot reboot issues.
At this point, you should be able to add storage, create VMs and templates, create containers, set backups, and networking. Since the repositories are properly set, you should be able to update the system from the web interface.
In this new guide, we are going to suggest a few other changes.
Beyond the Installation Basics
Beyond the initial setup, there are a few quick tips we have. First, if you want to utilize Open vSwitch, you will want to do that just after setting up the package manager. Changing to OVS after you have already joined the machine to a cluster and loaded VMs is much more difficult than doing it at the outset. Here is a good set of Proxmox VE OVS setup instructions from our forums.
You can also set up two-factor authentication which is new in Proxmox VE 6.0 and continues in Proxmox VE 7.0:
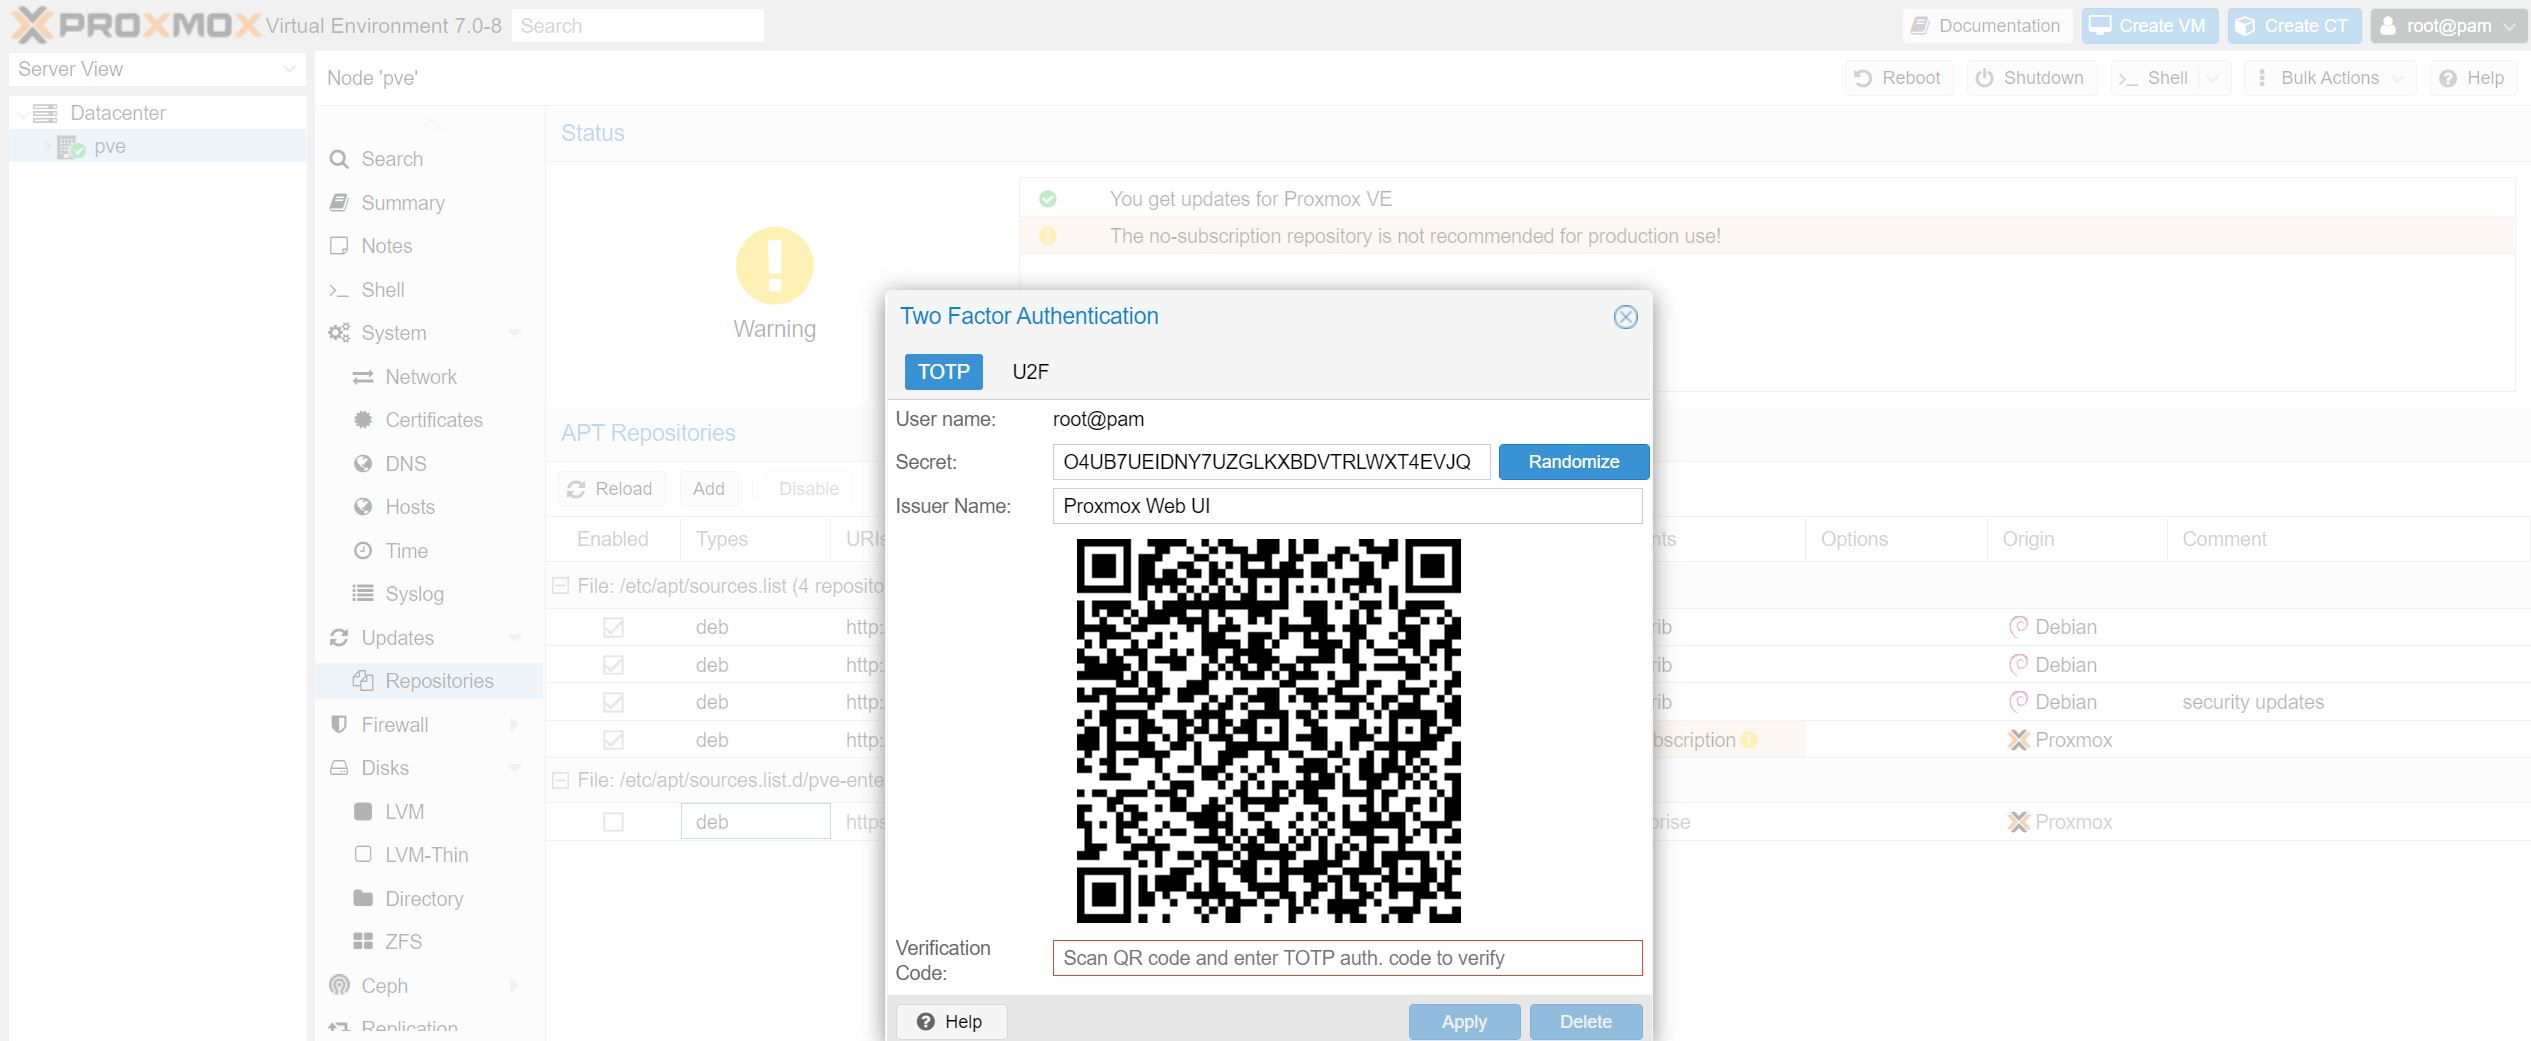
It is fairly self-explanatory. For those who are using Proxmox VE as a shared hosting platform, this may become an extremely useful feature.
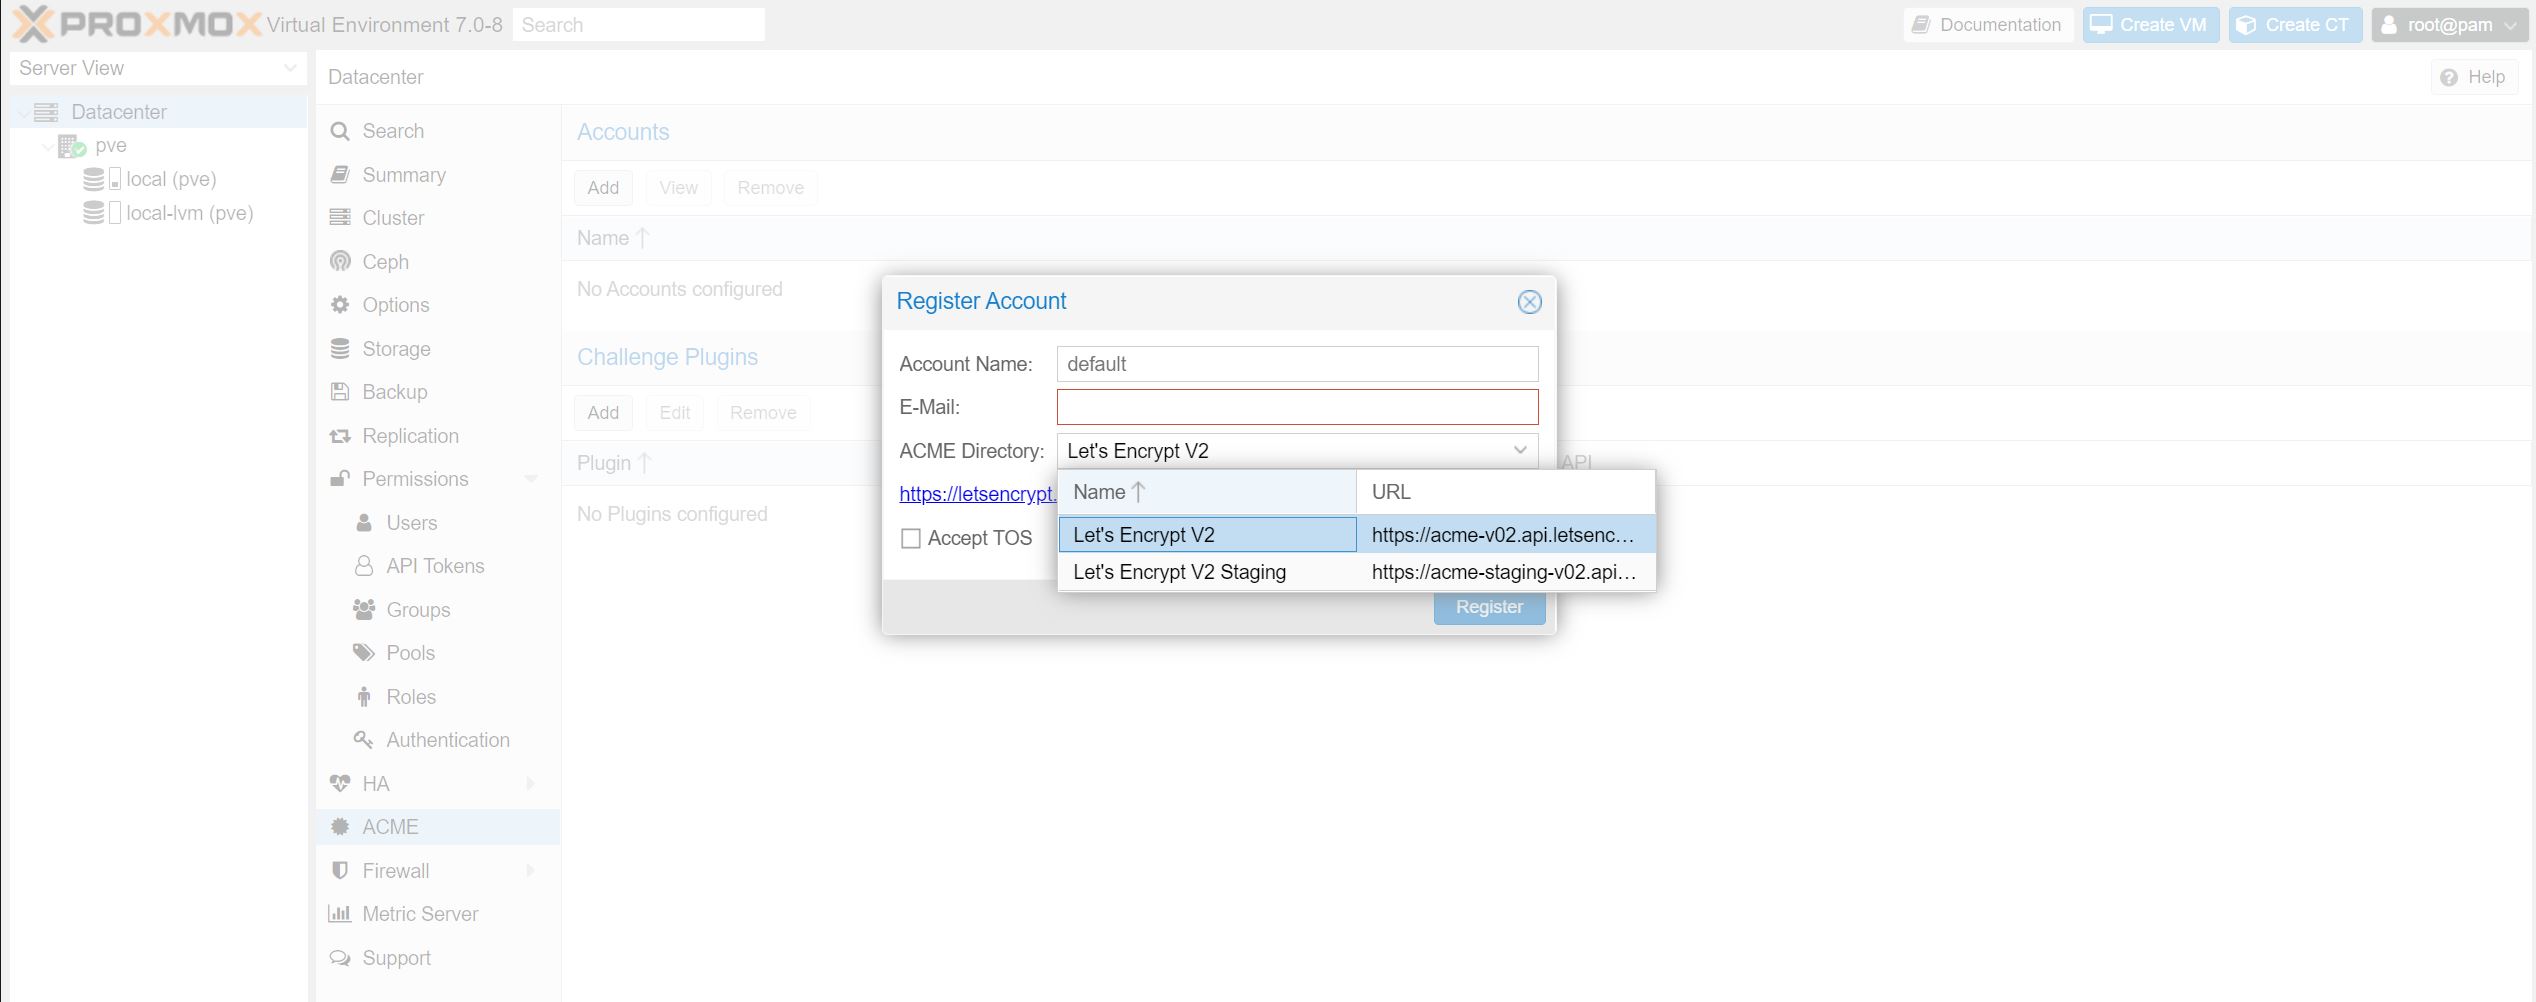
Also, over time the Promxox team has added ACME support with Let’s Encrypt V2. This is something that there is now a GUI for and so that may be something we suggest to do as well.
Finally, once you have a VM setup, there is an entire section on snapshots, replication, and backups. Taking basic precautions against failed hardware or even just software updates that went awry in guest OSs is only a few seconds to setup through the GUI. If you come from some other virtualization solutions, these may have been difficult steps, but with Proxmox VE the functionality is built-in.
Final Words
As with previous versions, we alwauys suggest bookmarking this page as it will come in handy not just for your first installation, but for subsequent installations as well. The change from 6.0 to 7.0 makes these steps easier to the point that all of the setup can be done via the web GUI instead of the CLI which will make Proxmox VE that much easier to deploy.


Not really related to pve7, but check if your nvme drives have 4096 bit blocksize, many come with 512 bit by default.
Can we have a tutorial on Proxmox VE PCIe Passthrough?
Just a question, what is the benefit of installing PROXMOX on the NVME as opposed on the ZFS VDEVS, I find the benefit of the latter is migration of easier to new hardware. Just connect the drives and it boots no need to import any pools, further I think you benefit from great disk redundancy
Second request for pci passthru. I have Ann visual 3080, and there are too many conflicting guides.
Second request for pci passthru. I have an NVIDIA 3080, and there are too many conflicting guides.
Another vote for PCIe passthrough. Especially I’d love a section discussing common issues.
+1 pcie passthrough
Yes to a PCIe pass through,for Mac OS and win10,please.To Manny- conflicting how-to`s in, YT land and in the comics.
Comments are closed.