
About a year ago, William had our Lenovo ThinkCentre M90n Nano IoT Review. In the interim twelve months, a few notable developments occurred. Specifically, we managed to purchase a unit with slightly lower specs from Lenovo at a greatly reduced price, and we started Project TinyMiniMicro. These Nano PCs are an even smaller form factor but certainly come with both some benefits and trade-offs. As a result, we wanted to give a bit more about the system in light of what we have learned in this segment as we have reviewed dozens of competitive systems.
Lenovo ThinkCentre M90n-IoT Background
We wanted to take a look at this system from a different perspective given the drastically changed pricing. We also have a video on this unit on the STH YouTube channel here:
As always, we suggest opening the video in a larger browser if you want to check out the video as that usually has a better viewing experience.
The reason we had the opportunity to look at this system (again) this was posted in the STH forums and was available from Lenovo.com directly and from Lenovo on ebay for only $200 new.
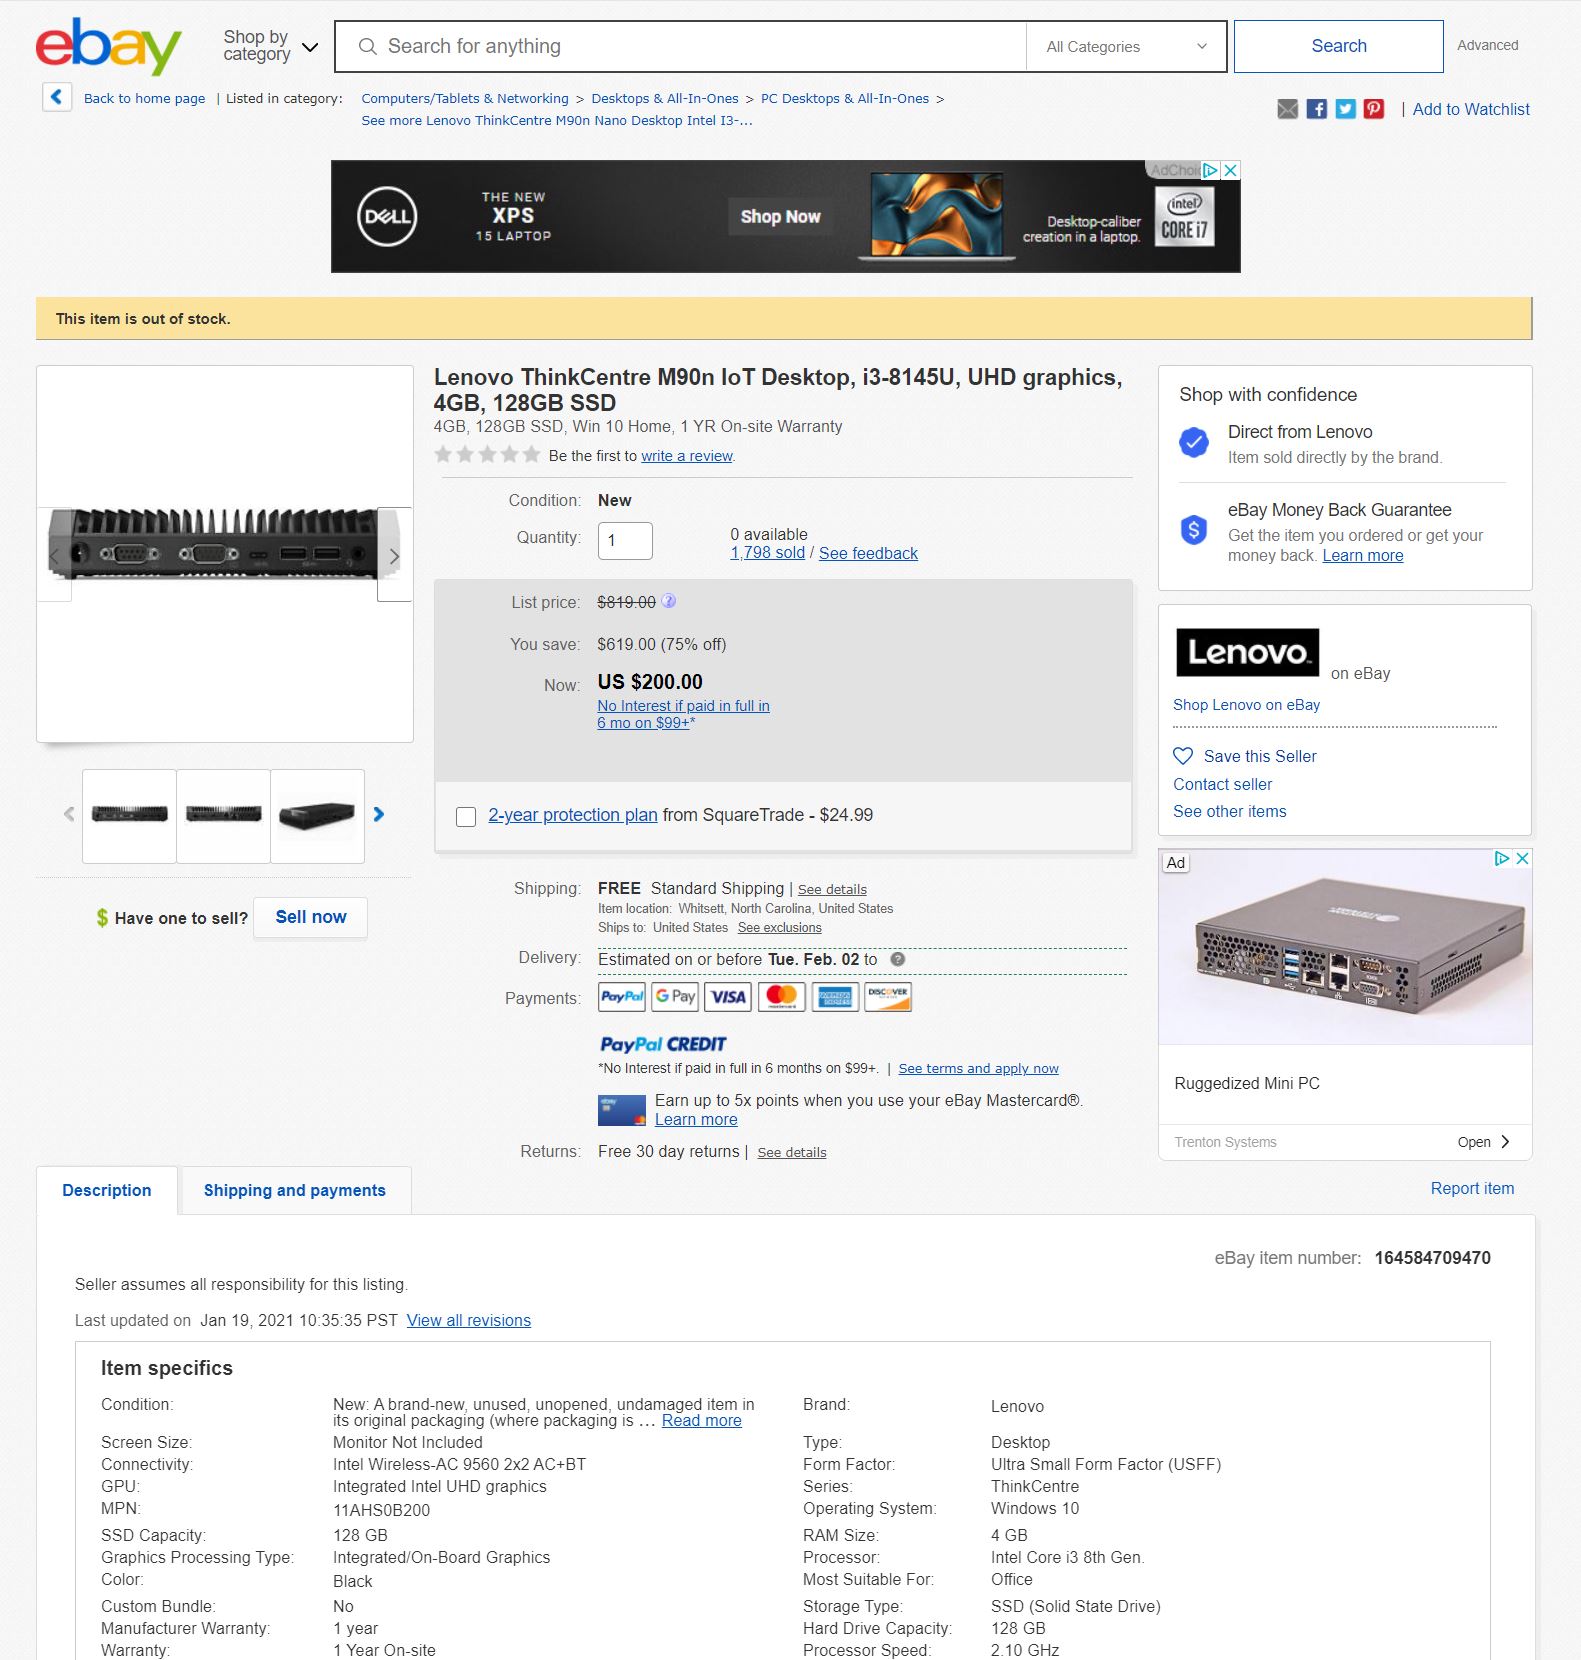
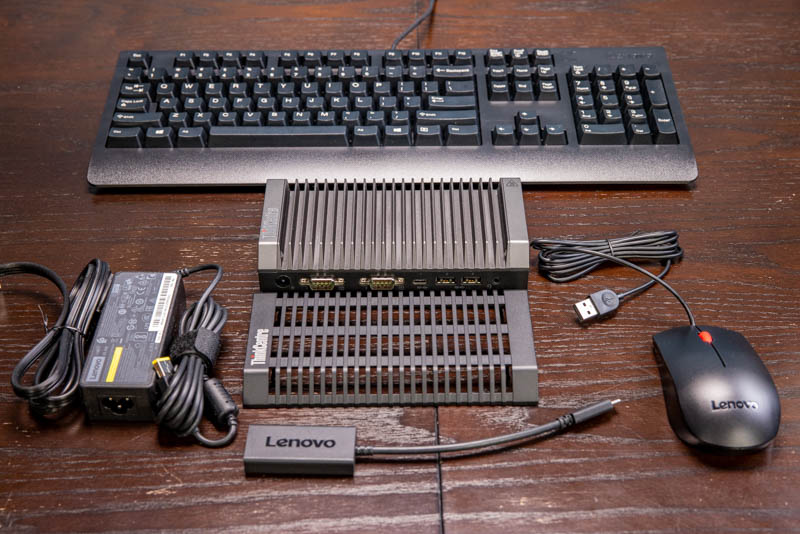
The configuration included an Intel Core i3-8145U dual-core processor, 4GB of memory, and a 128GB SSD. We were a bit surprised that we also got a keyboard, mouse, and a USB-C to HDMI 2.0b adapter in the box.
As a result, we wanted to take a look at the system as an alternative to our Project TinyMiniMicro series and just do a quick hardware/ application overview.
Lenovo ThinkCentre M90n-IoT Overview
The Lenovo ThinkCentre M90n-IoT is a very compact chassis.
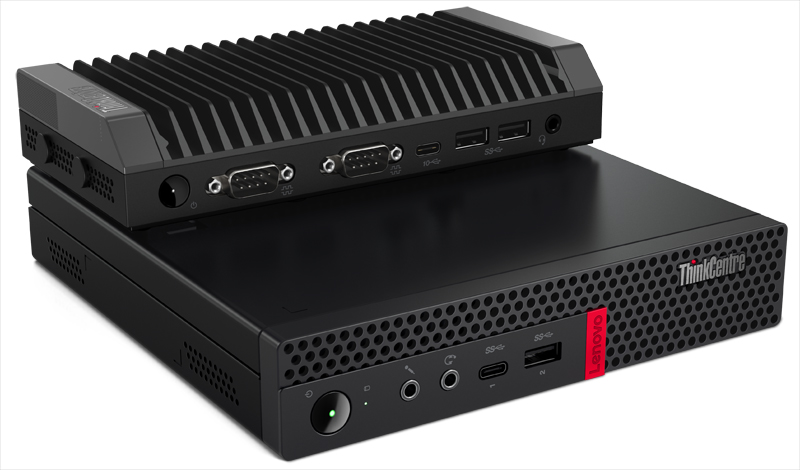
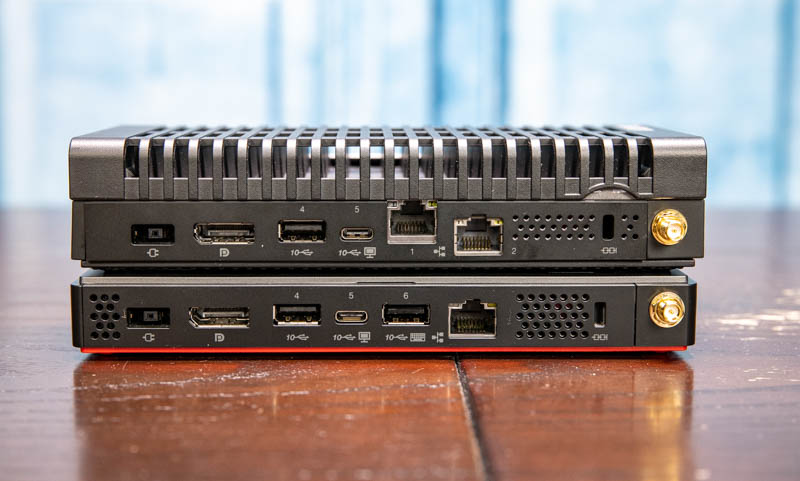
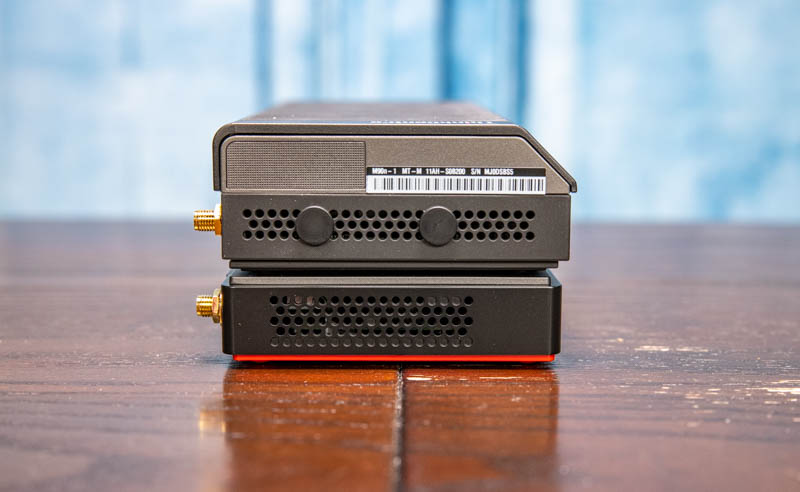
Just for some sense on size, it is considerably smaller than a Project TinyMiniMicro node such as the Lenovo ThinkCentre M920x. There are certainly trade-offs being made to achieve this small size.
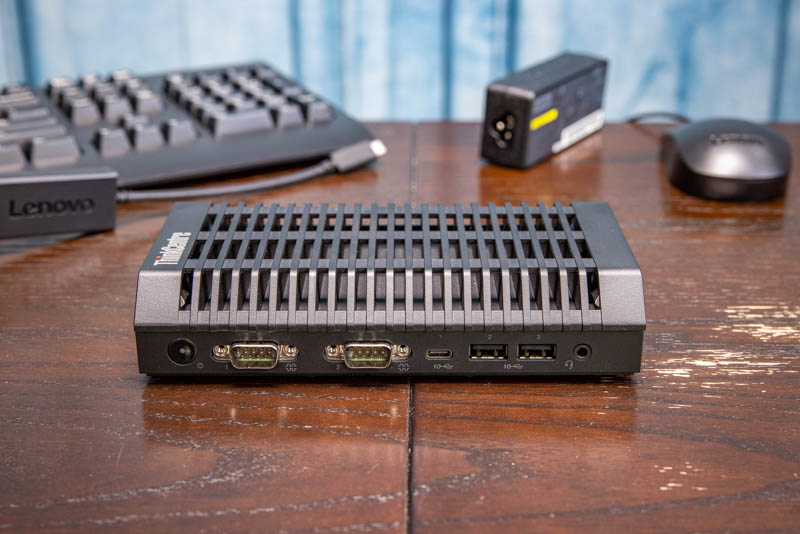
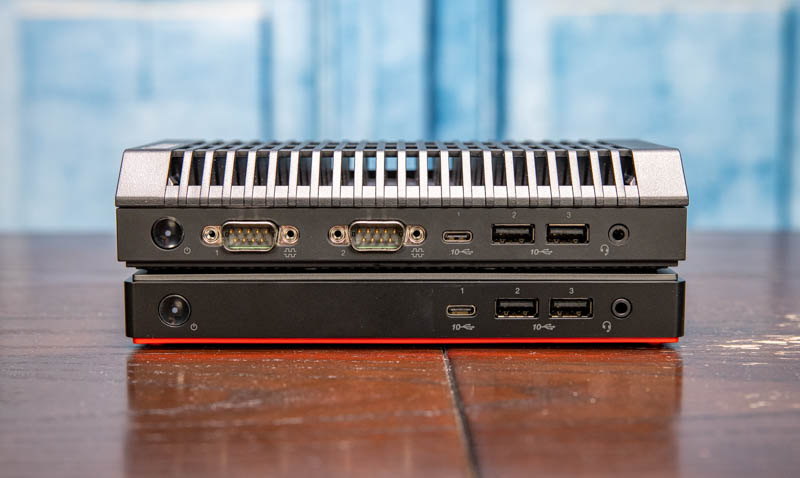
One of the high points of this system is the connectivity. On the front, we get three USB 3.1 Gen2 10Gbps ports. Two are Type-A and one is a Type-C port.
While that port layout, and including the power and headset jack may seem very similar to the M90n-1 Nano, the IoT version adds two serial COM ports. These are important since there are many IoT devices that utilize serial interfaces. Another major benefit of the legacy interface is that one can screw the serial cable in to secure it which is more resistant to inadvertently coming loose. Modern USB ports are designed to disconnect mush more easily.
The rear of the unit has a fairly standard power input (via a 65W power adapter) a display port and two additional USB 3.1 Gen2 10Gbps ports. One is a Type-A and one is a Type-C port. Lenovo includes a Type-C to HDMI 2.0b adapter to use with this Type-C port in order to get a second monitor output.
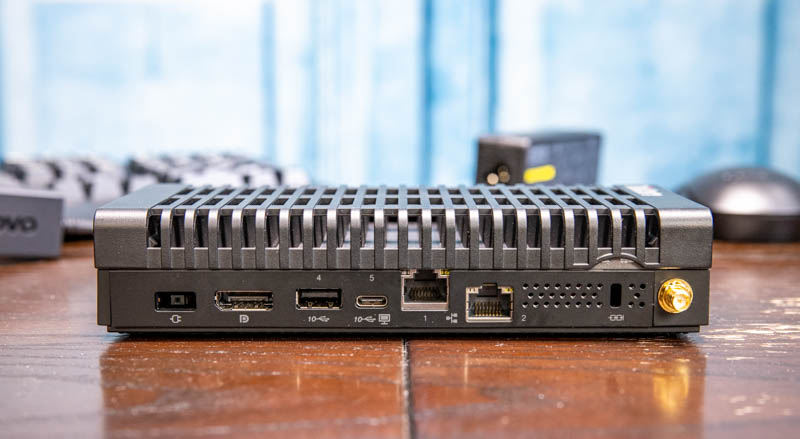
Perhaps the big feature here comes down to networking. There are two 1GbE network ports on the rear of this unit. One of the big asks we get around Project TinyMiniMicro nodes is around adding a second wired NIC. We even have a Guide to Turning a Project TinyMiniMicro Node into a pfSense Firewall due to requests around that solution. Here, we get two NICs. Since these are Realtek RTL8111-based NICs, for FreeBSD, we generally recommend updating drivers as sometimes the included drivers are dated and can cause performance issues. OSes such as Windows have more updated drivers.
This is a contrast to the non-IoT version which instead of this second NIC has a USB 3.1 Gen2 10Gbps Type-A port. Both of these units have 802.11ac WiFi so we get an antenna header.
We are going to get into the reason for this in our internal overview, but the side of the system has two additional antenna ports that are populated with blanks in our system.
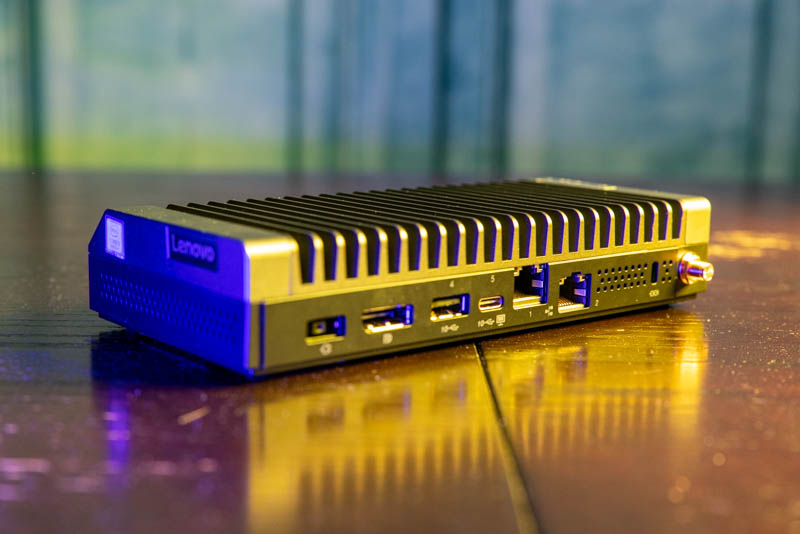
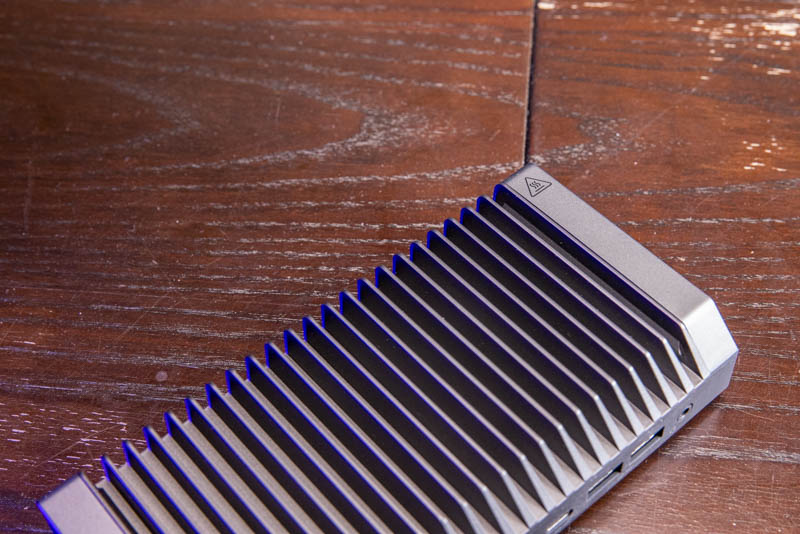
You may have noticed a plastic cover in some of the photos, but not in others. This plastic cover is designed to add some protection from the top of the M90n-IoT’s heatsink. This is a passively cooled unit, so the system can get potentially warm. Under that plastic cover we get a warning label. This is a nice little touch.
Next, let us look inside the system and discuss applications.


If only it had 8GB & Intel NICs for $250 ;)
There’s just enough RAM for hyper-v server, pfsense, and a file server. Bought one when they went on sale.
Using it at home for my router.
But OMG if this had 8GB RAM and Intel Nic!!! Yes please!!
Realtek nics makes this not good for pfsense. Too bad.
@Griffin and @SF
This is quite good:
https://www.seeedstudio.com/ODYSSEY-X86J4105864-p-4447.html
Why the fuss about a „weak“ CPU and „only“ 4 GB RAM? These devices typically function as sensor platforms for example. My company uses hundreds of these type of „industrial“ PC‘s to collect data from temperature and moisture sensors etc. and forward the data to a centra datacentre. For that, such CPU‘s and RAM are more than adequate. These are Edge devices after all and Linux uses very little resources. Running a desktop on this, is just plain silly.
Sometimes I get the feeling that the STH crew wants to run hypervisors on everything, where CPU and Memory are more important.
@Dave – you do know the title of the website? “serve THE HOME” – thats the entire idea. how we can get enterprise technology trickle down in size for use in homes. Not just by using old powerhungry servers. – Many homes are space limited, now i would agree that running a type 1 hypervisor on that m90n iot would be not so ideal. It is actually interesting to see how far we can go in size. I seriosly loved the Helmer Cluster – which was a blender Renderfarm in an Ikea Helmer Cabinet. A bunch of these – maybe a bit more powerful, and we could do the same cluster in 1 drawer of the cabinet :-)
Default of pfsense 2.5 devel gave terrible results of about 25mb on a gig line when running speedtest. Returning to my 720q w/ quad intel nic gives the 950mb i want.
I’ve heard others say that realtek can be improved with drivers, but that’s not an easy step for me, nor did they seem included with the latest nightly build of pfsense.
This is an IoT device, not a desktop replacement. Should be tested like one. When the price was lowered it put it with the various Pi/Odroid/Geekworm type setups. No upgradable RAM, etc. I have both the M90n and the M75n IoT models. I added a CAT9 LTE card to give it another WAN type. The M90n is great little device with the i3. The AMD M75 has a stripped down 6W Ryzen which is even cheaper than the M90. But its performance is much lower and closer to the ARM boards. Very easy to take apart. Very easy to change out the SSD’s, the WiFi or the WWAN. All accessible by removing the top cover. If you have hang ups about Realtek or memory expansion, look in a different price point.
Where is the power consumption of this unit? That’s what I want to know.
John, just plugged mine into a Kill-a-Watt, highest peak power I saw was on boot at about 17W for just a moment.
Pfsense at ‘idle’ is around 5 to 6W, it seems to go up and down by about 1W. I do have Two NVMe’s installed in this unit and that may slightly increase the power draw.
While doing a fast.com speed test the power went up to about 11W. This is a pretty standard dev pfSense 2.5 single LAN configuration, also added pfBlocker, just to see if I could get the CPU to do something while updating the blocker database. (It didn’t seem to go above 10W)
I used the updated Realtek drivers by dropping to the shell and doing “pkg install realtek-re-kmod” then following the instructions that are there to modify one file.
Sorry, I forgot to mention this was with a gigabit fibre which is almost symmetrical. Speeds of 970Mbps down and 950Mbps yo are normal bandwidth for me with my GPON fibre during the day.
The dual serial, wwan port and passive cooling would make this amazing for light industrial control/monitoring.
Comments are closed.