
The goal of this guide is to get Synology DSM-5.2 installed within a kvm virtual machine on Proxmox VE. The steps should work the same on other kvm backed projects and should work on other hypervisors. STH previously showed how to install FreeNAS NAS software in Proxmox VE for a hypervisor, storage and networking all-in-one solution.
Xpenology is a bootloader created from the open source code provided by Synology. It is not recommended for production environments but can be used to quickly sandbox changes before using them in production.
Preparation
You first want to start by downloading DSM_5.2-5644.pat (MD5 43a3c4a95c95c4fbe7ba0d2f39d60747) and XPEnoboot DS3615xs5.2-5644.5 ISO (MD5 a92ea8c869c48fc340a91e41a01d4cfd) from http://xpenology.me/downloads/ . Those files are what is needed to install and run xpenology.
Synology Assistant also needs to be installed. Synology assistant can be downloaded here
You will need to upload the xpenoboot iso to Proxmox VE. You can do this either through the Proxmox VE web interface (selecting local datastore) or using the easy SSH method for uploading Proxmox VE iso images.
Setting up Promxox VE for Xpenology
Start by creating a virtual machine with the following settings (these settings are confirmed to work, test other settings at will).
- OS:Linux 4.x/3.x/2.6 Kernel (l26)
- CD/DVD: choose xpenoboot previously uploaded to proxmox
- Hard Disk:SATA
- CPU: 1 Socket 2 Cores and Type Default(kvm64)
- Memory: Fixed size 1024MB OR automatically allocate Min 512MB Max 1024MB
- Network:VirtIO
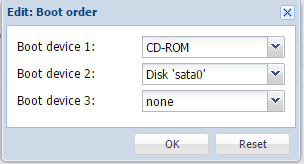
After the virtual machine is created, edit the boot order to set the cdrom as the first boot device. Boot order is located within the options tab.
Change display to vmware (from default) under the hardware tab. This step is not mandatory but, if Display is left on default you will experience some garbled text while xpenoboot is booting.
The Virtual machine is finally ready to start. When booting the virtual machine for the first time, you need to select xpenoboot install/upgrade and hit enter to start the installation process.

The virtual machine has completed booting when DiskStation login: appears on the screen. You are now ready to open Synology assistant. Synology assistant should find the virtual machine and automatically open a browser window.

The browser window should appear similar to the one below
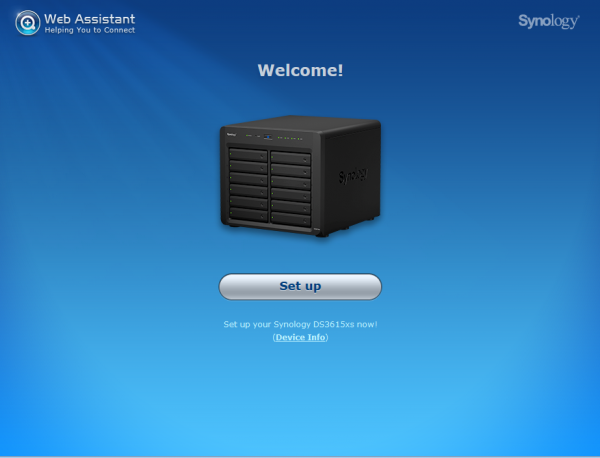
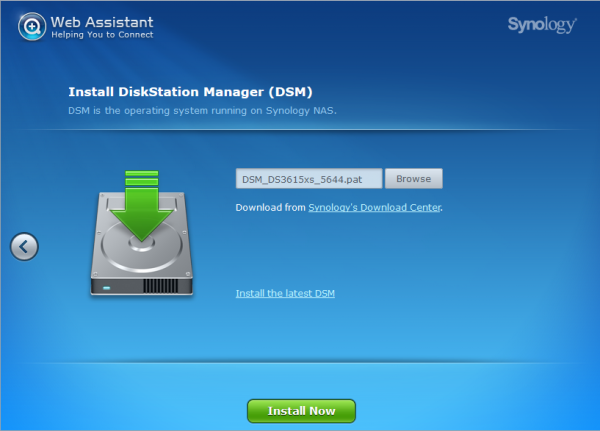
Click setup and you will be presented with an install Diskstation manager (DSM) screen. From there click Manual install. Once manual install is selected, use the browse button to select DSM_DS3615xs_5644.pat (downloaded earlier). Then click Install Now (Do Not Click Install the latest DSM)
Once Install Now is clicked, a prompt will appear warning you that all the data on the hard disk will be removed. Since this is a new virtual machine, we do not have to worry about losing data. Check I understand and click OK.
Once installation is done you will be prompted that your DiskStation is restarting. (keep this webpage open, it will be used to configure your DiskStation on reboot.)
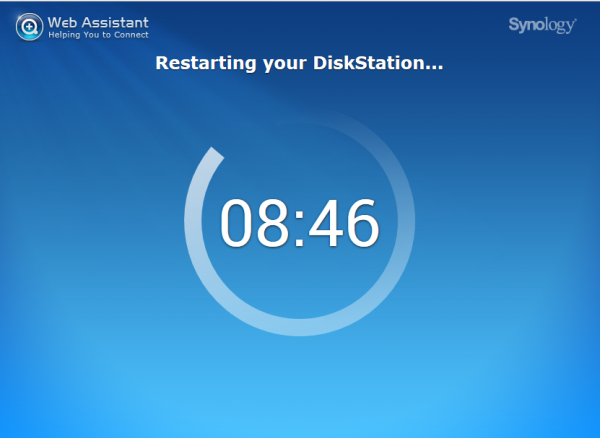
Since we previously set the virtual machine to boot from the CD-ROM the virtual machine should successfully reboot on its own (Selecting the first option XPEnology DSM 5.2-5644 by default. This is also an example of the garbled text mentioned earlier.)

Once the webpage detects that your Diskstation has rebooted you will be greeted with a welcome screen.
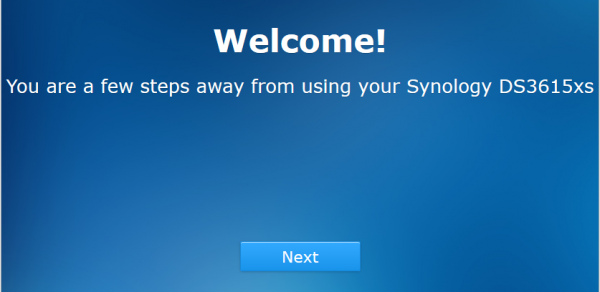
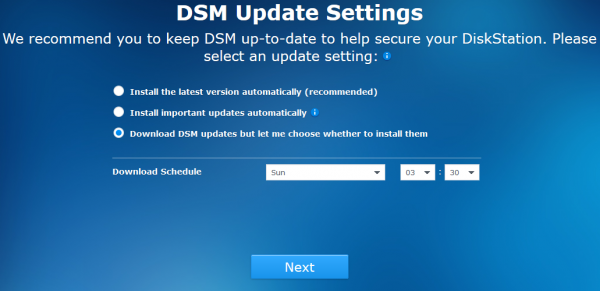
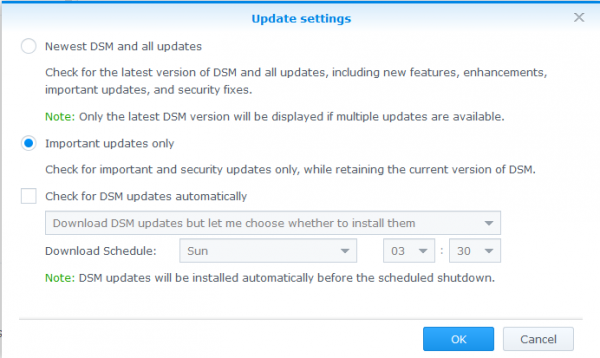
Click next to begin the DiskStation setup process (Create your administrator account). The next page focuses on DSM Update Settings. Since we have to manually install updates with this unsupported configuration, we need to disable auto updates. In this section select Download DSM updates but let me choose whether to install them and later on we will disable update checks
Set up QuickConnect is after DSM updates. Skip this step (if needed you can always change this setting later on.) When skipping this step, you will be prompted that you will need to set up port forwarding to remotely access your DiskStation. Click yes to proceed. Do not check help making DSM better at this time.
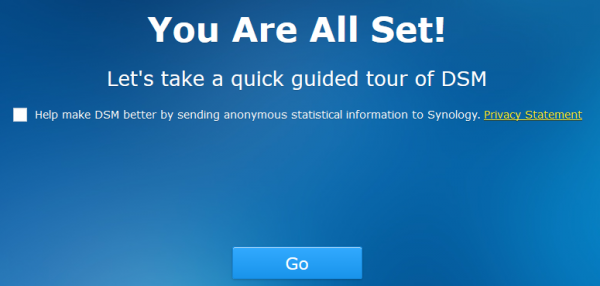
After clicking Go you are presenting with the DSM dashboard.
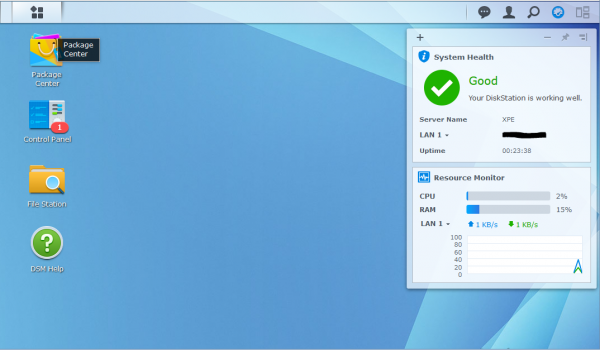
Now that we have access to the dashboard we need to disable automatically checking for updates. For this we will open control panel and select Update & Restore. Once in the Updates & Restore menu click Update Settings. Within the Update settings menu, select Important updates only and deselect Check for DSM updates automatically. This will disable DSM checking for and installing updates.
Now enjoy your Xpenology/ Synology NAS virtual machine!
A few notes on this setup:
- This is completely unsupported by Synology and is only made possible due to the open source contributions Synology has made. If you are running a production NAS, we suggest purchasing a Synology unit with support
- You can add drives via the KVM virtual machine including pass-through of devices
- You can snapshot the VM using Proxmox VE tools and revert if an upgrade goes wrong. Since this is a highly experimental setup, this is a suggested step


Thank you so much, this was really helpful!
Very useful guide!
I can’t download theXPEnoboot DS3615xs5.2-5644.5.iso file; seems the host is down and has been for over a week. Does anybody know a reputable alternate download?
I’ve tried the XPEnoboot DS3615xs5.2-5644.4.iso (the download is working for this file atm), but when trying to install the PAT file it fails with this message: “Failed to install the file. The file is probably corrupted. (13)”. I’ve tried re-downloading the file, and other versions of xpenoboot and pat file in various combinations, with the same result every time.
Anybody else getting this behavior? Any suggestions?
Hi
Can you expand on how to add drives both from Proxmox and directly to the VM? Advantages and cons of direct to vm?
Thanks