This is a simple guide to creating a VMware ESXi virtual machine for NexentaStor. Actual OS installation is very easy and will be covered in another piece. Just over a year ago I created The Big WHS on a platform of Windows Server 2008 R2 with Windows Home Server installed in Hyper-V. Simply put, this may have been the easiest installation ever since Hyper-V and Windows Home Server work well together. With the lack of a new Drive Extender technology in Windows VAIL server, many users are looking to other storage platforms to fill the void.
Lately, I have been building more and more ZFS based systems. One thing I can say without a doubt is that Windows Server 2008 R2, Hyper-V, and Windows Home Server V1 are much easier to administer for those that prefer GUIs to command lines. I still think that virtualization of storage platforms is the way to go, simply because CPU resources are oftentimes underutilized in storage servers. Nexenta is a company familiar to many folks as it provides a customized storage centric Solaris 10 platform with vendor support. In fact, Compellent Technologies which was just acquired by Dell utilizes the Nexenta platform for their zNAS line. Aside from commercial offerings, Nexenta offers a lightweight but free version of their storage platform that allows a user to store 18TB of data (raw disk capacity can be higher). Unfortunately, like most non-Windows operating systems, Hyper-V and Solaris do not mix. On the other hand VMware ESXi works very well with Solaris, and this guide will show one how to make a simple virtual machine for Nexenta in ESXi.
Test Configuration
- CPU(s): Intel Xeon X3440
- Motherboard: Supermicro X8SI6-F
- Memory: 2x 4GB kits of Kingston ECC 1333MHz DDR3 KVR1333D3E9SK2/4G (Unbuffered)
- Case: Norco RPC-4220
- Drives: 8x Hitachi 7,200rpm 2TB, 2x Western Digital Green 2TB, 6x Seagate 1.5TB 7,200rpm
- OS(es): VMWare ESXi 4.1
For easy reference, this is the same configuration that was used in the Configure Passthrough-VMDirectPath in VMWare ESXi article.
Creating the Virtual Machine
First off, I am assuming that anyone trying this has installed VMware ESXi 4.1. That does mean one needs compatible hardware. Secondly, I am using the VMDirectPath to pass through the Supermicro X8SI6-F’s LSI SAS2008 based controller. One does not need to do this step, but it is advisable to pass through entire controllers to any software based RAID operating system. Passing through the controller means that one needs both a compatible controller as well as a second controller where drive containing ESXi can be installed. Again, if one needs a guide see Configure Passthrough-VMDirectPath in VMWare ESXi article for details on hardware and configuration that one needs to make this work.
The first step, of course, is to open the vSphere Client and log into the ESXi machine.
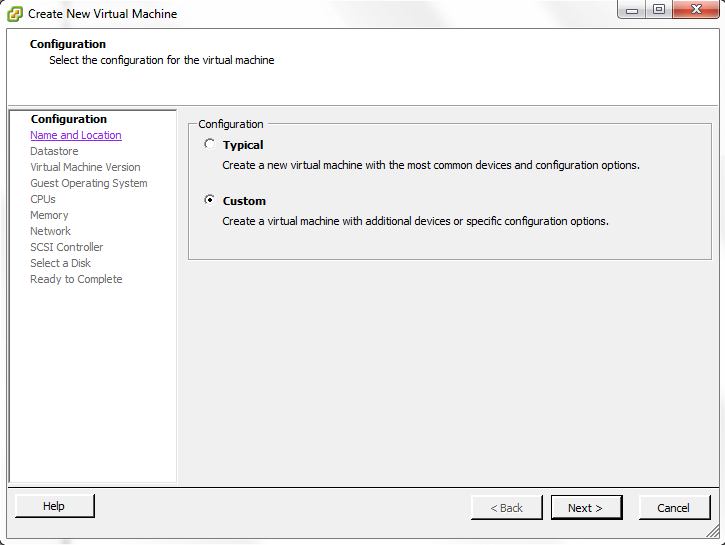
Create a new virtual machine (Control + n is the keyboard shortcut):
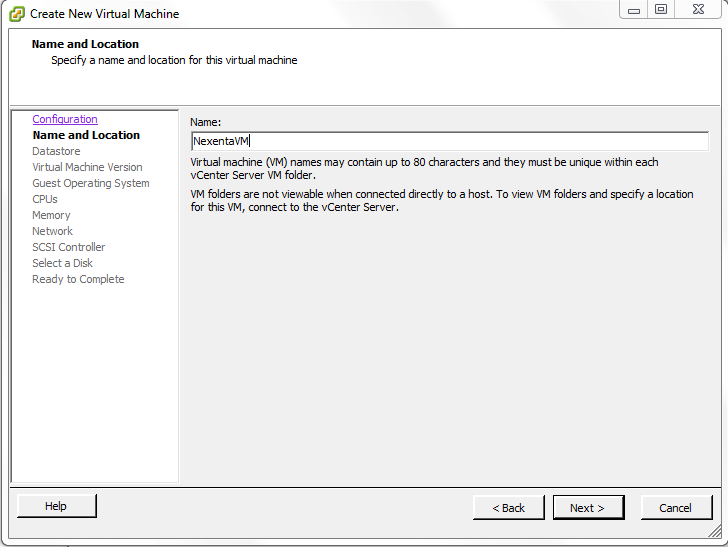
Give the VM a name, I used NexentaVM due to a lack of creativity on my part.
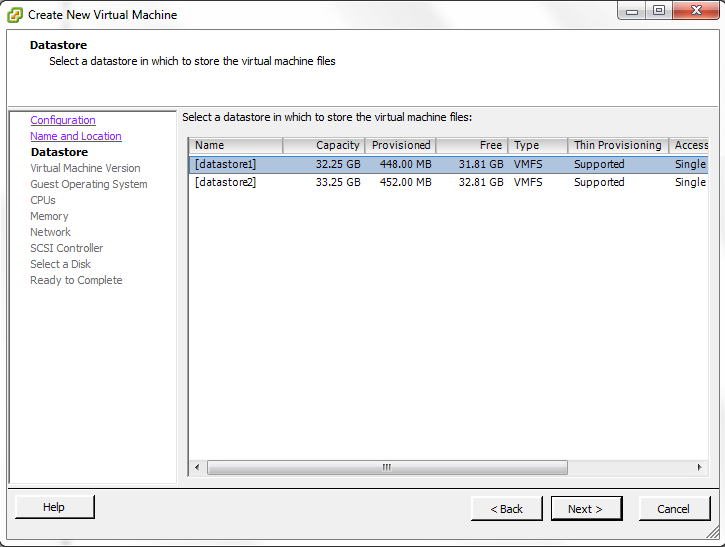
Configure the datastore, aka where the NexentaStor OS disk will reside.
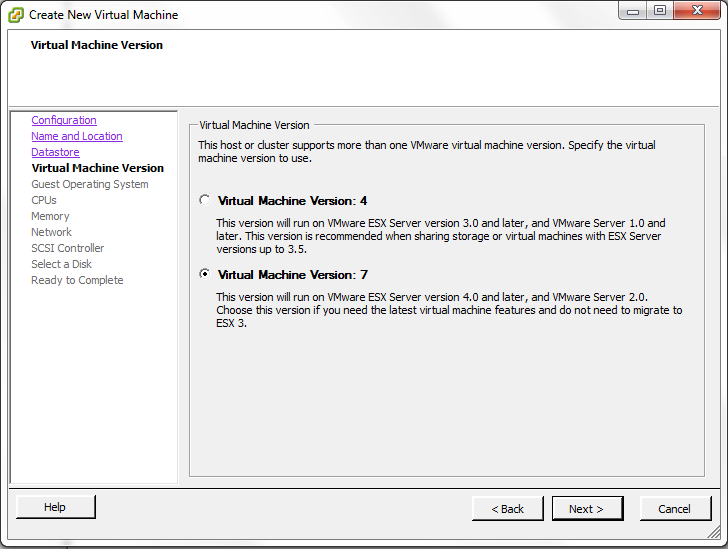
Select a Version 7 ESXi virtual machine unless you have a good reason to need backward compatibility with ESXi 3.5. For most users, skip Version 4 and use Version 7.
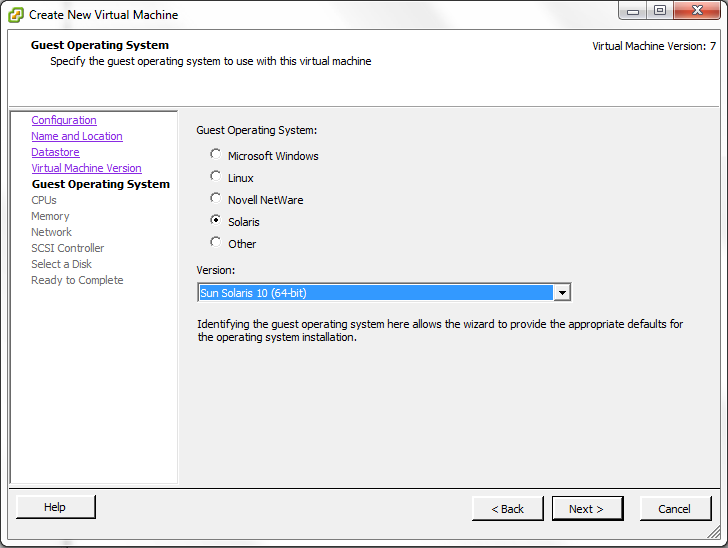
Configure the VM with a Solaris 10 64-bit guest operating system. NexentaStor is built upon a customized Solaris 10 installation so this is the best I have found.
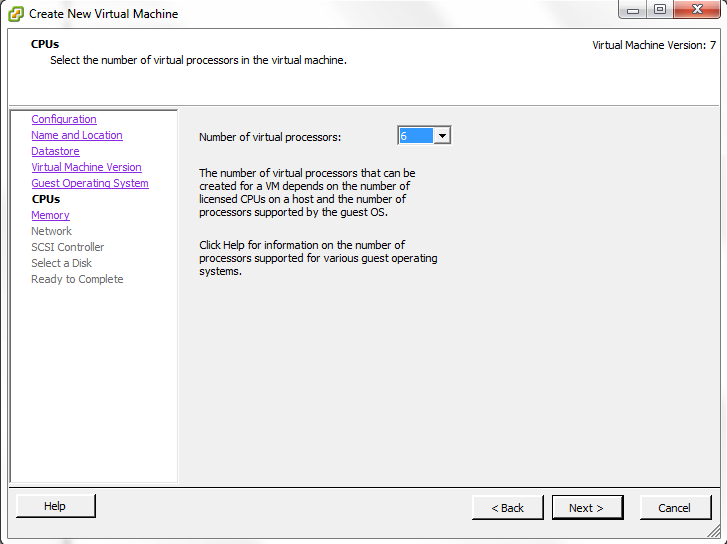
For the CPU configuration, give the NexentaStor virtual machine at least two CPUs. Sun was a leader in multi-CPU and multi-core architectures for a long time with their SPARC servers and workstations so Solaris based systems tend to take advantage of multi-threading. ZFS is no exception and can at times use as much CPU as one sends its way.
With ZFS, and today’s RAM prices, giving ZFS less than 4GB of RAM should be avoided at all costs. Here I am configuring the VM with 5GB to stay above that limit. If you have more memory installed, let the ZFS machine have as much as you can. Do not follow the minimum or recommended guidelines that VMware presents a user with.
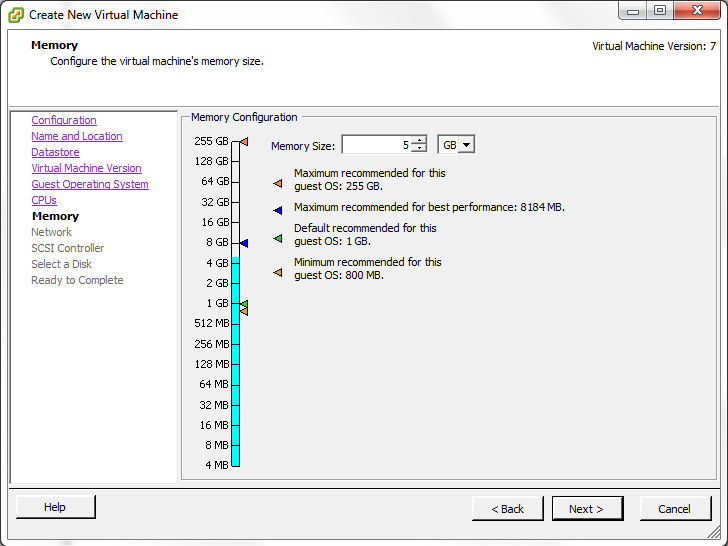
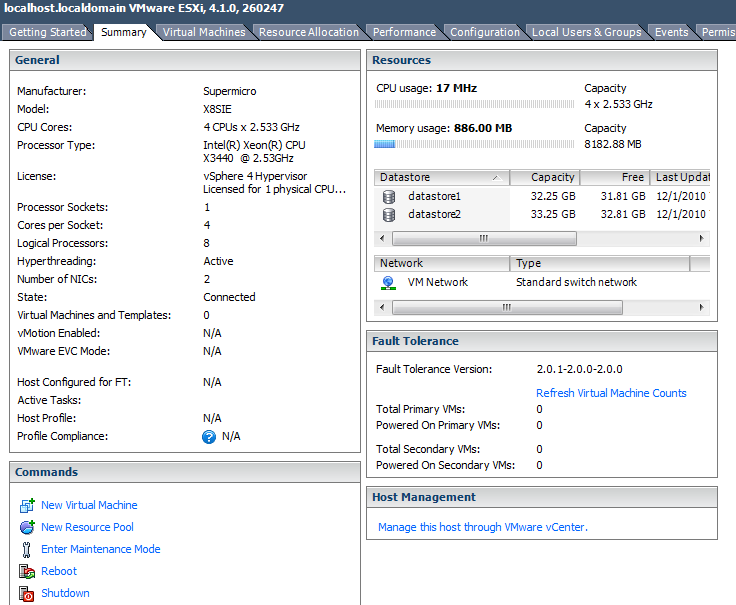
One thing to remember is that ESXi does require some resources. As one can see below, ESXi’s RAM requirements even without VMs running would lead me to recommend at least 6GB of installed RAM.
Next, configure the network. I will admit, I oftentimes pass-through network controllers to primary storage builds as the second PCIe device passed through. This is one big advantage of the SAS expander plus controller setup over a multi-controller setup as only one PCIe device is visible to ESXi. That allows a 10GigE adapter, or other adapters to be passed through.
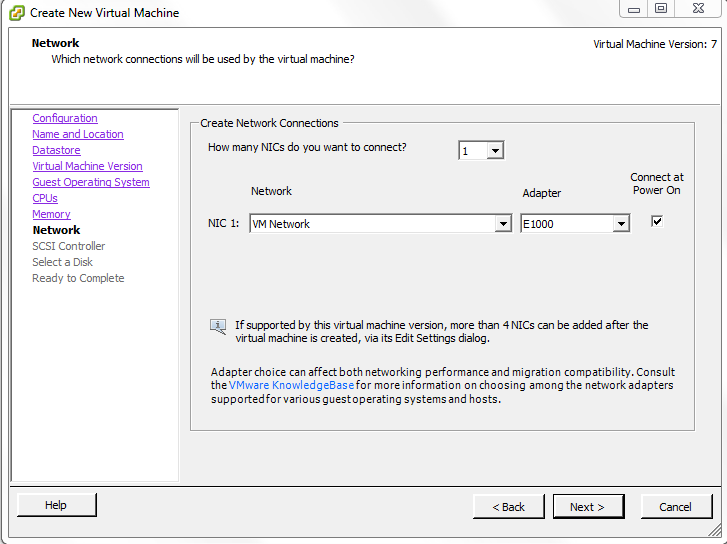
For the SCSI controller, choose the LSI Logic Parallel. I say this because the LSI Logic SAS gave me lots of issues while the LSI Logic Parallel just works.

Once the controller is setup, one should provision for virtual disk space.
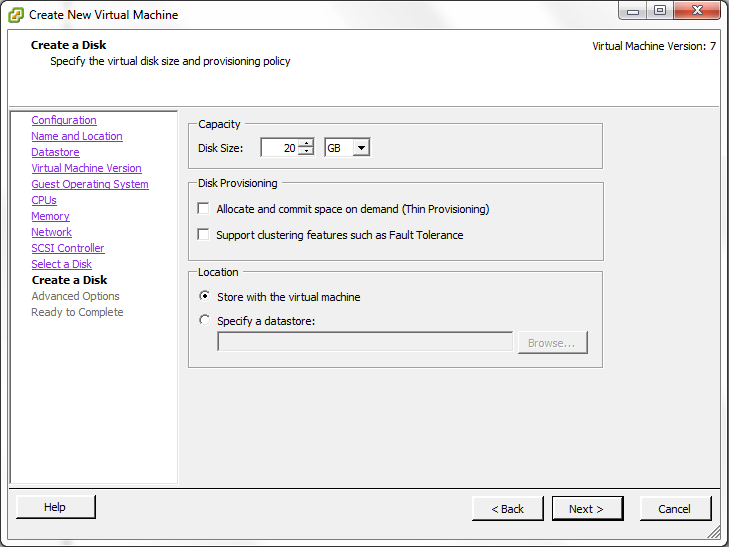
That’s all there is to this it is a very simple process. From here, one can either install a pre-built NexentaStor ESXi virtual appliance from a downloadable disk or install NexentaStor manually, which of course will be the subject of a future guide. Again, with ZFS make sure you look at the Configure Passthrough-VMDirectPath in VMWare ESXi article at this point because controller pass-through is best practice here.
Conclusion
Hopefully this helped illustrate how easy it is to setup the virtual machine in ESXi for a NexentaStor installation. ZFS has a lot of very desirable features, notably solid data scrubbing which are important to prevent data loss. Running NexentaStor in a VMware ESXi virtual machine allows a user to run another application on the hardware that is often underutilized in storage platforms.
Feel free to discuss NexentaStor and other ZFS platforms and VMware ESXi in the ServeTheHome.com forums.

Great tutorial; especially since I already wanted to try this for my home server. Do you have any benchmarks yet?