
The Yale Real Living Touchscreen Deadbolt is a serious piece of equipment. One of the most requested features on ServeTheHome is reviews of home automation products such as locks that can be controlled by methods other than keys. The Yale Real Living Touchscreen Deadbolt reviewed today is a lock that can be found at retailers such as Amazon for under $250. One cool feature of the Yale unit is that it can be ordered with a Z-wave radio to allow the unit to be remotely administered.
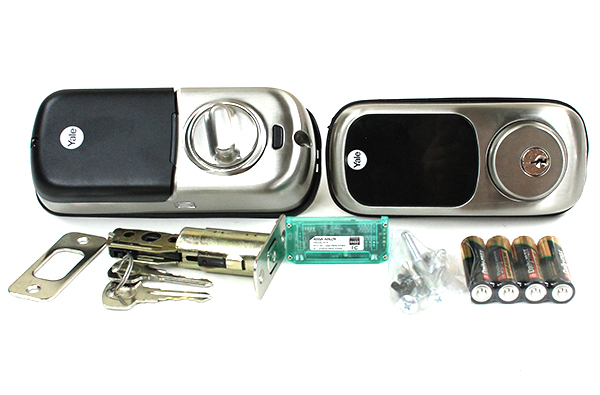
The Yale Real Living Touchscreen Deadbolt Hardware
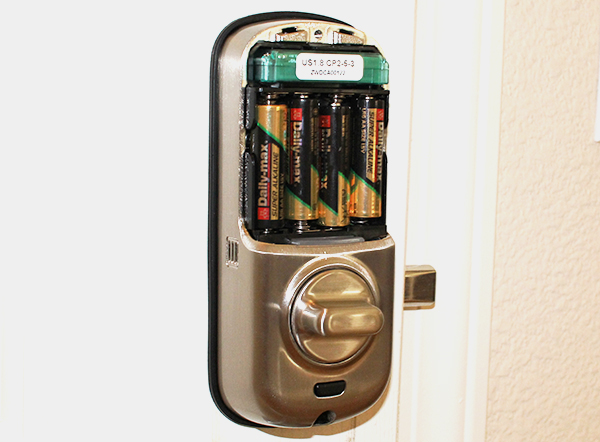
Key parts to the unit are the interior battery pack, and electronics unit. The external facing keypad and lock unit is the other main component of the system. One can see that two key are included as the unit can still be operated in the event of a power loss. There is other fairly standard hardware such as the actual deadbolt, end plates and mounting hardware for the door and the frame. The green translucent plastic casing is the Z-wave module and four AA batteries are also included.
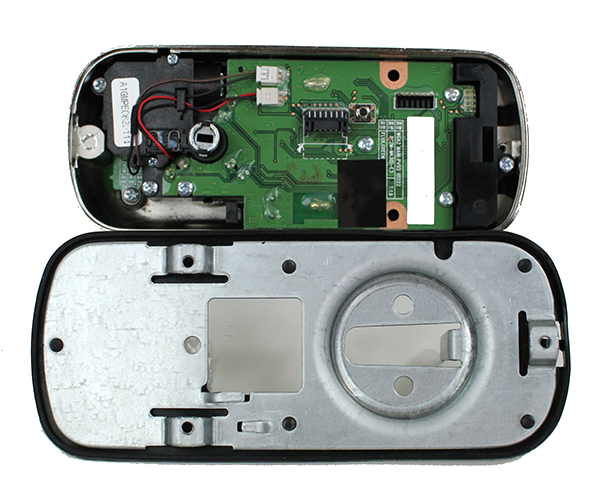
The internal casing has two parts. A mounting plate that attaches to the interior door side is included. The majority of the unit’s electronics can be found on the interior of the door. This includes a battery compartment, controller and Z-wave expansion module.
Installing the Yale Real Living Touchscreen Deadbolt
Even for the novice, installing the Yale Real Living Touchscreen deadbolt should not take more than half an hour. The first step is installing the deadbolt unit and door plates. Two screws for both the door side as well as the door frame side may need to be drilled out depending on your setup. The test door had a Schlage deadbolt on previously and the Yale Touchscreen version installed in-place.
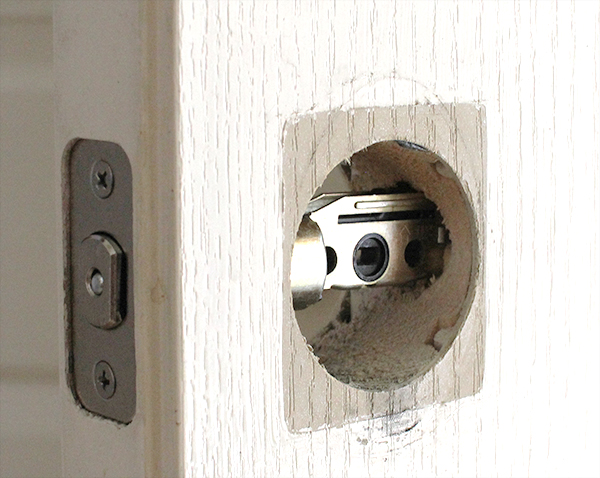
Once the deadbolt is installed the touchscreen unit is placed through the deadbolt and on the front of the door. The interior side of the door creates the other side of the “sandwich”. You simply screw two long screws in place to secure the interior door side and the exterior touchscreen to the door. A cable runs through the cutout (and Yale does provide a paper template for sizing all necessary holes) and will be connected to the main electronics portion of the unit.
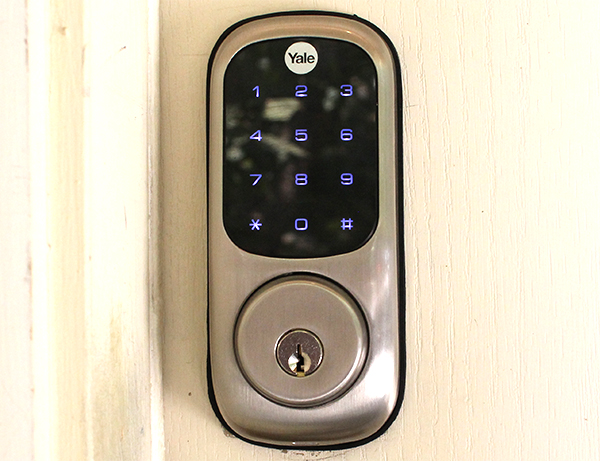
Once secure, the touchscreen portion sits on the exterior side of the door. It is larger than simple key operated units due to the size of the touchscreen.

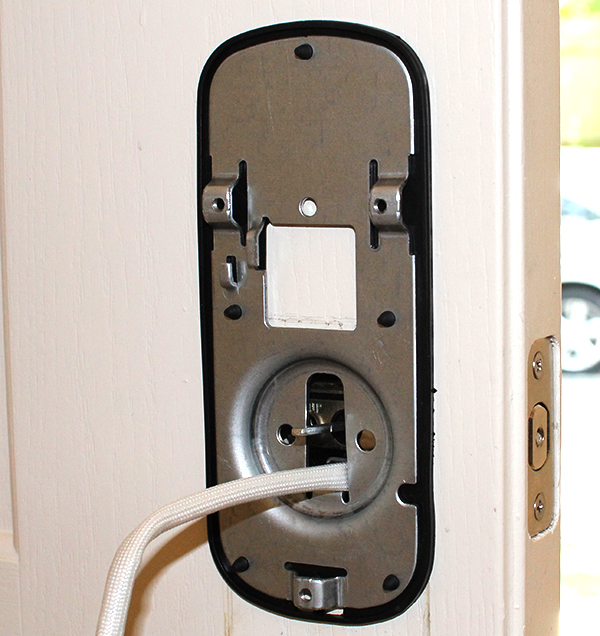
The next step in the process is installing the main electronics pack onto the interior door mounting plate. Three screws hold attach the electronics part. One also needs to plug the cable seen above into the main electronics unit so that it can power and interact with the exterior touchpad. In this picture, one can also see the Z-Wave radio module installed above the batteries.
If all goes well, the touchpad should light up. It may surprise you, but there are actually audio prompts for the setup of the Yale deadbolt. One can also use Z-Wave software or the included manual to setup access codes.
Easy but one challenge…
We did have one challenge installing the Yale Real Living Touchscreen deadbolt: batteries. The included batteries did not power up the unit. We switched to Duracell AA batteries and the unit turned on immediately. In terms of power, this did make us more aware of the risk that batteries will become depleted over time. Yale did think of this issue and has a low battery indicator to warn when power is running low. The deadbolt also has a key operated method that will help speed the process.
Thoughts after using the unit
We have been using the Yale Touchscreen deadbolt for some time now. It works great in a few use cases. One is when there are contractors working on premises. They can be given a unique code that can be turned off after work is complete. Second, when one forgets keys, having the ability to simply enter a pin code is an easy way to enter. Third, when one goes running, not having to carry keys reduces weight that is swinging in a pocket. Overall, this is a game changer if you are accustomed to key operated locks.
The only major downside that we have seen is that one needs to have a Z-Wave compatible ecosystem to make this unit work. It is a bit larger but the aesthetically large look is offset by how cool it is to have a touchscreen deadbolt on the door. Traditionalists may think otherwise though.
Overall a great unit and the promise of connecting the Yale unit to a Z-Wave system may make it a good choice for many. For under $250 on Amazon, it may be a good foray into home automation. We will have a follow-up piece on Z-Wave configuration. Stay tuned!


How about prints?
I don’t like the home automation color scheme
Great little excursion in to non server technology.
I like it, please keep up the good work.
Thank you.
Great review.
On a similar home automation topic, I’m looking for a decent 12V light dimer, controllable from a Harmony Touch remote, any product reviews coming up?
No light dimmers in the pipeline for the next month. If you do see something, let us know. We have an article suggestion forum here: http://forums.servethehome.com/servethehome-com-article-suggestions/
I just ordered two of these for our house. I have been wanting to try this for a long time.
Comments are closed.