
We wanted to show you an easy way to add a second network to a Proxmox VE host. Networking is a complex topic, and there are often many ways to do things. Still, we thought it would be worth showing a simple example since sometimes that is exactly what people need. We have already shown things like How to Change Primary Proxmox VE IP Address, but what if you have a second network that you need to access? That is the focus of this guide.
Assigning a Second IP Address to Promxox VE Hosts
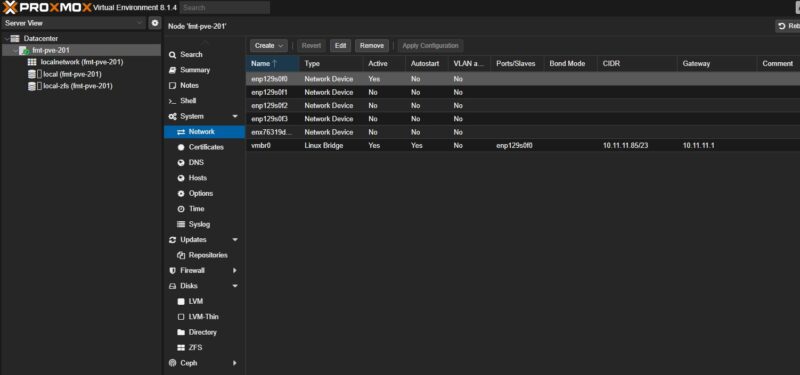
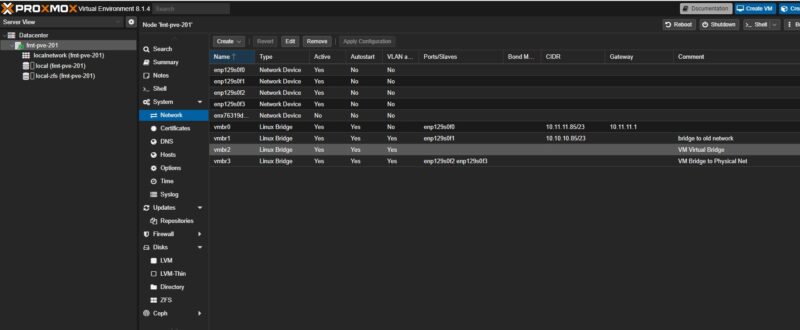
Here is our base Proxmox VE installation. We have a quad port Intel X710 network card with very long interface names. The one enp129s0f0 is the NIC that is attached to the initial Linux Bridge setup during installation. Here we can see it is on the 10.11.11.0/23 subnet and has both an IP address and a gateway of 10.11.11.1.
Now let us say, for example, that we want to have this Proxmox VE host on a second network with a second IP address and a second NIC. A good example of where this might be used is if you have an existing cluster on an older network and you are setting up a completely new cluster on a new network. Sometimes, the easiest way to do that transition is to add another network interface. Here, there are two options. First, you can directly set up an IP address on the second NIC. However, you may want to make this a bridge so local VMs can access this network. You may want to change interfaces without having to change other references and so forth. A bridge is usually a bit more flexible.
Here we are setting up the new bridge on enp129s0f1 (note the last digit tells us we are on the second port) and giving it an IP address on the 10.10.10.0/23 subnet. We also will not put a gateway on this since it is the secondary IP.
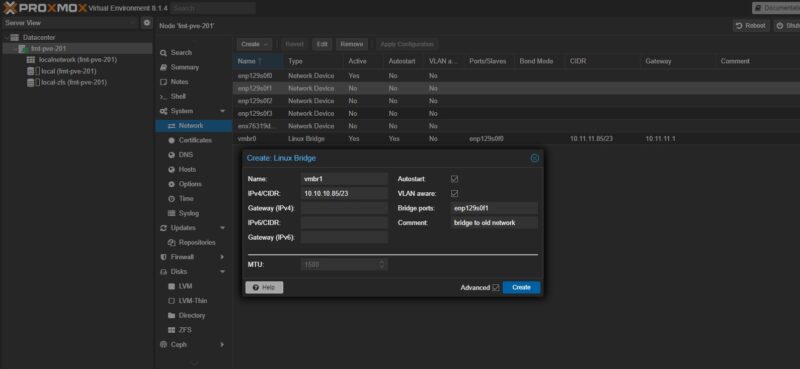
After clicking “Create” you will have created vmbr1 and see it on your interfaces list, but you will not be ready to use it. Instead, if you see the text below it says “Pending changes…” The reason for that is you need to Apply Configuration.

The text shown below is the draft /etc/network/interfaces file. If you get stuck and need to CLI a change, then there are plenty of resources on how to do this. A quick tip is that if you are learning Linux networking, you can read though this file for a template. Proxmox VE’s GUI makes a lot of things intuitive without having to learn syntax. That GUI tends to spit out configuration files for networking, KVM virtualization, and so forth making it a great source to learn basics.
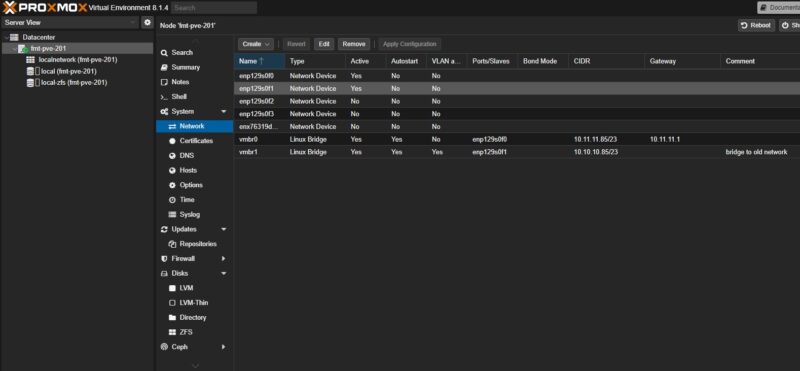
After clicking Apply Configuration, the network will reload and it will be up and running.
These Linux Bridges are very useful. For example, you can make a bridge with no physical ports and no IP address for local VM-only access.

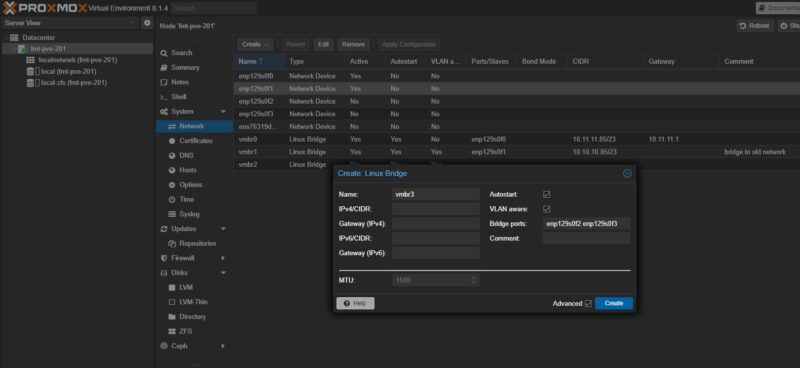
Another fun option is you can skip the IP address and put multiple ports onto a Linux Bridge. A common way to setup Proxmox VE is with the initial Linux Bridge (vmbr0) as a management interface on one NIC, then a second Linux Bridge configured without an IP address and with just a second physical interface to handle VM traffic to the rest of the network.
Of course, all of these options, and more can be done with just the base networking functionality and not getting into the SDN features, tagging VLANs, and so forth.
There is a lot to explore here.
Final Words
Making a second bridge with a second IP address is not the most common thing, but it can be very useful. For example, when building a new cluster, you can put it on its own network and use this to copy VMs, containers, backups, and more from one cluster to another if you do not want to touch the old cluster other than by adding a single network cable. These days it is very common to see servers with multiple physical interfaces, and this trick can save you a lot of time. It can also be handy if you are setting up a new primary network interface and want to create a safety network before making changes to the primary.


Normally it is considered the correct “data center” practice to put all interfaces into a bridge, assign one IP address to the bridge for host access, and then attach the interfaces to separate switches if possible. Virtual machines and containers, either on the native network or with VLAN tags, can then be assigned IP addresses attached to the bridge.
Creating affinity between hosting elements and physical interfaces is generally considered bad practice unless you are attempting to “steer” traffic towards a particular interface … that might be the case if you have A/B networks for storage.
Important clarification on Art C’s comment: you put the interfaces into a bond and then put the bond into a bridge. If you just put the interfaces into a bridge and start plugging them into switches you’ve at best just merged a bunch of subnets into a single L2 and at worse just took down your network with a multipoint loop.
2nd clarification: don’t rely on spanning tree (even when it does work it’ll be subpar) and make sure you select an appropriate bond type for how you are going to configure your switches.
Good article, thank you for posting. I had this same problem in the past and I was able to resolve it by changing the “host” file. Here is an example of the host file which accomplished the same thing.
“127.0.0.1 localhost.localdomain localhost
99.23.149.237 freddy.attlocal.net freddy
192.168.1.250 freddy.attlocal.net freddy
# The following lines are desirable for IPv6 capable hosts
::1 ip6-localhost ip6-loopback
fe00::0 ip6-localnet
ff00::0 ip6-mcastprefix
ff02::1 ip6-allnodes
ff02::2 ip6-allrouters
ff02::3 ip6-allhosts”
Comments are closed.