Creating users with a Synology NAS is simple! We have already done a few guides such as how to create an iSCSI target with a Synology NAS and how to create network shares. Those were very quick. Today we are going to do a guide to create users on a Synology NAS. Again, we will use the Synology DS1812+ that the company provided, but this is a common guide for the Synology range. When a NAS is used in both business and home environments, creating users is helpful to fine-tune access privileges. This guide will show how to create users with a Synology NAS.
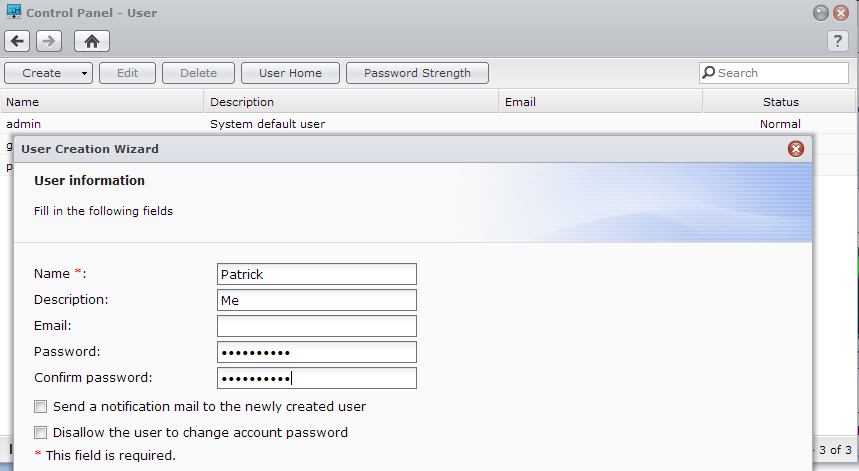
First, from the User Control Panel click create. This will bring up a User Creation Wizard that makes this process very simple. The first step you will want to do is fill-in basic user information such as username and password.
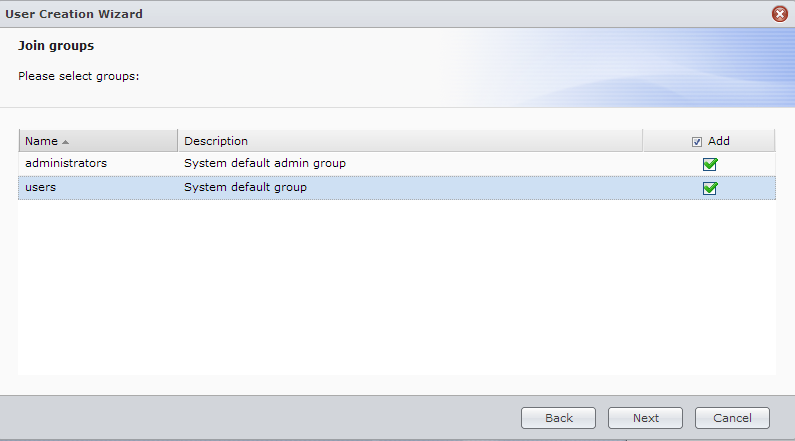
The next step is to assign users to groups. This concept has been around for a long time so most should find it familiar. Especially in a small business scenario where there can be many different users with different access needs, using groups is handy. This allows the NAS administrator to tune privileges by both user and groups of users.
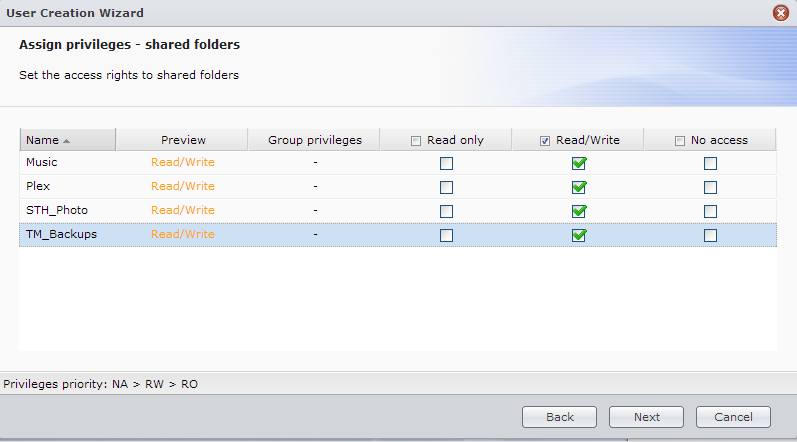
The next thing one needs to do is assign privileges. As one can see, the “Patrick” user is given read/ write access to all folders. If we did not want Patrick to access the Music directory, we could give him no access privileges. If we wanted Patrick to play music but not upload files to the directory, we would give read only access.
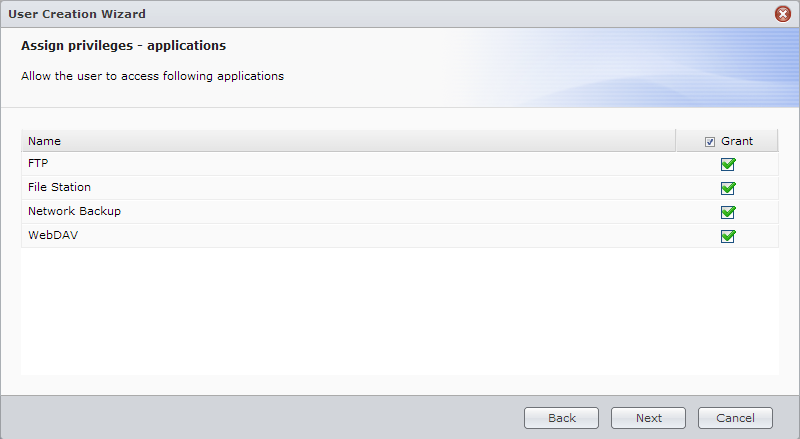
The next step is giving application privileges. The Synology NAS is capable of doing much more than simple file serving duties. As a result, we may want to give all users Network Backup but only the development team users WebDAV access.
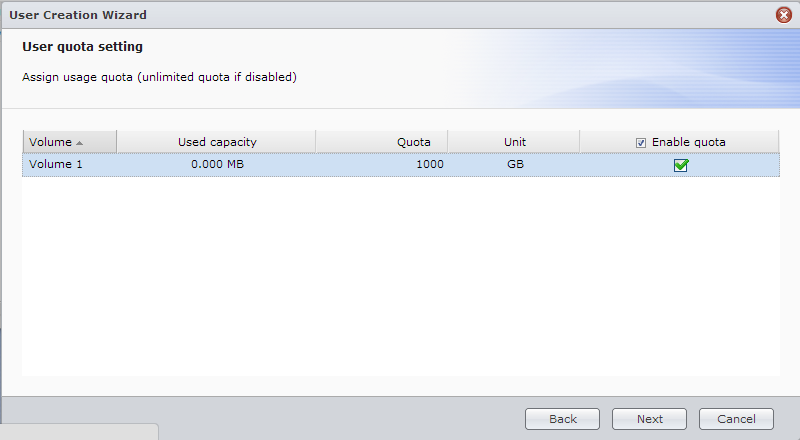
One other power feature when you create a user with a Synology NAS is to provide users with quotes on different shares. This is very important because if someone is handling primarily Microsoft Office documents, they are unlikely to use 1TB of storage. By giving users quotas, it lowers the likelihood that questionable content will be stored on the NAS.
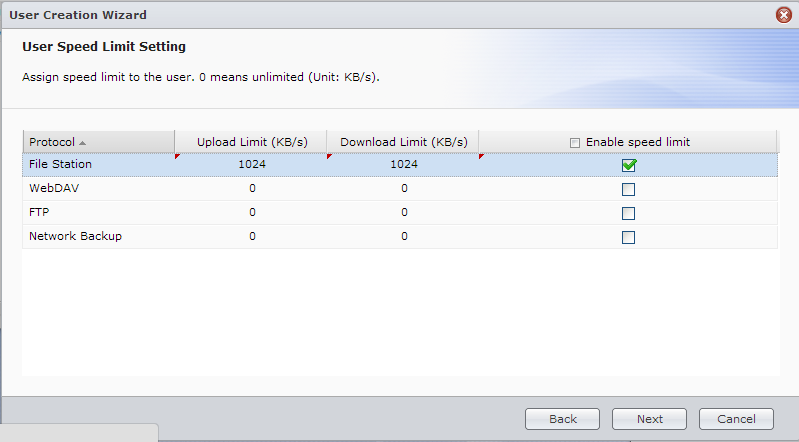
Another great feature the the ability to throttle NAS speeds. If you want to ensure that a given user does not bring down the company NAS due to torrent feeds, this is a good place to enable a speed limit.
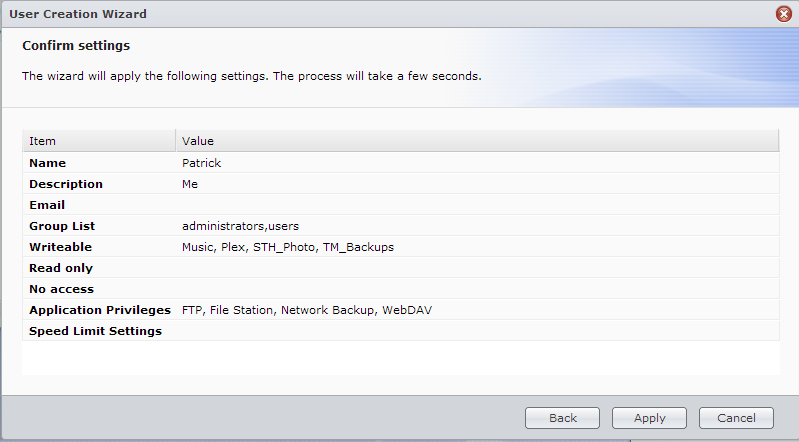
After all of the settings are filled-out, you will be asked to review and confirm settings.
Overall, this was a very simple process. The goodness in this process remaining simple is that it encourages administrators to finely tune user access during creation. Overall, it takes about 1-3 minutes to provision or create a user on a Synology NAS. With capable NAS units, like the Synology DS1812+ that can hold 36TB of data and run applications such as databases and web servers, provisioning users is important.

Did this today with my new diskstation. Easy guide. Thanks for your seriez