
Chatsworth Products or more commonly known as CPI has a new product aimed at alleviating a common cause of frustration in data centers: the cage nut. For years, cage nuts have been a fairly simple and static way to get things done. There is usually a nut with a metal cage assembly. Two sides of the cage spring and connect into rack holes to ensure they stay in place during equipment installation. Often those springs are difficult to access, and that is where the CPI Clik-Nut comes in. It offers a remarkably simple solution to this repetitive rack installation process.
Background
A few months ago I was in the data center and someone was raving about the CPI Clik-Nuts. I had no idea what they were. The gentleman promptly reached into a bin of probably 1000+ of them and handed me a set of eight cage nuts. At that point, I had no idea how much they cost, but I had the opportunity to install a small switch using them. A few days later, I did a second installation. They were great.
I purchased a few more since they were so easy to use. I did not use a cage nut tool so, in my mind, they were clearly simple. I realized this was something I wanted to share with STH readers but there was an issue: our examples were hard to see installed in racks. After reaching out to CPI they sent bags of the zinc and black zinc versions for us to show.
Chatsworth Products CPI Clik-Nut Overview
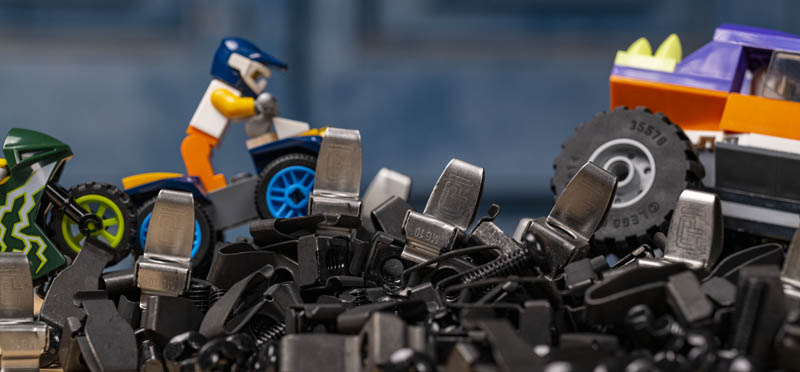
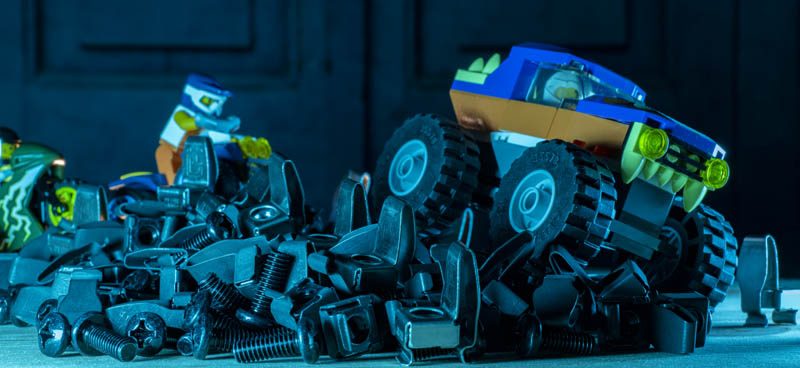
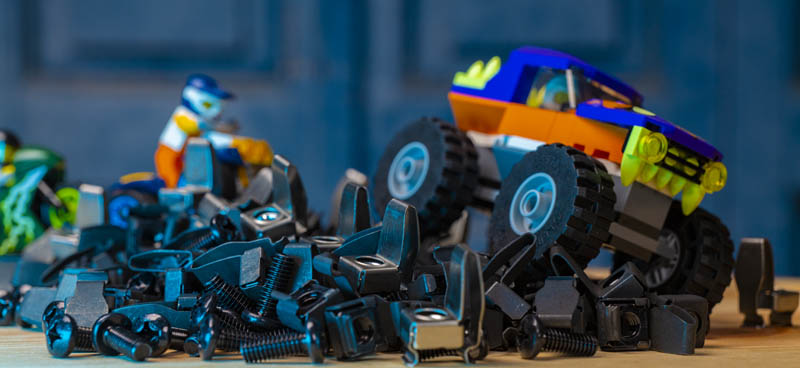
In terms of complexity, this is certainly a few steps below one of our standard reviews. Looking at a picture of a cage nut frankly looked about as uninspiringly uninteresting as could be. Instead of seeing a cage nut on wood, we have an “off-road” racing scene. In the scene, we have the “zinc” color Clik-Nuts as the track pylons and the “black zinc” version as the racing surface. Instead of looking at 2-3 static angles, which you can see elsewhere, this gives you several angles to see them installed in.

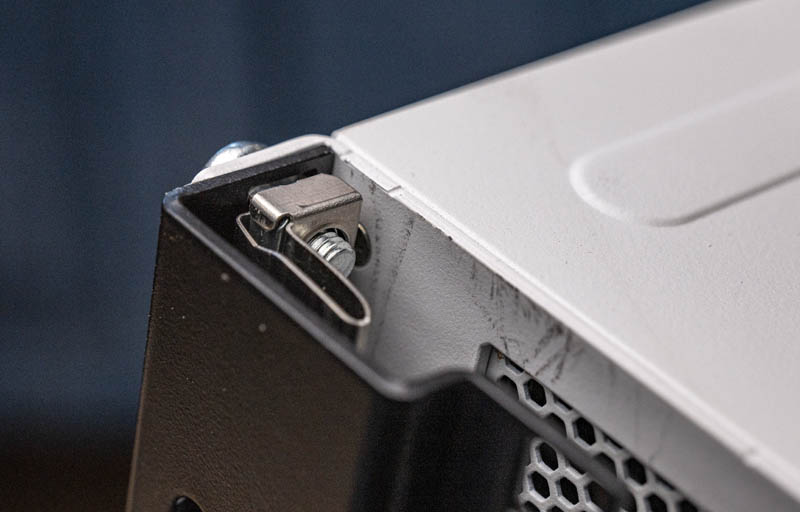
The CPI Clik-Nut is a nut, with a cage that is elongated in one direction. From the front, it looks like a standard cage nut.
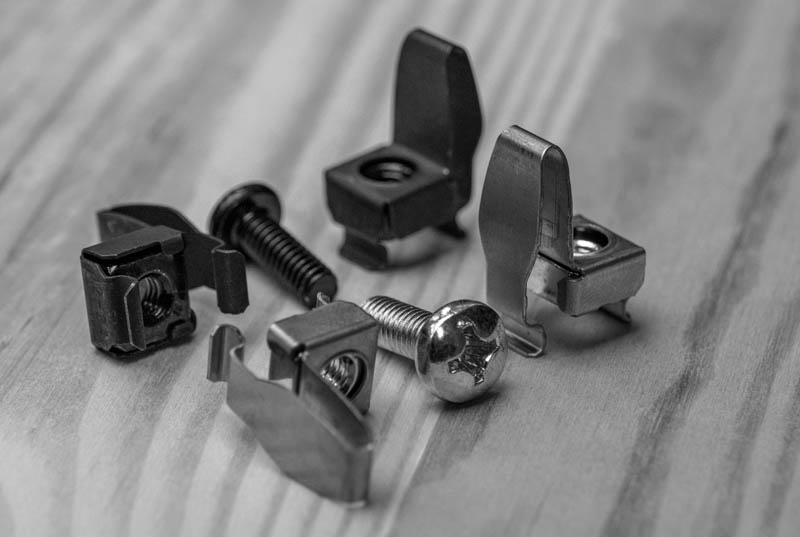
From the rear, the Clik-Nut has one side of the cage that is elongated. This allows one to apply leveraged pressure to the metal arm to compress the cage’s spring. This in turn allows for simple installation and removal.
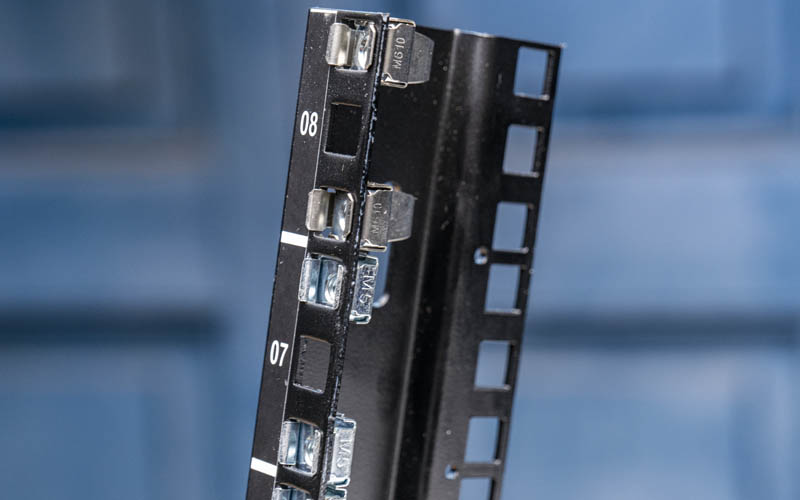
Here is what one looks like installed in a rack:
That metal arm is basically the key differentiator and something that CPI patented. With the arm, it is incompatible with most cage nut tools.
The importance of the arm is that it removes the need for cage nut tools.
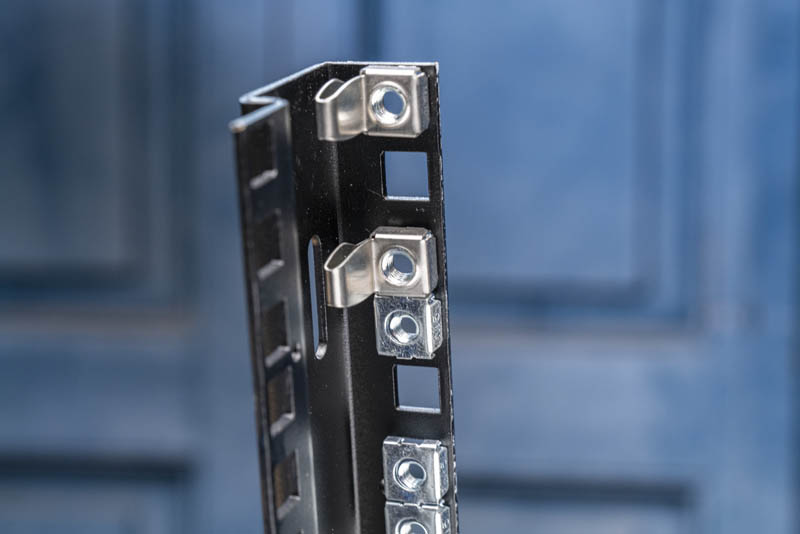
We have seen these installed a few different ways. Officially, the metal arm is supposed to be installed facing the side of the post, not the equipment.
Overall, this is a relatively simple solution, but it works well.
CPI Clik-Nut Size Finish and Pricing
Here is the pricing break down for the different Clik-Nuts. They are available in M6, #12-24, and #10-32 formats and either in Zinc or Black Zinc.
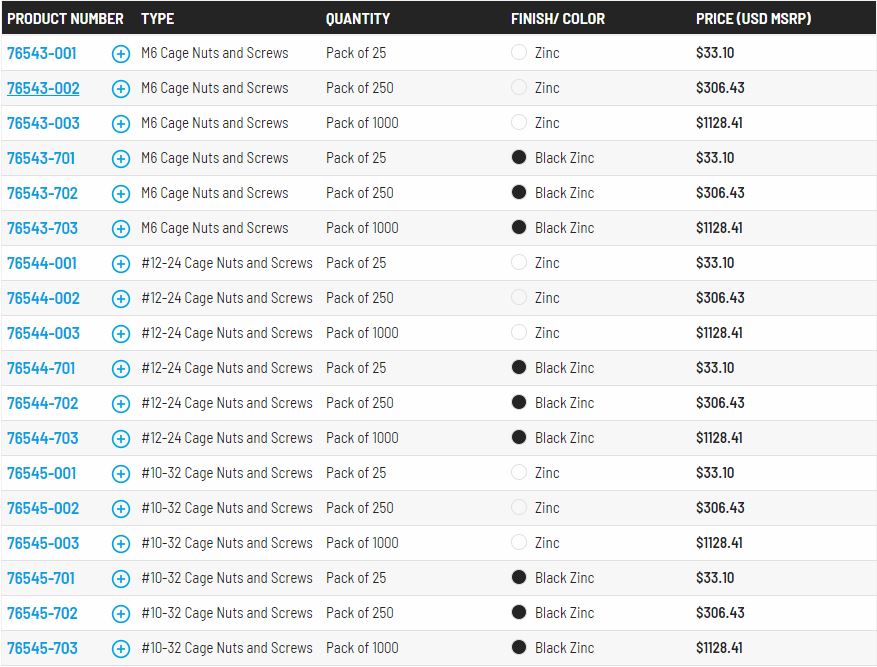
Three sizes, two finishes per size, and then three different pack quantities (25, 250, or 1000) are the options. Pricing ranges from 25 at $1.324/ ea, 250 at $1.22572/ea, or 1000 at $1.12841/ea. That makes them around 5x more expensive than standard M6 cage nuts in bulk.
Testing the CPI Clik-Nut
This is not the first time we have tested cage nuts and studs. Years ago we did a piece on the first-gen RackStuds. Since we reviewed those, RackStuds has a new Series II that are supposed to be stronger than the version we tested. In our review, we managed to sheer the first-gen RackStuds but we still had a few units we could use for a quick installation time test.

We tested two cases. First, we tested a 1U switch in a short edge rack the StarTech RK8OD Review 8U Open Frame Rack. Second, we tested a 2U server in one of our main data center lab racks. Of note, Chatworth makes racks but we are not using them for this review. We are going to use the original RackStuds, a standard cage nut with the cage nut tool we normally use, and then the Clik-Nuts. We are going to time the total installation to fully mount the chassis, but exclude time to wire. The wrong metric here would be a percentage of installation time since mounting the chassis is only a small part of installing gear. Instead, we are going to look at relative installation times.
Test Case A: Network Switch and Small Rack
In our first test case, we had a very simple task: install a network switch into a small 8U open-frame rack.
Here we saw a fairly decent improvement over the other options. The “StarTech M5” cage nuts we have were the lower tension spring versions. We have seen different tension on their cage nuts. For purposes of this, assume the M5 is a low tension cage nut option and the M6 + tool is a high tension nut with a tool.
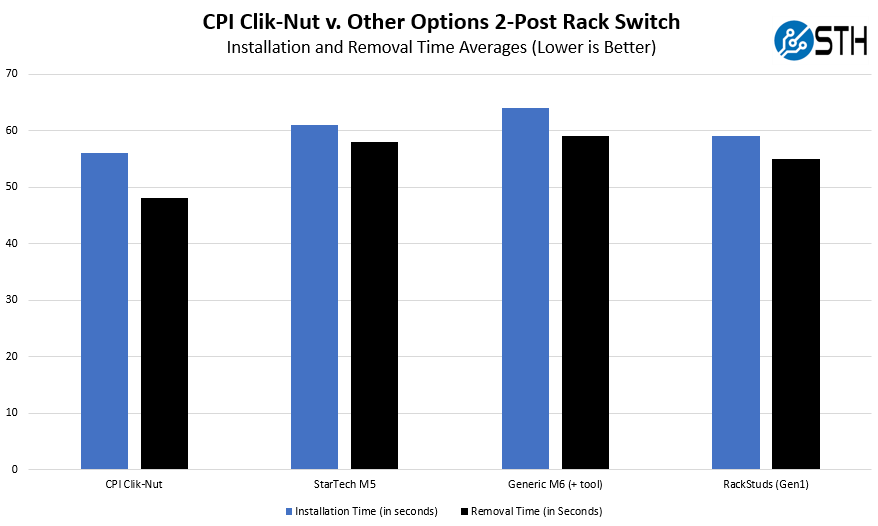
Since we were doing the installation at the top of these two-post racks, it was actually faster to not use the cage nut tool since we could skip the step of priming the tool. Easy access makes those tools often less useful for installation. For removal, the tool helped. Most of the Clik-Nut advantage in the installation is from having easy tactile feedback for installing in the rack. You can pick up a cage nut and know the orientation easily without looking due to the extended arm. It also helps to lower the compression force needed to push against the spring since there is a longer lever.
Test Case B: 2U Server in the Lab
The second test case we had was installing a test server into our racks. This is the aisle and rack that we are using shown with the open door. It is the 8th rack in the row which means there is some time moving from hot to cold aisles to affix mounting hardware.
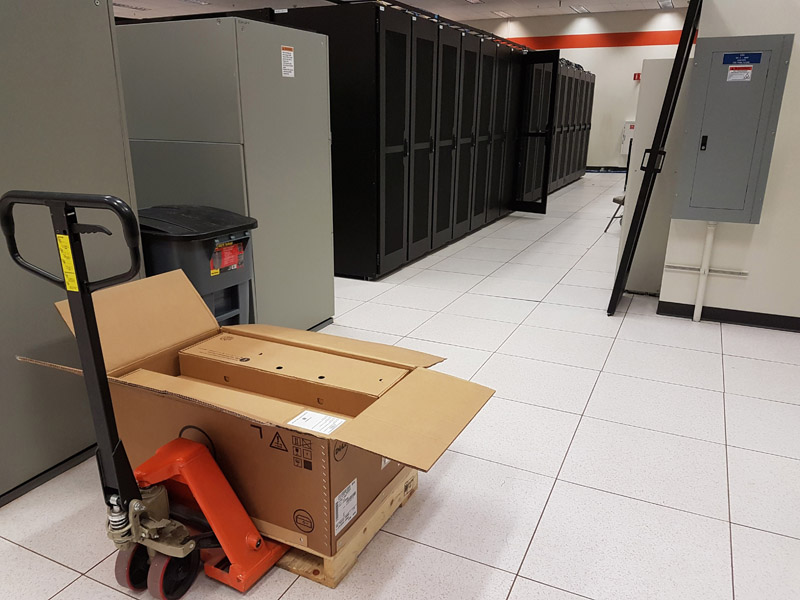
Of note, we added a second “tool-less” server design here since that is a broader data center racking trend.
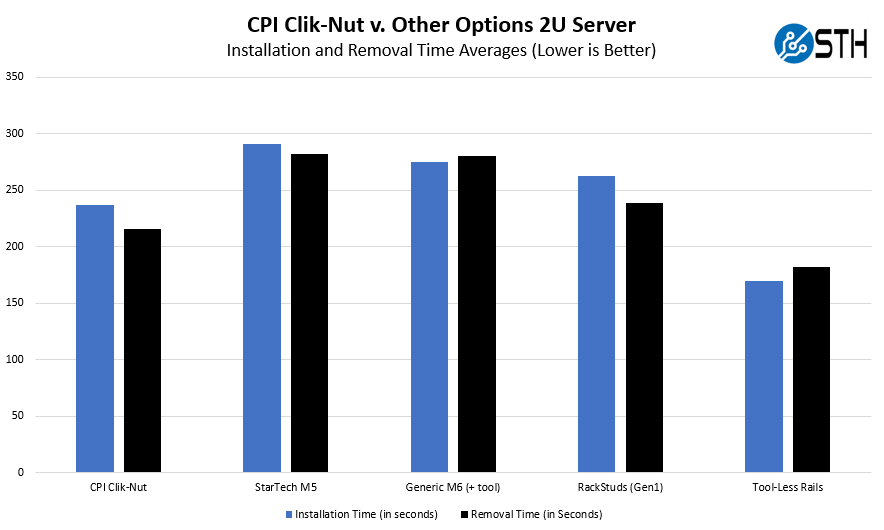
Here, the Clik-Nut beat the generic M6 set we use plus the RackStuds (Series 1.) A big part of that victory is because this is a 2U server installation in a crowded rack so there are servers on top and bottom. That limits the amount of room to work more severely than on the 2-post rack example. The fastest time was the tool-less rail option. That is the reason we started to push for these even from smaller vendors in our reviews several years ago. Still, a notable victory for the Clik-Nuts.
Final Words
There are a few other aspects that we wanted to discuss. The first is the price. On one hand, they cost ~5x what one would get standard M6 cage nuts for. 5x the price for a small piece of metal jetting out seems expensive. On the other hand, and CPI’s point here is that they save an enormous amount of labor when using many of these cage nuts.
When buying 8 of these to install a single server (one front, one rear) the cost is $9-10, which is much lower than many servers and the saved labor. On the other hand, many large servers are moving to tool-less rail designs that do not need cage nuts at all. Even lower-cost servers with 4-post rails are moving to tool-less because the server vendors have heard this feedback. The rush for tool-less rails in the server industry has made it notable now when rails are not tool-less.
There are still many areas where we do not see tool-less rails. Great examples are usually in products such as rack-mounted PDUs, cable management gear, ATS units, and lower-cost network switches and firewalls/ routers. For these types of use cases, the Clik-Nut makes a lot of sense. If you only need to install a few U of 2-post gear, these will make installation and replacement much faster.
Price-wise, these feel like they have a large premium for a small amount of metal. On the other hand, the marginal dollars are small in the context of operating rackmount gear. Ever since someone handed me my first set in the data center, I have been hooked and I do not think we have installed other types of cage nuts. That switch happened even before CPI sent us a few samples for this review so perhaps that is a good indicator of preference or value. It is amazing how simple this solution is and how long it took to bring it to the market.


Just me or is that like the coolest nut photo ever? I don’t know how you’re coming up with this stuff.
$1.2x a piece? no thanks… thats like…5 cents of metal. sure DC’s will buy these things probably by the thousands, but for my home lab I’ll stick with my <20cent normal cage nuts.
Little things can make a big difference.
Please put minifigs in all future photoshoots: )
OK I admit it: Minifigs make me smile.
Patrick, you’ve got several typos where you have “CPU” instead of “CPI” for the company name. At least four image captions say CPU.
This was the most confusing article I’ve read in a long time. It felt like a hoax or punking, not because of the topic, which is fine, but the writing.
One of the things was the strange statements about how boring the topic was, or had the potential to be. And that pictures of products are boring. And this:
“Instead of looking at 2-3 static angles, which you can see elsewhere, this gives you several angles to see them installed in.”
I don’t understand. Static angles? You mean normal photos? And what do you mean by installed in? All I saw were bizarre piles of these Clik-Nuts, with toys thrown in. That was supposed to be “installed”? Why are the products in piles? To show more angles? That’s so weird. You can just take photos of the different sides, and that would cover it. You don’t throw a bunch of servers in a pile in order to provide more angles for readers, so… I don’t understand what this is. How is a jumble better than normal photos?
Comments are closed.