Beelink ME Pro Performance
On the subject of performance for the Beelink ME Pro NAS, there is not a ton to say here. The ME Pro is designed to function as a simple NAS, and its hardware is carefully configured for exactly that role. Such a simple NAS does not require a powerful CPU, so we have Intel’s N95 chip. This is an Alder Lake-N CPU with 4 E-cores that tops out at just 3.4GHz. For running Windows and maintaining a RAID-1 array, it is satisfactory.
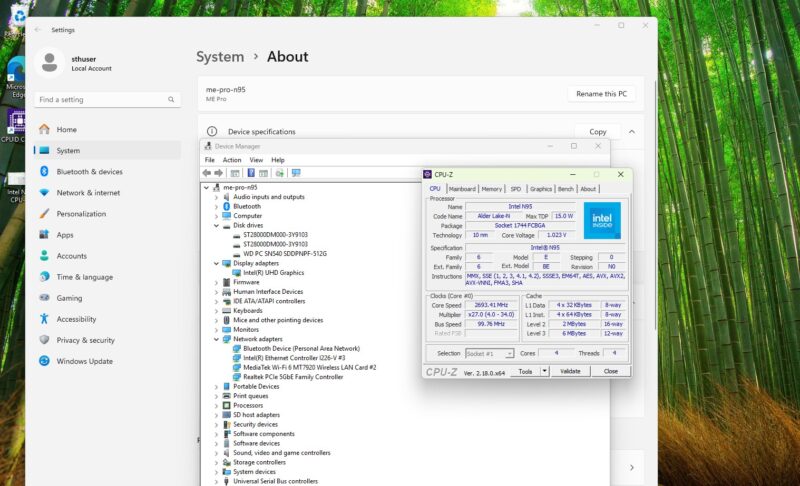
Similarly, while the SoC also includes an integrated Intel UHD Graphics iGPU, do not expect it to do much more than handle desktop graphics. Though like all Xe-LP GPUs, it does pack in one of Intel’s QuickSync video blocks, which supports hardware H.264 and H.265 video encoding, for PLEX users or the like who need transcoding support.
Geekbench 5 and Geekbench 6 CPU
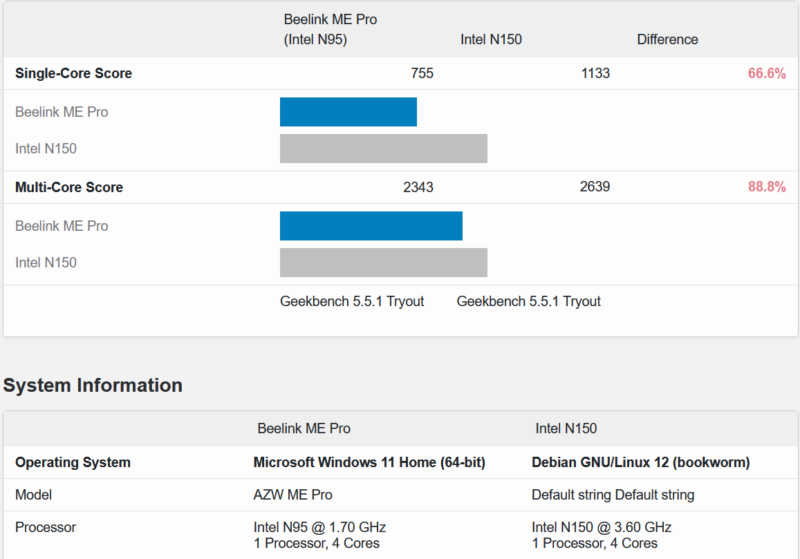
For our brief look at CPU performance, we have the N95-based ME Pro up against a similar quad-core processor, Intel’s N150. Here is the Geekbench 5 result:
Here is the Geekbench 6 result:
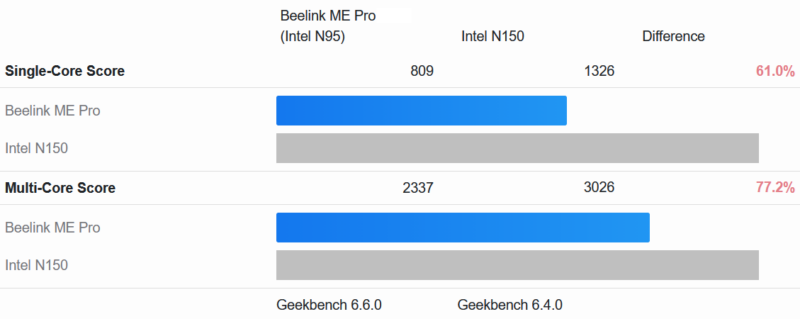
N95 is the slowest of Intel’s quad-core Gracemont-based CPUs, and it shows. The N150 is a similar quad-core CPU, but its clock speed and other resource advantages underscore why the N95 is where it is. The plus side, at any rate, is that the N95 is a very low-power chip, and its 15 Watt TDP is probably overly conservative. So while the CPU in this NAS does not deliver a ton of performance, it will not take away much in terms of power consumption, either.
Experiments in OpenClaw: Can a Lobster Set Up a NAS?
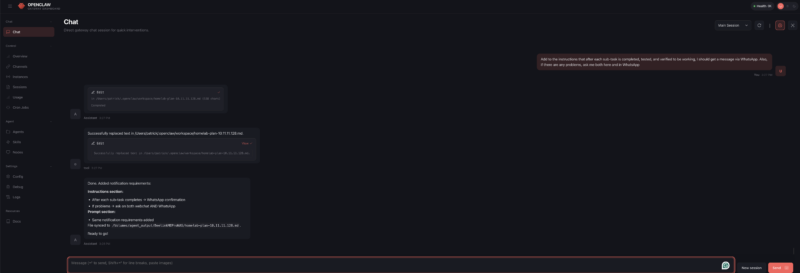
While we were working on putting together this review, Patrick came up with an interesting idea: what if we tasked OpenClaw with configuring the Beelink ME Pro as a Linux NAS? Not that we could not do it ourselves, of course, but this would be both a test to see if OpenClaw could simplify the relatively complex setup process. The results blew past our expectations. Not only did OpenClaw successfully set up the NAS, but it did so with minimal prompting and guidance beyond its initial instructions.
For our experiments, we threw two major tasks at OpenClaw. The first was to set up and configure Ubuntu Server on the ME Pro after it was installed, and OpenClaw had absolutely no problem with it. Assigning that task had Ubuntu Server up and running with the hard drives in a ZFS pool shared over the network in 30 to 35 minutes. We were using a Mac Mini M4 as our OpenClaw host to set up a system that costs less than the Mac Mini, but that is not the point. Instead, we just wanted to see if it would work.
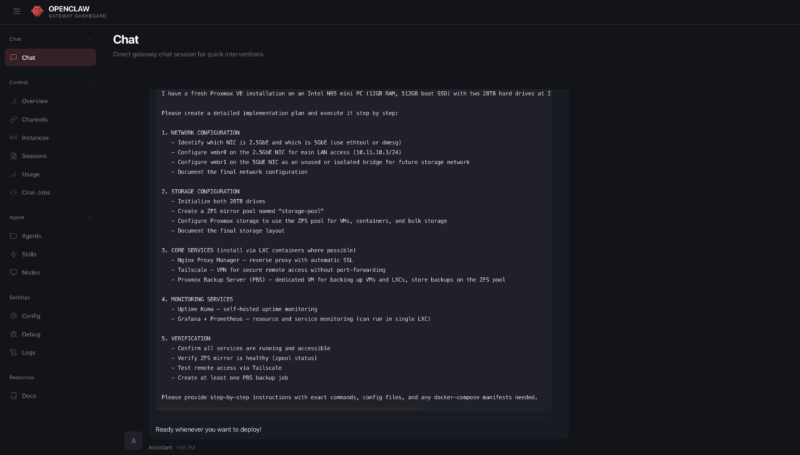
If anything, this was too easy a task. So we gave it a more difficult and complex task: set up Proxmox VE (no subscription) and fully update it, and then configure that with ZFS pooling, network shares, Tailscale for VPN networking, Nginx Proxy Manager for reverse proxying, and Uptime Kuma for uptime monitoring.
Much like Ubuntu Server before, the initial part of the setup process went quite well. OpenClaw had little trouble getting Proxmox VE and Ubuntu configured.
We ran into some problems further down the line that brought things to a standstill. OpenClaw could not authenticate via SSH. But this turned out to be a typo on our end, and once that was corrected, OpenClaw was able to resume.
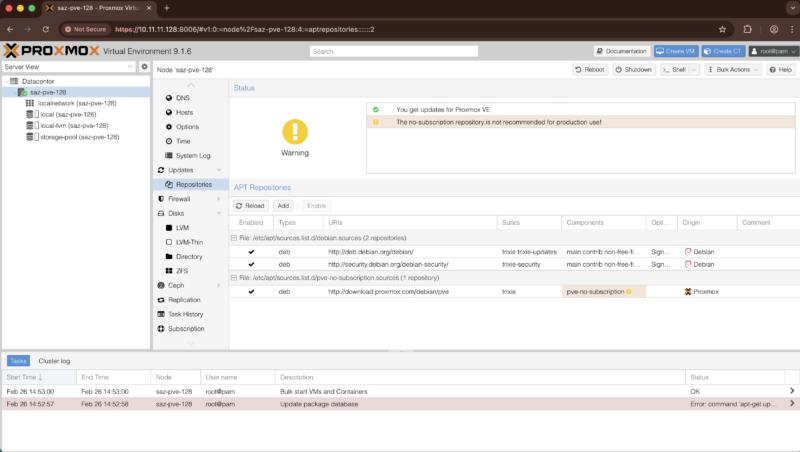
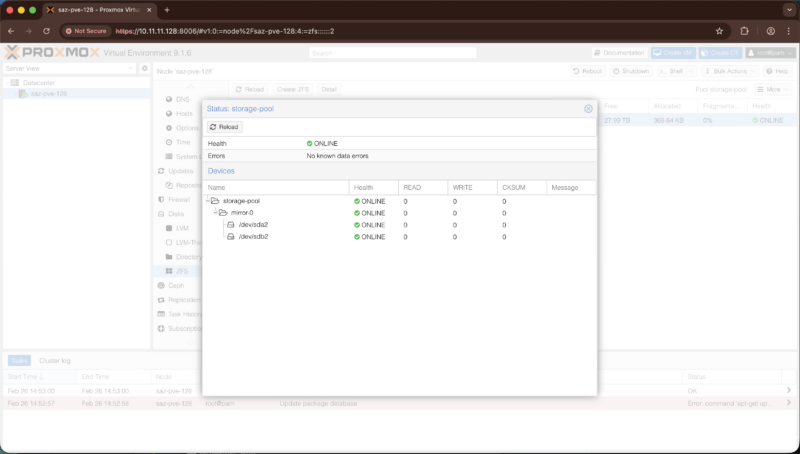
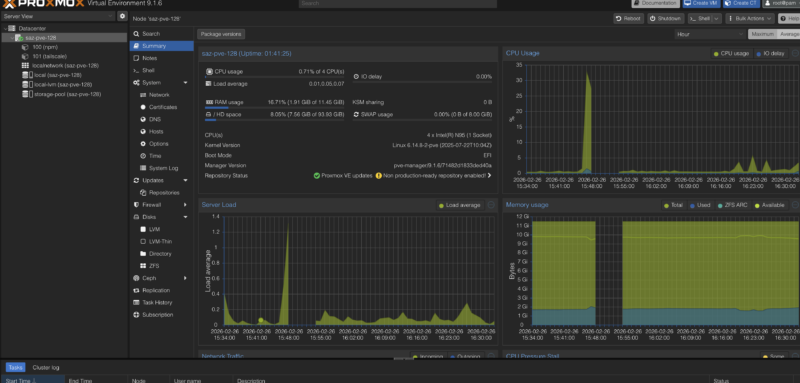
Within a few minutes, OpenClaw had the Proxmox VE dashboard installed and working, and to Patrick’s surprise, properly disabled Proxmox’s enterprise repositories so that it could pull updates from the no-subscription repository. A little while later, the ZFS mirror was also created, running the 28TB Seagate drives in a mirrored configuration.
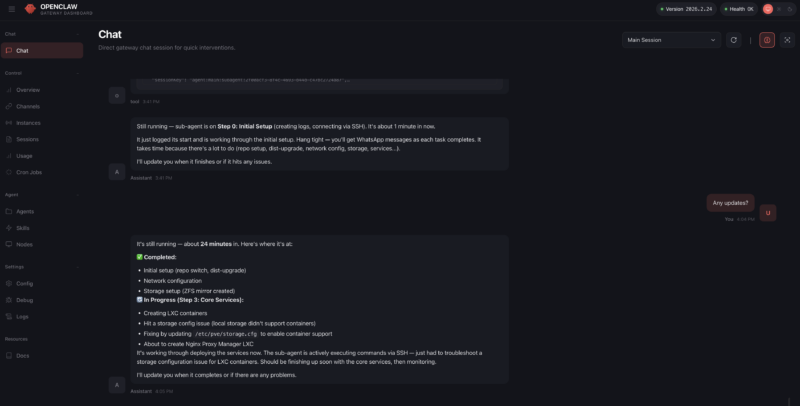
Things did end up moving more slowly for the next step of getting containers installed. OpenClaw had initially predicted that it would take 15 to 30 minutes. In practice, it was more like 35 minutes. For that extra time spent, OpenClaw ended up deploying LXC containers for our experiment, which was a rather inspired choice given the limited performance of the SoC. This would have required OpenClaw to not only reason about LXC being available as an alternative to full virtual machines, but also that it was the better choice for this low-power hardware.
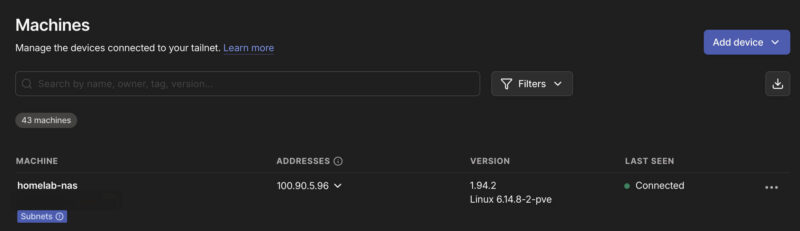
Ultimately, after some further trial and error on OpenClaw’s part, it succeeded here and had Tailscale up and running about an hour later. Tailscale turned out to be another breakpoint that required a human touch, as OpenClaw could not proceed until we had authenticated with Tailscale.
At this point, however, the monetary costs of having OpenClaw hard at work over the past couple of hours were catching up. OpenClaw was succeeding, but it had also burned through around $25 of OpenRouter tokens in the process. So, in order to cut down on spending and throw an additional degree of challenge to the task, we redirected OpenClaw to only use local inference, running off of the other machines in our lab. This included a Mac Studio with MiniMax M2.5, a Ryzen AI+ 395 system with the Qwen 3 Coder model, and a DGX Spark running GPT-OSS-120B. Of note, the GPT-OSS-120B has been largely replaced by Qwen3.5-122B-A12B in our OpenClaw environment.
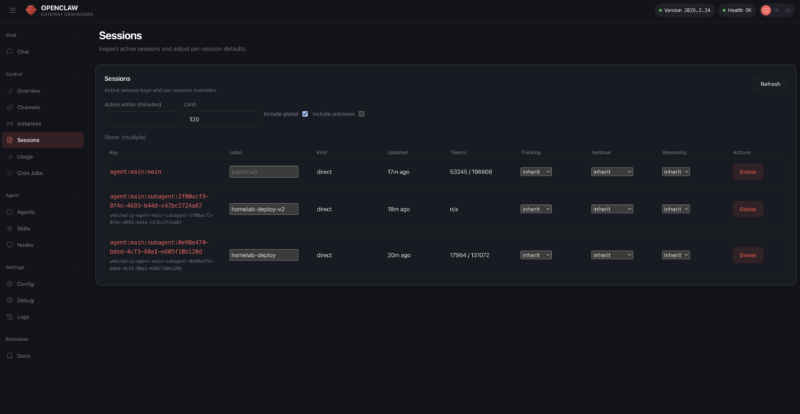
Technically, this late-game switch from cloud to local (LAN) inference succeeded, but I say “technically” because OpenClaw first corrupted its own configuration files. Thankfully, we had a backup (key lesson: always have a backup of the config file when asking OpenClaw to make config changes), and once we restored, OpenClaw went back to work.
That was, in effect, the last notable part of the setup process. It ultimately took OpenClaw another couple of hours to actually finish the rest of the setup and validation tasks, partially because we were using the MLX instead of the GUFF MiniMax-M2.5, which was not playing well with the KV Cache. Once it was done, the ME Pro had a fully configured Proxmox VE environment with all of the features we requested: Tailscale and Nginx for networking, Uptime Kuma for uptime monitoring, and the network share backed by a ZFS mirrored drive pool. Even snapshots for backups were working.
Ultimately, then, our experiment with OpenClaw proved to be quite fruitful. The agentic AI software was eventually able to set up the Beelink NAS with both our simple (Ubuntu Server) and complex (Proxmox) scenarios as we requested, only truly failing either when a human did not do something they were supposed to, or when a human changed the parameters of the experiment in the middle of the process.
With that said, there are some good reasons that this was an experiment, and we are not going to suddenly have OpenClaw do all of our system setups. First and foremost is simply the cost: this was ultimately using almost $16,000 of machines on our network to set up a sub $500 NAS. While that is fair, and $100 of OpenRouter tokens would likely have also done this full setup, it probably does not tell the full story. That cost was for a few hours of work out of an entire year. It is a high nominal value, but it also means we did not have to go through the setup ourselves.
The second reason for caution is that this required giving OpenClaw root access to the NAS, which is a massive security risk even at the best of times, never mind the fact that AI inference still involves hallucinations that could eventually propagate as unintended effects down the line.
Still, it is extremely neat to see that agentic AI has come so far in such a short period of time. If it can already set up a simple NAS, what other homelab configuration tasks might it be up to in the near future? As a hint, within 48 hours of setting this up, we let OpenClaw and Claude Code at an 8x NVIDIA GB10 cluster, and it did a lot more than we did in this version. Stay tuned for that one.
Next, let us discuss power consumption.


