Beelink ME Pro Internal Hardware Overview
With a small Allen wrench embedded in the case, gaining access to the internals of the ME Pro NAS is not too hard. The use of hex-head bolts certainly brings some mixed feelings on our end.
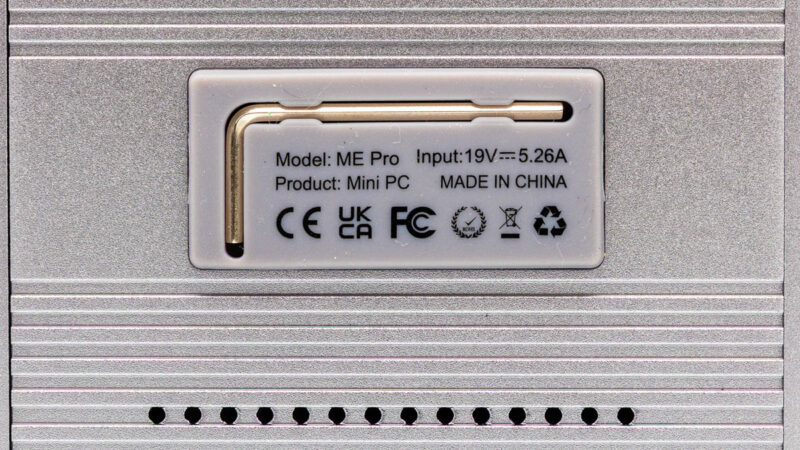
On the one hand, this ensures that the NAS can be opened up without any additional (user-supplied) tools. On the other hand, pictures do not do the situation justice for just how small the screws and the Allen wrench are. The wrench is absolutely tiny, which is part of the reason why Beelink was able to stow it on the bottom side of the case to begin with.

The end result is that, especially if you have big hands, you are likely going to want to use a screwdriver anyhow. At which point this system is back to requiring external tools. Thumbscrews would have arguably been more useful here, but I digress.
The first port of call for disassembling the ME Pro is removing the plate that holds the Allen wrench itself, as well as covering the M.2 drive bay.
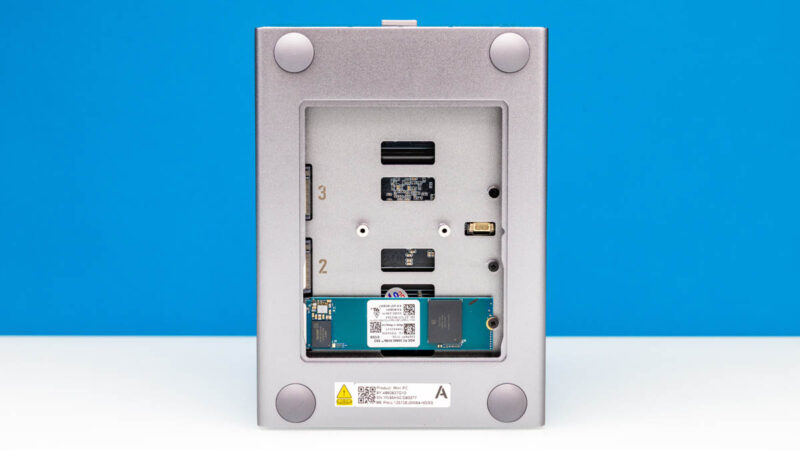
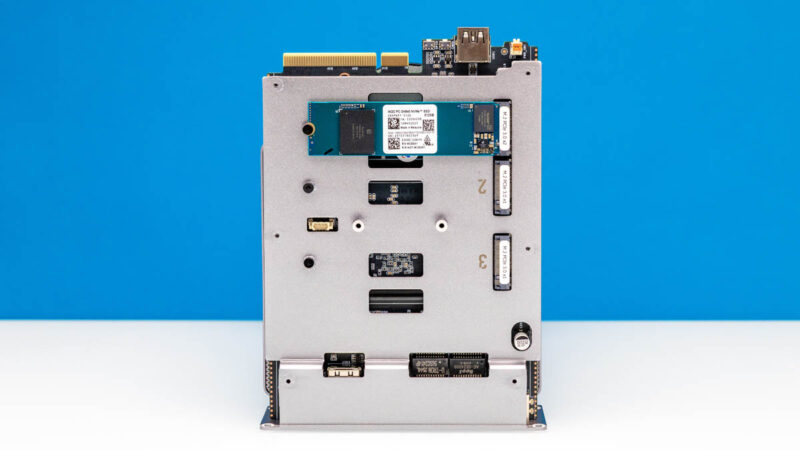
Once inside, we find 3 drive bays. The bottom bay in this situation is where Beelink installs the included SSD. And it also happens to be the fastest M.2 slot in the system.

Altogether, the ME Pro offers three M.2 2280 slots. Slot 1 (bottom) is the fastest of these, and is wired up as a PCIe Gen3 x2 slot. Slots 2 and 3 above take things down another notch and are wired up as PCIe Gen3 x1 slots. In principle, these slower slots are intended for data storage, while the fastest M.2 slot can be used for the boot drive. It goes without saying that a contemporary SSD will bottleneck on any of these slots, but it is ultimately a design decision that maximizes the number of SSDs that can be thrown into the system over SSD performance. Especially as a NAS, even a PCIe Gen3 x1 SSD should be able to saturate a 5Gbps network link.
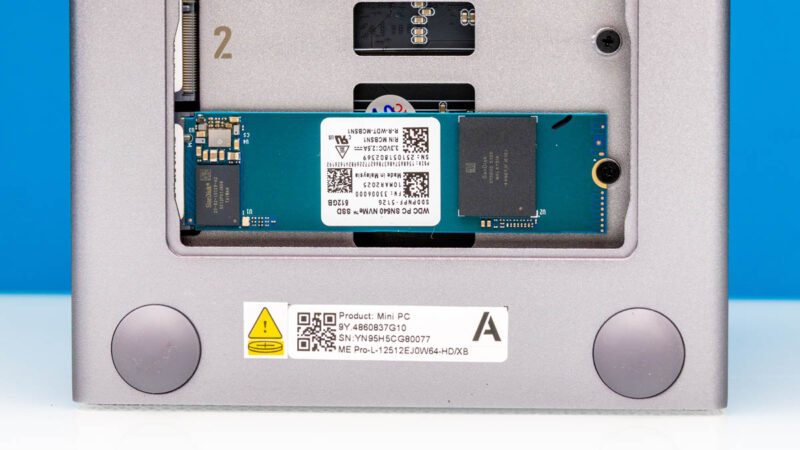
Speaking of boot drives, our system came with a 512GB SSD provided by SanDisk (formerly Western Digital). The SN540 is an unremarkable drive that will have little trouble keeping up with the rest of the system.
Even with 3 M.2 SSD slots, the ME Pro is designed to use hard drives for the bulk of its storage. For that, we have the system’s two 3.5-inch drive bays, which take up most of the system’s volume.
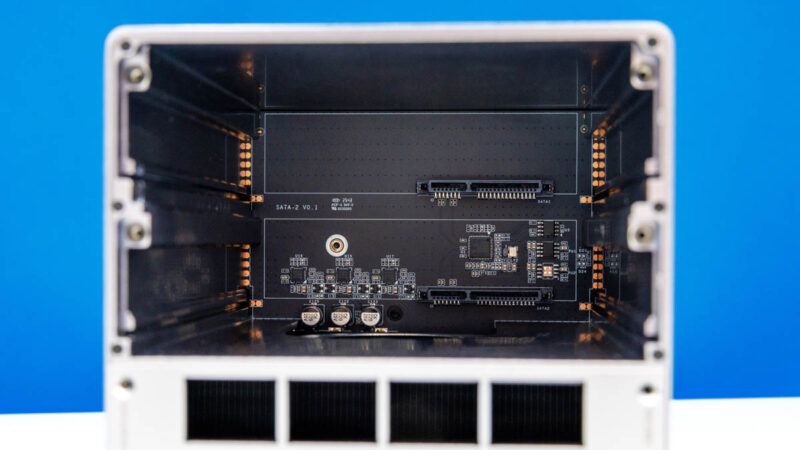
Beelink’s trays are not toolless, so you will need to use an Allen wrench to remove some screws to get them out. Once you do, a quick look inside the NAS shows the SATA backplane that connects the two drive bays.
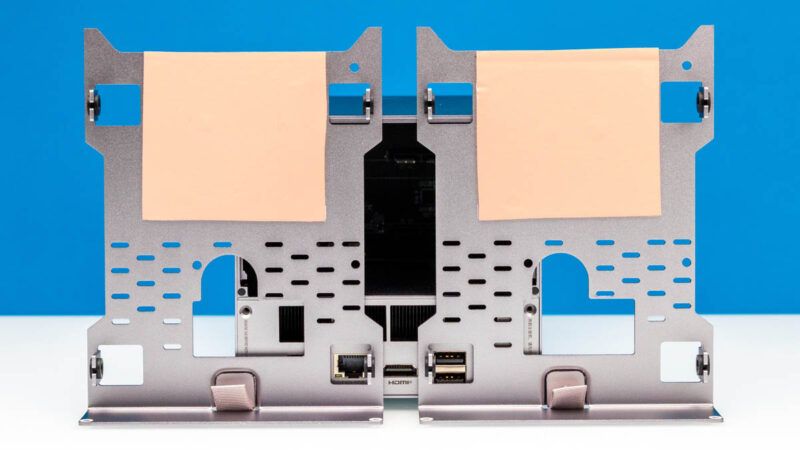
The trays themselves are fairly straightforward. Each features rubber grommets to reduce drive vibrations, with the drives themselves screwed into the tray. Thus far, Beelink has qualified the platform to support hard drives up to 30TB, and there should not be any issue with adding larger hard drives as they become available.
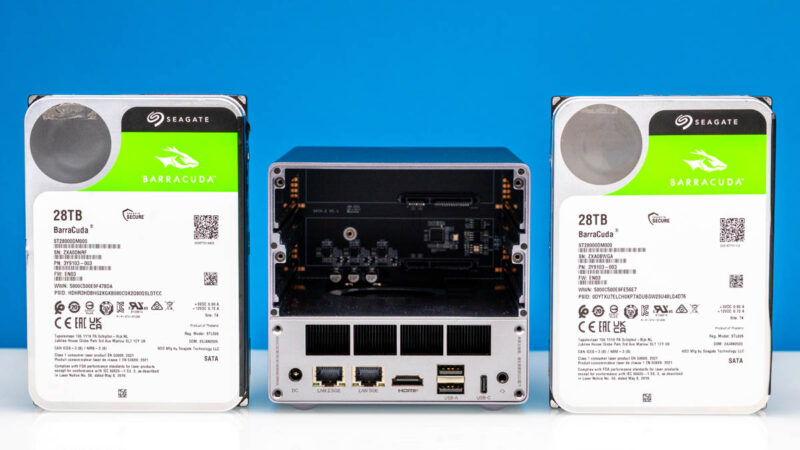
For that matter, we chucked in a pair of Seagate Barracuda 28TB drives, which are based on the company’s HAMR-based Mozaic 3+ platform. So the system has no trouble working with the latest generation of drives.
Cooling for the hard drive bay is a bit of a complex matter, however. There is not a fan directly cooling the drive bay from the front (this being where the backplane is), and as a result, there is no direct front-to-back airflow in this NAS. Instead, Beelink has engineered the system to essentially use the hard drive bays as the intake, pulling air down to the compute module. To better understand that, let us pull out that compute module.
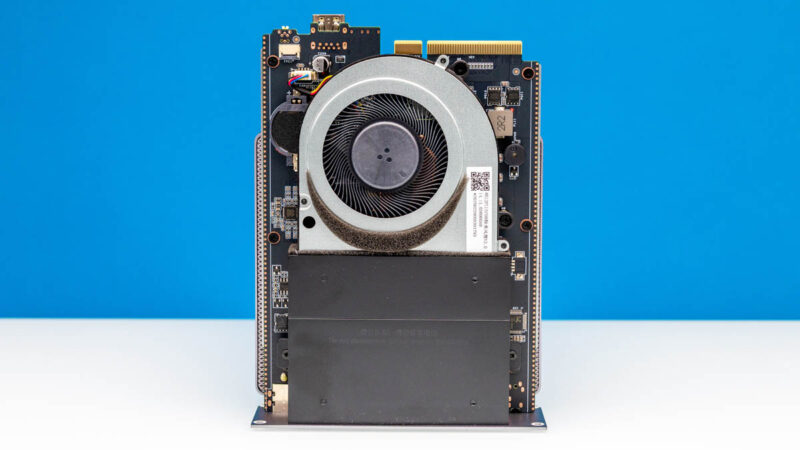
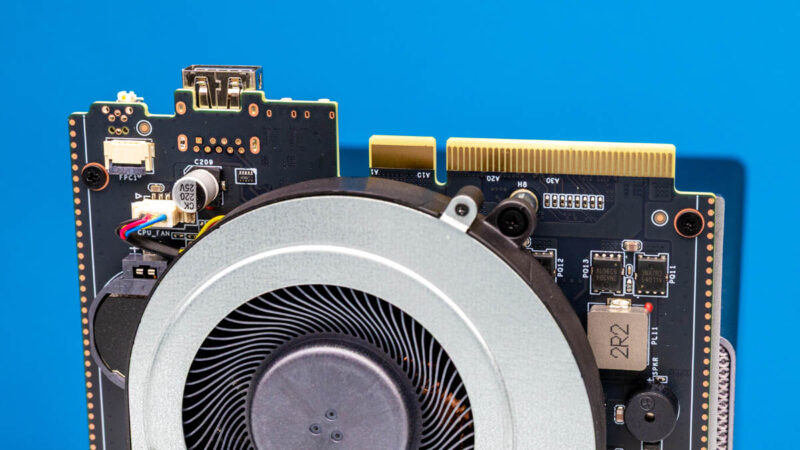
Removing a few more hex screws allows you to pull the compute module out of the bottom rack of the NAS. From it, you can see a single small blower fan that provides all the airflow within the system. With the blower exhausting air through the compute module itself, which is then pushed out through the vents we saw at the rear of the system earlier, cooler air is drawn in from the drive bays above. This is not an optimal design (heat rises), but given the system’s overall low power, it gets the job done. The chassis still runs fairly warm, make no mistake there.
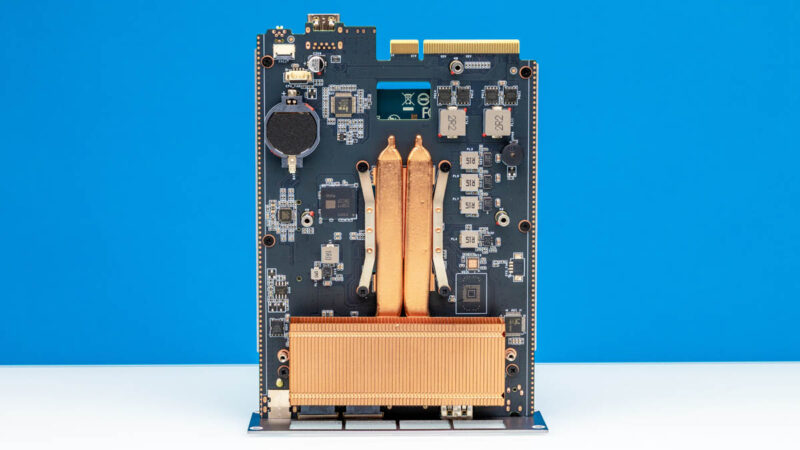
Taking off the fan, we can see bits and pieces of the compute module. The CPU is under a copper heatpipe-and-heatsink setup. The Intel N95 processor underneath has a TDP of just 15 Watts, so it takes relatively little to keep the CPU cool even under full load. Architecturally, the CPU is from Intel’s Alder Lake-N platform, a budget platform based around a quad-core CPU using Alder Lake’s efficiency cores, Gracemont.
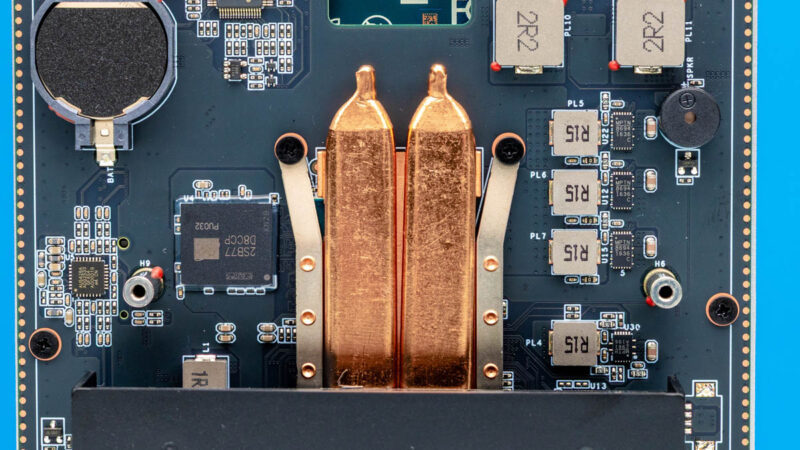
Paired with it, to the left of the heatpipes, is a single LPDDR5-4800 chip that provides the system’s 12GB of DRAM. Notably, this means that everything except the storage is soldered down on this system, so there are no user-upgradable or serviceable parts on the compute module other than the blower fan.
Meanwhile, near the top of the small motherboard, we can find the front USB port connector and an edge connector for the hard drive backplane.
Finally, flipping the compute module over, we find the SSD bay again, this time fully liberated from the rest of the system. Pulling out the compute module is not necessary to swap SSDs, but if you do have it out for any reason, you can also install and remove SSDs while you are at it.
With our tour of the hardware complete, let us talk about performance.


