
When the Apple Mac Mini M1 was released, we were intrigued to say the least. A new Arm-based Mac with solid performance and low power consumption in a form factor that aligned with Project TinyMiniMicro nodes seemed like a winning proposition. Still, adding the Mac Mini to our racks seemed like a challenge given its form factor. The folks at MyElectronics.nl are both STH readers, and also a company with a solution to rackmount both the Mac Mini and Raspberry Pi in the same 1U chassis. As a result, we ended up with a 5-node Arm cluster neatly packed in 2U of rack space.
Video Version
For this one, we are doing a video just to give a better sense of what the solution entails:
As always, feel free to open that in a new window so you can see what is going on. MyElectronics.nl sent us the two versions of the rack so we could give them a try. Just a quick note on this, due to the nature of the solution where much of it is in-rack and installation, the video may be more informative than the written article.
MyElectronics.nl Apple Mac Mini and Raspberry Pi Rack
The base rack is a 1U shelf that has a number of features custom-designed for the Apple Mac Mini. Below, you can see the basic unit with a small customization. On the right, we have the holes for the bottom of the Mac Mini. On the left one can see the holes for the Mac Mini but the faceplate has two spots sized for Raspberry Pi I/O.
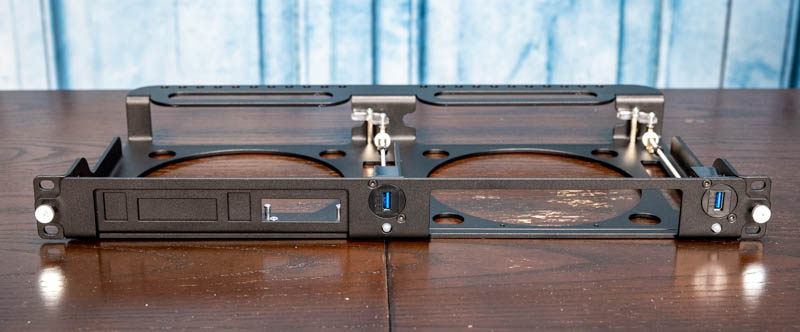
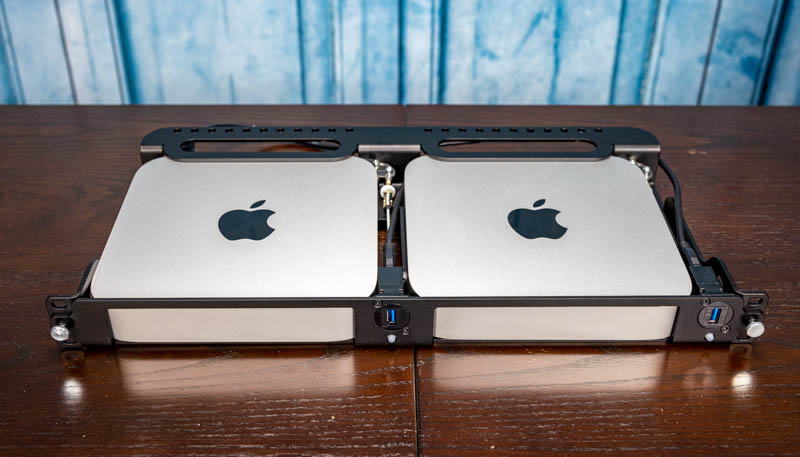
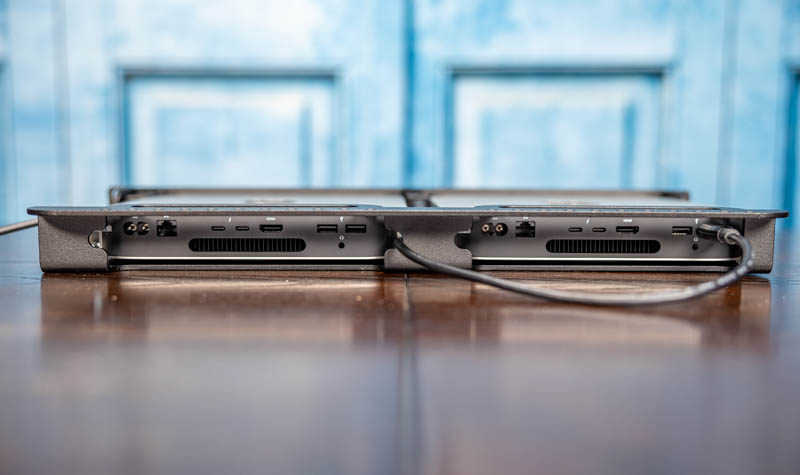
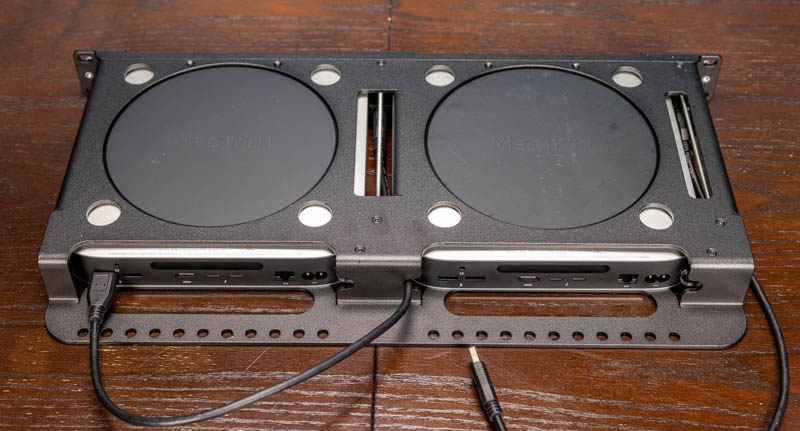
All of the base units can take up to two Mac Mini’s. In this case, we have two of the Apple Mac Mini M1 units side-by-side, so this does not have the Raspberry Pi faceplate. The company says this rack also takes older Intel-based Mac Minis.
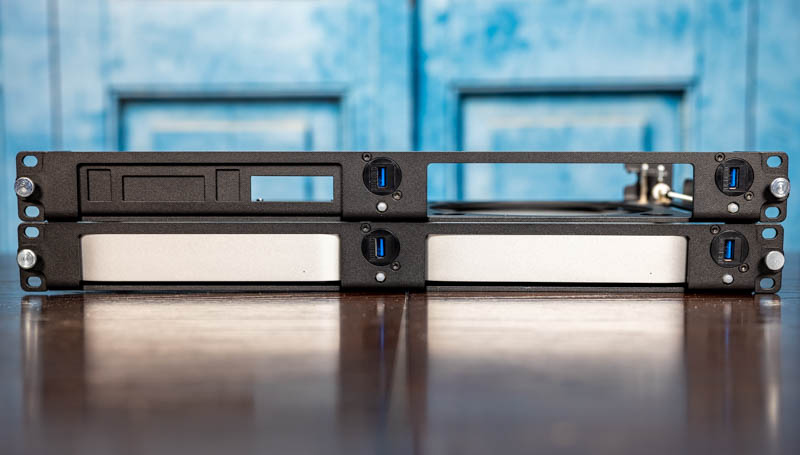
Just for some perspective of the unpopulated and the populated rack mounts, here are those two units stacked atop of one another. We will have the top one populated in a rack later in this article.
Installing the Mac Mini’s is very easy. There are two screws at either end of the faceplate that unscrews and allows you to easily slot a Mac Mini into the mounting area.
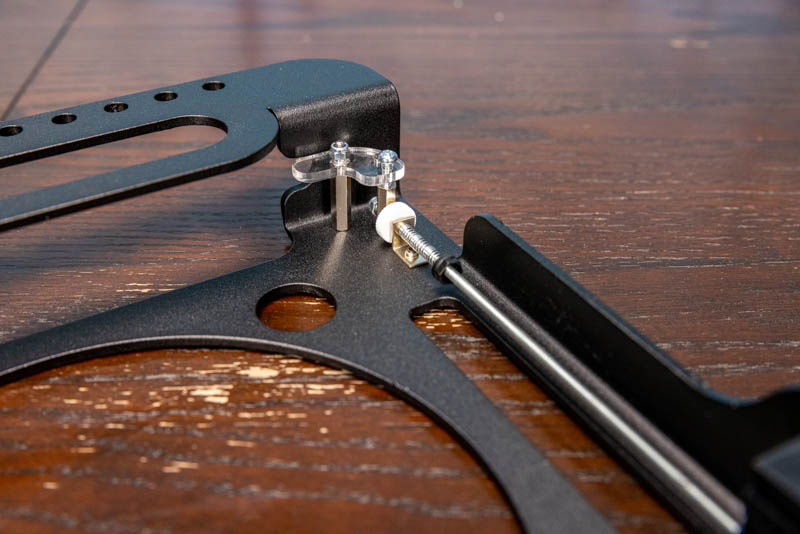
The small white button at the bottom of the unit is used to trigger a push rod and lever. This is designed specifically to actuate the power button at the back of the Mac Mini. On two of our three Mac Mini installations, this worked out of the box. One of them we needed to calibrate a bit to get the right movement distance. With this feature, one does not need to get behind the Mac Mini to power cycle the machine.
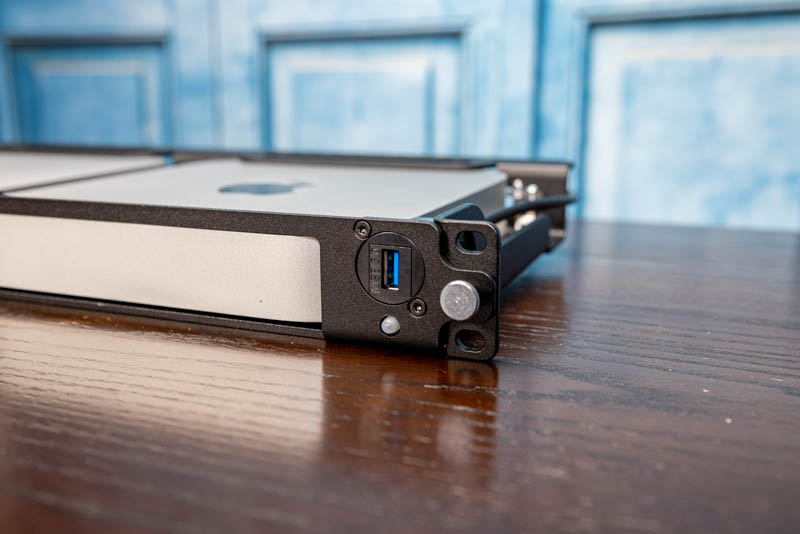
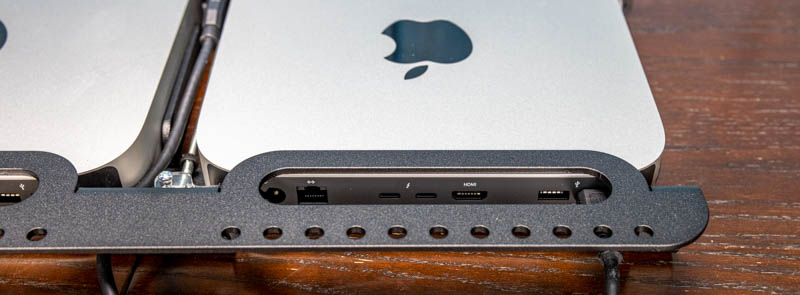
There are additionally two USB 3.0 Type-A ports.

These are I/O jacks that connect via cable to the rear of the system.
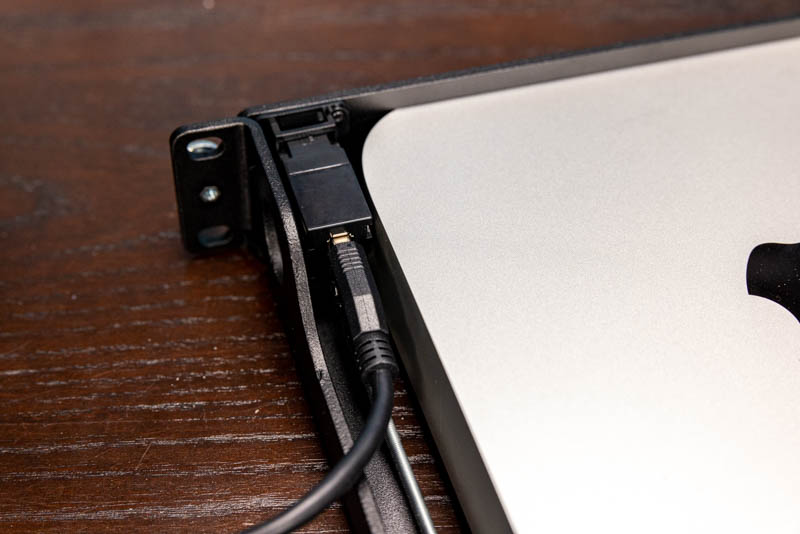
The cables loop to the rear of the system and can be inserted into one of the Mac Mini’s USB ports.
In the left of the photo above which is flipped so on the right below, one improvement we would love to have seen is a notch on this side for the USB cable. In an open rack or man other racks it is not a big deal. At the same time, the notch on the inner part of this vertical support is blocked by the power button actuator so it would be nice if one could simply route the cable straight through the rear. There are plenty of other options for routing, this would just make things a bit cleaner.
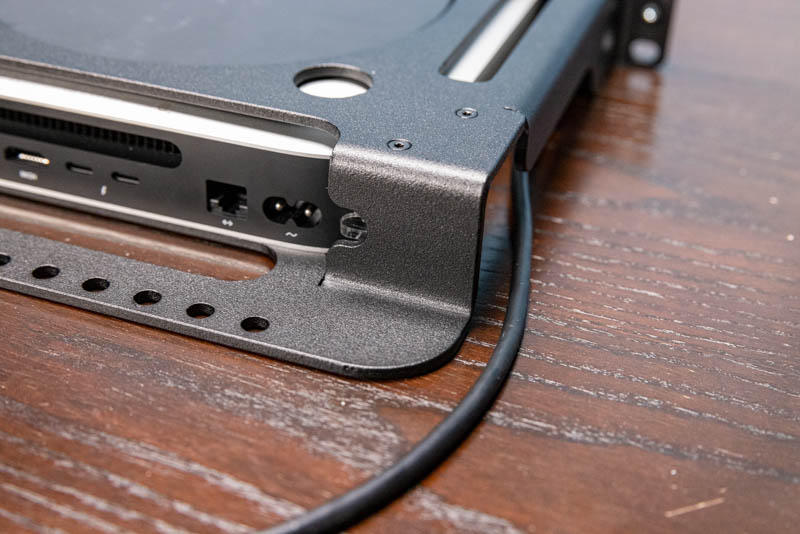
On that front, the unit has the rear top retention bracket with perforated holes on the horizontal cross bar. We would have liked to have seen a bit of padding to keep the Mac Mini free from scratches. We did not scratch our units, but a softer surface would have put our minds at ease.
The perforated holes allow one to use zip ties for cable management. There are only seven possible cables at the rear of the unit so one may wonder why this is necessary. Our immediate thought was that it can help keep non-locking cables such as USB and power cables installed by limiting their ability to be removed.
We noted earlier that one can install Raspberry Pi’s as well. Here we have two Raspberry Pi 4 8GB models side-by side. In the middle I/O RJ45 we have routed the 16GB Mac Mini M1’s Ethernet port to. We could have just as easily added a HDMI port here as that is an option as well.
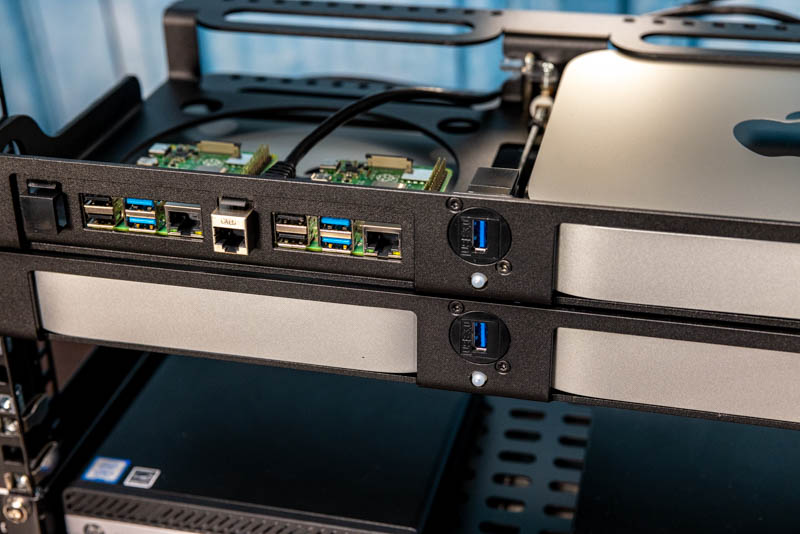
Installing each Raspberry Pi requires only two screws. There is a lot of room in the metal chassis for cooling, but it does leave the units bare (except for the rackmount chassis.) One item to watch out for is that the Raspberry Pi has side USB ports. If you are using the USB Type-C port for power, the cables we tried fit, but it seems likely that one could run into clearance issues if the connector side of the cable is too long.

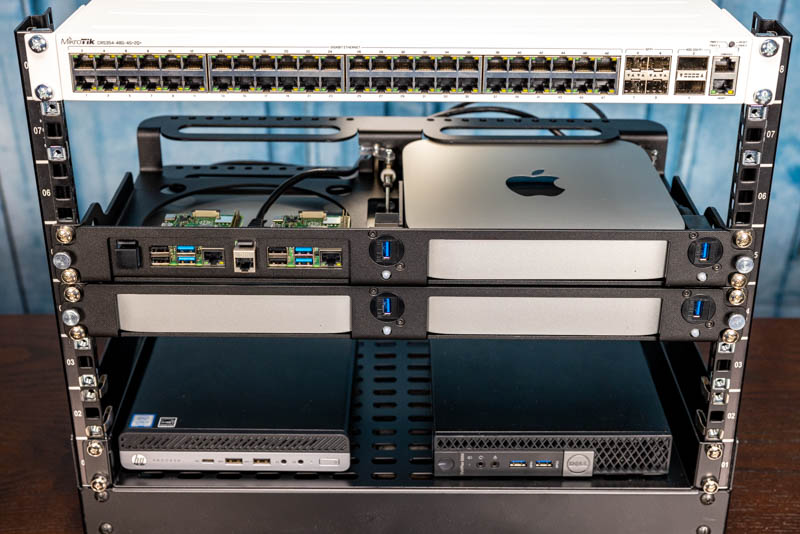
As you can see, in the 8U StarTech RK8OD Review Open Frame Rack you can see how this five-node Arm cluster is more secure than the HP and Dell TinyMiniMicro nodes on the bottom inexpensive shelf. We have asked for a rackmount version for TMM, but for now we just strap our nodes to very inexpensive shelves.
We are going to quickly note here that one can alternatively get either side blanked out, or with an I/O panel. In the video we show the 8x I/O panel option. MyElectronics.nl sells I/O options for USB, Network, HDMI, 1GbE/ 10GbE and others. I almost wish that the USB ports were USB and RJ45 ports. Having front networking would allow one to do cable management on the side of racks and skip needing a patch panel.
Final Words
At 175 Euros (excluding VAT) and up depending on options, these are not inexpensive and probably more in-line with Apple pricing than Raspberry Pi pricing. The RK8OD 8U rackmount kit is only $45 and the shelf we use is usually sold for around $20 both including 2-day shipping. On the other hand, with the shelves and using straps it feels much less robust than having a customized metal enclosure. The Mac Mini and Raspberry Pi rack kits are made of thicker metal as well so they feel sturdier. We also get features such as the USB 3.0 ports, modularity, and the power button system. Still, if you are on a tight budget, you may use a shelf and straps or simply just place the units on a desk.
There are DIY options, but this type of solution is turnkey and just works. Assuming this MyElectronics.nl units are in your budget, having the Mac Mini and Raspberry Pi combination racked like this is really nice from an organization standpoint.


Great idea, have long wanted this same exact solution.
Sadly the price is way to high for home lab useage budgets such as mine.
50€ maximum and it would be a no brainer. Too bad.
I like it! In the future we will likely see proper rackmount ARM servers, but there is a time in every product’s lifecycle like this. For example, a company called “Cube Computers” was making rackmount SPARC machines years before Sun ever did. This is the same thing in the ARM server lifecycle.
Waaay to much money. 226$ us. If these were 100 each I’d buy a few.
Putting a computer in a rack does not make it a server.
And… like evrything else associated with Apple (including Apples own pizza boxes of yesteryear) this piece of stamped metal is _ridiculously_ priced.
I have a 15 inch macbook pro Intel version that I want to use as a server. Is there a rack solution such as this for the 15 inch macbook pro?