To install FreeNAS in a Hyper-V virtual machine one needs to do some configuration of the virtual machine, just as one would with a physical machine. Allocating hardware resources is much easier in Hyper-V versus physical machines because you can do it remotely through screens instead of physically taking a box offline and installing hardware. This guide will show the basic Hyper-V virtual machine setup for installing FreeNAS, an open source NAS appliance based on FreeBSD.
Before you start this guide, make sure you have created a basic Hyper-V virtual machine. For the guide to making a generic virtual machine for FreeNAS, OpenFiler, OpenSolaris, Linux, and etc. see the guide here. Not to be repetative, but if you want to recreate the test system I am using:
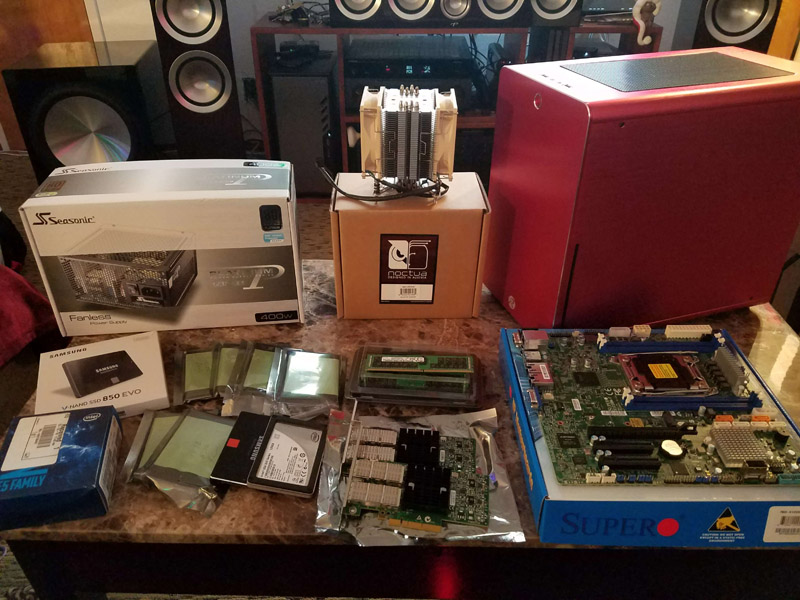
- CPU: Intel Core i7 920
- Motherboard: Supermicro X8ST3-F
- Memory: Patriot Viper 12GB DDR3 1600
- Case (1): Norco RPC-4020
- Case (2): Norco RPC-4220
- Drives: Seagate 7200rpm 1.5TB, Hitachi 7200rpm 2TB and 1TB, Western Digital Green 1.5TB
- Controller: Areca ARC-1680LP
- SAS Expanders: 2x HP SAS Expander
- NIC (additional): Intel Pro/1000 PT Quad
- Host OS: Windows Server 2008 R2 with Hyper-V installed
Now that the test configuration is laid out, here is how to take a Hyper-V virtual machine shell, configure the virtual machine, and get FreeNAS 64-bit to work using the LiveCD image.
1. Create a new network. From the Hyper-V Manager select Virtual Network Manager. Select a name for the virtual network (in this case FreeNAS2 as I already had a working FreeNAS virtual machine and associated virtual network). You can see that I configured this network as an external network and gave it its own gigabit Ethernet link on the Intel Pro/1000 PT Quad. Best practice is to name your virtual network accordingly for whatever VM will be using that network as it facilitates troubleshooting later on.
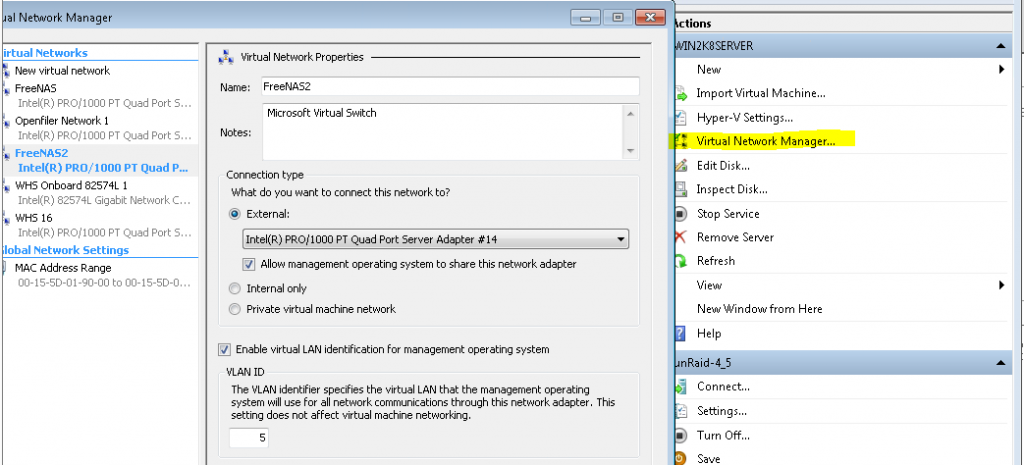
2. After this is done, it is time to start configuring the virtual machine. In the Hyper-V Manager, select the virtual machine you made (mine is called FreeNAS2 for this guide). Then click settings (highlighted in the screenshot below).

3. Next, select Add Hardware and Legacy Network Adapter. Sadly, FreeNAS does not like the standard Network Adapter that is the default adapter in Hyper-V.
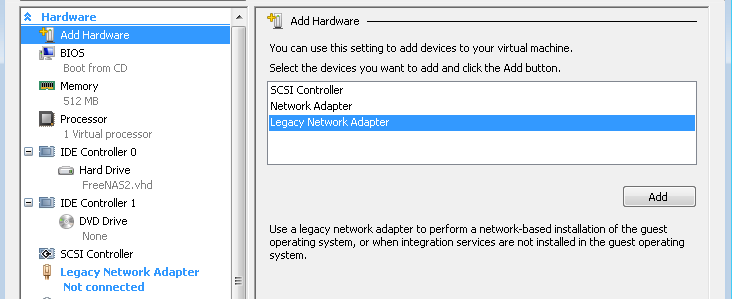
4. Click on the added Legacy Network Adapter (highlighted in the left pane below). Select the previously created network to bind to the Legacy Network Adapter (FreeNAS2 in this case). If you want to set an IP you can do that manually or use DHCP to assign the VM an IP address.

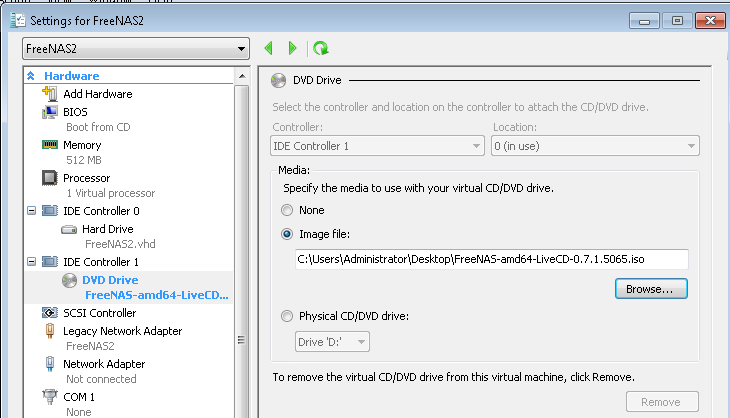
5. Next select the DVD drive on the IDE controller, specify that the OS is located in an image file, and navigate to that file. Click apply then OK to go back to the Hyper-V Manager.
6. Make sure you again have the correct VM in the left pane. Click connect (so you can see what the VM is doing), then click start. These are all highlighted in the screenshot below.
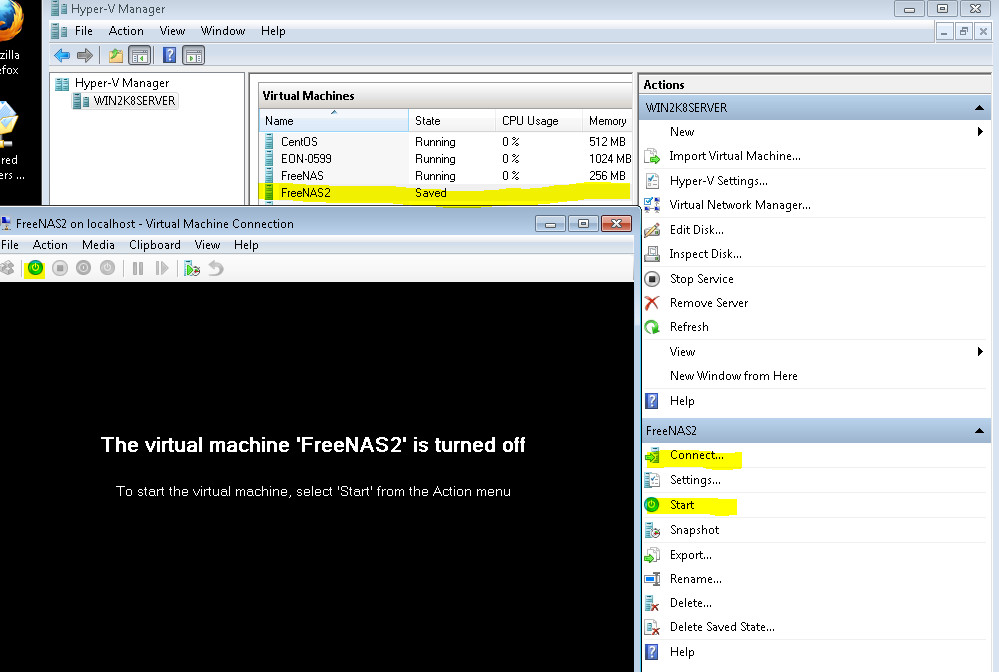
7. It will take a few seconds to boot but then say, Hello FreeNAS! Note, at this point FreeNAS is running off of the live CD image that was selected above. The next part of this guide will go through the initial setup of FreeNAS, but at this point, FreeNAS is up and running in the Hyper-V virtual machine.

That concludes this guide. Next guide will of course be turning this LiveCD image FreeNAS implementation into a standalone Hyper-V virtual machine with FreeNAS 64-bit installed to a .vhd instead of running off of the LiveCD.

It keeps halting at “calcru: runtime went backwards from…. “. I’ve looked around on the internet but can’t find any relevant answers. Any ideas?