
Last week we started a new series of articles that will provide you with all the information you need to create your own private cloud and virtual desktop infrastructure. In the first article we covered Getting Started with Xen Cloud Platform (XCP). Today, we are going to show you how to create your own Xen Cloud Platform USB Installer and walk through the installation process.
For this installation I will be installing to an ITX Server that I recently built. If you want to check out the build log hit us up on the forums.
Meet the Xen Cloud Platform XCP Hosts
- Case: iStar S-21
- Motherboard: Intel S1200KPR
- CPU: Intel Xeon E3-1265L
- Ram: Crucial 16GB Kit (2x8GB) 240-Pin DIMM DDR3 PC3-12800 CT2KIT102472BA160B
- HDD: Intel 320 Series 40GB SSD
- VM Storage: Hosted on a NFS Share from my Synology DS1812+
Software you need
- Unetbootin
- XCP 1.6 ISO – Scroll to the bottom
Creating the Xen Cloud Platform XCP USB Installer
The USB drive does not need to be very large but it does need to have a FAT32 partition. The installer itself is only about 400MB. After you create your FAT32 Partition you are ready to image the drive with the XCP Installer.
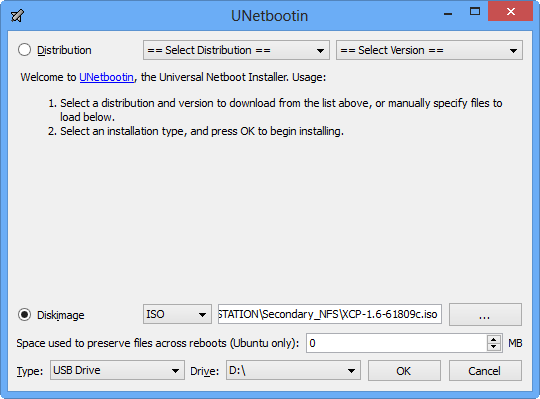
- Start unetbootin
- Select Diskimage and then your XCP 1.6 ISO image that you downloaded
- Select USB Drive under Type
- Select your thumb drive device
- Press OK
After this completes we have a few steps to accomplish so that your thumbdrive will work properly:
- Open your thumbdrive
- Rename the file syslinux.cfg to syslinux.cfg.bak
- Rename the directory boot/isolinux to boot/syslinux
- Rename the file boot/isolinux/isolinux.cfg to boot/isolinux/syslinux.cfg
- Rename the file boot/isolinux/isolinux.bin to boot/isolinux/syslinux.bin
Not renaming the syslinux/isolinux files will get you an Unfound kernel error on boot.
Installing XCP from USB
Now just insert your USB drive into your host and boot to the USB device!
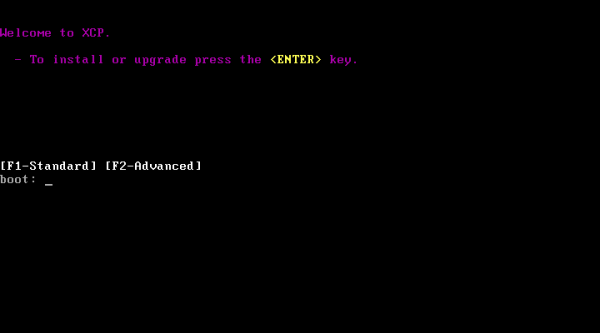
Today I will be installing this to one of my ITX Hosts that I built. After booting to your newly created USB XCP Installer you should be greeted with this screen. If you do not hit enter it will automatically boot into the installer.
After the boot process you will see a series of familiar Linux Distro Install Questions. I have not detailed each of them here because I am expecting you to be able to choose your own keyboard type, accept EULAs, warnings, etc. The important screens I have captured below.
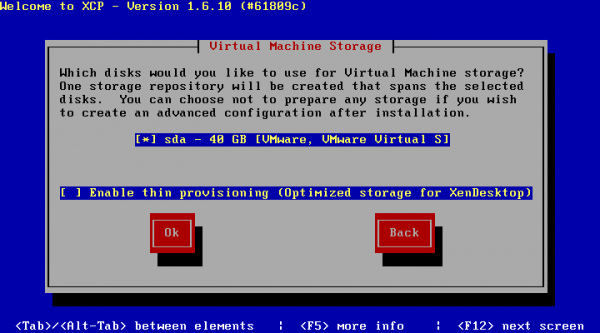
Virtual Machine Storage – During the Installer you have to choose a default storage repository for VM Storage. Don’t worry we will be changing this later to our Shared Storage on the Synology DS1812+. I have not checked the Thin Provisioning option because we will not be storing VMs on this disk.
Next choose Local Media in the Xen Cloud Platform installer:

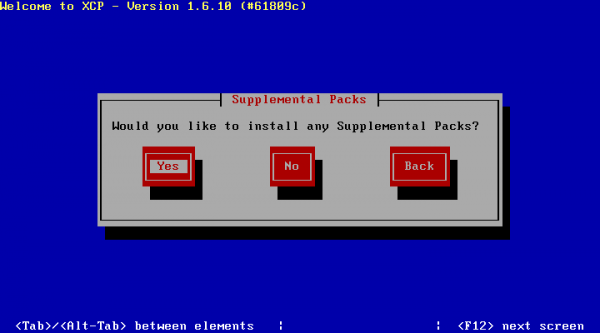
Now decide if you want to add any supplemental packs. As a note: No…you can always (easily) add stuff later.
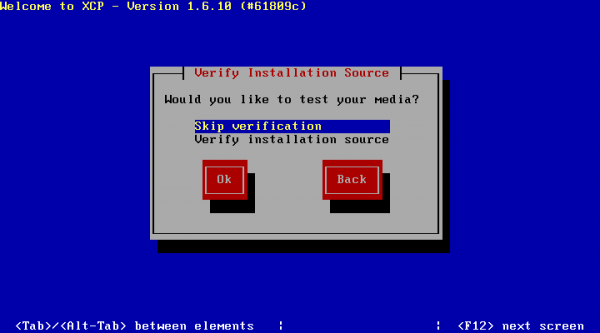
Skip Installation Verification – This is usually a waste of time, just double check the checksum after you download if you are worried about it though.
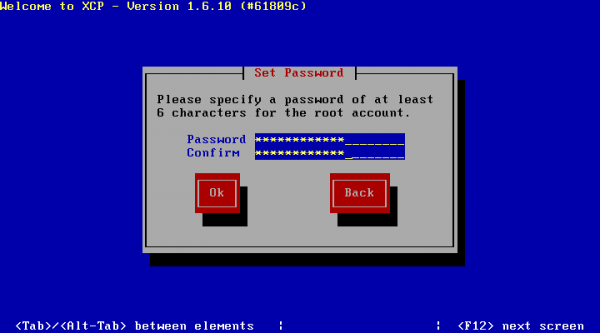
Set a Password – Do not forget this, you will need it to manage your host.
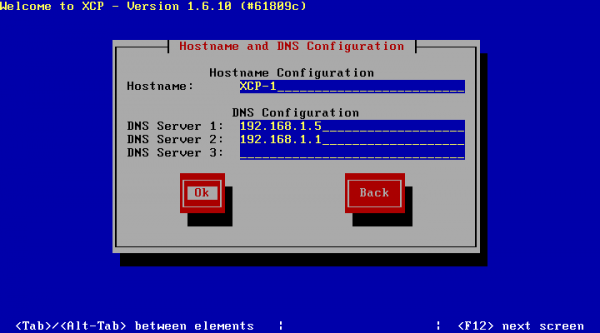
Networking – I prefer to set Static IPs for my hosts because XenCenter (what we will use to manage the hosts) does not handle resources changing IPs very well. You will also set your hostname, DNS servers, Time Zone, and NTP Servers.

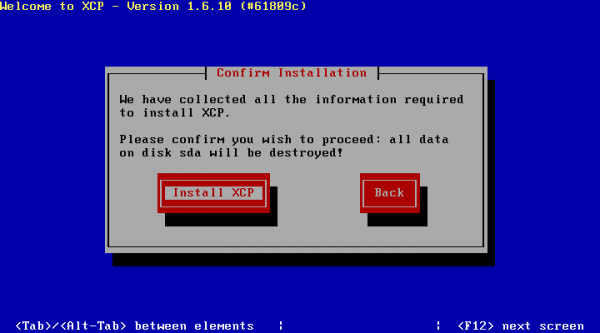
Finally Install XCP!
Now we just have to play the waiting game. This should not take very long, on the system listed above it took about 5 minutes.

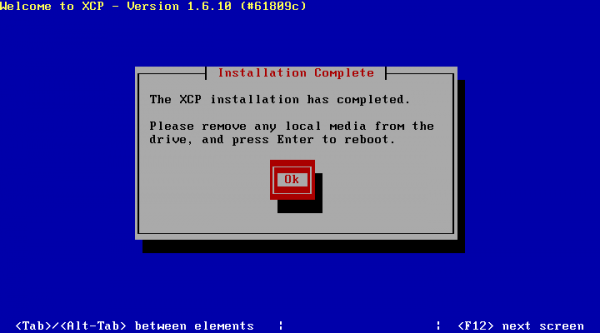
When it completes, choose OK and remove your USB device.
After a reboot, you will be greeted with a cute little panda loading screen.

After bootup you will see the administrative console – Here you can modify all system settings as well as open the shell.

For the most part this will be unneeded as you will be doing most of the changes from the XenCenter Management tool.
Stay tuned for the next installment! We will be covering XenCenter and will show how to add a host, add a storage repository, modify host settings, and create your first Virtual Machine!


 USB Installer and installation guide.)
How hard is the networking side? Can you use a single NIC? Do you need a private network?
Nice series. Will it cover HA controllers?
Hey Karlo – The networking side if fairly straightforward. You can use a single NIC, you can separate traffic out by VLAN if you wanted. For my setup, I dont really need to separate traffic as I am not running a cloud service. If you were to host an internal private cloud for a medium/large organization you would want to.
Regarding HA – XCP does not natively support HA. However, it does have Live Migration, meaning I can move a VM to another host within the same pool, without any downtime. The nice thing about XCP is that there is not a separate controller, each system is completely autonomous and works with other XCP servers to create a pool. Now when you create a pool, there are some synergies that are realized, but should the pool master go down for maintenance your other hosts will continue to operate.
Later in the series will be adding Cloudstack on top of XCP to manage it and run it as proper private cloud ecosystem but that will not be for a few weeks. In the article I posted a link to the forum and I have detailed what I am doing from a software perspective so you can see where were headed.
I noticed you have 16GB of RAM in the machine, how do you get XCP to use it all? I just tried an install of XCP and it only finds 4GB of my 8GB. According to the overview linked to below, XCP is only 32-bit. Is there a workaround for it?
http://wiki.xen.org/wiki/Xen_/_XCP_/_XCP_on_Linux_Overview